How to create a website using WordPress/How to use plugins/No-code construction blog


Build a matching site with WordPress! Explaining the basic email settings for PremiumPress' Microjob
At HanamiWEB Online School,
●Ask questions in real-time in the virtual study room!
●Ask as many questions as you want via chat!
●E-learning materials that you can learn as much as you want, 24 hours a day!
All included for just 2,500 yen/month!
I wanted to build a matching website using WordPress! I tried out a Micro job theme from an overseas theme company called PREMIUMPRESS, and this article explains how to build it.
This time we will explain how to set up email.
What you can do with email settings
Set this in the [Email Address] section of PREMIUMPRESS.
- Incoming and outgoing mail settings
- Header/footer template settings
- Email Newsletter Settings
are the main functions.
Email address settings
Configure the settings in [Email Settings].

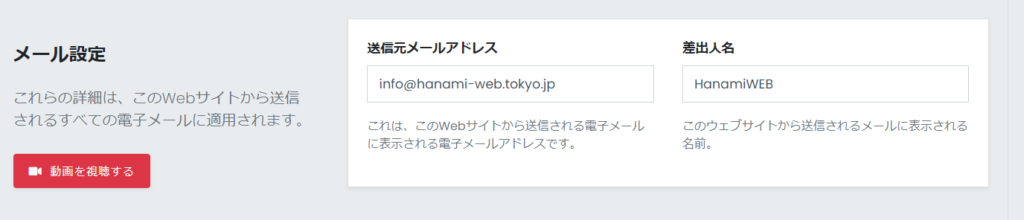
Source Settings
Set the sender settings for all emails sent from your PremiumPress theme.
- email address
- Sender name
Enter the.
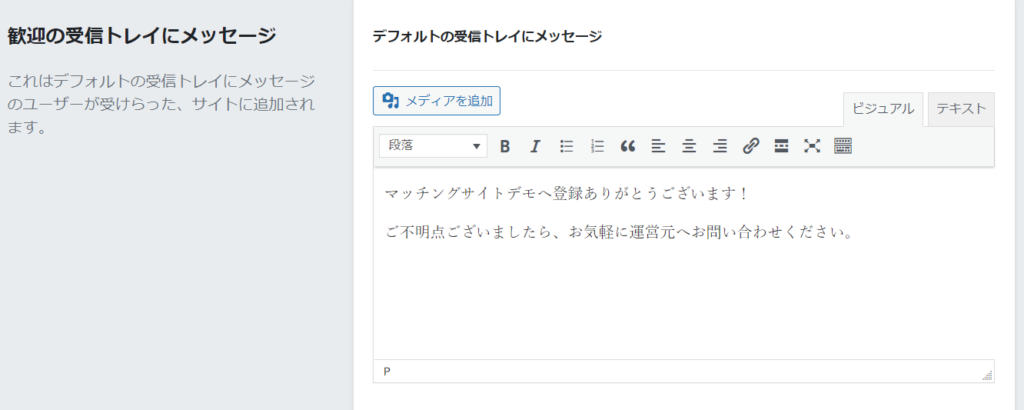
Default Email Settings
Once user registration is complete, the email you set here will be sent to the user's chat.
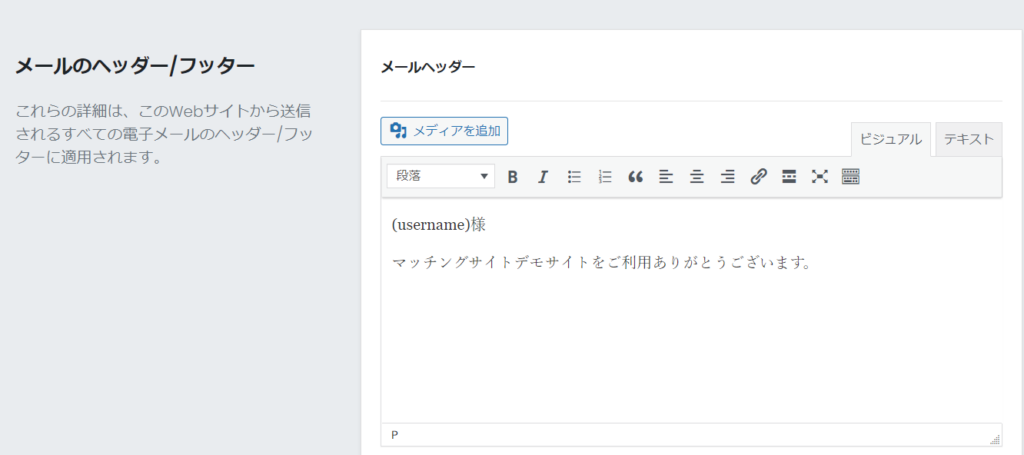
Mail header template settings
This is the text that will be added to the beginning of all emails. If you don't need it, you can leave it blank.
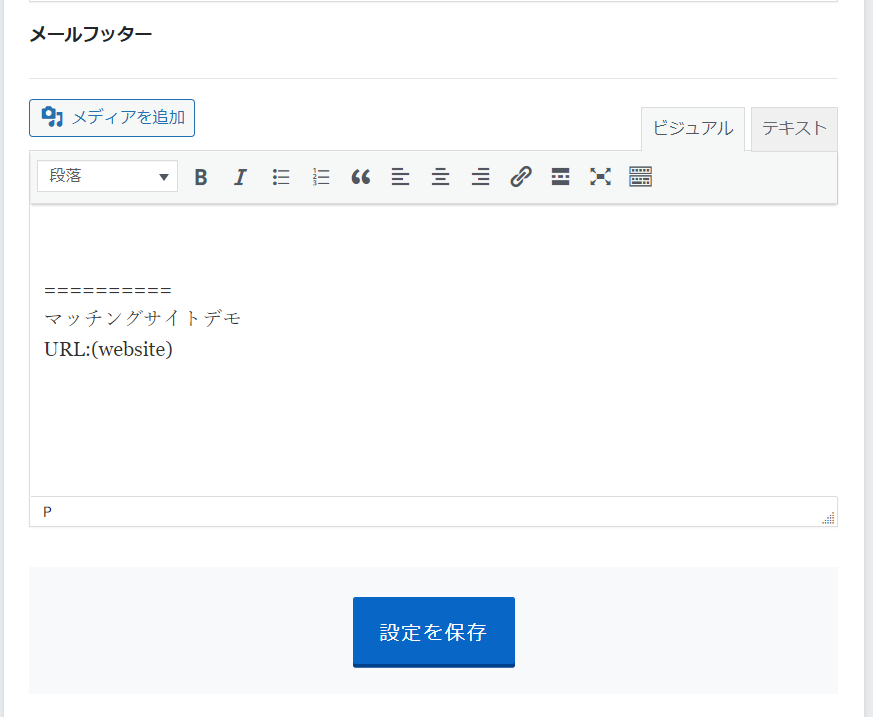
Email footer template settings
This is the text that will be added to the footer of all emails. It is a good idea to include administrator information.
Various email settings
Configure the settings under [Manage email].

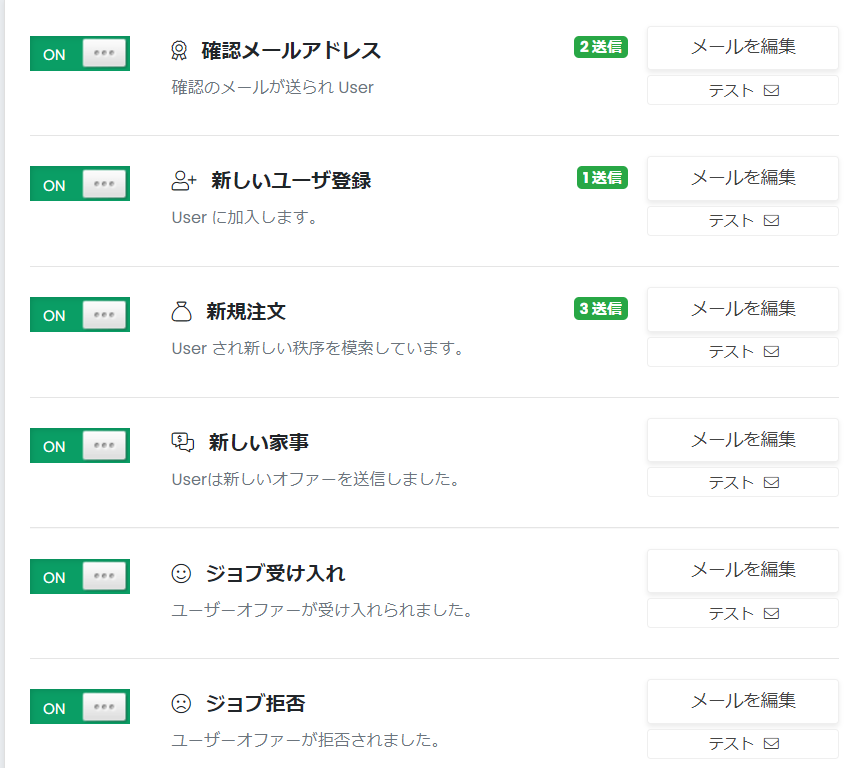
(To user) Email
- Confirmation email address - Sent if email verification is enabled during user registration
- New User Registration - Sent when a user registers
- New Order - Sent when a user makes a purchase, such as a membership or product purchase
- Sent when a new Housekeeping-Listing service is purchased
- Job Accepted - This email notifies you that the purchased item has been accepted and the transaction has started.
- Job Rejected - This email will notify you that the purchased item was not accepted and the transaction was not completed.
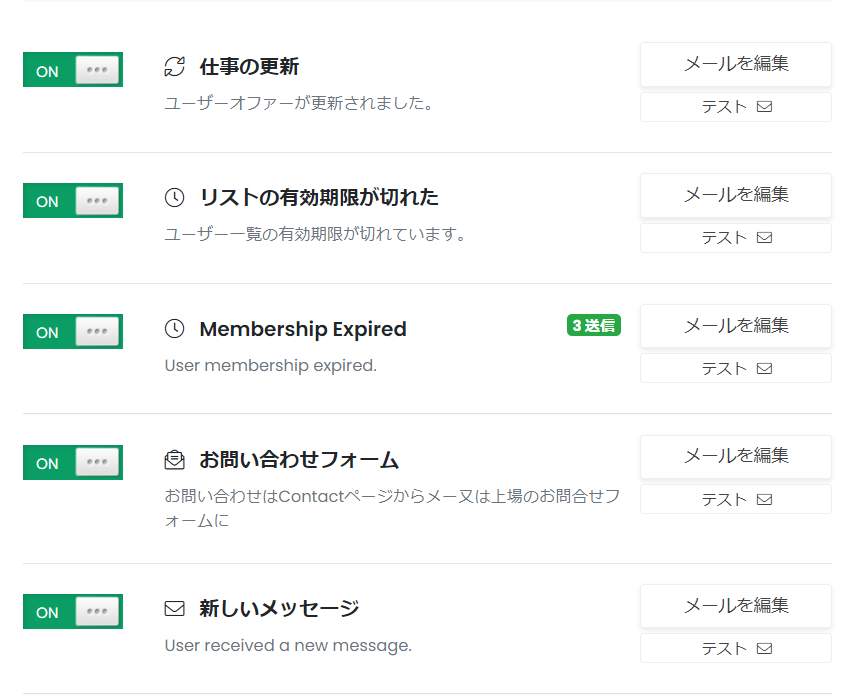
- Job Update - This email is sent to notify you that the information on the product you have listed has been updated. If you have set up an approval system for the listing of your service, etc.
- Listing has expired - This email will notify you that your listing has expired.
- Membership Expired - This email will notify you that your membership has expired.
- Inquiry Form - This is the automatic reply email sent when you make an inquiry using the inquiry form built into PremiumPress.
- New Message - This will notify you when a new message arrives in your private chat.
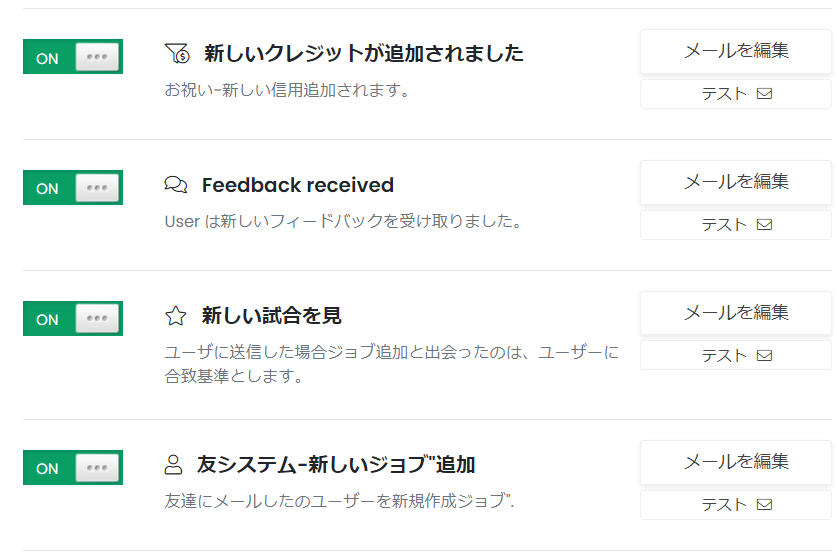
- New credits added - This email notifies you that new deposits have been added to your account.
- Feedback received - This is an email notifying you that your feedback has been received.
- Watch new matches - You will be notified when new services are registered in the categories you have registered for notifications on your user page.
- Friend System - Emails to notify you when users you have added as friends have listed new services
(To administrator) Email
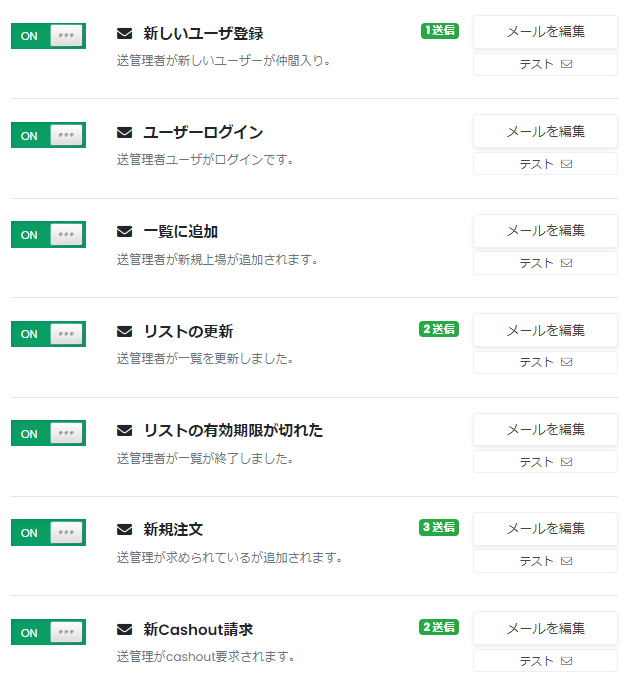
- New User Added - Sent when a new user is added
- User Login – An email will be sent every time a user logs in
- Added to list - Email to notify you that a new listing service has been registered
- Listing Update - Email notification when your listing has been updated
- When your listing expires – you will receive an email informing you that your listing service has expired.
- New Order - An email notifying you that a payment has been made, such as a membership purchase or listing package purchase.
- New Cashout Request - Email notifying the user that they have requested a sales payment
Check the email log
By looking at the system email, you can see how many emails have been sent so far, but if you use it for a long time, this number will become difficult to manage.
If you click on the [Logs] section of PremiumPress, you will see a list of whether the email was sent.
This is where you can view all logs, not just emails, but also which users have updated their listing services, registered new ones, etc.

When you want to send bulk emails
By using the [Send Email] button, you can send emails to all registered users at once.
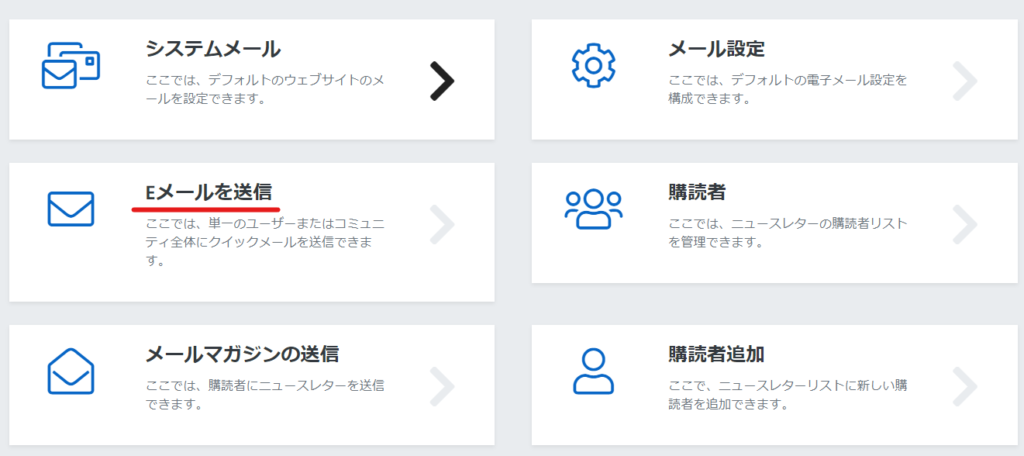
You can send an email to all registered users or to specific people.

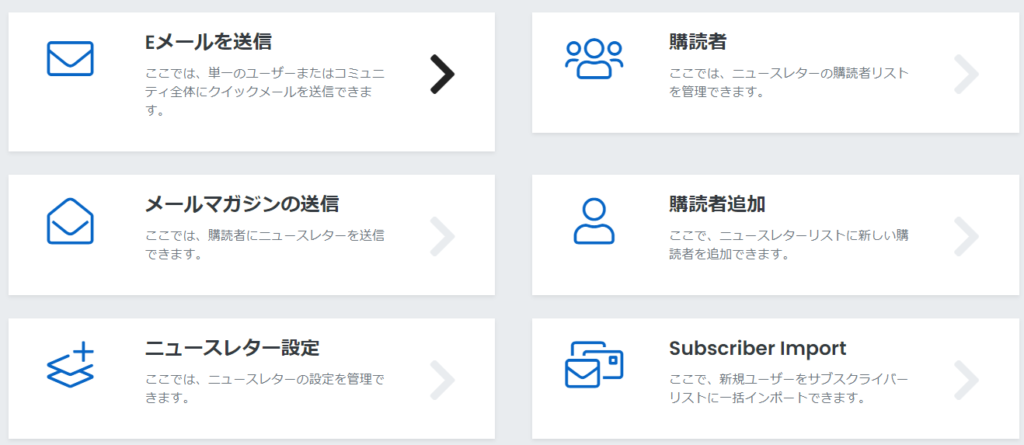
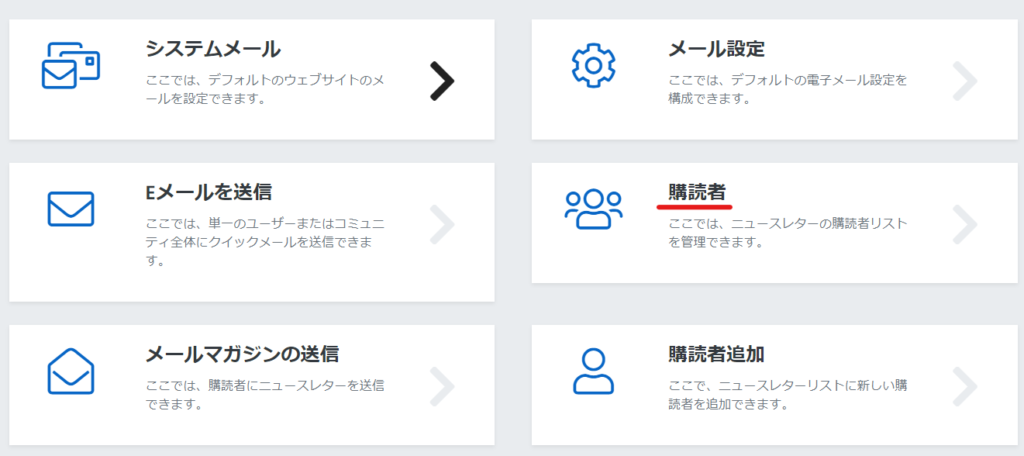
Email Newsletter Settings
Make your settings in [Newsletter Settings].
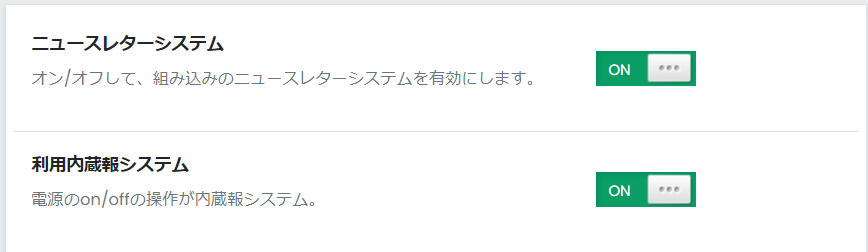
Newsletter function ON/OFF
- Newsletter System - ON to enable the youth newsletter system
- Use the built-in information system - Setting whether to perform email authentication when registering
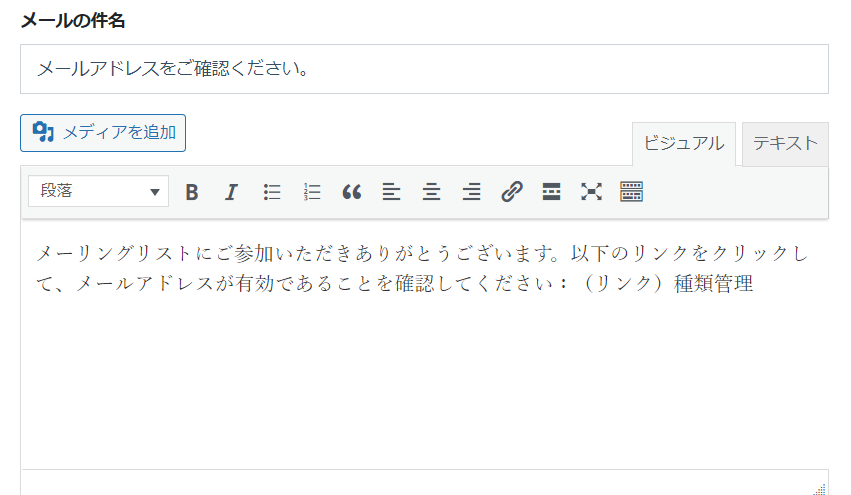
Newsletter registration verification email
Below that, you can set up a verification email that will be sent as an automatic reply when people sign up for your newsletter.
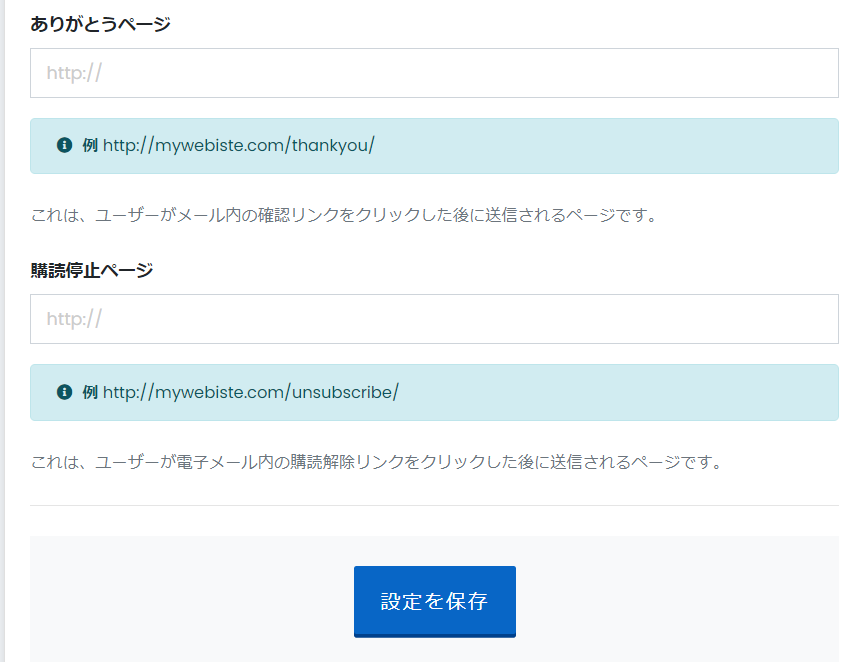
Verification completion email/newsletter unsubscribe email
- Thank You Page - Set the page to be displayed after clicking the verification email. You need to create one static page.
- Unsubscribe Page - Set the page that will be displayed after the customer clicks Unsubscribe. You need to create one static page.
Email newsletter subscriber management
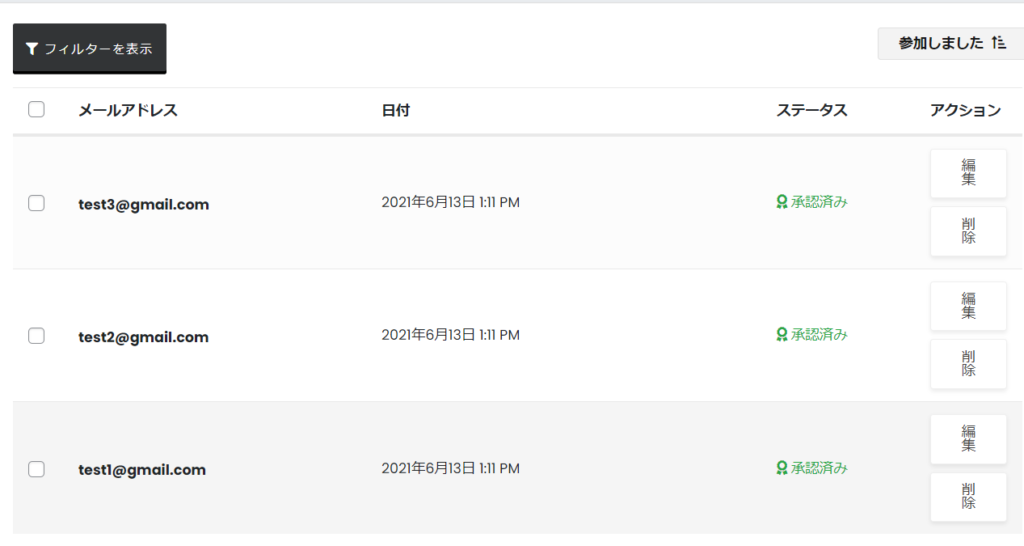
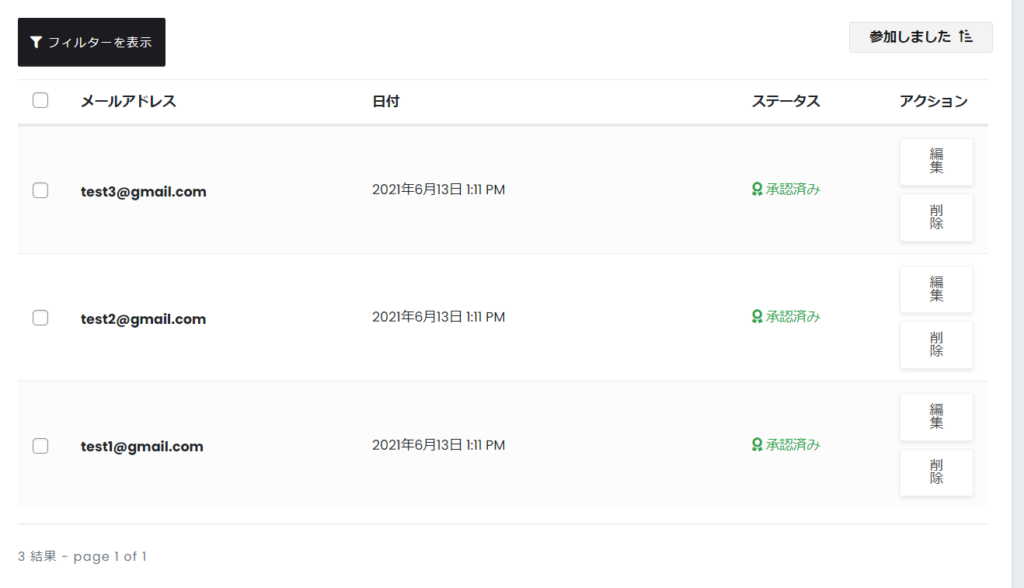
Manage your subscribers in the [Subscribers] section.
Participants list
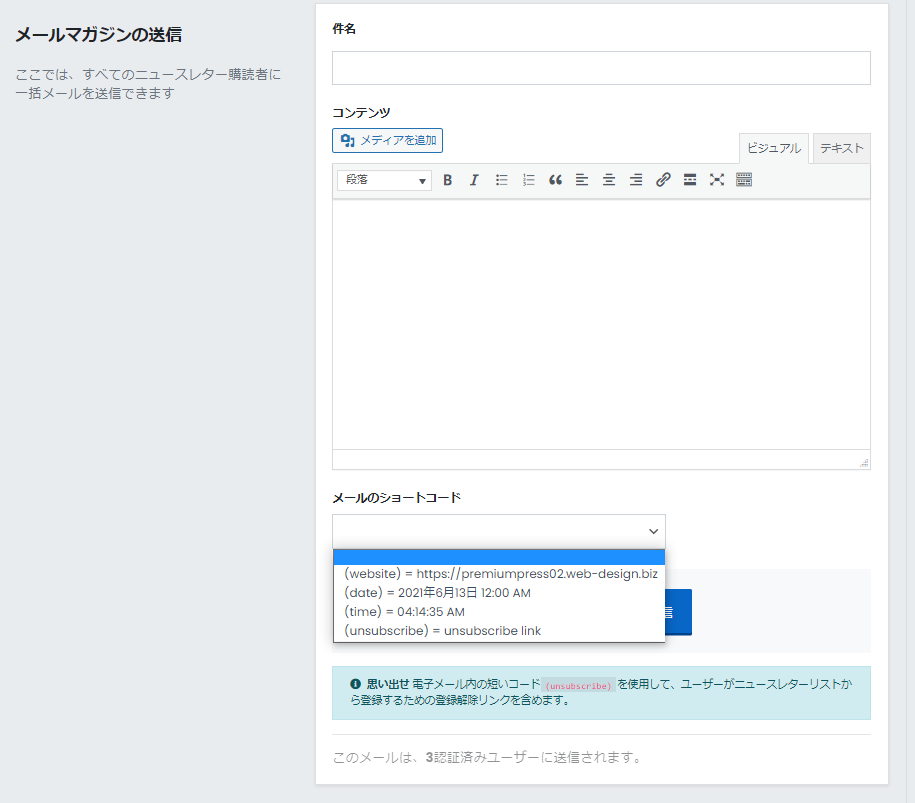
Send email newsletter
Create the email to send by clicking [Send Email Newsletter].

- subject
- Text
Enter and send. The short codes you can use are listed under [Email Short Codes].
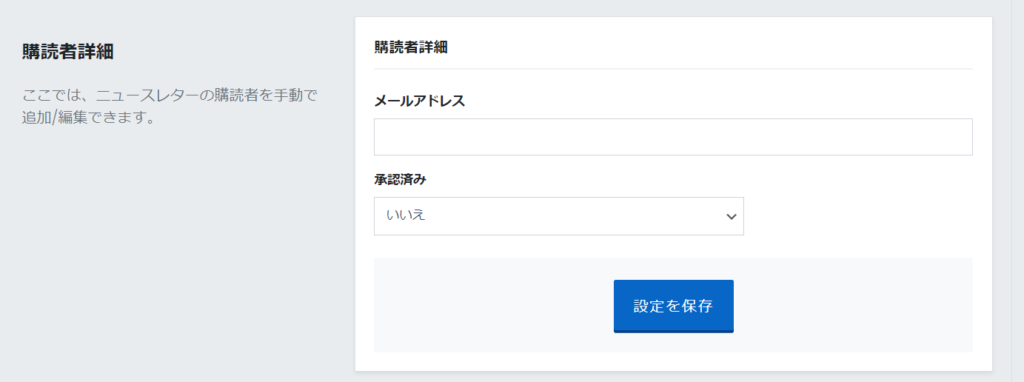
Add email newsletter users
Add them from the [Add Subscriber] section.
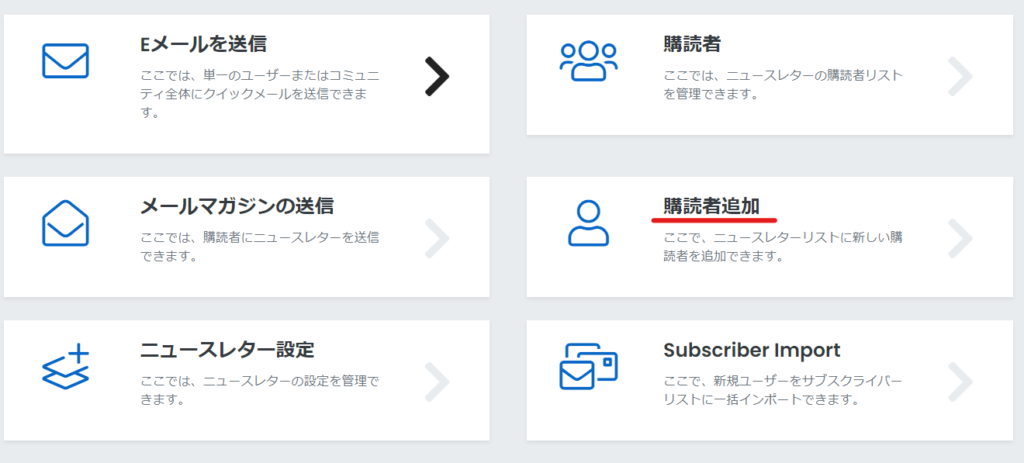
- email address
- approved
Set it and register it.
Bulk email newsletter registration
You can bulk register to email newsletter lists in the Subscriber Import section.
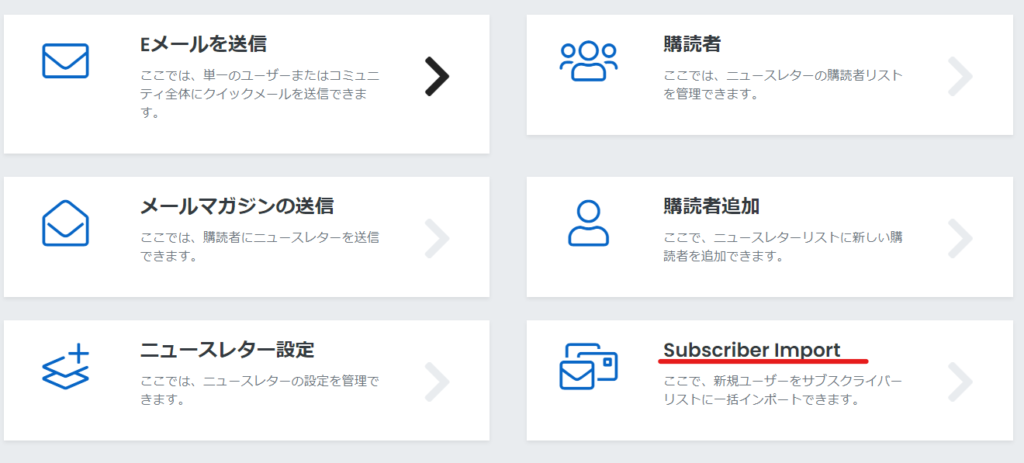
Please enter one email address per line to register.
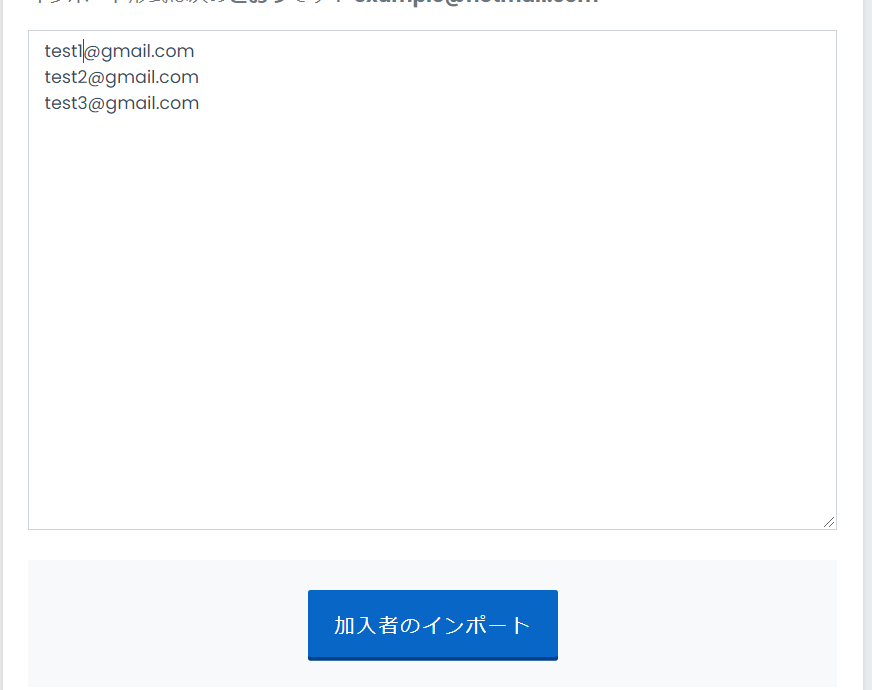
You have been registered.
There are lots of settings for email.
Also, since the text is originally in English, you will need to translate it all again or change it to suit your own service.

We are available on weekends and holidays!
Please contact us if you have any problems with your website!

- Unable to log in to WordPress
Malware infection?
- The homepage suddenly stopped displaying!
- A PHP error is occurring.
We also offer support on weekends and holidays for those who need assistance.
If you are in a hurry, please call us now at 03-6694-7024.
Latest Articles
Timing and Process for Renewing Your Recruitment Website | Key Points to Review to Increase the Number of Applications
7 Key Points for Creating a Recruitment Website | How to Create a Recruitment Site That Job Seekers Will Choose
What is the average cost of a recruitment website? A thorough explanation of pricing by production method.
5 Benefits of Creating a Recruitment Website with WordPress | Explaining Why It's Easy for the Person in Charge to Update