How to create a website using WordPress/How to use plugins/No-code construction blog


")
[LifterLMS Illustrated] Explaining how students register for courses
At HanamiWEB Online School,
●Ask questions in real-time in the virtual study room!
●Ask as many questions as you want via chat!
●E-learning materials that you can learn as much as you want, 24 hours a day!
All included for just 2,500 yen/month!
I am a WordPress instructor, and I often have the opportunity to teach the same content, such as how to get started with WordPress and how to use WordPress. I came to know about the Learning Management System (LMS) because I thought it would be nice if my customers could learn through e-learning.
I also learned that you can get started for free by using a WordPress plugin, and this time I'll explain how to install a plugin called Lifter LMS. This is a recommended plugin for those who want to provide a higher level of education by taking lessons and courses online.
This time, we will introduce the process for students to register for courses!
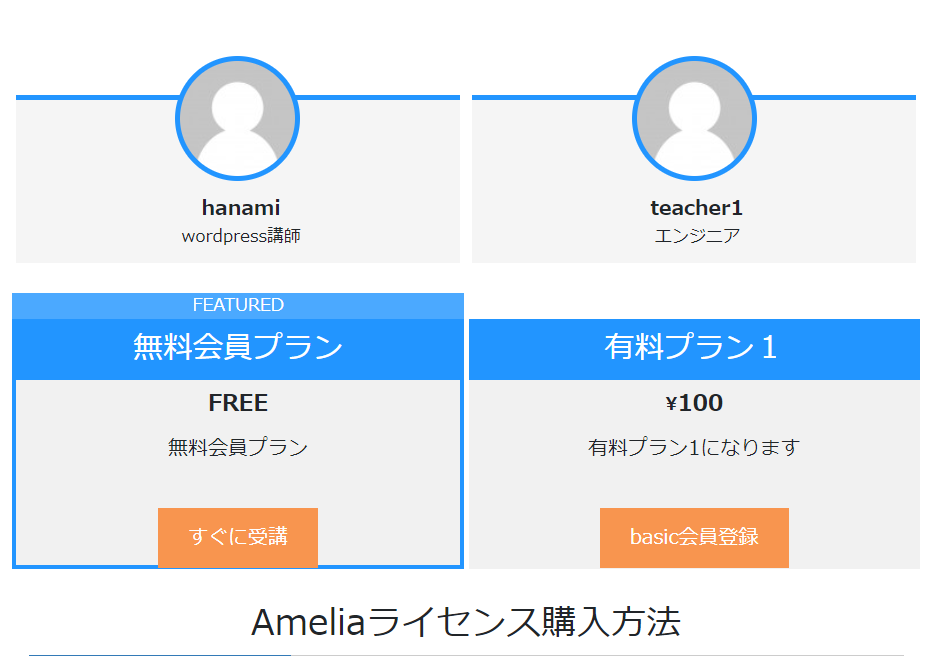
Register via the course price list
Select the course you wish to enroll in from the course list page and register for the course via the fee schedule.
Student information registration
This is the registration page for the free course.
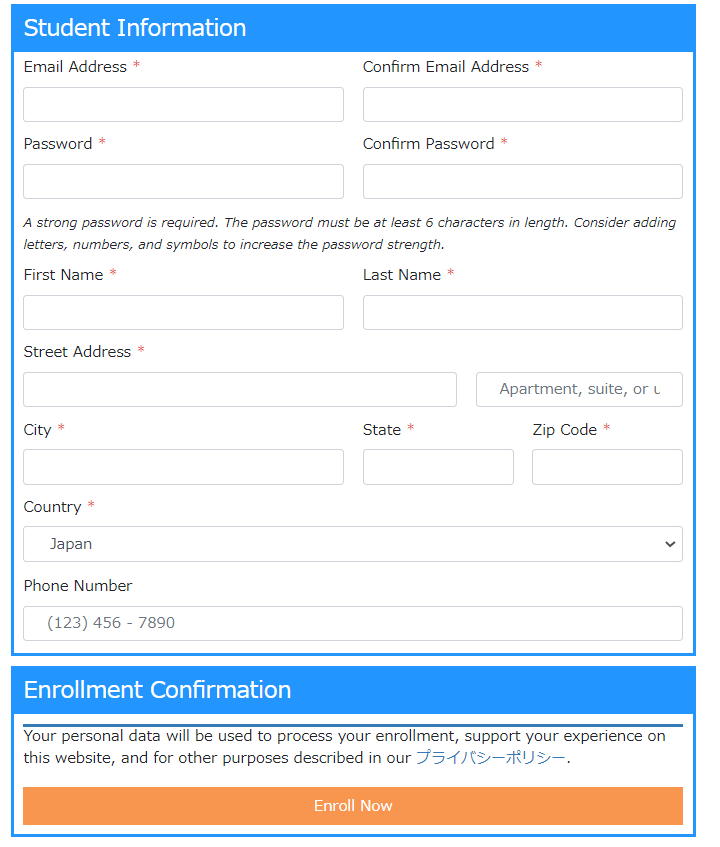
In order to register a password, you had to use an automatic password generation tool and make it 12 characters long, including alphanumeric characters and symbols.
Once you have registered, you will have access to the dashboard.
Here is the information you can manage.
Student Dashboard
Slug [dashboard]
A list of the courses you have enrolled in will be displayed.

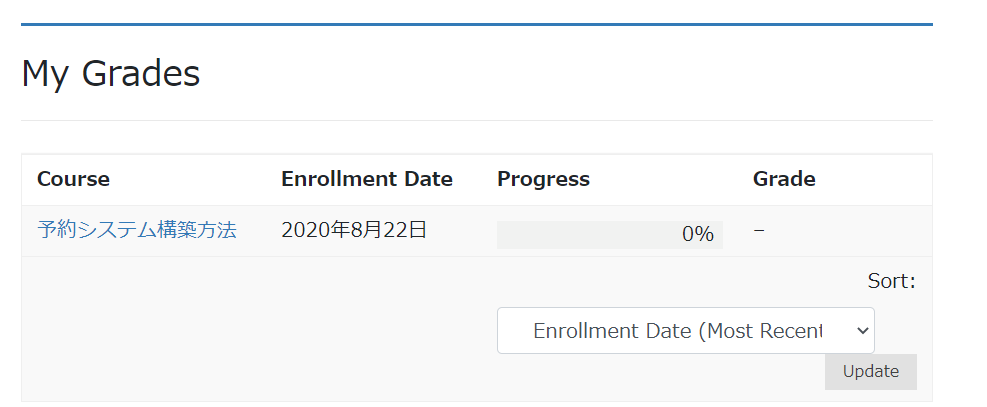
Student Grades
Slug [dashboard/my-grades]
You can track your progress in the courses you've enrolled in.
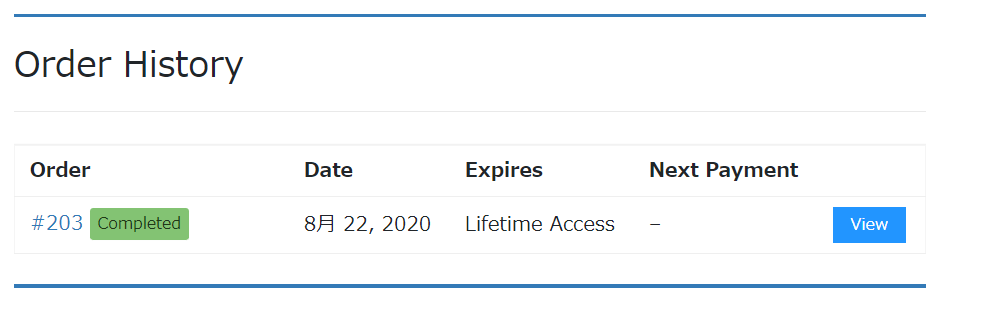
Student Order History
You can check your order history.
Administrator's information management method
Order Management
You can check your order list by going to [Order] > [Orders].
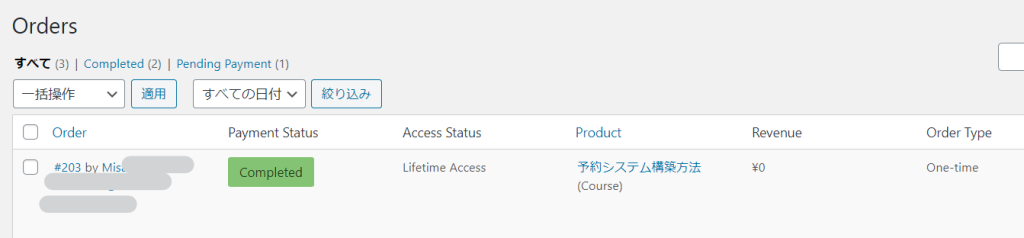
Click on the user name to view details and change the order status under [Order Information].
- Completed
- Pending Payment - Pending payment. If you are making a manual payment on a free plan, this status will be displayed, and once you have confirmed the payment, it will change to Completed.
- Cancelled
- Refunded
- Failed
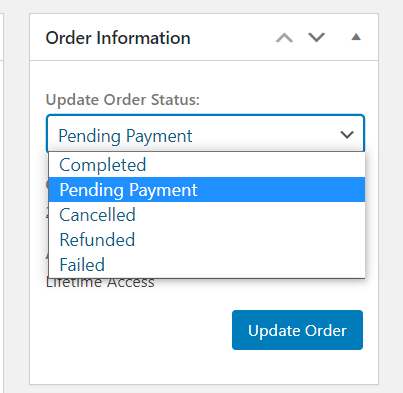
If it says Pending Payment, it means that the payment has not been completed, so you will not be able to start the course unless you change it to Completed.
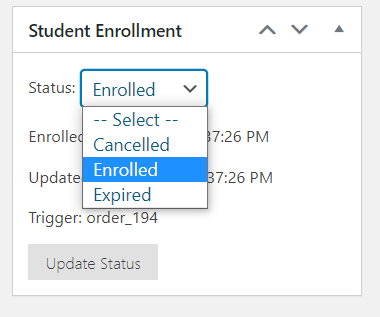
[Student Enrollment] Enrollment Status
- Cancelled
- Enrolled
- Expired
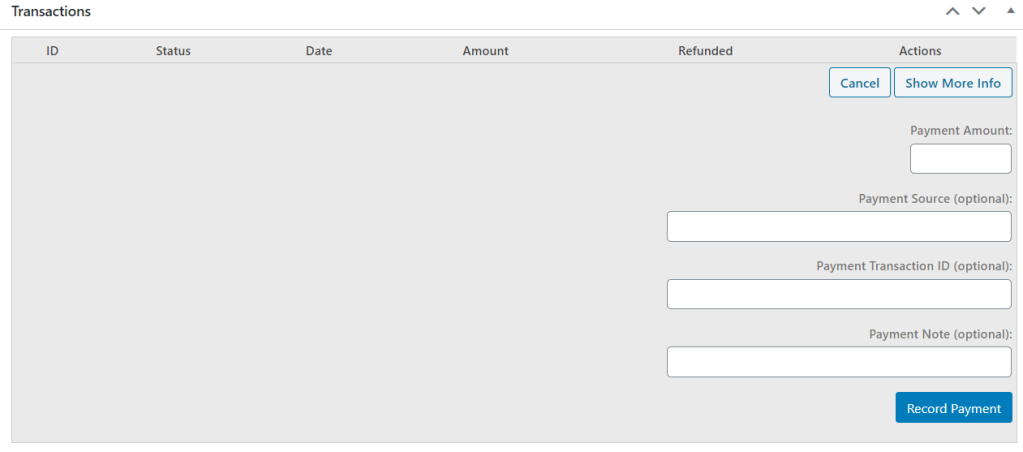
Manually enter payment status
Click [Record a Manual Payment] under [Transcations] to manually record a payment.

You do not need to enter any options.

Student reports
You can check the reports at [LifterLMS] > [Reporting].

You can manage various reports, such as student lists.
- Student Report
- Course Report
- Memberships - Membership Report
- Quizes - Quiz Report
- Sales - Sales Status Report
- Enrollments - Enrollment Status Report

Released as soon as the next morning! Weekends and holidays are also available!
Super rush website creation plan
We offer a rush website creation plan for those who need a website in a hurry!
We can publish your content as soon as the next morning, even on weekends and holidays! If you have any questions, please check the details below!

Latest Articles
How to Enhance EEAT with WordPress | Settings and Design Improvements Necessary for AI-Driven Traffic
[2026 Latest] How to check the number of visits from generated AI using GA4's exploration function
Error message: Allowed memory size of 268435456 bytes exhausted (tried to allocate 14684160 bytes) Error: On Lollipop