How to create a website using WordPress/How to use plugins/No-code construction blog


LifterLMS Customization example when the registration date and active date are different due to bank transfer, etc.
At HanamiWEB Online School,
●Ask questions in real-time in the virtual study room!
●Ask as many questions as you want via chat!
●E-learning materials that you can learn as much as you want, 24 hours a day!
All included for just 2,500 yen/month!
We explain LifterLMS, which allows you to create e-learning sites using WordPress plugins.
In this case, if you pay by credit card, there is no problem because the registration date is the same as the start date of use. However, if you pay by bank transfer, there is a problem in that the registration date and the actual start date of the course are different.
Solution
First, make a bank transfer
② Once payment has been confirmed, we will provide you with the registration URL and have you register.
If you choose the free setting, you will be able to start taking the course as soon as you register, so there will be no discrepancy between the registration date and the start date of the course.
This can be solved without customization, but I customized the plugin and successfully made it display the activation date on the site, so this is a memo.
Problems when students make bank transfer payments with LifterLMS
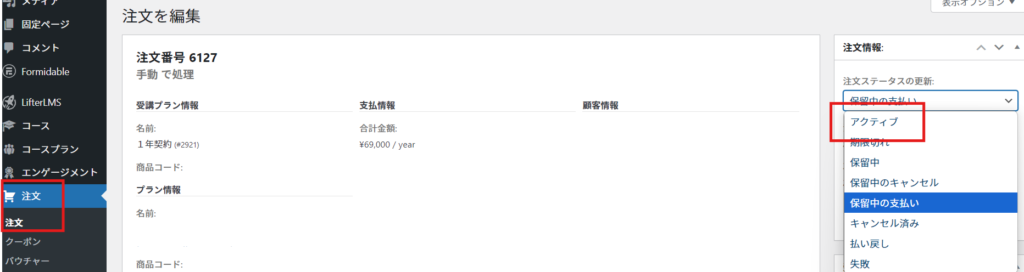
Once the bank transfer has been confirmed, manually change the order status to active from the "Orders" section on your dashboard.
There is a discrepancy because students cannot begin taking a course unless their order status is active.
Code snippet to get the activation date
Modify the template file wp-content/plugins/lifterlms/templates/loop/enroll-date.php.
It is dangerous to modify it directly, so copy enroll-date.php to your child theme and work on it.
① Download wp-content/plugins/lifterlms/templates/loop/enroll-date.php
② Upload it to wp-content/themes/used theme file/lifterrlms/loop/enroll-date.php
The return code is:
defined( 'ABSPATH' ) || exit; $student = llms_get_student(); if ( ! $student ) { return; } ?>
<div class="llms-meta llms-enroll-date">
<p>
get_enrollment_date( get_the_ID() ) ); ?>
</p>
</div>Customization Code
defined( 'ABSPATH' ) || exit; $student = llms_get_student(); if ( ! $student ) { return; } ?>
<div class="llms-meta llms-enroll-date">
<p>
get_enrollment_trigger( get_the_ID() ), $matches) ? $matches[0] : [null])[0], 'active_date', true )); printf( // Translators: %s = Enrollment date. esc_html__( 'Enrolled: %s', 'lifterlms' ), esc_html( $active_date ? $active_date : $student->get_enrollment_date( get_the_ID() ) ) ); ?>
</p>
</div>Let's rewrite it like this.
The code at the top gets the acrive_date, and the code at the bottom instructs the system to rewrite the registration date if there is an active_date.
What will change?
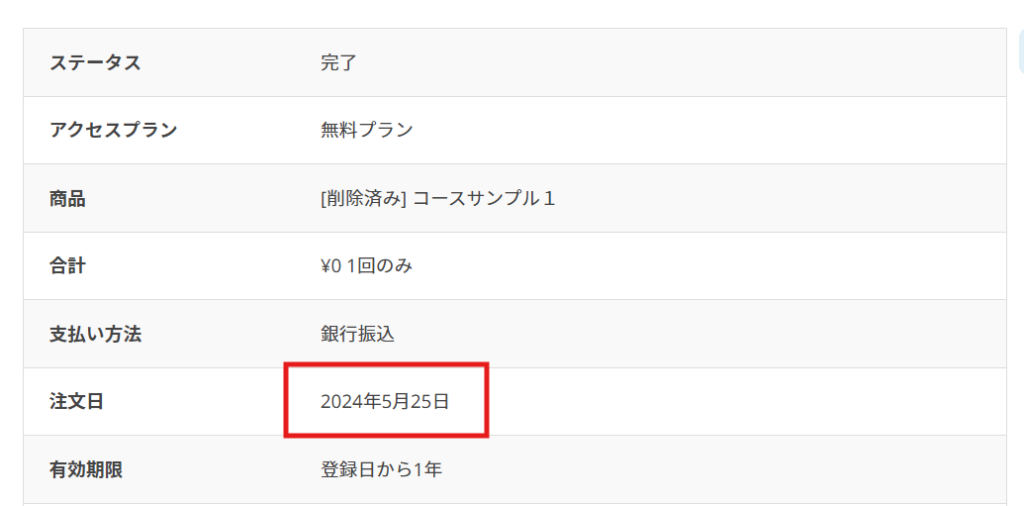
The data on the User My Page > Order History Details page will change.
I have changed the translation of the attached image, but the original text is "Start Date" which is "Start Date".
If active_date exists, the date will be rewritten.
Code to add one row of active data to the Order Details table
I customized it further.
Add the following code to function.php.
function lifterlms_view_order_table_body_cb( $order ) { ?>
<tr>
<th><?php esc_html_e( '利用開始日', 'lifterlms' ); ?></th>
<td>
get( 'user_id' ) ); $active_date = trim(get_post_meta( $order->get( 'id' ), 'active_date', true )); echo esc_html( $active_date ? $active_date : $student->get_enrollment_date( $order->get( 'product_id' ) ) ); ?>
</td>
</tr>
<?php
}
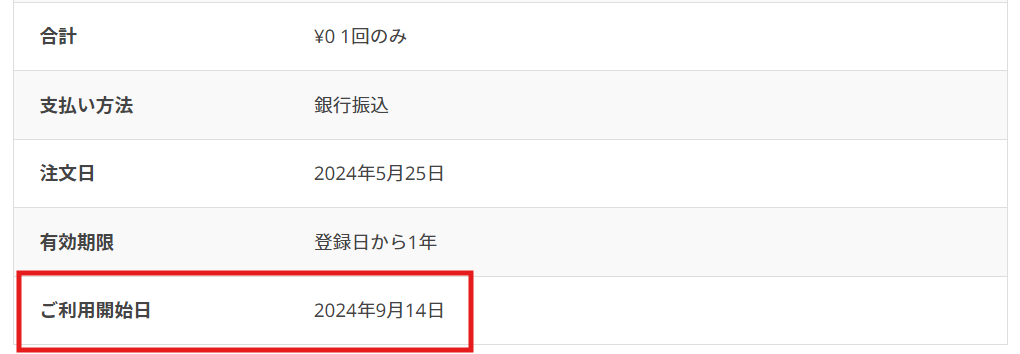
add_action( "lifterlms_view_order_table_body", "lifterlms_view_order_table_body_cb", 10, 1 );This is the code that adds the active_date row to the 10th row of the table on the order details page.
By doing this, it is now possible to output the order date and the activation date separately.
Manage start date values with custom fields
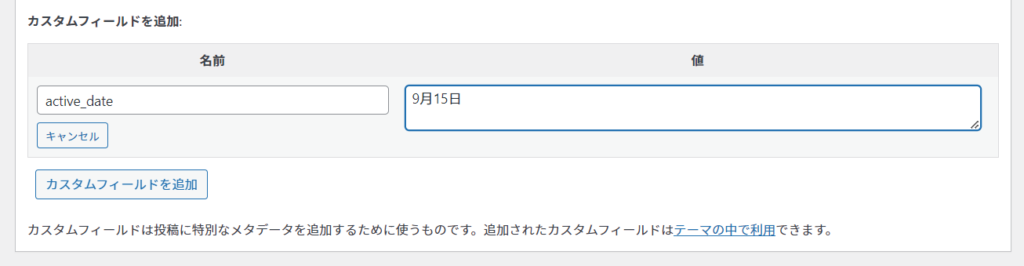
In fact, the code added to function.php is linked to the custom fields on the order confirmation screen.
- Name: active_date
- Value: any string
If you add it in this way, the value entered in the custom field will be reflected as the value to the right of "Start date" displayed in the table on the order details page.
Released as soon as the next morning! Weekends and holidays are also available!
Super rush website creation plan
We offer a rush website creation plan for those who need a website in a hurry!
We can publish your content as soon as the next morning, even on weekends and holidays! If you have any questions, please check the details below!

Latest Articles

How to Enhance EEAT with WordPress | Settings and Design Improvements Necessary for AI-Driven Traffic


[2026 Latest] How to check the number of visits from generated AI using GA4's exploration function

Error message: Allowed memory size of 268435456 bytes exhausted (tried to allocate 14684160 bytes) Error: On Lollipop