How to create a website using WordPress/How to use plugins/No-code construction blog


Lifter LMS Basic Settings
At HanamiWEB Online School,
●Ask questions in real-time in the virtual study room!
●Ask as many questions as you want via chat!
●E-learning materials that you can learn as much as you want, 24 hours a day!
All included for just 2,500 yen/month!
I am a WordPress instructor, and I often have the opportunity to teach the same content, such as how to get started with WordPress and how to use WordPress. I came to know about the Learning Management System (LMS) because I thought it would be nice if my customers could learn through e-learning.
I also learned that you can get started for free by using a WordPress plugin, and this time I'll explain how to install a plugin called Lifter LMS. This is a recommended plugin for those who want to provide a higher level of education by taking lessons and courses online.
This time, we will explain the basic settings of LifterLMS!
Lifter LMS Basic Settings
We will explain the plugin's [LifterLMS] > [Setting].
Course Category Settings
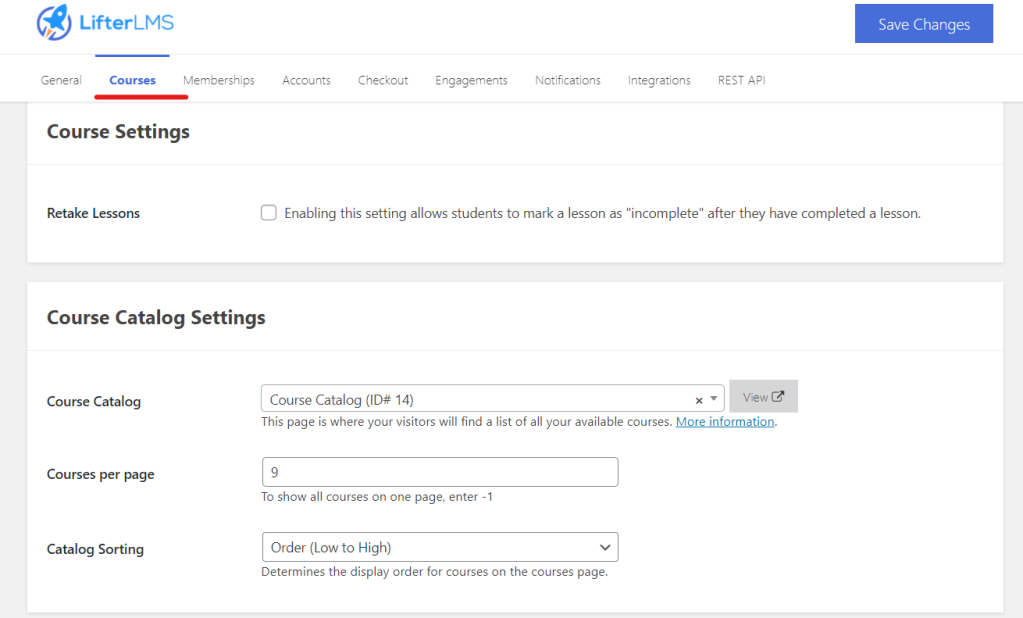
【Courses】
Course Settings
- Retake Lessons - Check this box if you want students to be able to change their status to incomplete even after completing the course.
Course Catalog Settings
- Course Catalog - Select a page to output the course category on a static page
- Courses per page – Set the number of course categories to display per page
- Catalog Sorting - Set how course categories are sorted
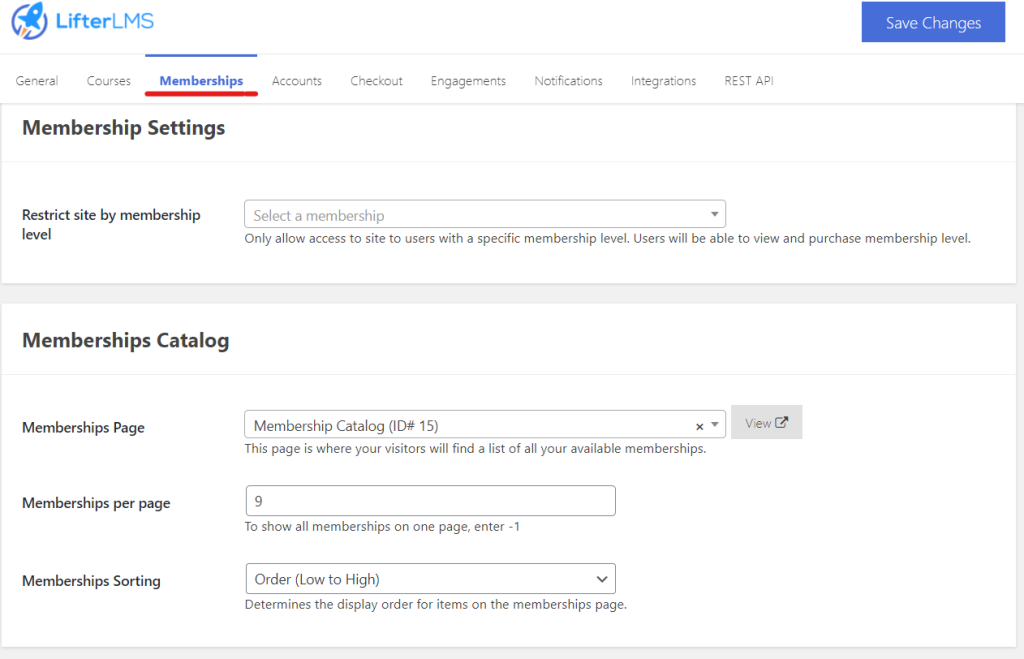
Membership Settings
Membership Settings
- Restrict site by membership level - If you want to allow only certain memberships to access the site, select the memberships to allow.
Membership Category Settings
- Memberships Page – Select the static page to output the membership page
- Memberships per page – The number of membership categories to display on the membership page
- Memberships Sorting – How membership categories are sorted
account settings
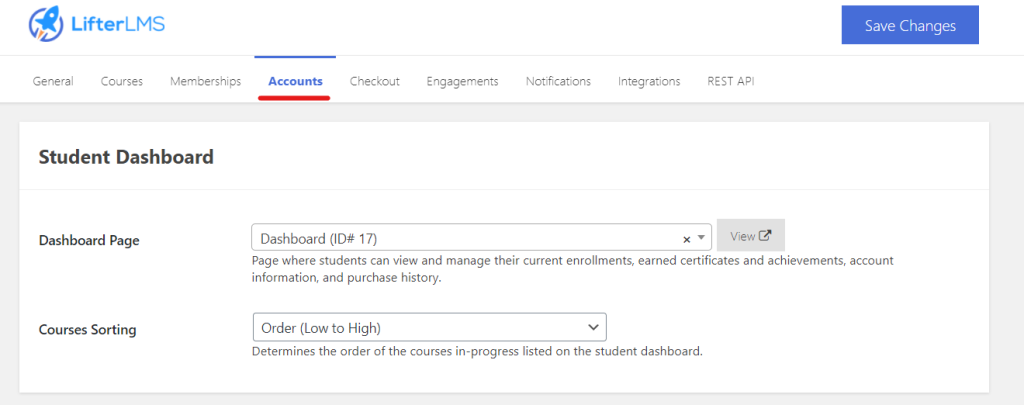
Student Dashboard Settings
- Dashboard Page – Select a static page to output the student dashboard
- Courses Sorting – Setting the order of courses on the student dashboard
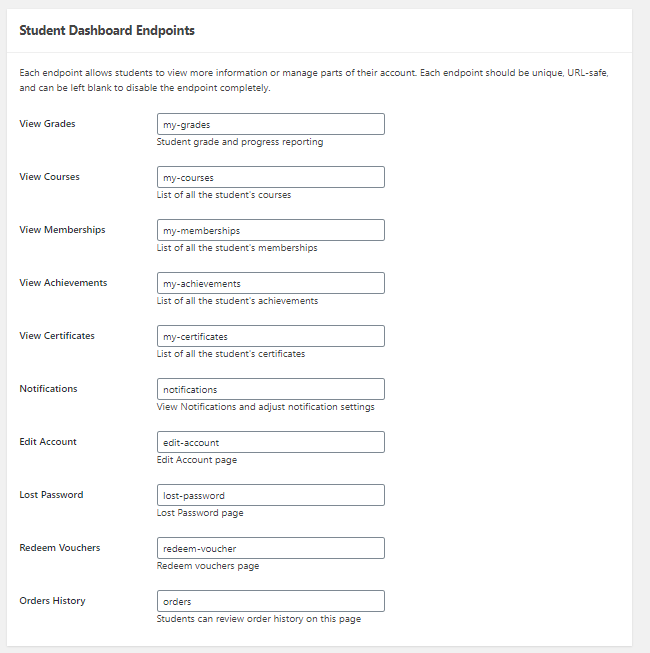
Student Dashboard Preferences
Set the URL slug for each page that will be displayed under the student dashboard items.
- View Grades - Your grades and progress
- View Courses - List of courses currently being taken
- View Memberships
- View Achievements
- View Certificates - List of completed courses
- Notifications - Notification settings
- Edit Account - Delete Account
- Lost Password
- Redeem Vouchers - Coupon page display
- Orders History
Since the URL slug is part of the URL address, it is better not to use Japanese. When connecting words with alphanumeric characters, connect them with a half-width hyphen [-].
Student Information Options
We will now set up detailed information about students.
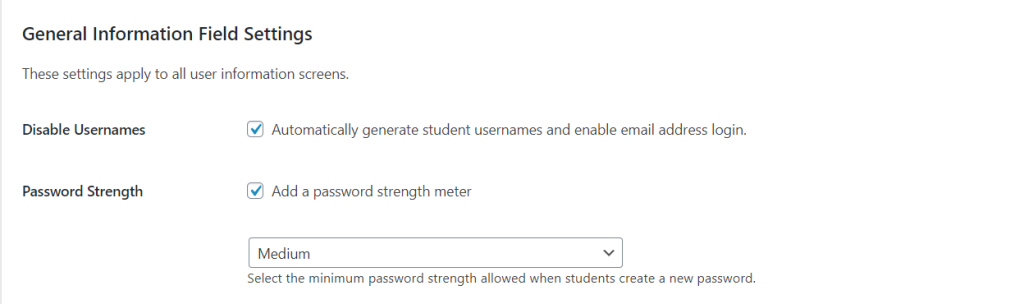
General Information Field Settings
Student information field settings
- Disable Usernames - Auto-generate usernames and allow login with email address
- Add a password strength meter
(You can set the password strength.)
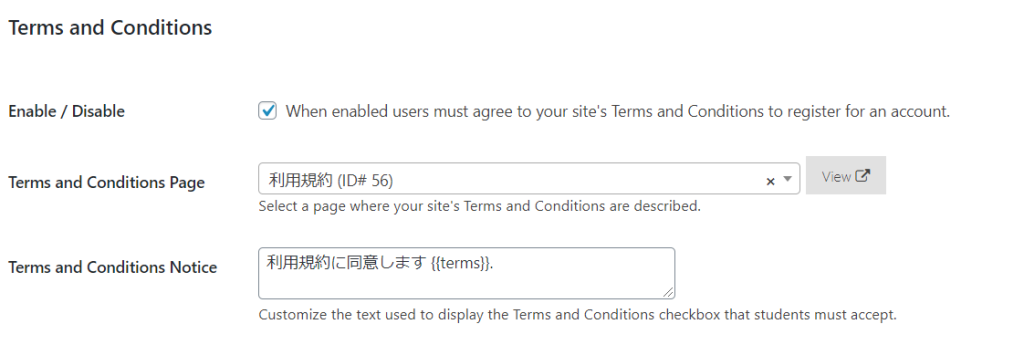
Terms and Conditions
Terms of Use Settings
- Enable / Disable - When enabled, users will be required to agree to the terms of use when signing up.
If enabled, specify the terms of use you created on the static page. You can also replace the warning text.
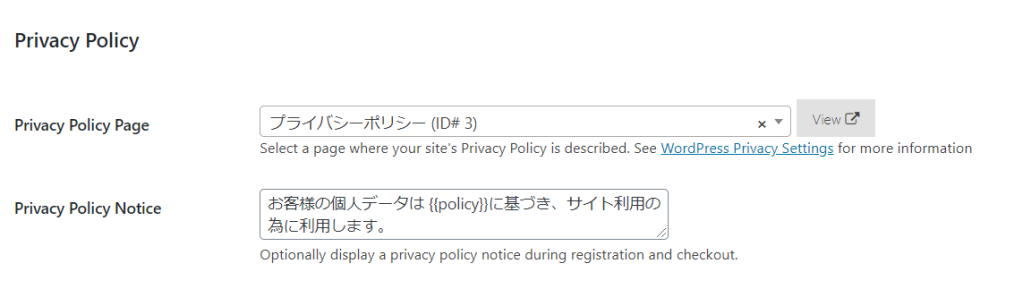
Privacy Policy
Privacy policy settings. Specify the privacy policy page you created as a static page and set the notice in Japanese.
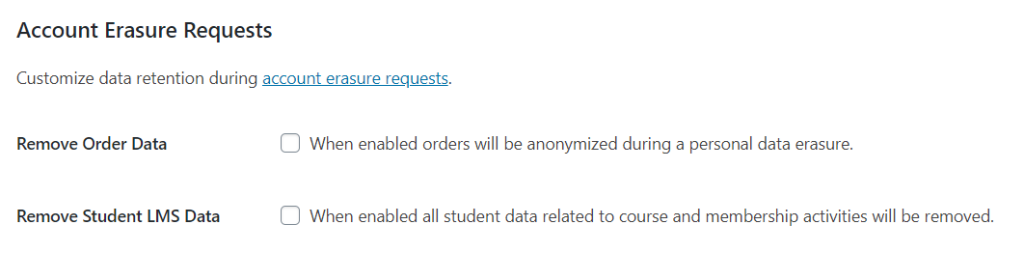
Account Erasure Requests
Set the account deletion settings. Check to enable.
- Remove Order Data – When you delete your account, your order data will also be deleted.
- Remove Student LMS Data - When you delete your account, your course membership data will also be deleted.
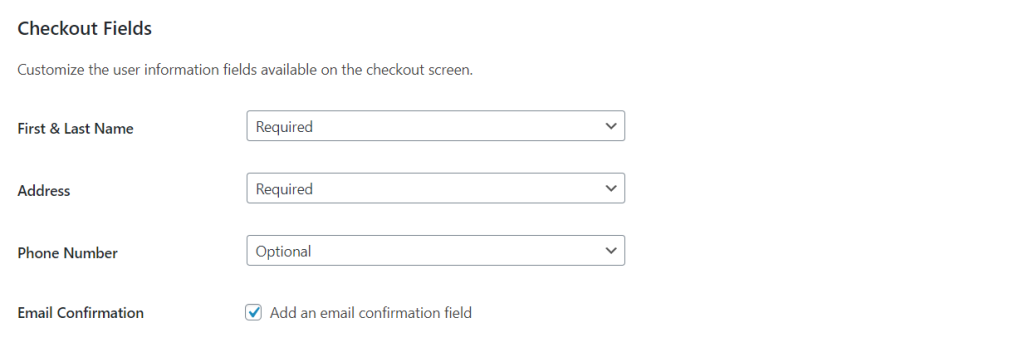
Checkout Fields
Set whether or not user information items must be entered when making a payment. Select [Required] to make them required. Select [Optional] to make them optional, or [Hidden] to hide them.
If you want to output an email confirmation field, check [Add an email confirmation field].
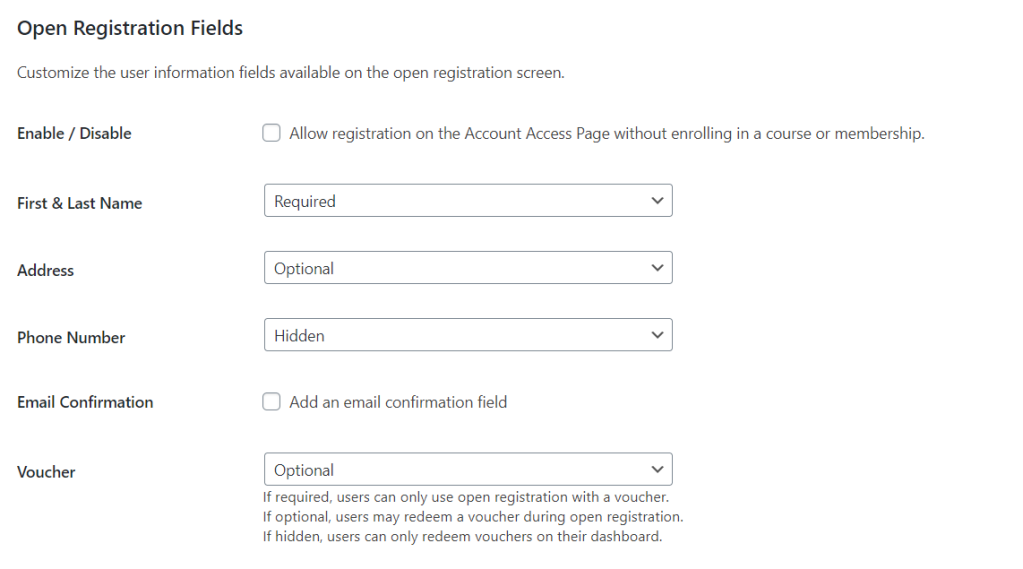
Open Registration Fields
Set the input fields on the course registration screen. The setting method is the same as for Checkout Fields.
Allow registration on the Account Access Page without enrolling in a course or membership. Check this box to allow account registration without enrolling in a course or membership.
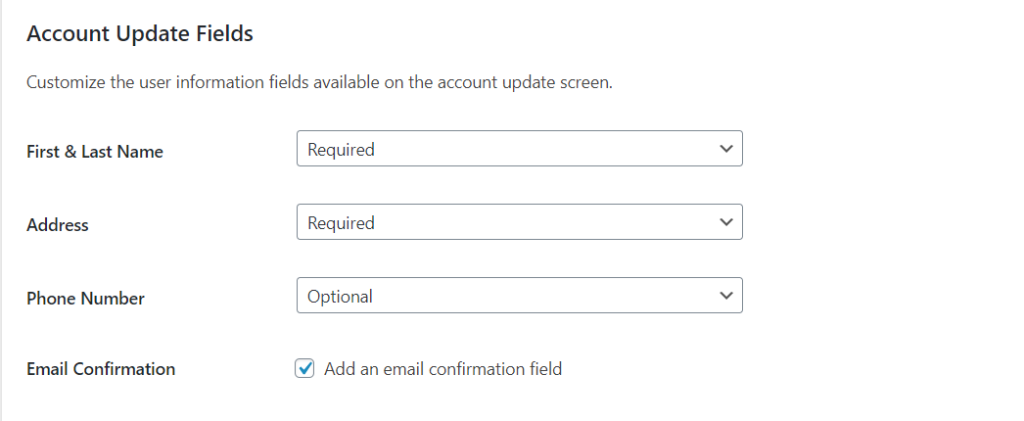
Accout Update Fields
This sets the input fields when updating an account. This is the same as the Checkout Fields setting.
Payment Settings【Checkout】
Set up your payment.
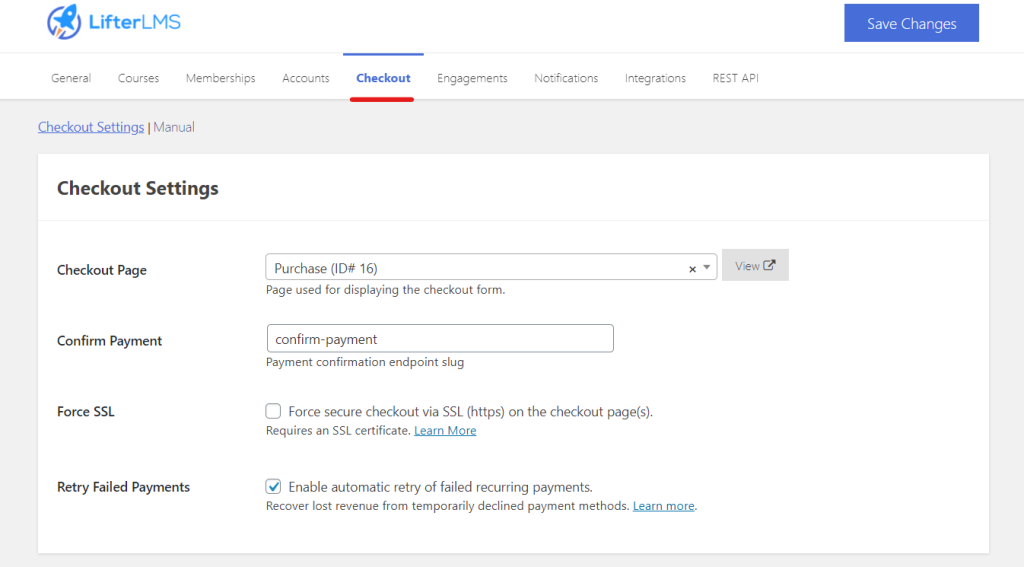
Checkout Settings
- Checkout Page - Select the static page where all payment information is created
- Confirm Payment – Set the payment page slug (no need to change this)
- Force SSL - If you are making payments, we recommend that you enable SSL on your site and check this box.
- Retry Failed Payments - Check this box if you want to retry failed recurring payments.
Currency Options
Set the currency.
- Country - Japan
- Currency - Japanese yen
- Currency Position - Location of the ¥ symbol
- Thousand Separator - Thousands value separator
- Decimal Separator - Decimal separator
- Decimal Places – Decimal place (set to 0 for Japanese Yen)
- Hide Zero Decimals - Hide the decimal points if the decimal point is 0. In the case of Japanese Yen, there are no decimals in the currency, so check this box.

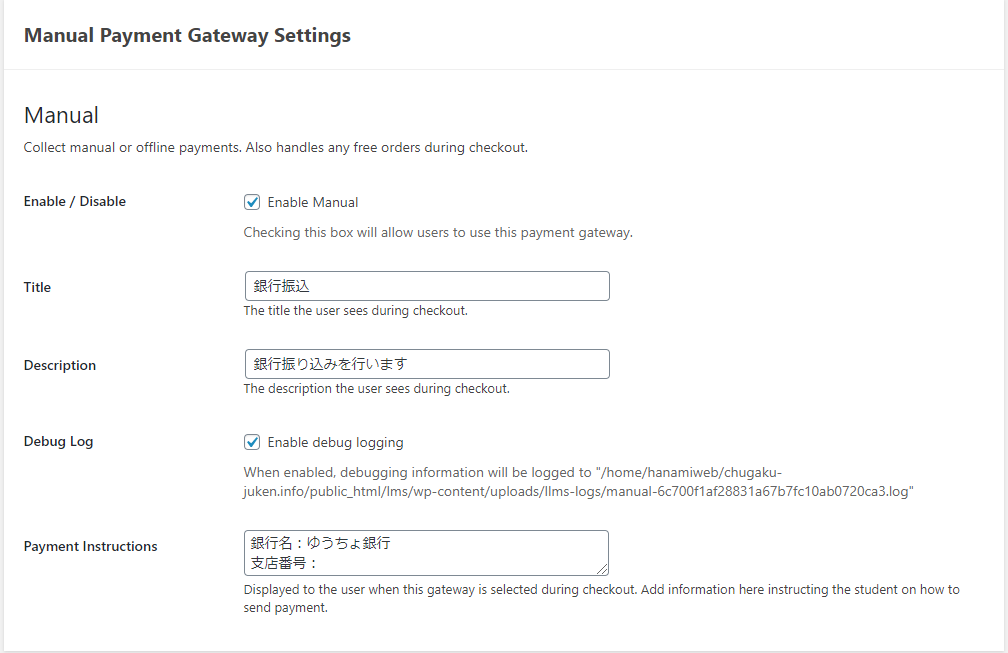
Payment Gateway
There should be a manual included. Set up the payment method for bank transfer.
In the free version, you can only set up bank transfers.
Click the link text.
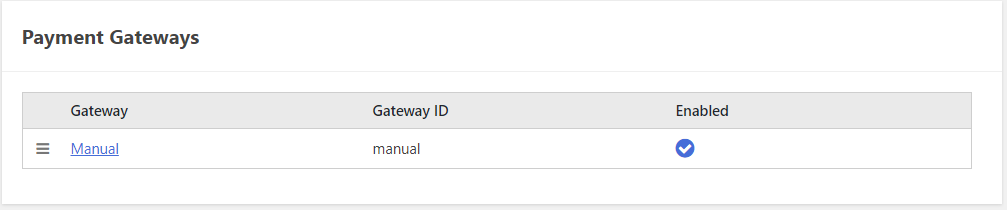
- Enable/Disable - Set whether to allow bank transfers
- Title - Set the title
- Description - Set the description.
- Debug log - Set whether to manage the log
- Payment Instructions - Provide details on where to transfer the funds and how to transfer the funds
Email Settings (Engagements)
Configure your email settings.
- Sender Name - Set the name that will be displayed as the sender name.
- Sender Email - Set the email address
- Header Image - Set this if you want to include an image in the header.
- Email Footer Text - Footer text settings
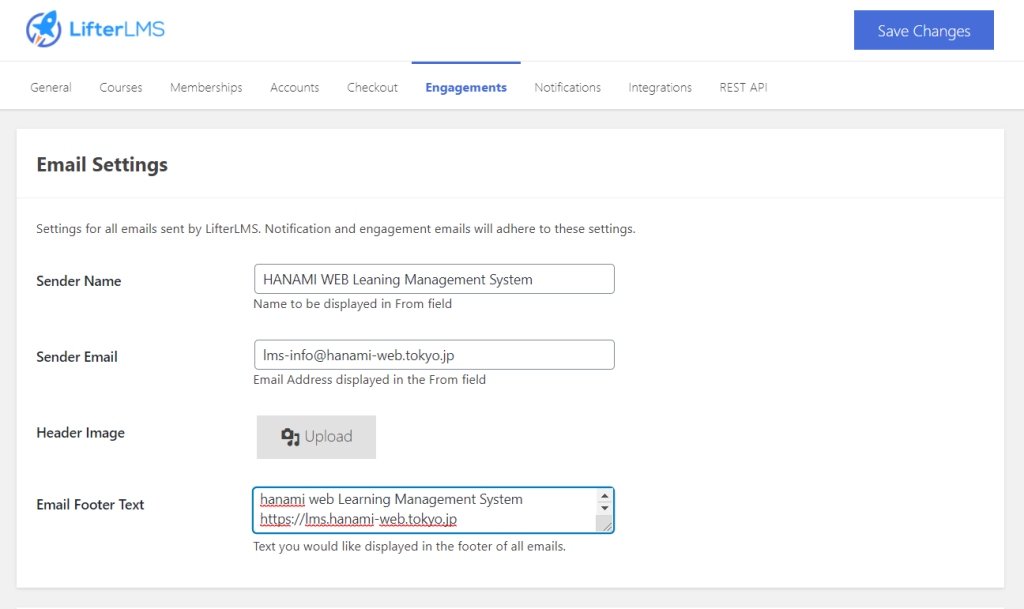
this time,Email DeliveryNo settings will be made.
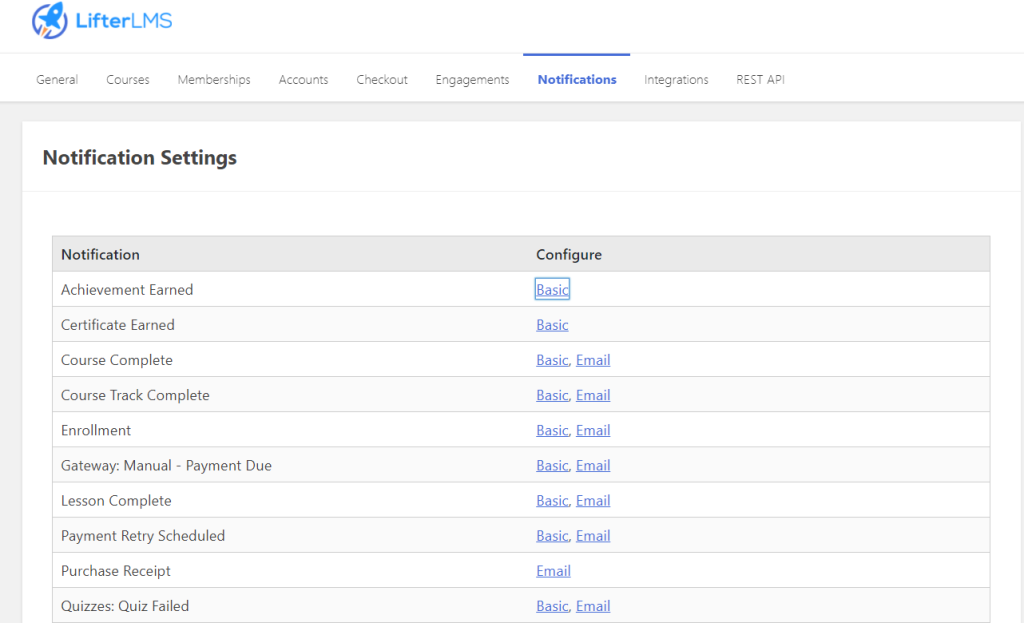
Email notification settings (Notifications)
Set the email notification text. The type of email to be set is
- Achievement Earned – When you achieve an achievement
- Certificate Earned – When you earn a certificate
- Course Complete – When you have completed a course
- Course Track Complete – When you have completed a course track
- Enrollment - When you register for a course
- Gateway: Manual - Payment Due - Notification of deadline for manual payment (bank transfer)
- Lesson Complete – When a lesson is completed
- Payment Retry Scheduled
- Purchase Receipt
- Quizzes: Quiz Failed
- Quizzes: Quiz Graded
- Quizzes: Quiz Passed - When you pass a quiz
- Section Complete – When a section is completed
- Student Welcome - when you register as a student
- Subscription Cancellation Notice - When you cancel your subscription
Notification text details settings
For example, let's go to the editing screen for [Achievement Earned].
Rewrite the title and email body in Japanese and with details of your services.
In that case, by using [Merge Codes], you can set it up to automatically output student names, etc.

We won't need the Integration and Reset API this time, so we won't explain them here.
summary
There were few settings to configure, so it was relatively easy!
Released as soon as the next morning! Weekends and holidays are also available!
Super rush website creation plan
We offer a rush website creation plan for those who need a website in a hurry!
We can publish your content as soon as the next morning, even on weekends and holidays! If you have any questions, please check the details below!

Latest Articles
How to Enhance EEAT with WordPress | Settings and Design Improvements Necessary for AI-Driven Traffic
[2026 Latest] How to check the number of visits from generated AI using GA4's exploration function
Error message: Allowed memory size of 268435456 bytes exhausted (tried to allocate 14684160 bytes) Error: On Lollipop