How to create a website using WordPress/How to use plugins/No-code construction blog

How to issue a certificate of completion for a course using Lifter LMS
At HanamiWEB Online School,
●Ask questions in real-time in the virtual study room!
●Ask as many questions as you want via chat!
●E-learning materials that you can learn as much as you want, 24 hours a day!
All included for just 2,500 yen/month!
I am a WordPress instructor, and I often have the opportunity to teach the same content, such as how to get started with WordPress and how to use WordPress. I came to know about the Learning Management System (LMS) because I thought it would be nice if my customers could learn through e-learning.
I also learned that you can get started for free by using a WordPress plugin, and this time I will explain how to install a plugin called Lifter LMS.
What I will introduce this time is how to issue a certificate of attendance when you have completed all the courses. So, I will show you how to set it up!
This time, I will introduce how to create an LMS using Amelia, a plugin that allows you to build a reservation management system using WordPress.
LifterLMS can issue three types of certificates
- Digital Certificates
- Achievements
Three types of certificates can be issued:
1. Digital certificate issuance
Click [Engagements] > [Certificates].

Create a new certificate
Click [Add Certificate].

Enter the title of the certificate
Give the certificate a title to identify which course it is for in the administration screen.
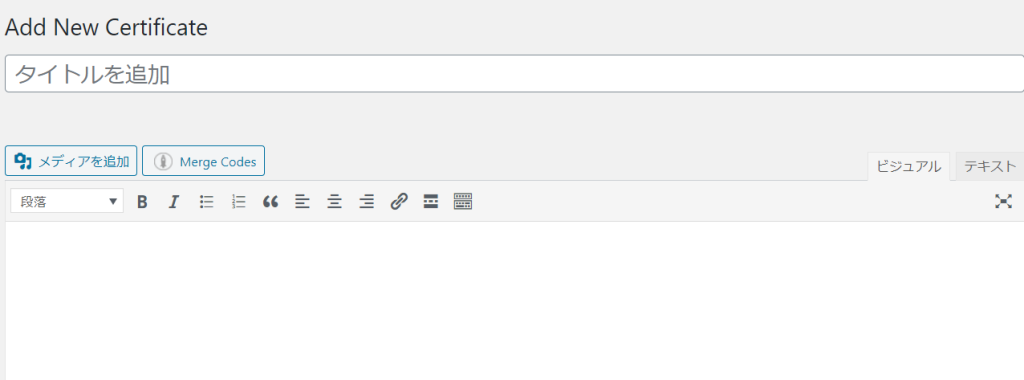
Create the text
Create the text in the visual editor.
Click [Merge Codes] to output names, etc.


Continue further down
Deciding on the title and frame design for the certificate
You can also use your own uploaded images in WordPress.

Finally, publish it by clicking the [Publish] button.

Achievements
Click [Engagements] > [Achievements].

Added new achievements
[Add Achievements]

Enter information for achievements
- Add a title - Give it a title that will help you identify it in the admin screen
- Achievements Title – Enter the title to display for the achievement
- Achievements Content - Enter text
- Background image – Select background image
Finally, click the [Publish] button.

I tried to write it in this format.

Click [Engagements] > [Emails].

Create a new email certificate
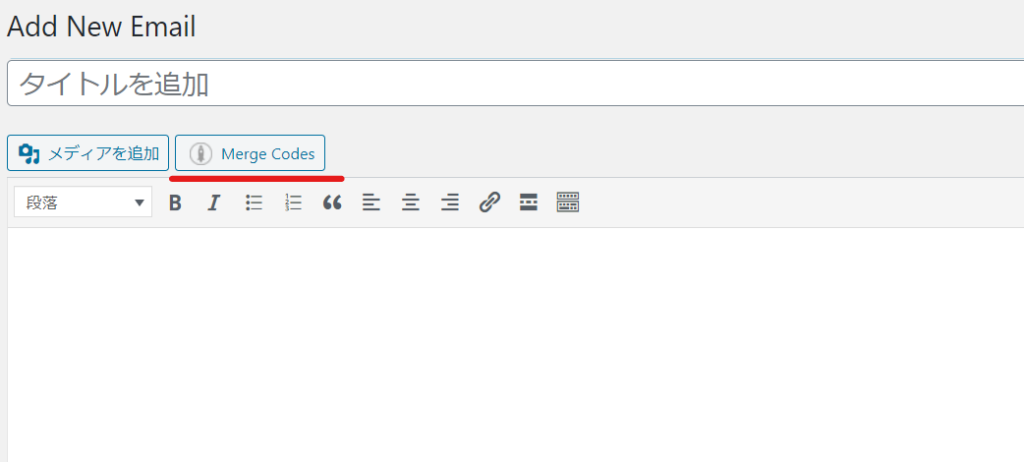
Click [Add Email].

Enter the title and text
The title should be used to identify the page on the admin page.
Create the body of the email so that the student's name and other information from the [Merge Codes] are displayed.
It's simple, but I set it up like this:

Email sending settings
Going further down
- Email Subject – Set the subject of the email
- Email Hedling - Sets the heading that appears above the email body.
- Email To - Set the email destination
- Email CC - Set the email address to send to in CC
- Email BCC - Set the email address to send to via BCC
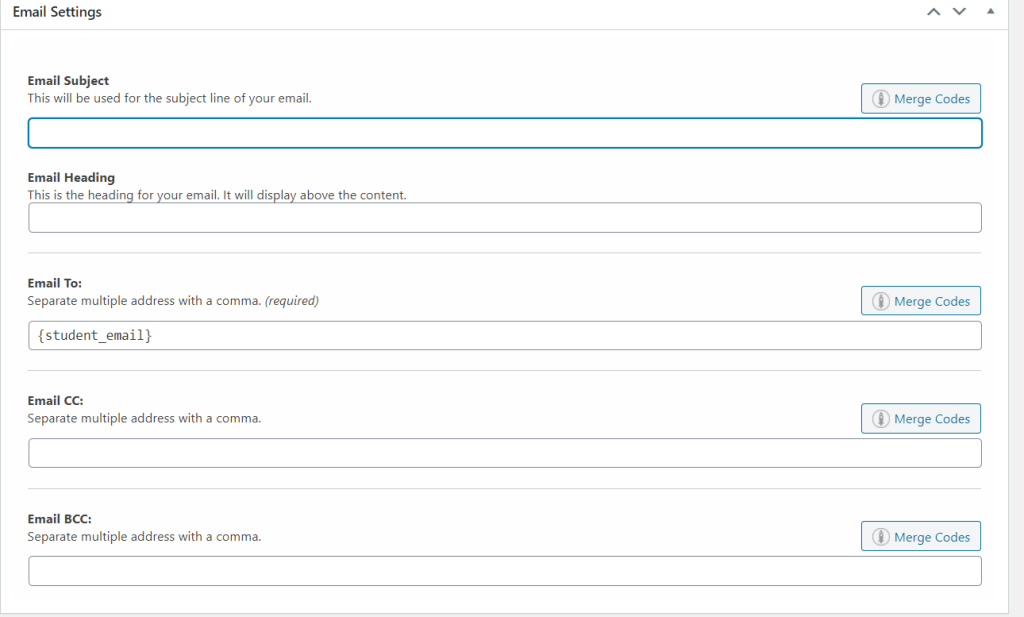
I tried setting it up like this.

Finally, click Publish.
Linking a certificate to a course
It is necessary to link which course the certificate will be issued upon completion.
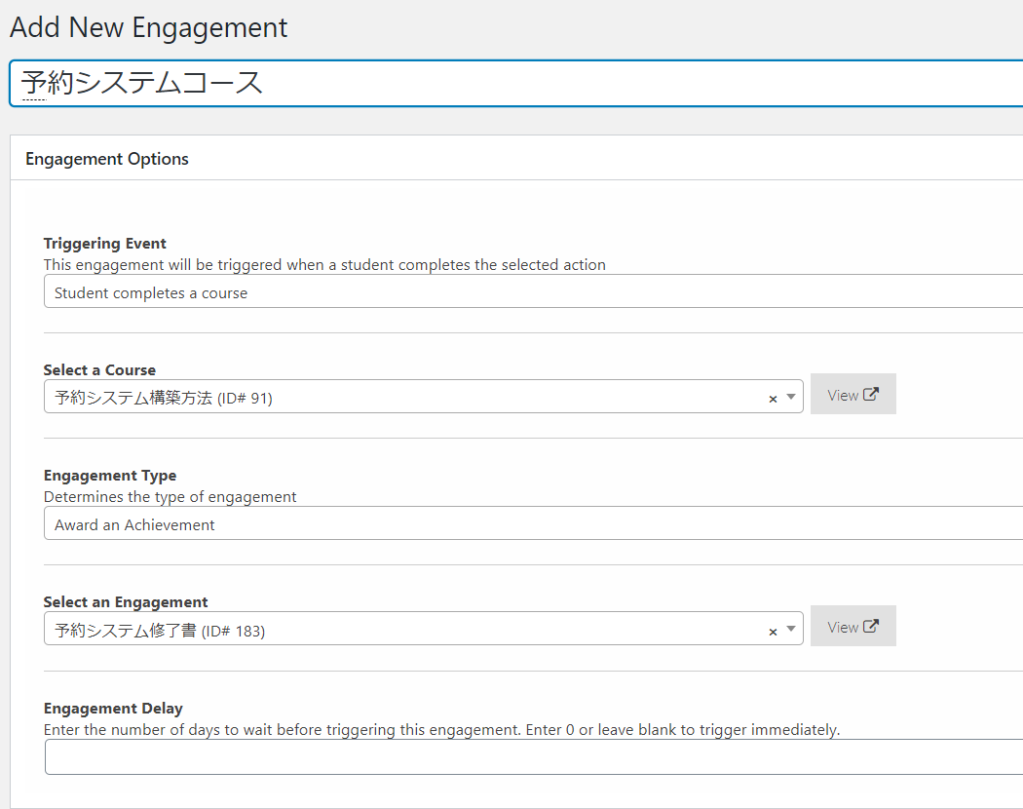
Click [Engagements] > [Engagements] > [Add Engagement].

Advanced Setting
- Triggering Event – Select the timing. In this case, select [Student completes a course].
- Select a Course – Select the course you want to apply.
- Engagement Type – Select either Certificate, Achievement, or Email
- Select an Engagement - Select which of the certificates you have created to issue.
- Enagement Delay - If you want to delay the timing instead of ending at the same time, set it here.
summary
I thought it was a great system that even with the free plan, you are issued with a certificate at the end of the course and can check your progress at any time from your personal page!
Released as soon as the next morning! Weekends and holidays are also available!
Super rush website creation plan
We offer a rush website creation plan for those who need a website in a hurry!
We can publish your content as soon as the next morning, even on weekends and holidays! If you have any questions, please check the details below!
Latest Articles


