How to create a website using WordPress/How to use plugins/No-code construction blog


LMS plugin LearnDash basic settings ~ Email extension settings
At HanamiWEB Online School,
●Ask questions in real-time in the virtual study room!
●Ask as many questions as you want via chat!
●E-learning materials that you can learn as much as you want, 24 hours a day!
All included for just 2,500 yen/month!
We explain LearnDash, a paid LMS (Learning management system) plugin that allows you to build an e-learning system using WordPress.
This time, we will explain the email extension settings.
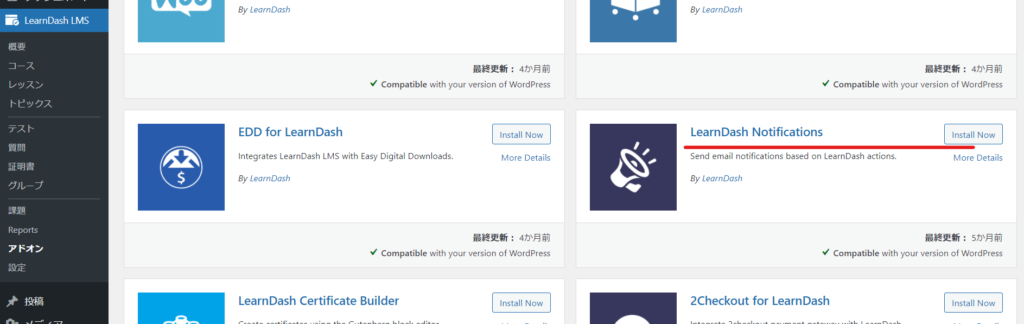
Enable email extension
- LearnDash LMS
- add on
- LearnDash Notification
- Install Now
- Active
to.
Notification item added
- LearnDash LMS
- Notification
- Status
Please check the following first.
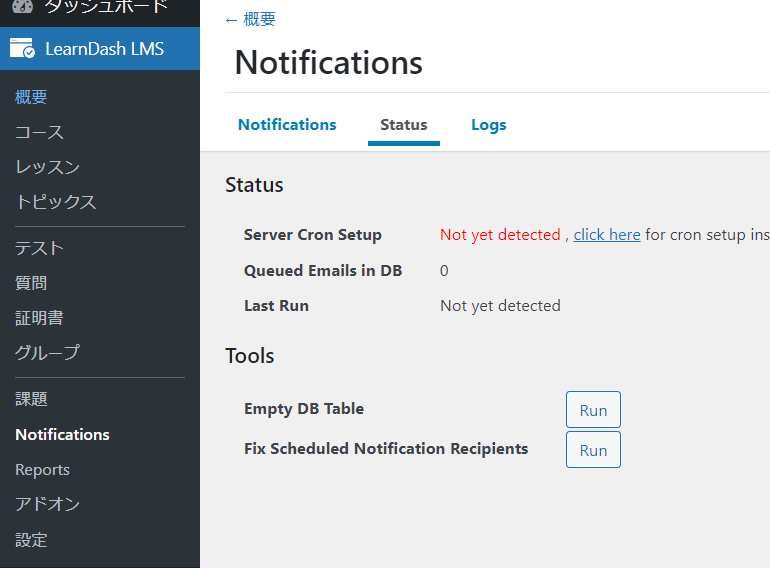
Cron Settings
in preparation
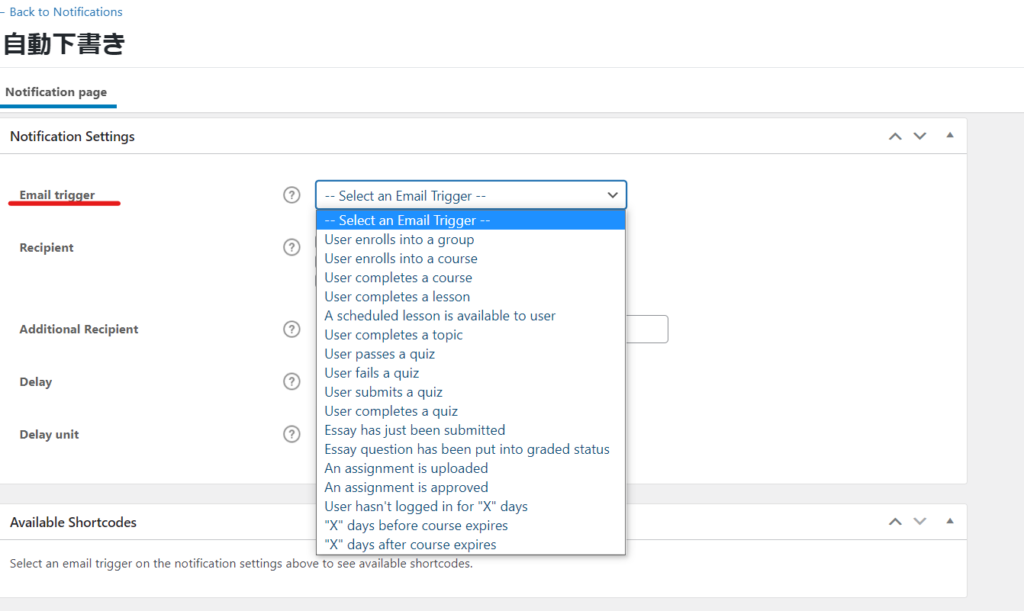
Types of emails you can send
By using Notification Add-ons, you can send emails at the following times:
- Users subscribe to groups
- A user enrolls in a course
- A user completes a course
- User completes a lesson
- Scheduled lessons are available to users
- A user completes a topic
- The user completes the quiz
- The user passes the quiz
- The user fails the quiz
- User submits quiz
- Essay Submitted
- Essay questions graded
- The assignment will be uploaded
- Allocation approved
- User hasn't logged in for 'X' days
- "X" days before course expiration
- "X" days since course expiration
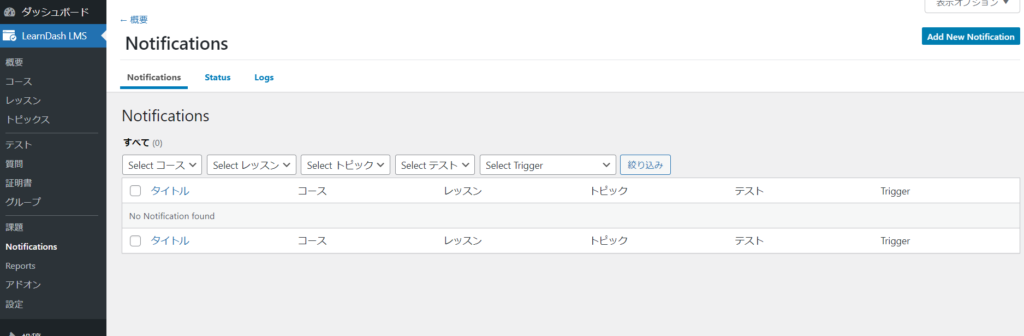
Add a notification
Now let's add notifications.
- LearnDash LMS
- Notification
- Add New Notification
and set it up.
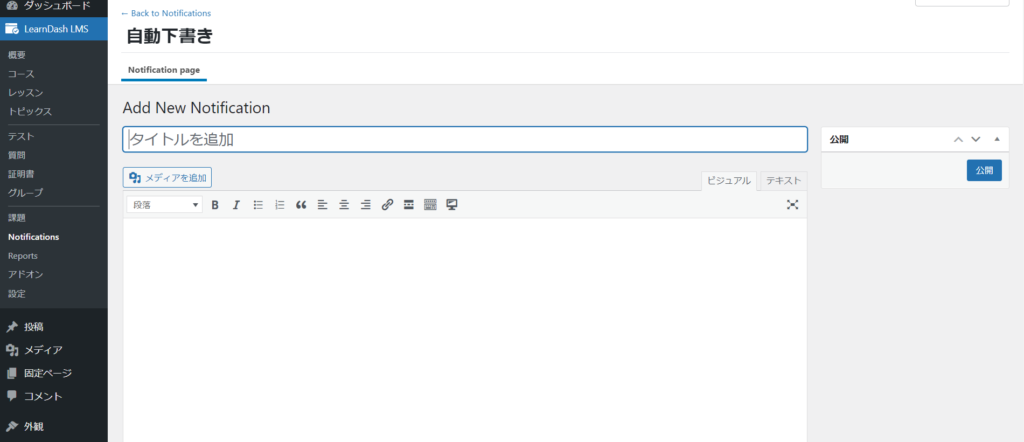
Enter subject and text
Enter a subject and message.
Transmission timing settings
Specify the timing to send.
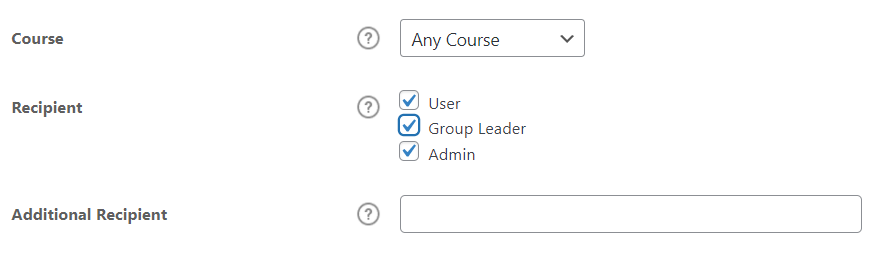
Setting the destination
- Couese - You can also decide which course to set.
- Recipient - You can set the recipient
- Additional Recipient - Set this if you want to send to another email address that is not a user or administrator.
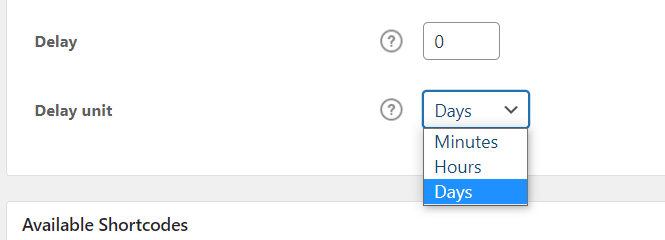
timing
If it is set to 0, the message will be sent immediately, but it can also be delayed by minutes, hours, or days.
Email Variable
Here are some dynamic text examples that you can use in your text.
username
[ld_notifications field="user" show="user_name"]email address
[ld_notifications field="user" show="email"]First name
[ld_notifications field="user" show="first_name"]Last name
[ld_notifications field="user" show="last_name"]Course Title
[ld_notifications field="course" show="title"]Course URL(You can encourage users to continue taking the course or provide them with information on how to download the certificate.)
[ld_notifications field="course" show="url"]Lesson Title
[ld_notifications field="lesson" show="title"]Lesson URL
[ld_notifications field="lesson" show="url"]
We are available on weekends and holidays!
Please contact us if you have any problems with your website!

- Unable to log in to WordPress
Malware infection?
- The homepage suddenly stopped displaying!
- A PHP error is occurring.
We also offer support on weekends and holidays for those who need assistance.
If you are in a hurry, please call us now at 03-6694-7024.
Latest Articles
Timing and Process for Renewing Your Recruitment Website | Key Points to Review to Increase the Number of Applications
7 Key Points for Creating a Recruitment Website | How to Create a Recruitment Site That Job Seekers Will Choose
What is the average cost of a recruitment website? A thorough explanation of pricing by production method.
5 Benefits of Creating a Recruitment Website with WordPress | Explaining Why It's Easy for the Person in Charge to Update