How to create a website using WordPress/How to use plugins/No-code construction blog


Opening an Online School with WordPress - Part 4
At HanamiWEB Online School,
●Ask questions in real-time in the virtual study room!
●Ask as many questions as you want via chat!
●E-learning materials that you can learn as much as you want, 24 hours a day!
All included for just 2,500 yen/month!
We are launching an online school that will teach you how to create WordPress without coding.
The plugin we will use is Lifter LMS, an e-learning system called Learn Management System (LMS).
In Part 1 of Opening an Online School with WordPress, I wrote a memo about installing plugins, installing the theme, and setting up the initial settings.
In part 2, we created an outline of the course and set up items related to the page that serves as the basis for application, such as the pricing plan.
In Part 3, I wrote an article about creating the content of the lessons that would serve as teaching materials.
That was a long introduction, but this time I would like to build the section where students can register!
Flow of taking online school classes using the E-learning system
This is the flow of membership registration.
- [Students] Membership registration
- [Students/Administrators] Receive email
- [Students] Payment (If you have purchased an addon and wish to extend the program, you can make payment at the same time as registering as a member)
- [Operator] Member activation
- [Students/Administrators] Receive email
This is the flow.
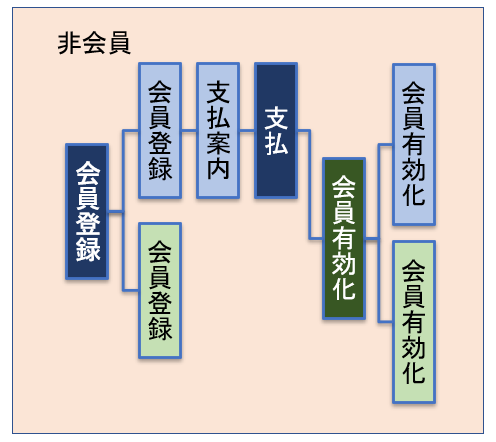
After registering as a member
- [Students/Administrators] Completion email upon completion of course
- Next payment reminder email
- [Operator] Cancellation notice in case of cancellation
- [Operator] Change status to Cancelled from the dashboard
This is the flow.

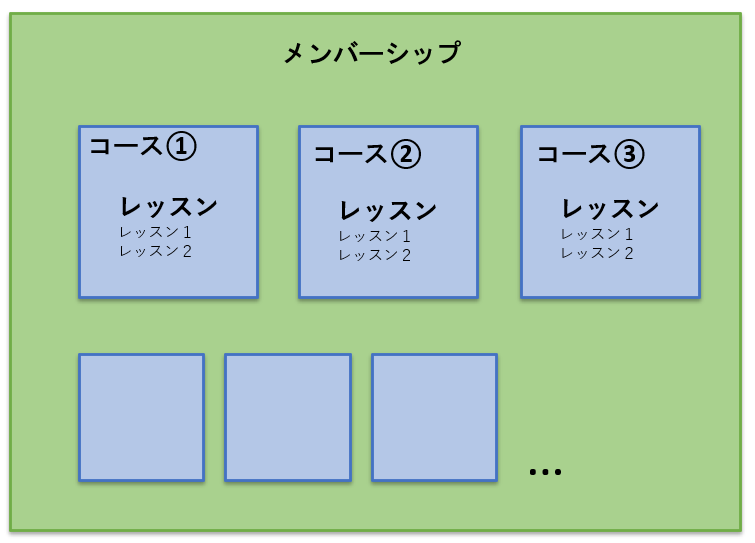
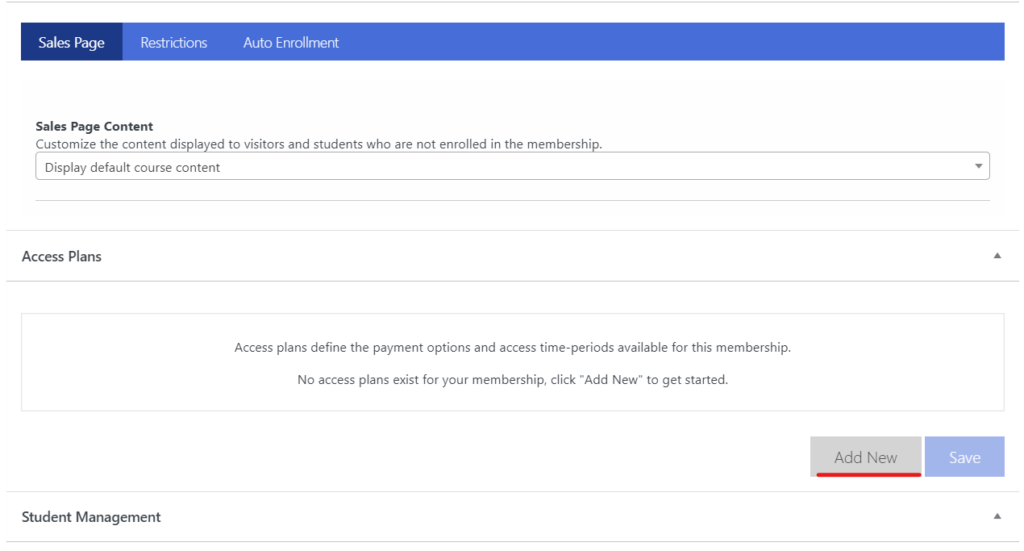
Membership Creation
We will create a membership and create a registration process that includes courses that can be taken within the membership.
One benefit of membership is that you can create multiple types of membership by changing the courses included for each membership.
You can add courses later, even if you already have students.
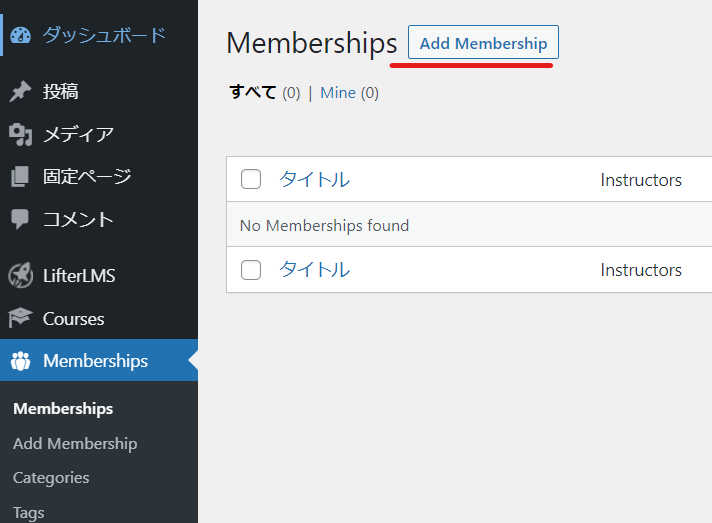
Create a new membership by clicking [Membership] > [Add membership]
Create a new membership by going to [Membership] > [Add membership] in the WP dashboard.
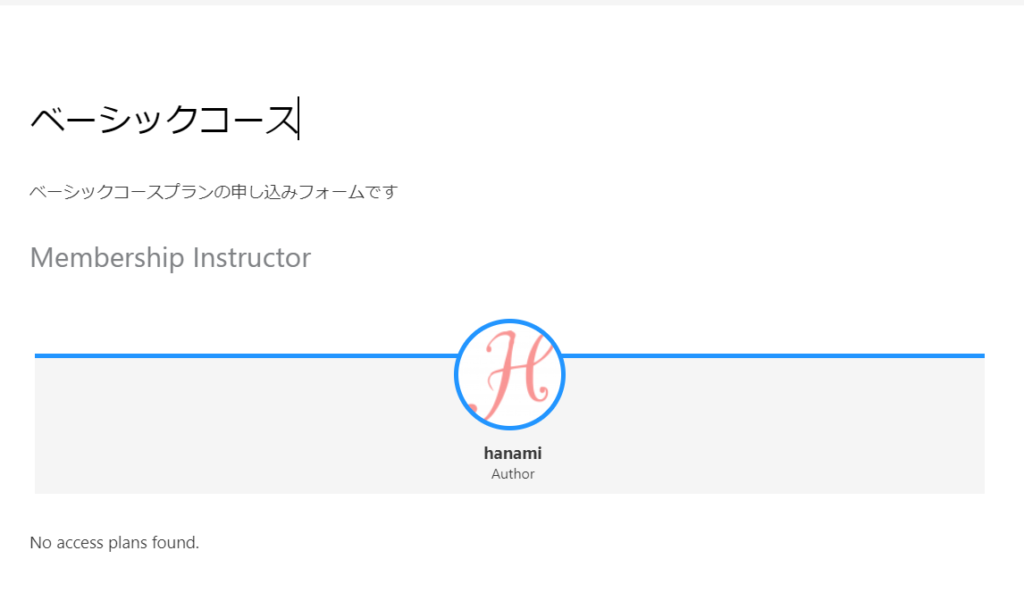
I added a title and description.
The instructor and access plans were set by default.
Create a rate plan
Scroll to the bottom of the page.
Click [Add New] to create a new pricing plan.
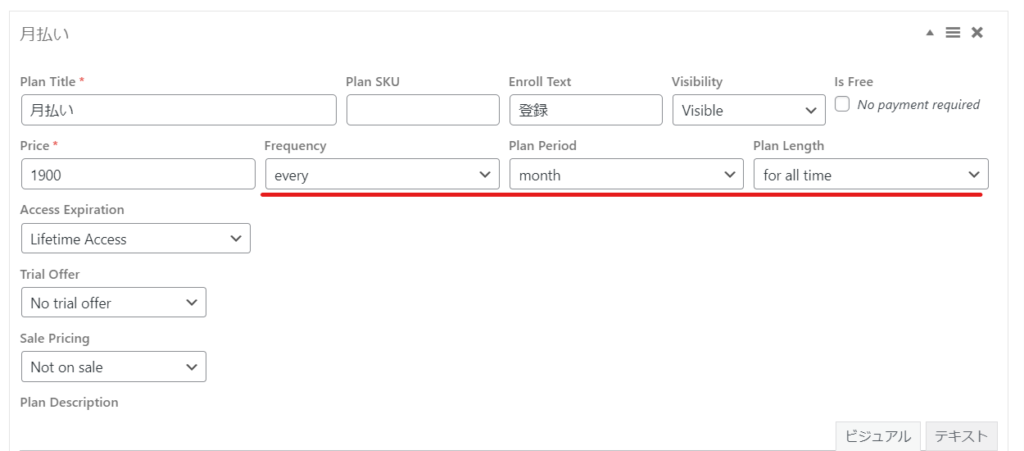
Monthly subscription pricing
The red line indicates the monthly payment setting.
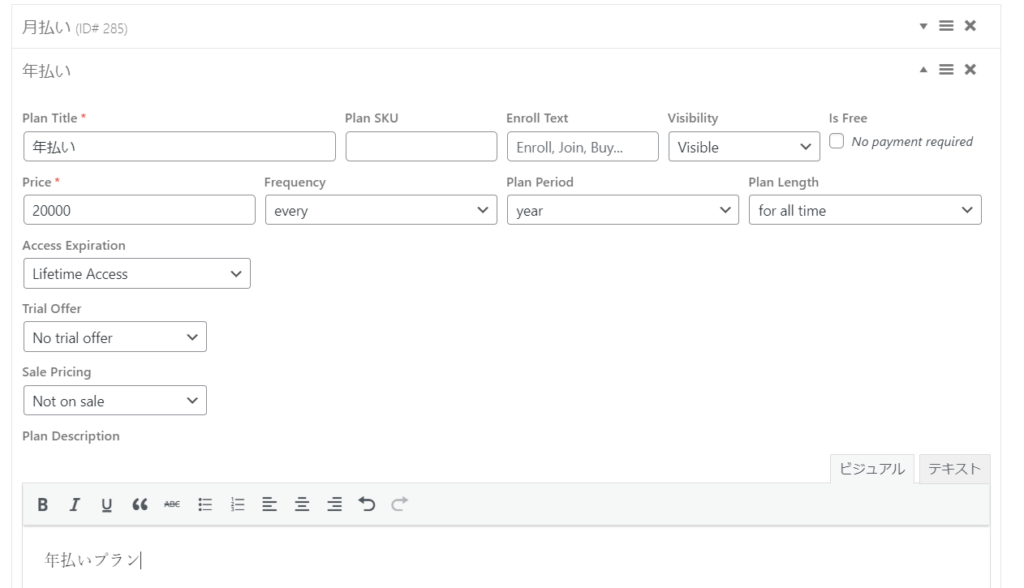
Try creating an annual payment plan
Click [Add New] to create another pricing plan.
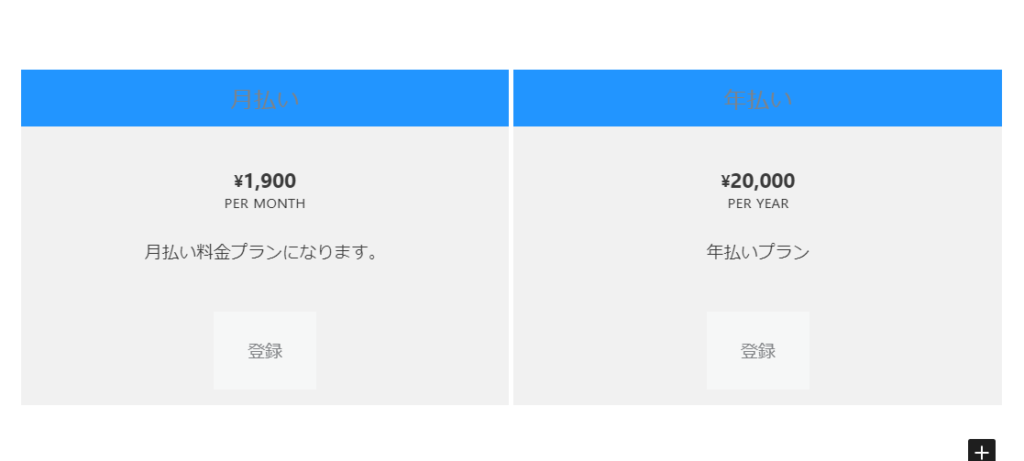
The change is automatically reflected in the access plan section of the editing screen. Students can click the [Register] button to proceed to register for the course.
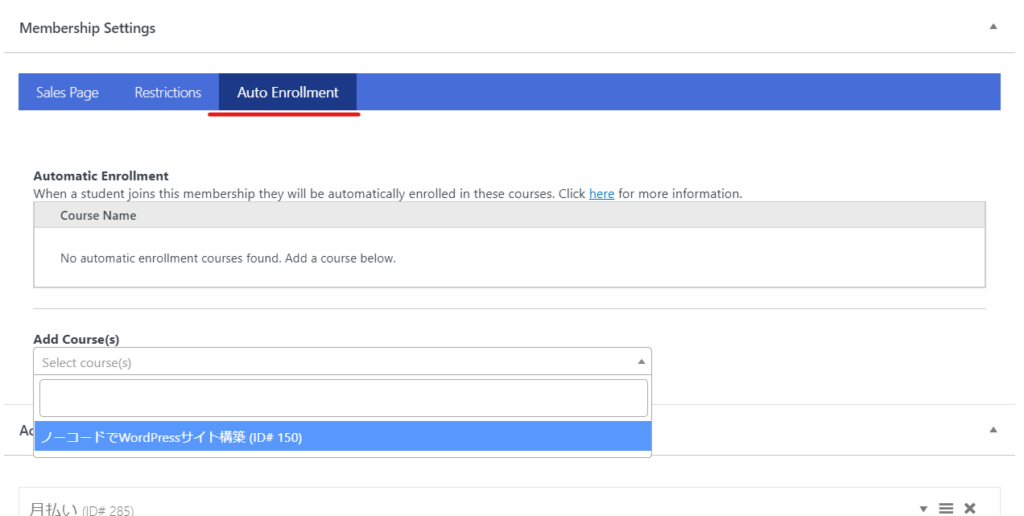
Add a course to your membership
If you leave it like this, even if you sign up for membership it will not be linked to a course.
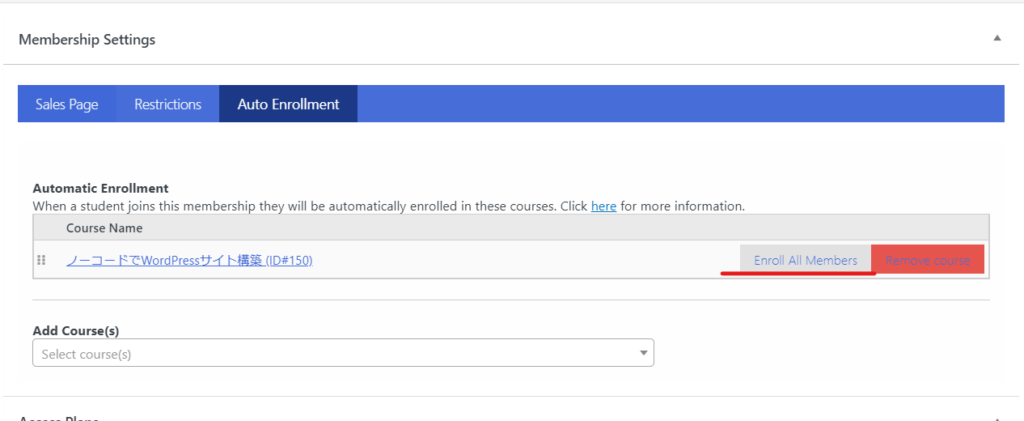
Go to [Auto Enrollment] to the right of the section where you created your rate plan.
Add the courses you want to include by clicking [Add Course].
Registration form customization
We have created a membership and pricing plan. Now we will customize the registration form that will be displayed after pressing the [Register] button.
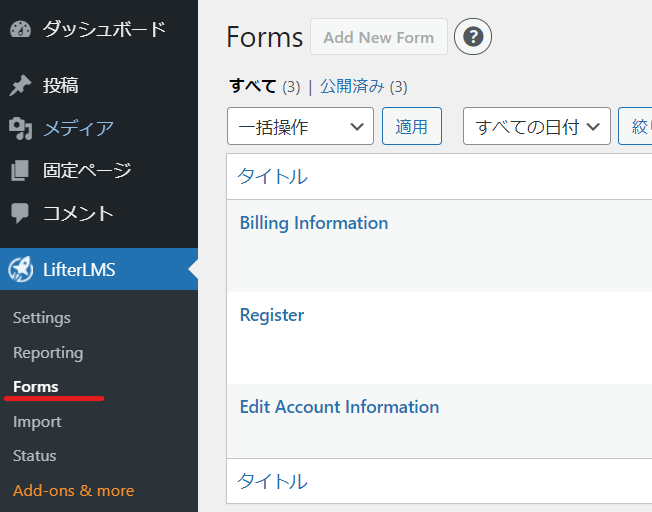
[Lifter LMS] > [Forms]
Three types of forms are set by default in [Lifter LMS] > [Forms].
- Billing information - Registration form on the payment screen
- Refister - Membership registration form
- Edit Account Information - My Page Edit Form
There are three types. When you click on the membership registration, the associated form is called [Billing Informatino].
Edit Billing Information
It is set to English by default, so you can customize it.
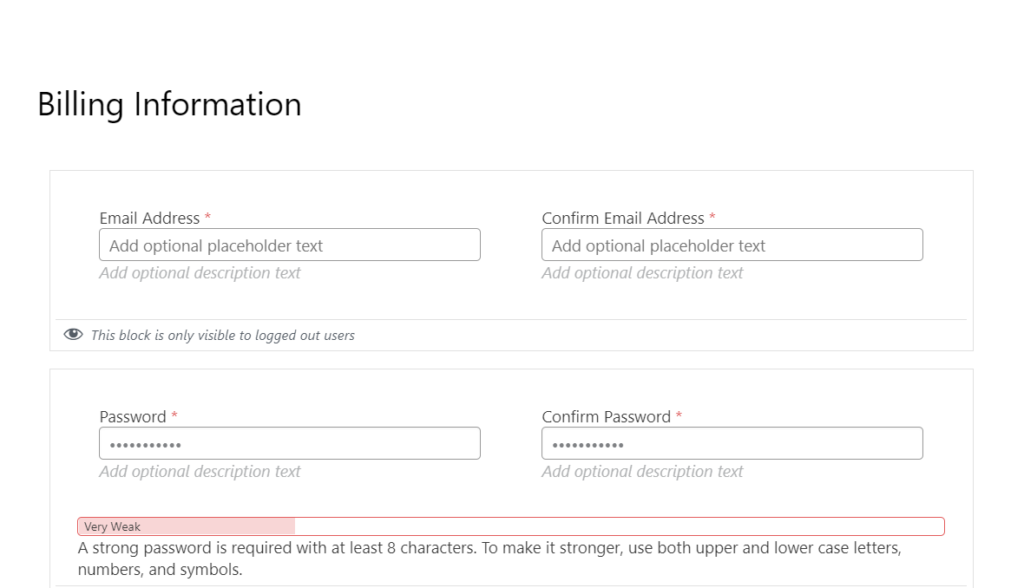
Visible only to non-logged in users
The email address section is set by default, but since it can be a hassle to have logged-in users enter their email address again, it is possible to control it so that it is displayed only to users who are not logged in.
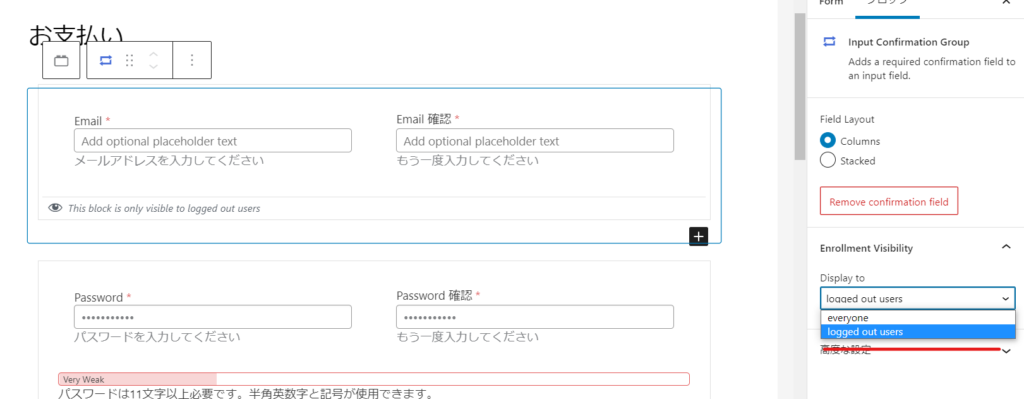
Password must be at least 11 characters
By default, passwords had to be 11 characters or longer, so we added a note to that effect.
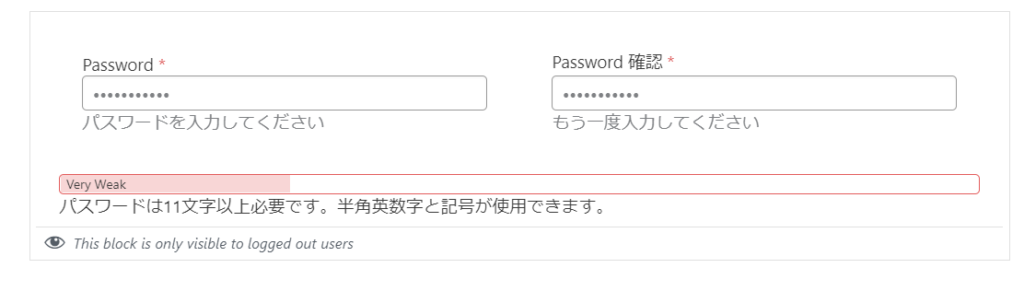
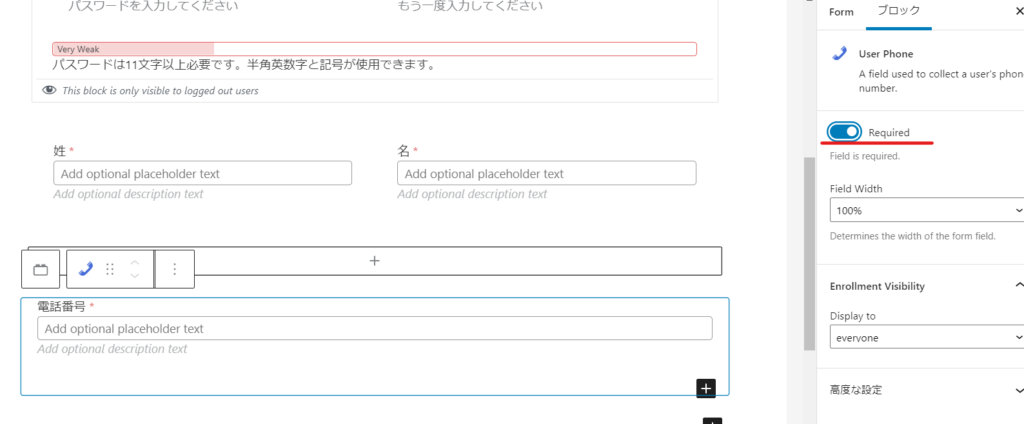
Change phone number to a required field
If people register their email address incorrectly, we will not be able to contact them, so we have made phone number a required field as well.
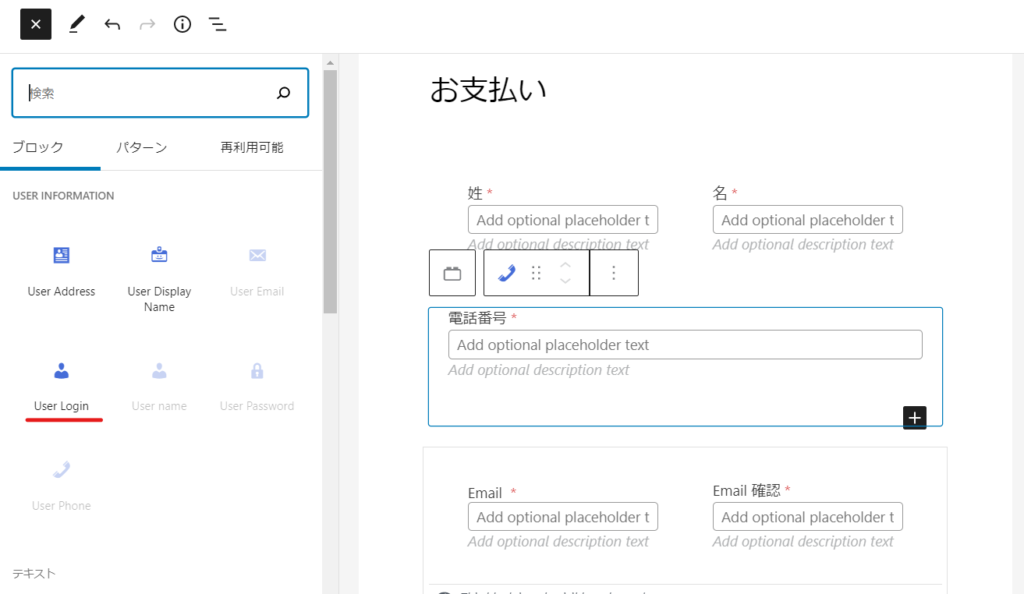
Add login ID
Since registration is not possible without the user ID field, which is required for WordPress user registration, we will add a part called [User Login].
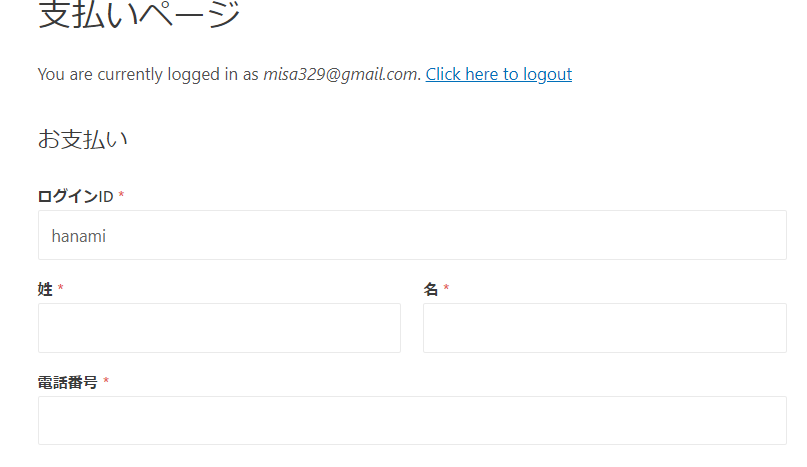
Check the preview
Since I previewed while logged in as an administrator, all items except those hidden by the logged-in user were output.
Member output settings
In addition, you will need to set up output for your member page.
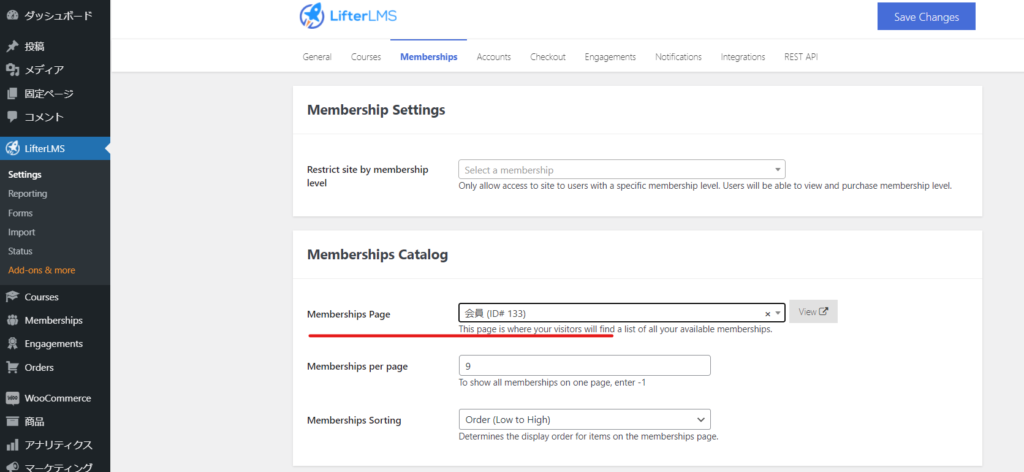
[Lifter LMS] > [Settings] > [Memberships]
Select 【Membership Page】.
A static page called "member" should be generated by default, so specify the member page with the shortcode embedded in it.
Membership registration page → Complete the registration form
So far, we have completed creating the member registration page and member registration form.
Membership registration information page
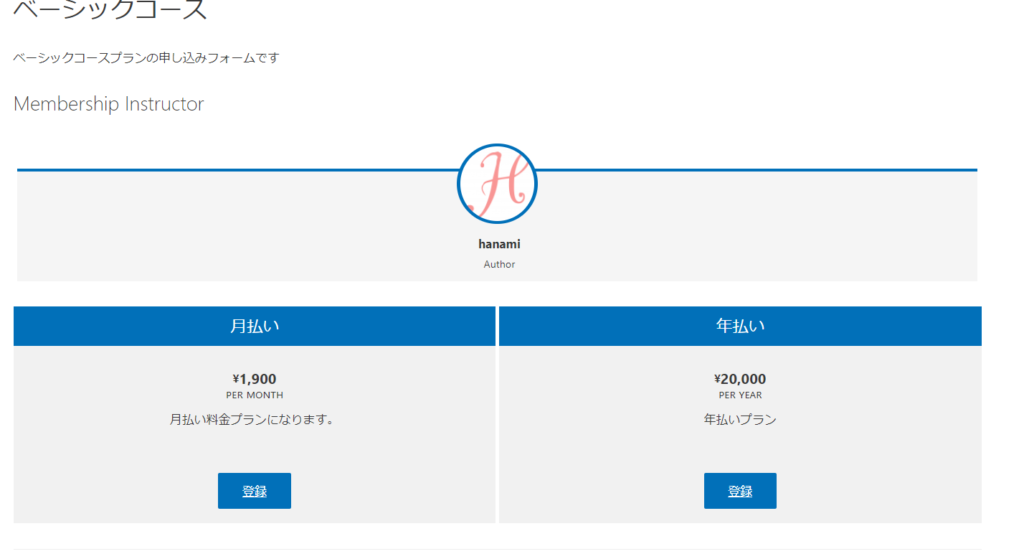
Click the [Register] button.
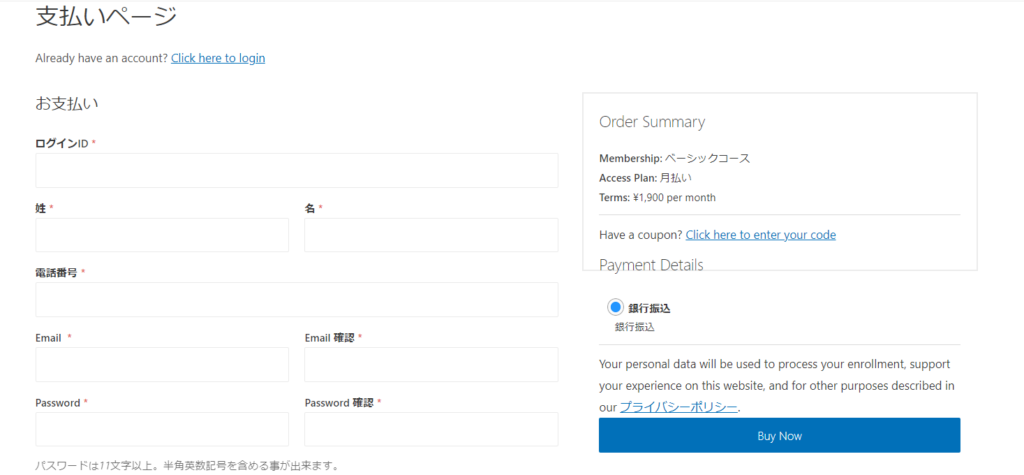
You will be redirected to the payment form screen that you modified in Forms.
The default payment method available is bank transfer. Click [Buy now] to register.
Email Settings
We experimented with email flow.
The basics of email setup
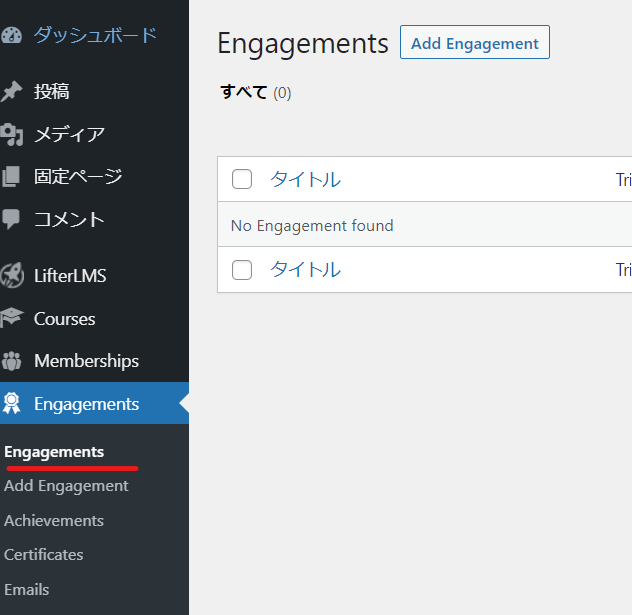
This can be done in [Lifter LMS] > [Settings] > [Engagements].
- Sender name
- From email address
- signature
Register the following:

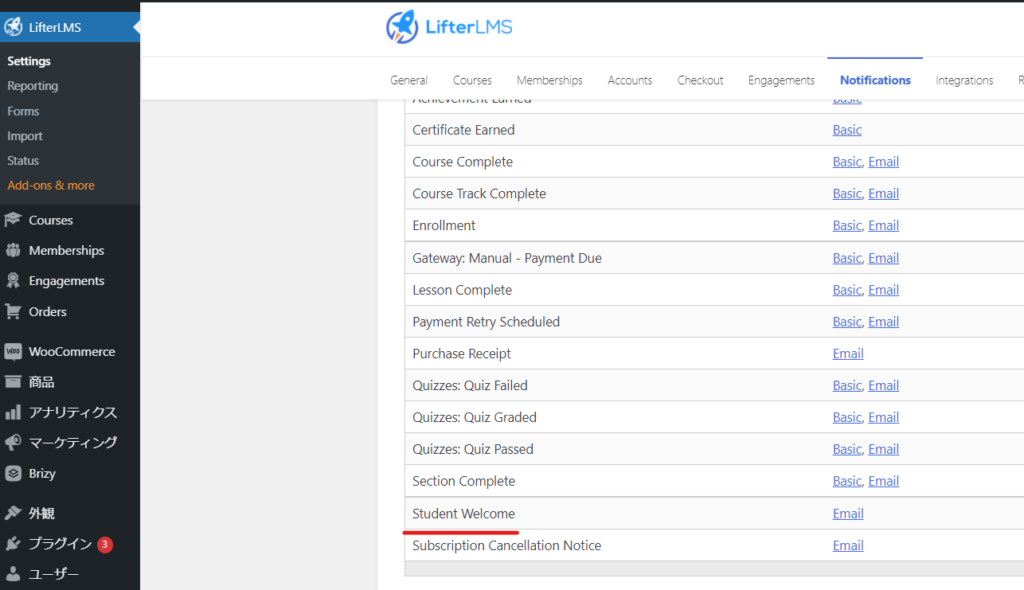
To set up automatic emails, go to [Notification] and
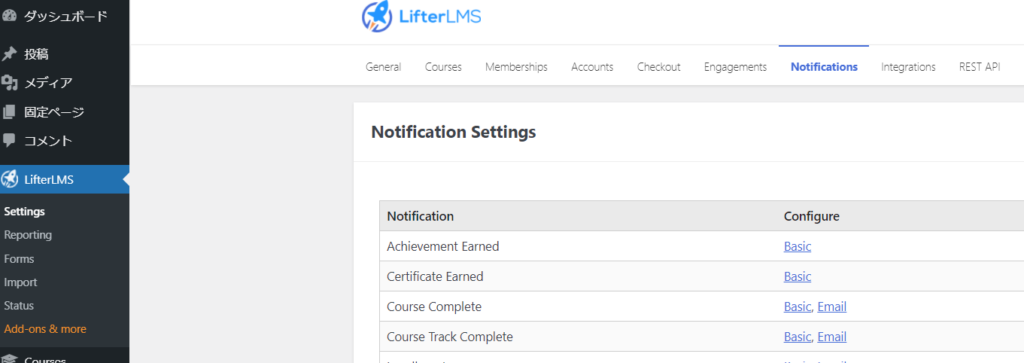
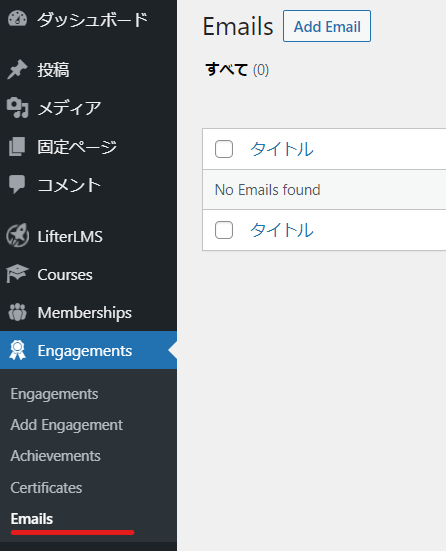
I set it in the [Engagements] > [Emails] section.
(Students) Email sent immediately after registration
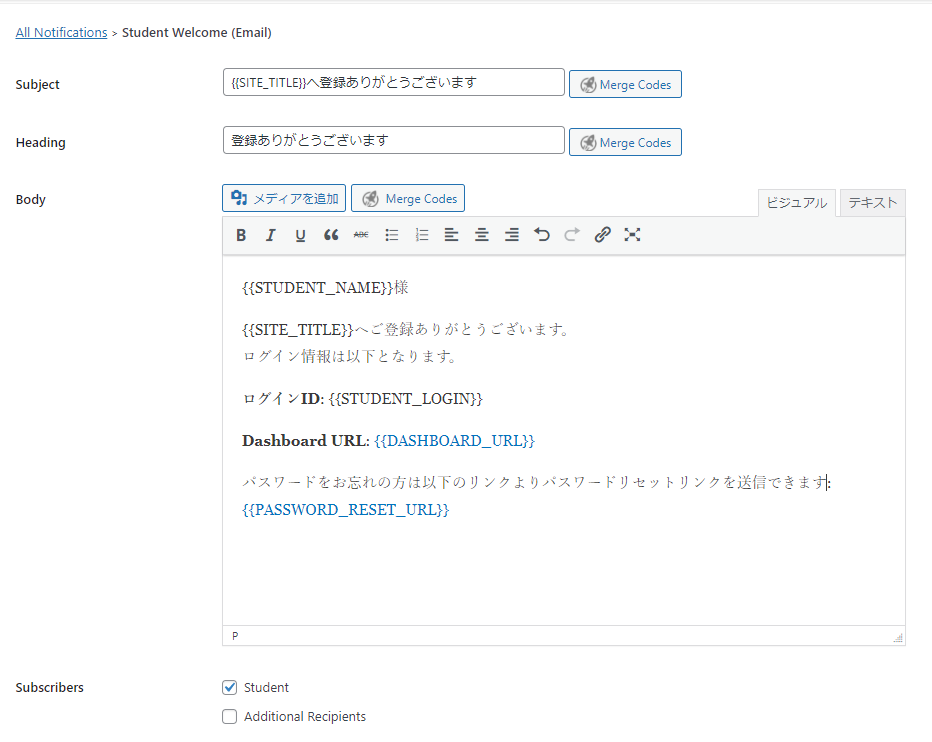
I set it up in [Student Welcome] under [Notification].
I changed it like this.
(Operator) Email sent immediately after registration application
Although it is possible to receive the same email as students using the above procedure, I have set it up separately.
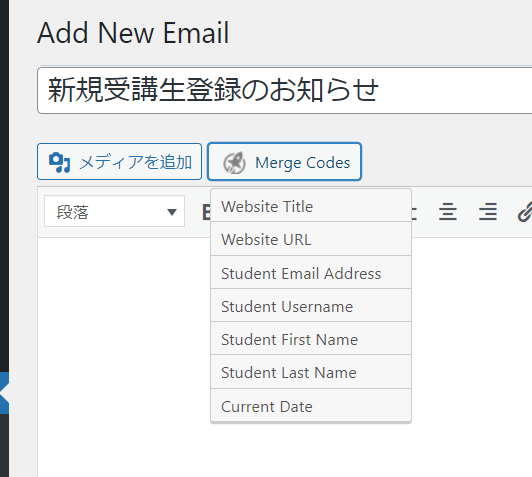
Click [Add Email] under [Engagements] > [Emails].
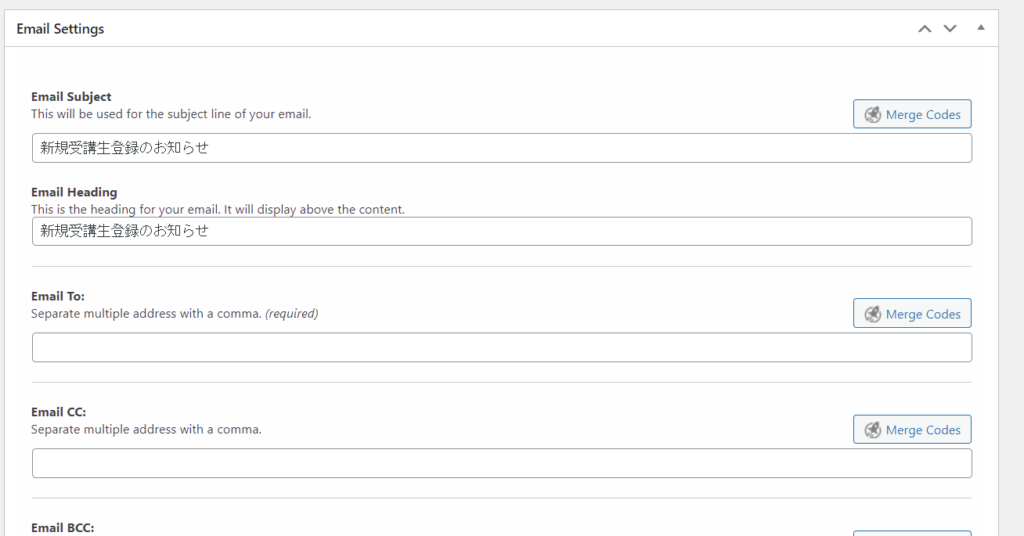
Paste the necessary information into the notification email for new student registration.
After setting the body of the message, scroll down and enter the administrator’s email address in the Email To field.
Once you've completed the setup, click Publish.
Next, set the timing for sending emails in [Engagements].
Click [Add Engagements].
- When did you sign up for the membership?
- Membership is Basic Course
- Send Email
- Send notification of new student enrollment at Emali
Just set it like this.
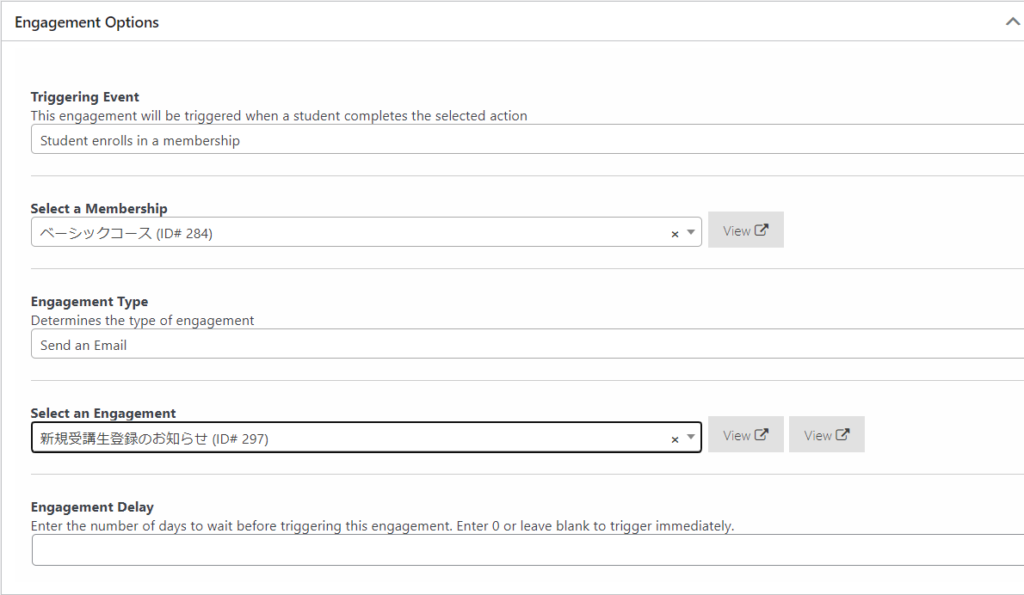
Make sure you set the timing.
By setting [Engagement Delay] to 0, the message will be sent immediately.

(Students) Payment information email
Immediately after you register, you will receive another email regarding payment.
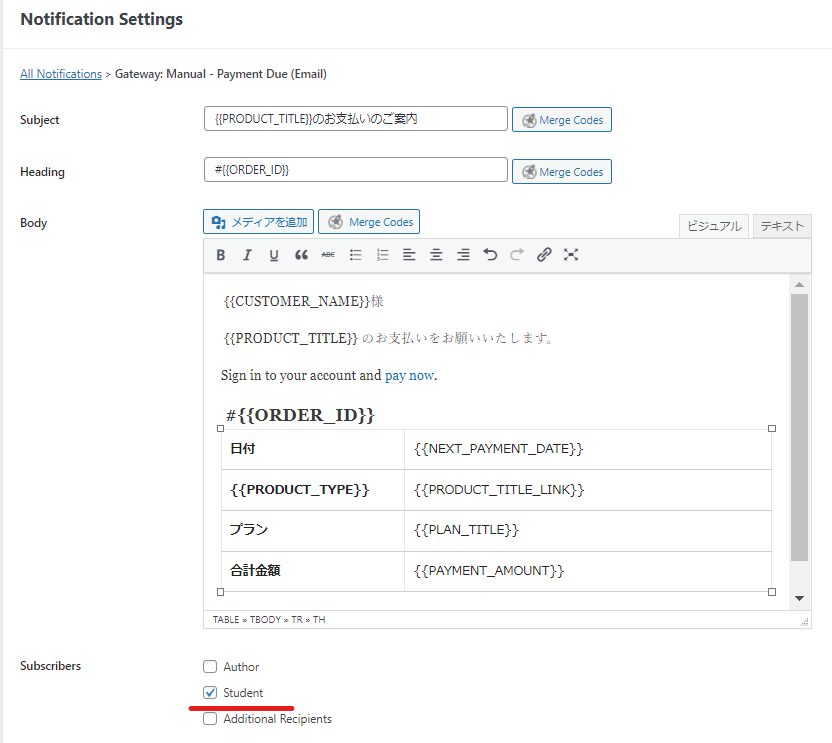
[Gateway: Manual - Payment Due] under [Notification]
This is a notification when you select the default bank transfer option.
Basic is a pop-up notification, so you will need to edit the Email address to set it.
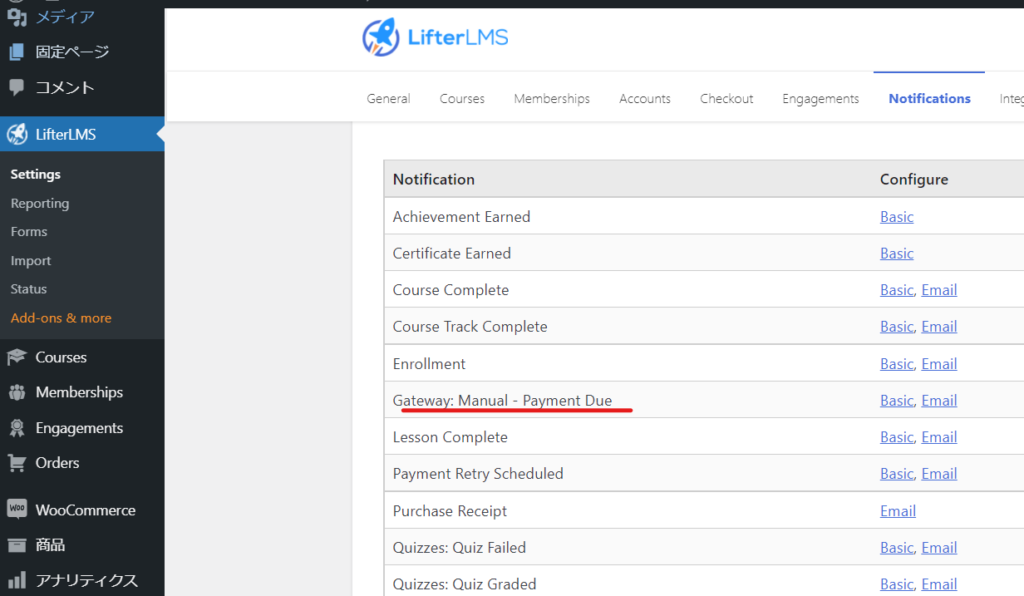
I don't think it's necessary for the management to be notified of this, so I think it's fine to just check [student].
We are assuming a free setup, so once registration for subscription payment via bank transfer, PayPal or Stripe has been confirmed, the management will need to change the student's status.
(Students/Administrators) Membership activation email
An email will be sent once payment has been completed and students' membership status has been activated.
Create your email text in [Engagements] > [Emails].
I used the variable {student_email} as the recipient so that emails can be sent to students.
We also registered the management's email address in the cc field and set it up so that the same email text would be sent at the same time.
Once you have created the email text, create a new Engagement by going to [Engagements] > [Engagement].
This time
- When your membership payment is complete
I chose the option "Student purchases a membership."

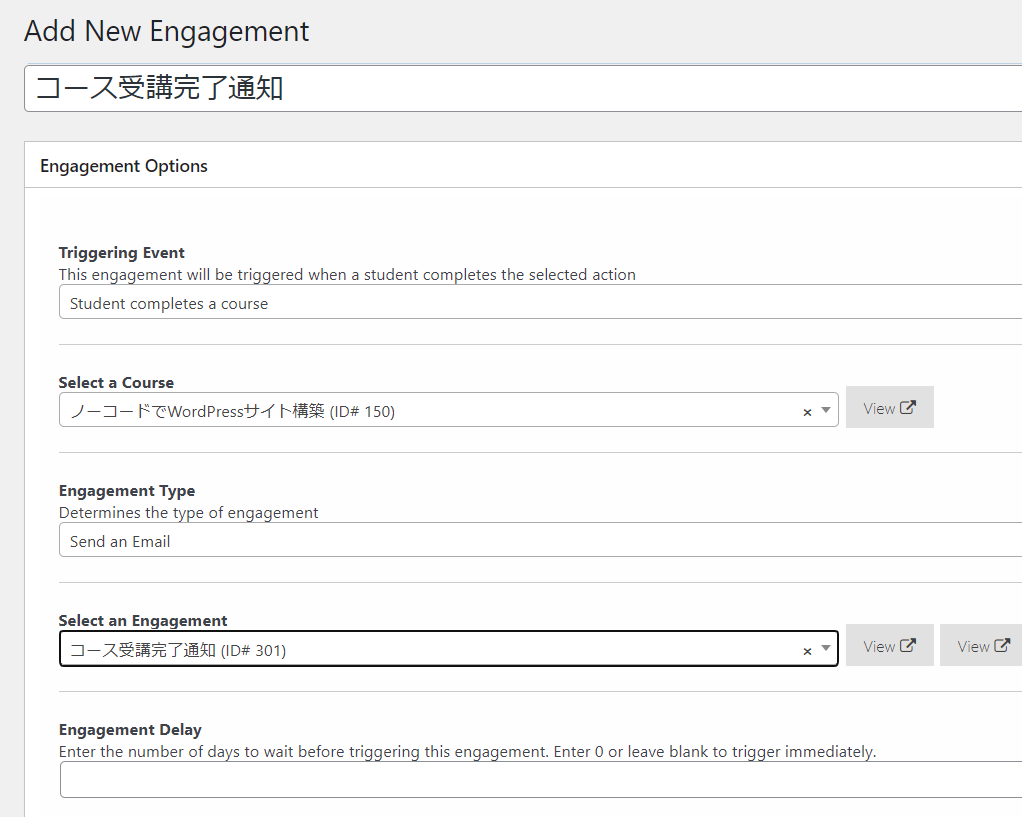
(Students/Administrators) Notification of course completion
There is a setting for course completion notifications in the Notifications section, but since these can only be sent to the management side, I decided not to use the Notification settings and instead set it up in [Engagements].
Create emails to students and administrators in [Emails]
By setting the trigger to [Student completes a course], you can send an email when a student completes a course.
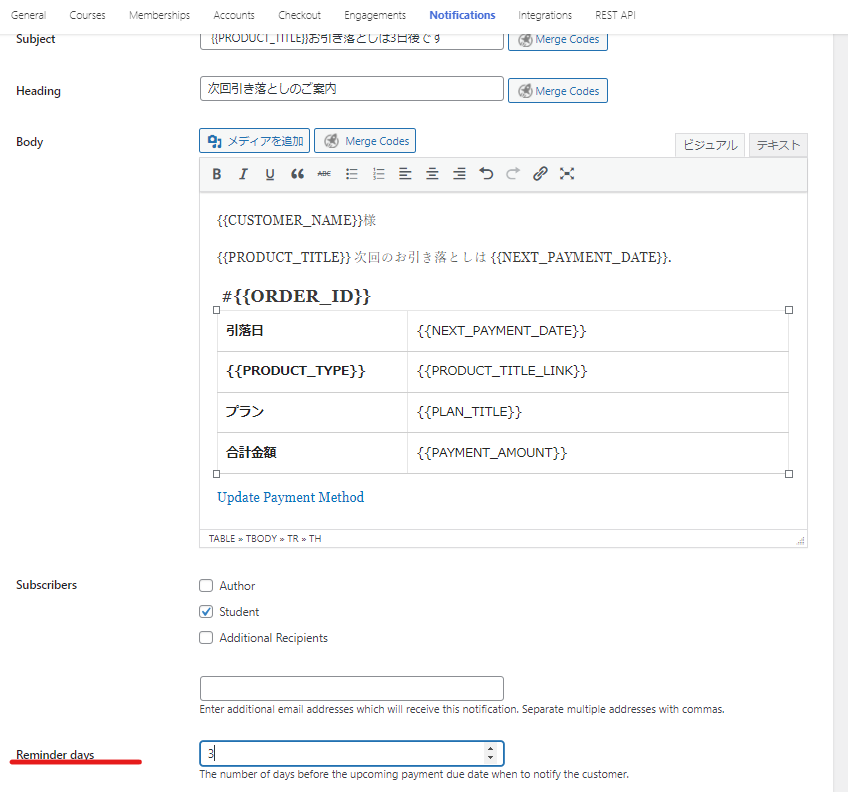
(Students) Next payment notification
You can set up a reminder email for your next payment.
This is under [Notifications] and is called [Upcoming Payment Reminder].
Edit your email.
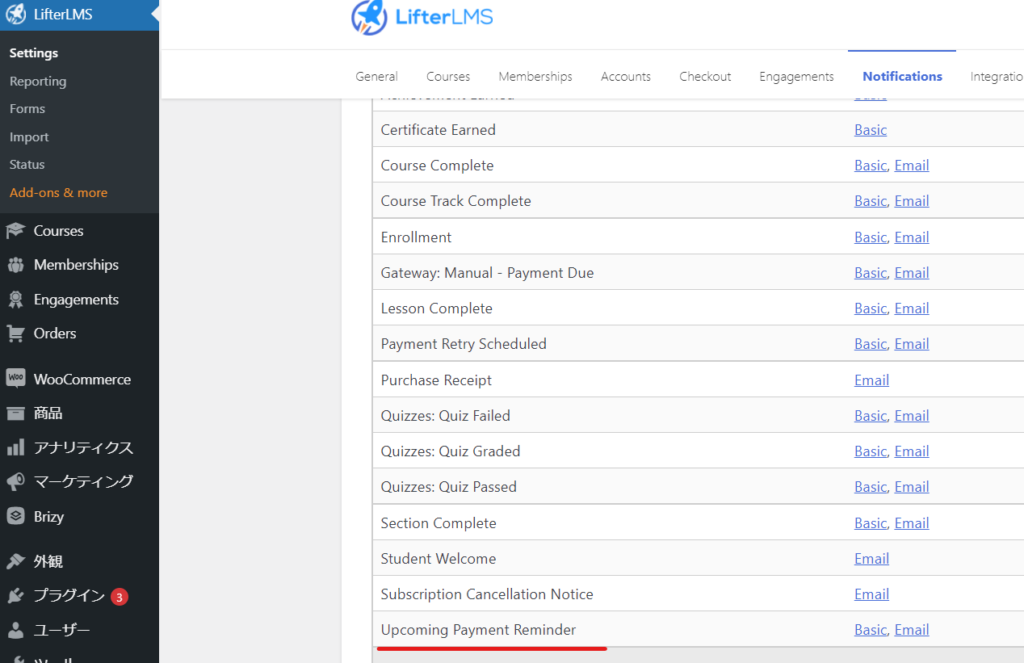
At the bottom you can set how many days before the withdrawal date you want the email to be sent.
I left the shipping address set to Student only.
How to cancel a subscription
Now that we have completed the general outline of the process from registration to taking the course, I would like to finally introduce the process for canceling.
Student Subscription Cancellation Request
Students can request to cancel their subscription by clicking the "Cancel Subscription" button in the payment information section of their My Page.
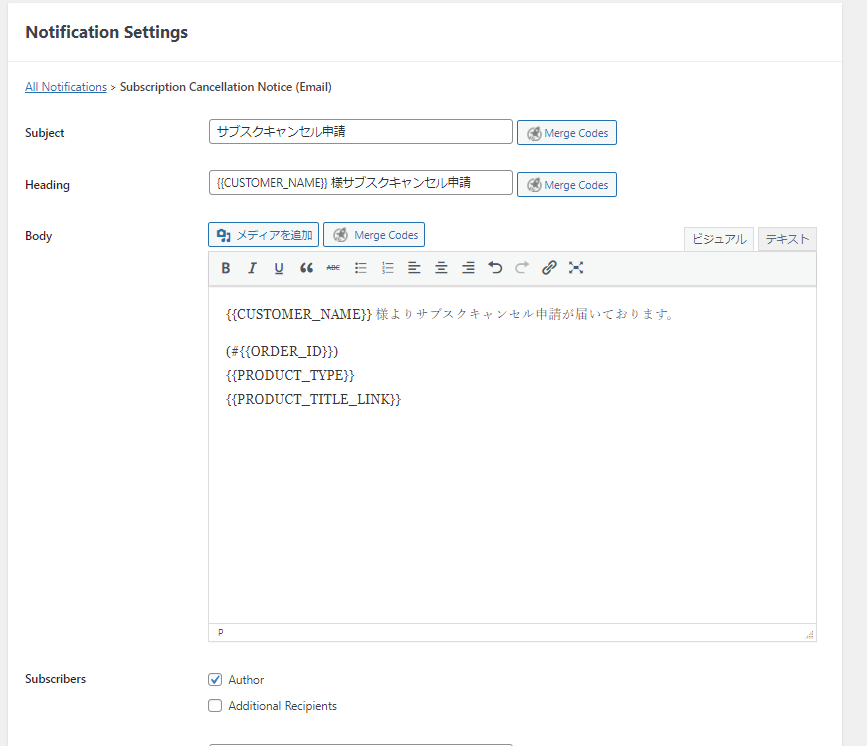
(Operator side) Receives subscription cancellation request email
The subscription cancellation request email setting is in the Notifications section.
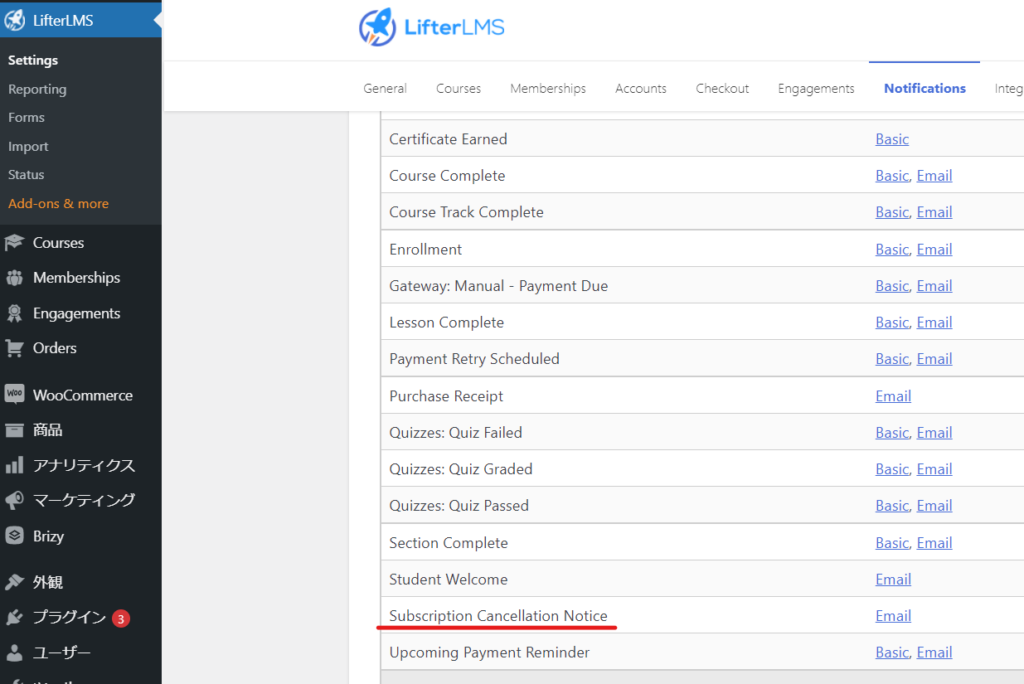
The email will only be sent to the administrator.
Changes to student status
If you have set up subscription payment separately with PayPal or Stripe, cancel your subscription from each dashboard.
After that, change the status of the student in question to Cancelled in the [Order] section of your WP Dashboard.
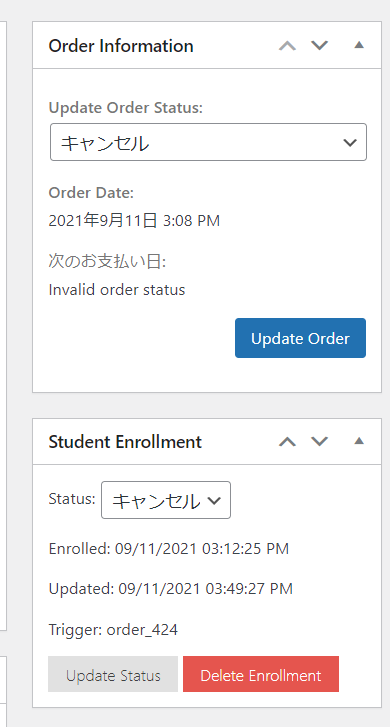
Your membership status will be invalidated
Your membership status will be invalidated, so although you will be able to log in to your member page, you will no longer be able to view courses.
If you also want to delete membership information, you can delete the target user from [Users] in the WP dashboard, and they will no longer be able to log in.
Can't add more membership courses?
Even if I add a course to my membership, the course doesn't appear on my student's pageThis is what happened.
This is the default setting, and it is caused by the fact that content added after enrollment is not automatically made available for viewing.
You can set the courses included in the membership in the [Auto Enrollment] section of the membership settings. At this time, you can click [Enroll All Members] to allow all students who are members of the membership to take the course.
summary
I have written my memorandum on my blog in four parts, and I was able to grasp the overall flow.
The biggest disadvantage of Lifter LMS isYou cannot link credit card payments unless you purchase a paid add-onis.
Stripe now makes it easy to issue URLs for subscription payments, so you can link them to payments with some ingenuity, but you need to be careful as you will have to cancel in two places on the site: cancel and cancel the payment.
By the way, the paid add-on is $120/1 year. If you have a fair number of members, it is definitely better to install the paid add-on!
Please take a look at my memos so far if you'd like!
- Memorandum 1- Lifter LMS initial settings, theme initial settings
- Memorandum No. 2- Creating an online course
- Memorandum No. 3- Creating online lessons
Released as soon as the next morning! Weekends and holidays are also available!
Super rush website creation plan
We offer a rush website creation plan for those who need a website in a hurry!
We can publish your content as soon as the next morning, even on weekends and holidays! If you have any questions, please check the details below!

Latest Articles

Error message: Allowed memory size of 268435456 bytes exhausted (tried to allocate 14684160 bytes) Error: On Lollipop


Explaining the Meta Pixel feature of the paid version of the WordPress booking system plugin Amelia (9.x and later)

Explaining the Zoom Integration Feature of the Paid Version of the WordPress Amelia Booking System Plugin (9.x and later)