How to create a website using WordPress/How to use plugins/No-code construction blog


LMS plugin LearnDash basic settings - payment settings
At HanamiWEB Online School,
●Ask questions in real-time in the virtual study room!
●Ask as many questions as you want via chat!
●E-learning materials that you can learn as much as you want, 24 hours a day!
All included for just 2,500 yen/month!
We explain LearnDash, a paid LMS (Learning management system) plugin that allows you to build an e-learning system using WordPress.
This time, we will explain the payment settings, which are the basic settings you will want to make first.
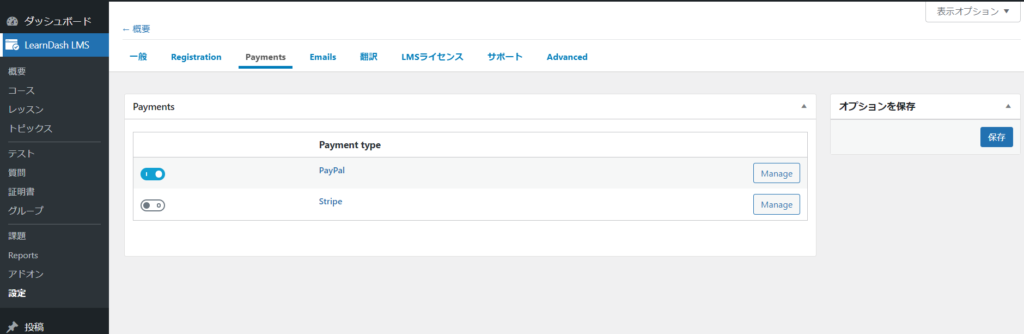
Payment Preferences
- LearnDash LMS
- setting
- Payments
and configure it.
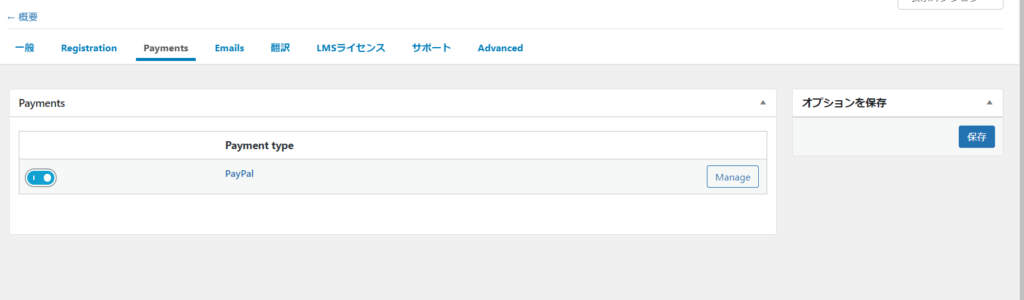
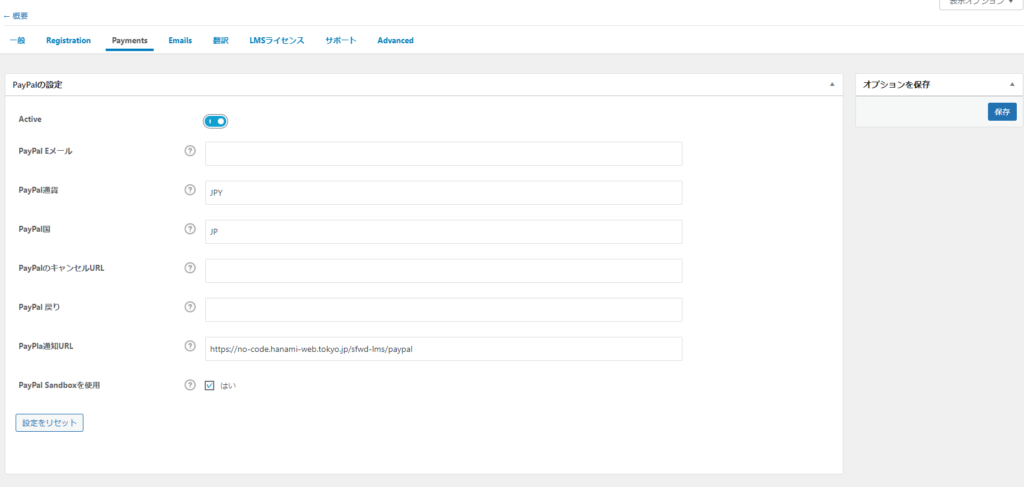
PayPal Settings
- Activate - Please turn it ON
- PayPal Email - the email address of the PayPal account that will receive payments
- PayPal Currency – JPY
- PayPal Country - JP
- PayPal Cancel URL - Set the URL of the page where the user will be redirected after canceling (this is a static page that you create yourself)
- Return to PayPal - Set the URL of the page to which the user will be redirected after completing the payment (this is a static page that you can create yourself)
- PayPal Notification URL - leave the default value
- Use PayPal Sandbox - Sandbox is a test mode
Stripe credit card payment settings
By adding a free addon, you can implement credit card payments via Stripe.
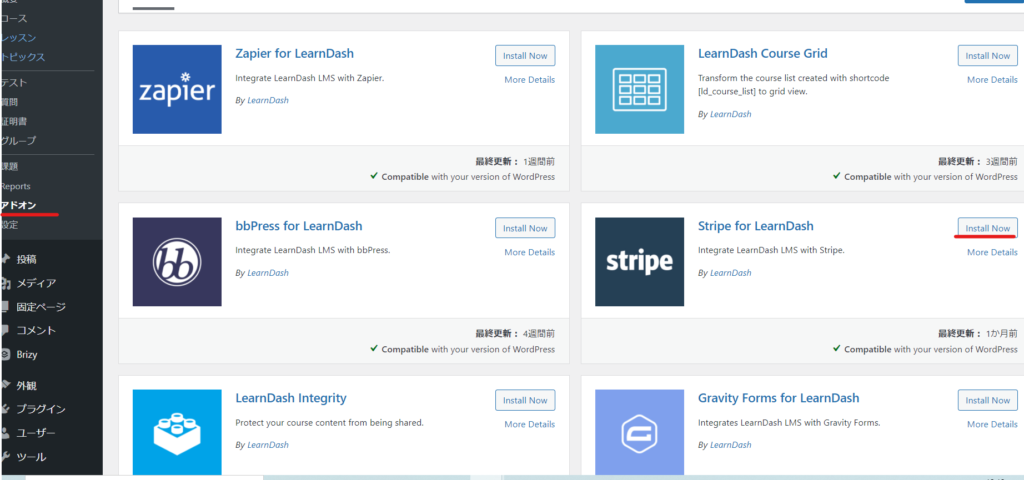
Stripe ADD-ONS installation
- LearnDash LMS
- add on
- Click Install Now for [Stripe for LearnDash]
Enable
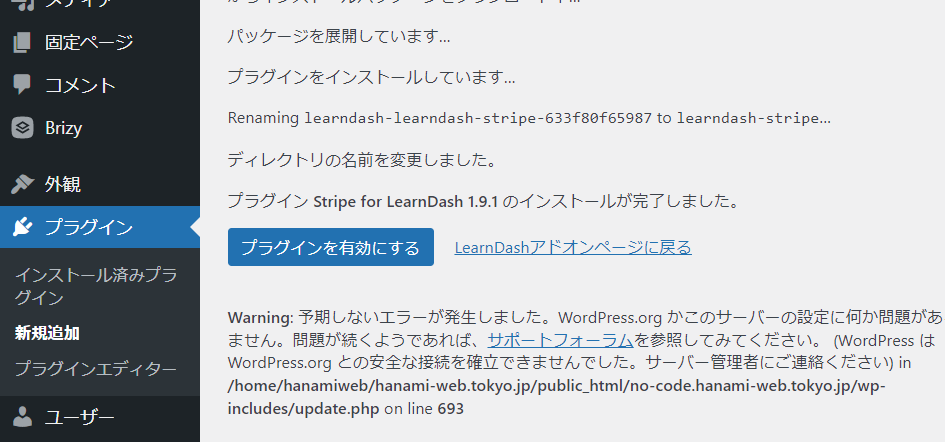
Stripe has been added to Payments.
Log in to Stripe
Endpoint Settings
Return to your WordPress dashboard.
- LearnDash LMS
- setting
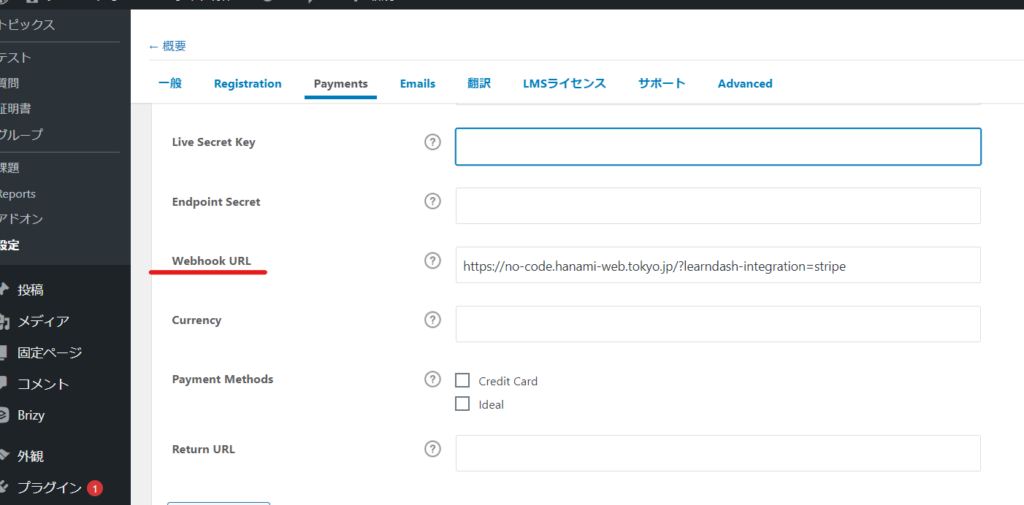
- Payments
- Stripe
Open the settings and copy the URL in the Webhook URL field.
Next, log in to Stripe and set it up.
- Developer
- Webhook
- Adding an endpoint
Click.

Paste in the end pound URL.

- Version - The latest API version
- Event added -
customer.subscription.deleted/invoice.payment_failed / invoice.paid / checkout.session.completedAdd four events.
to hold.
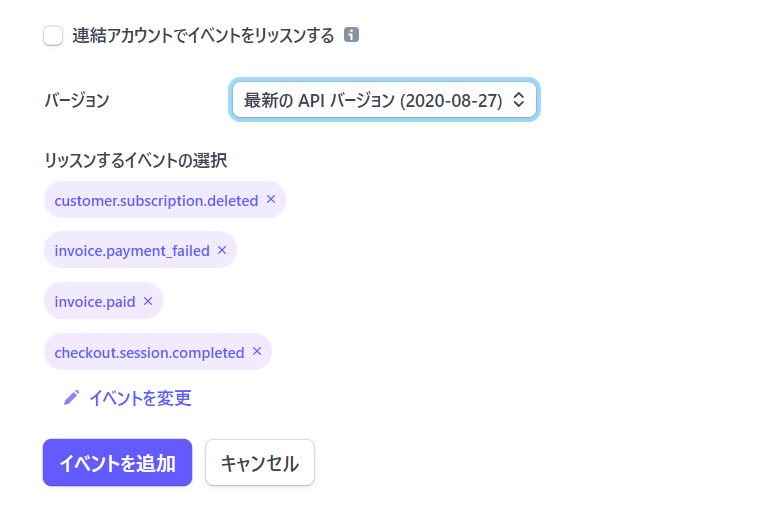
Finally, click on Add Event.
Next, set the end pool secret key.
On the page you are directed to after adding an event, click [Show Signature Secret] to display the end pond secret.
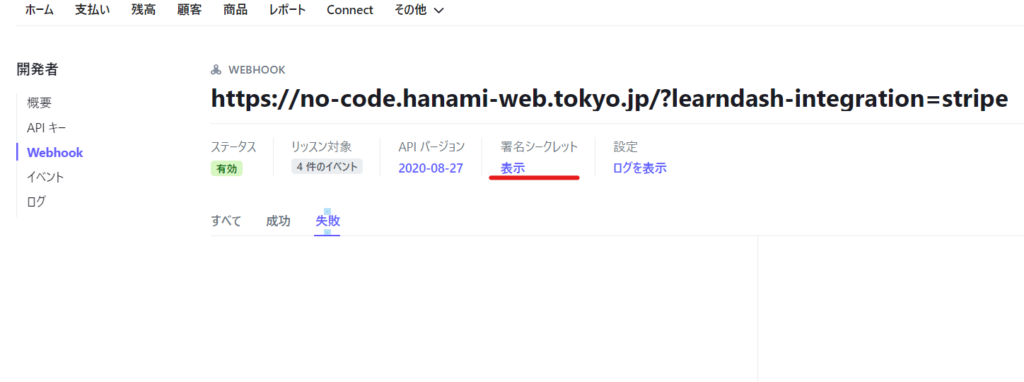
Paste the secret key displayed into your Stripe settings in LearnDash.
Next, set the secret key and public key.
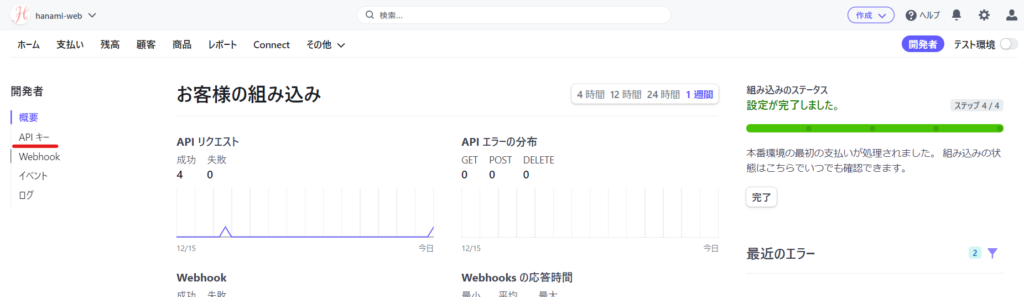
You will then be taken to the Stripe admin page.
- Developer
- API Key
Click.
Click on [Create Secret Key].

Give it a name. I gave it a name that makes it clear that this is for a no-code course.
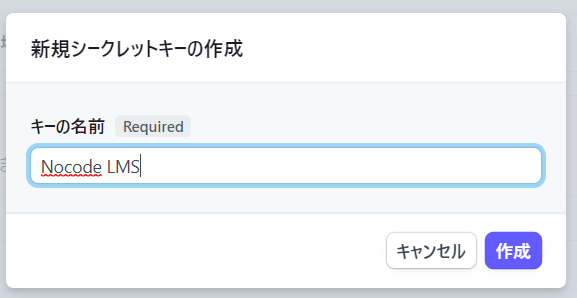
A secret key will be issued.

The public key is available in the attachment.
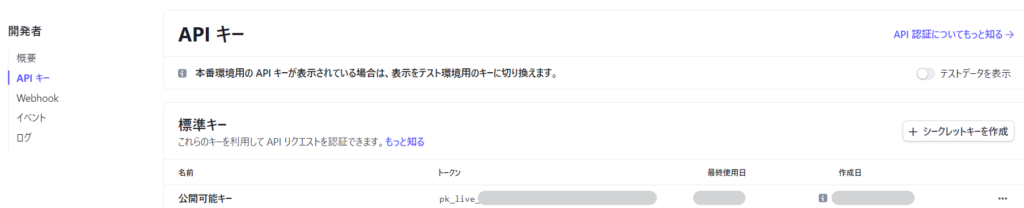
The secret and public keys will be entered into the Stripe settings in WordPress.
- Live Publishable Key - Public Key
- Live Secret Key
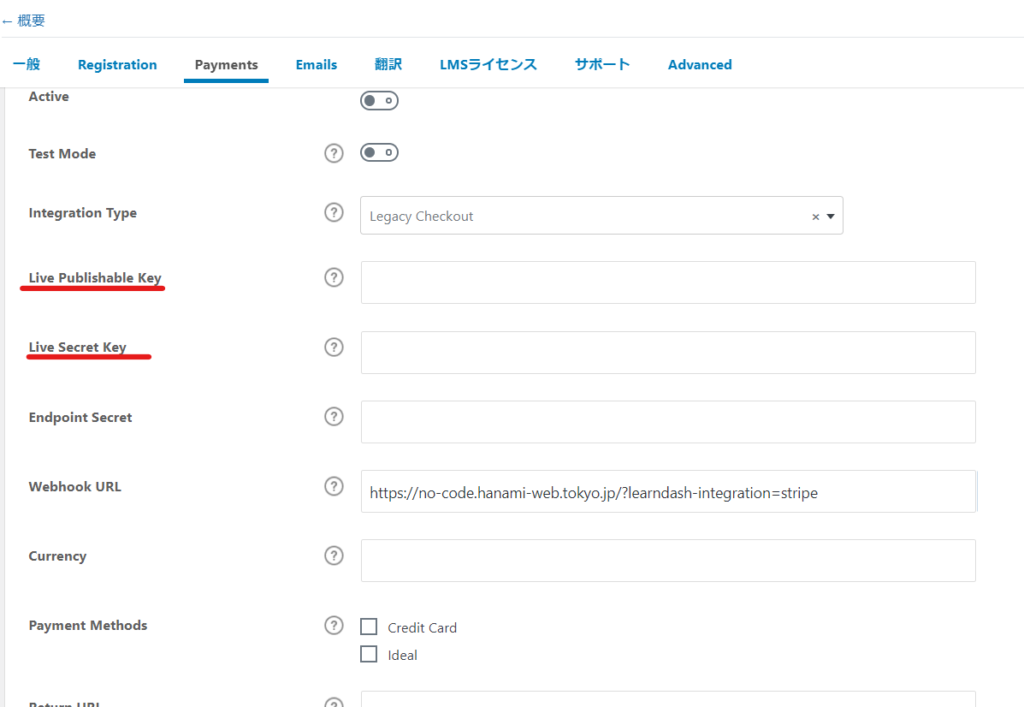
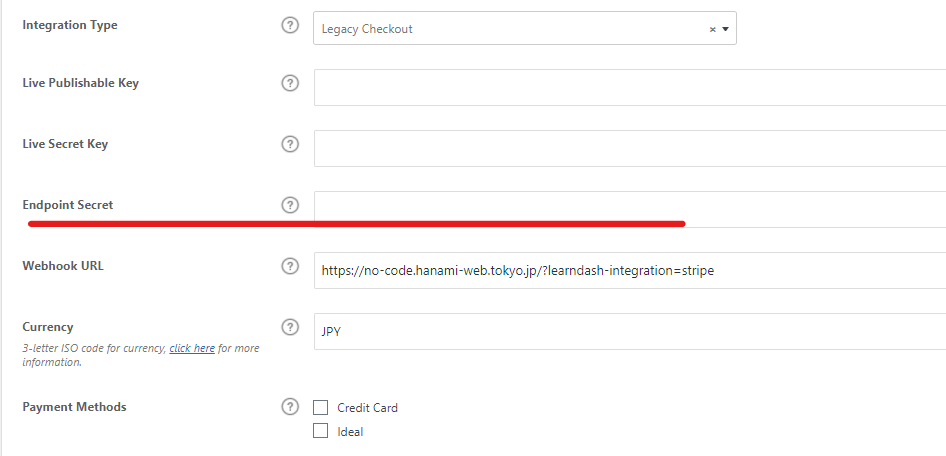
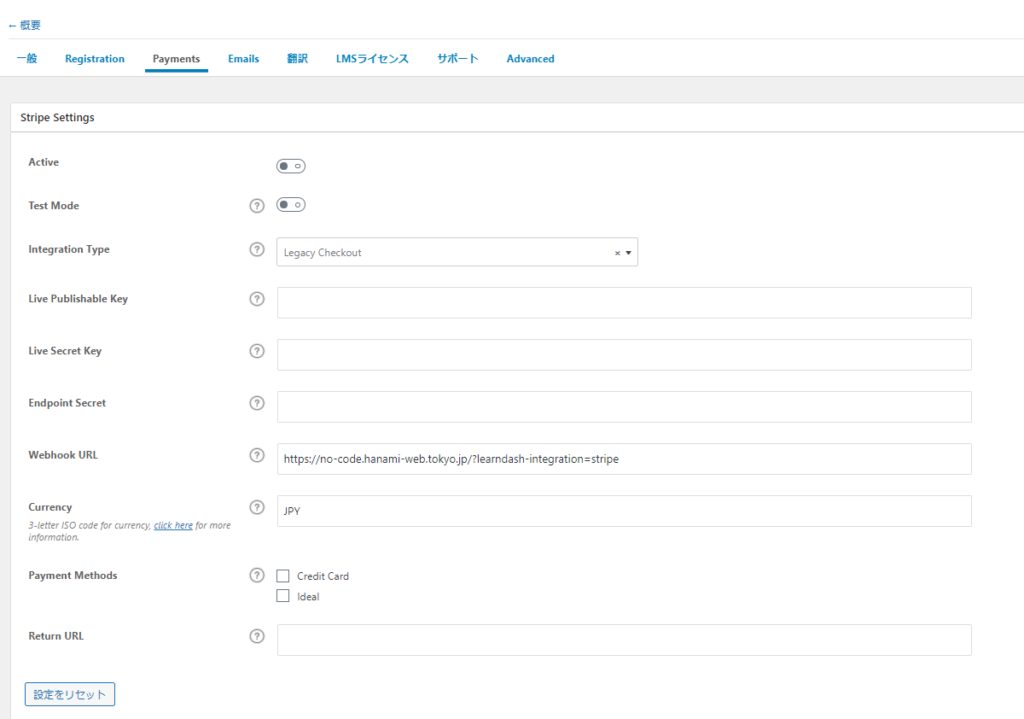
Other Stripe settings
- Active - Turn it ON to enable it
- Test Mode - Turn it ON if you want to test payments in test mode
- Integration Type - Choose from Legacy Checkout / Checkout (Support SCA)
- Live Publishable Key - Enter the public key issued by Stripe
- Live Secret Key - Enter the secret key issued by Stripe
- Endpoint Secret - Enter the endpoint secret key issued by Stripe
- Currency – JPY
- Payment Method - Ideal is not common in Japan, so I think Credit Card is fine.
- Return URL - You can specify the page to which the customer will be redirected after completing the payment.
summary
When building a site that requires payment using WordPress, it is common to set up PayPal and Stripe.
StripeAnyone can make credit card payments without registering as a memberThis is especially recommended!
Released as soon as the next morning! Weekends and holidays are also available!
Super rush website creation plan
We offer a rush website creation plan for those who need a website in a hurry!
We can publish your content as soon as the next morning, even on weekends and holidays! If you have any questions, please check the details below!

Latest Articles
How to Enhance EEAT with WordPress | Settings and Design Improvements Necessary for AI-Driven Traffic
[2026 Latest] How to check the number of visits from generated AI using GA4's exploration function
Error message: Allowed memory size of 268435456 bytes exhausted (tried to allocate 14684160 bytes) Error: On Lollipop