How to create a website using WordPress/How to use plugins/No-code construction blog

[Diagram & video explanation] Adding social account login function to WordPress login
At HanamiWEB Online School,
●Ask questions in real-time in the virtual study room!
●Ask as many questions as you want via chat!
●E-learning materials that you can learn as much as you want, 24 hours a day!
All included for just 2,500 yen/month!
A WordPress teacher will carefully explain how to add a social login function to your WordPress login!
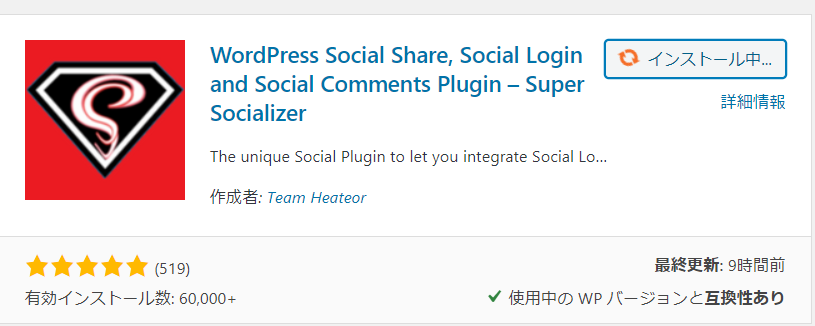
[Super Socializer] plugin enables social login.
You can log in with just one click, so you don't have to worry about forgetting your password, and depending on the membership site, you can even implement a social login function for members!
For example, Simple Membership is a plugin for building membership sites.
[Illustrated and video explanation] Simple Memberships membership registration plugin ~ How to set up social login ~
WordPress Social Share, Social Login and Social Comments Plugin – Super Socializer Plugin Settings
The official name is WordPress Social Share, Social Login and Social Comments Plugin – Super Socializer. Use this to enable the social login function.
WordPress Social Share, Social Login and Social Comments Plugin – Install and Activate the Super Socializer Plugin
In WordPress plugin searchSuper SocializerCheck it out and install and activate the plugin.

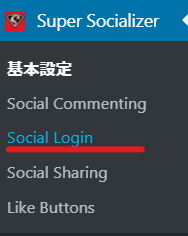
[Super Socializer] > [Social Login]
An item called [Super Socializer] will be added to the left sidebar, so click on [Social Login] inside it to proceed to the settings.
Enable social login
Please check the box.

You will need the ID and secret key of the social site you want to use to log in. This time we will use google.
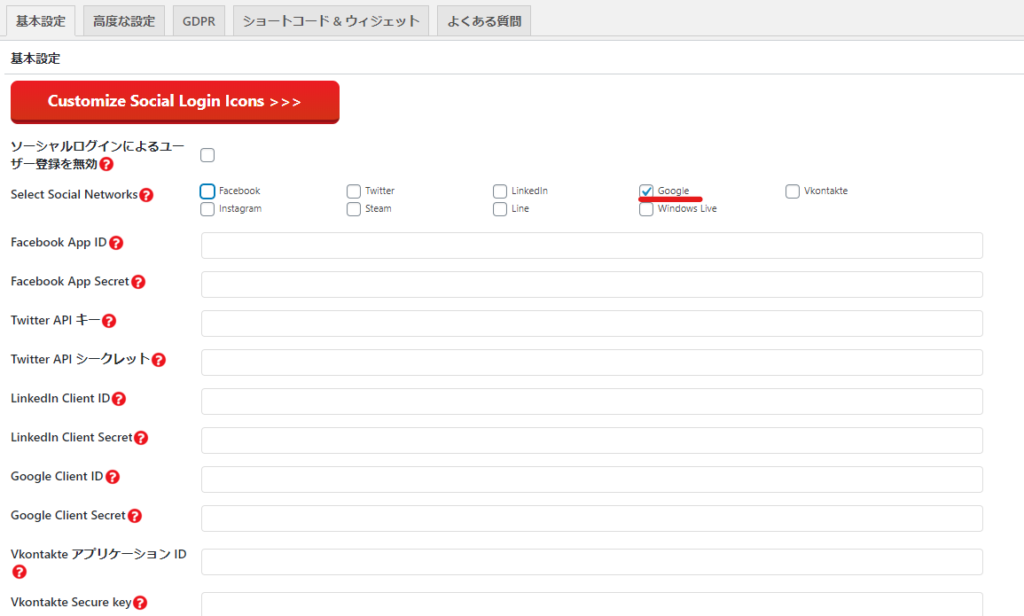
Google Login Settings
Access the API Management Console
https://console.developers.google.com/dcredirect/
Go to the Google API management console from the above URL.
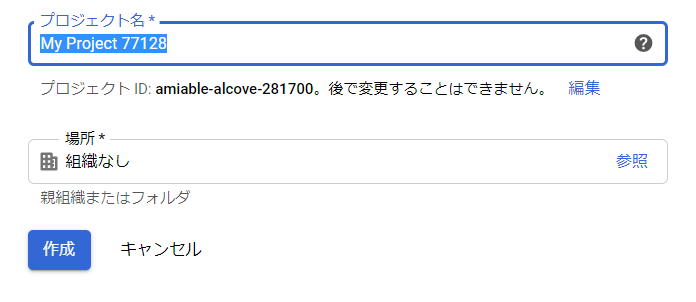
Create a project
Click Create project

Enter your desired project name
Enter a project name of your choice and click [Create] without specifying an organization.
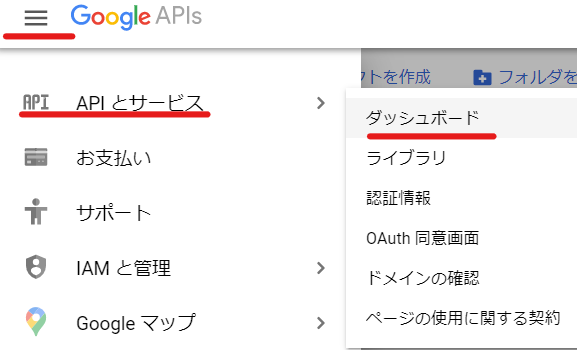
Go to Dashboard
OAuth consent screen
Select External and click Create.
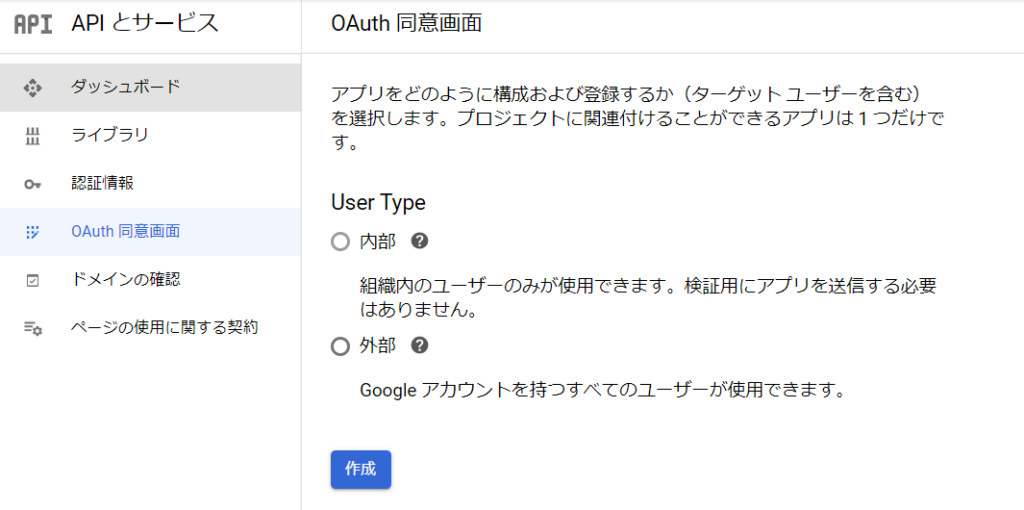
OAuth consent screen
The items to be set are
- Application Name
- Accepted Domains
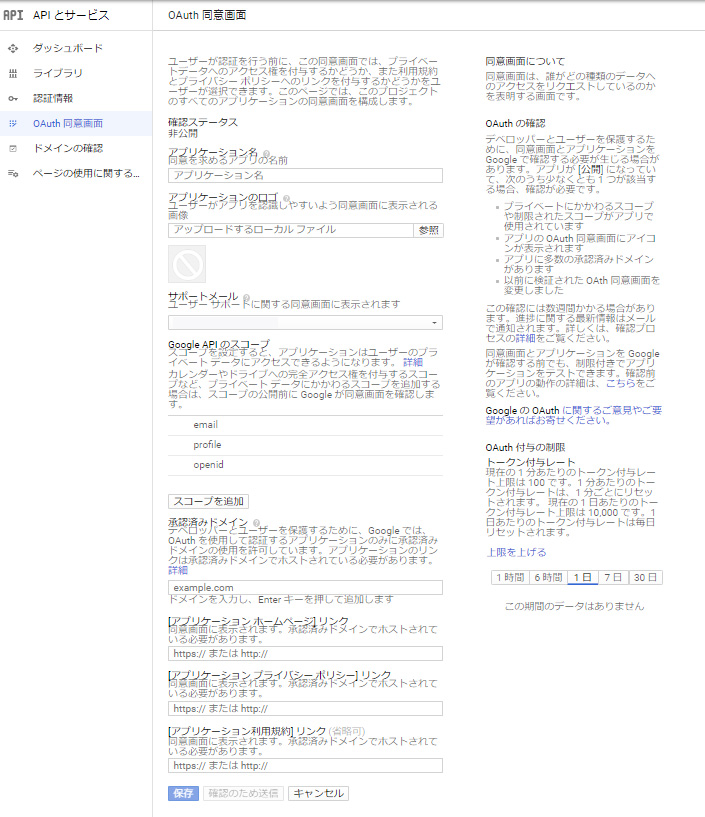
1. Application name
Anything is fine, but we recommend using your website or company name.
2. Approved Domains
Enter the domain of the site you will be using, such as ●●●.com. There is no need to include "https" or similar.
Don't forget to press enter after entering the domain, otherwise the domain you entered will not be confirmed.
3. Finally, click the Save button.
Authentication information
Click on [Credentials] in the left side menu and then click on [+Create Credentials].

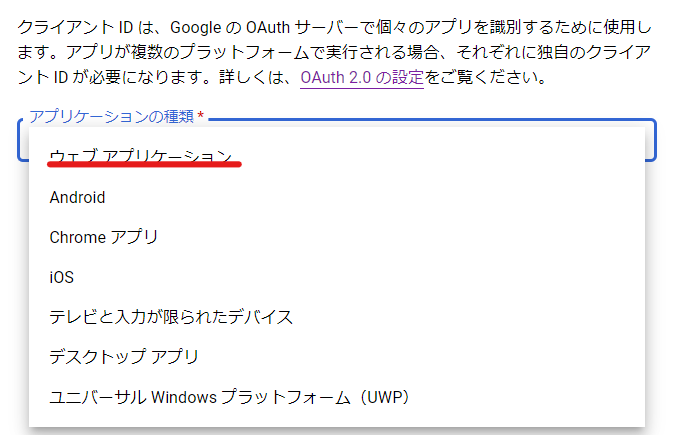
Click on OAuth Client ID
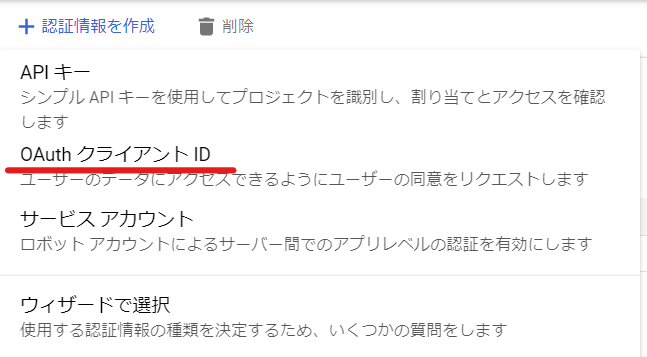
Select Web Application
Advanced Setting
The items to be set are in the following two places:
- name
- Approved Redirect URLs
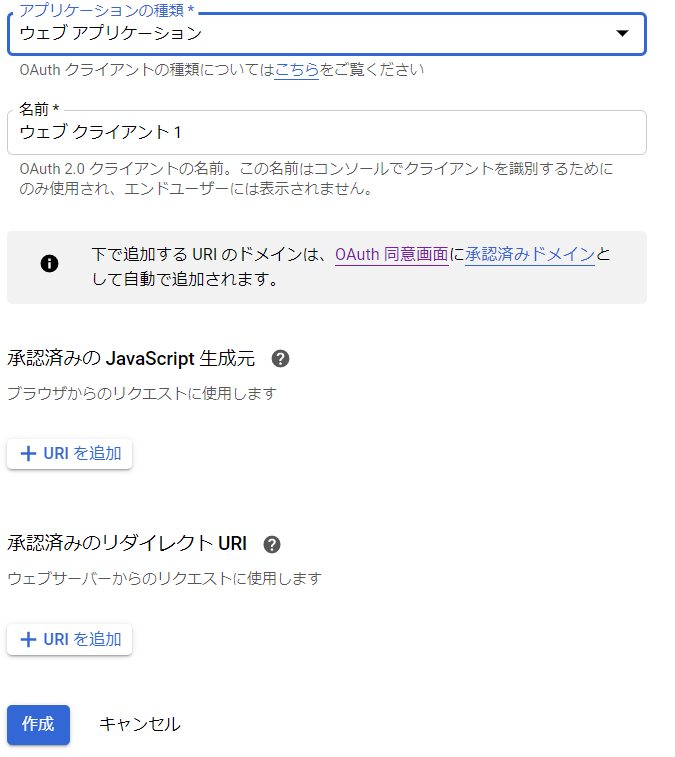
1. Name
Anything is fine, but we recommend your website or company name.
2. Approved redirect URIs
Copy the website URL. This time, enter the official URL starting with https://.
When you copy a URL, a / character may be added to the end, but be careful not to include this here.
3. Click the Create button
Your client ID has been created. You can view your client ID and secret key by clicking the pencil icon.

Checking the Client ID and Client Secret

The Google icon appears on the login screen.
You can now log in to the admin panel by clicking the Google icon without having to enter your WordPress username and password!
You must register as a user with a Google account (an email address registered with Gmail or Gsuite).

Released as soon as the next morning! Weekends and holidays are also available!
Super rush website creation plan
We offer a rush website creation plan for those who need a website in a hurry!
We can publish your content as soon as the next morning, even on weekends and holidays! If you have any questions, please check the details below!
Latest Articles


