How to create a website using WordPress/How to use plugins/No-code construction blog

How to get and set a Google Maps API key
At HanamiWEB Online School,
●Ask questions in real-time in the virtual study room!
●Ask as many questions as you want via chat!
●E-learning materials that you can learn as much as you want, 24 hours a day!
All included for just 2,500 yen/month!
We explain HivePress, a free plugin that allows you to create a matching site using WordPress.
By setting a Google MAP API key, you can display Google Maps on your site.
Access to Google Cloud Platform
To issue an API key, go to Google Cloud Platform.
Add a new project
First, add a new project.
Click the arrow

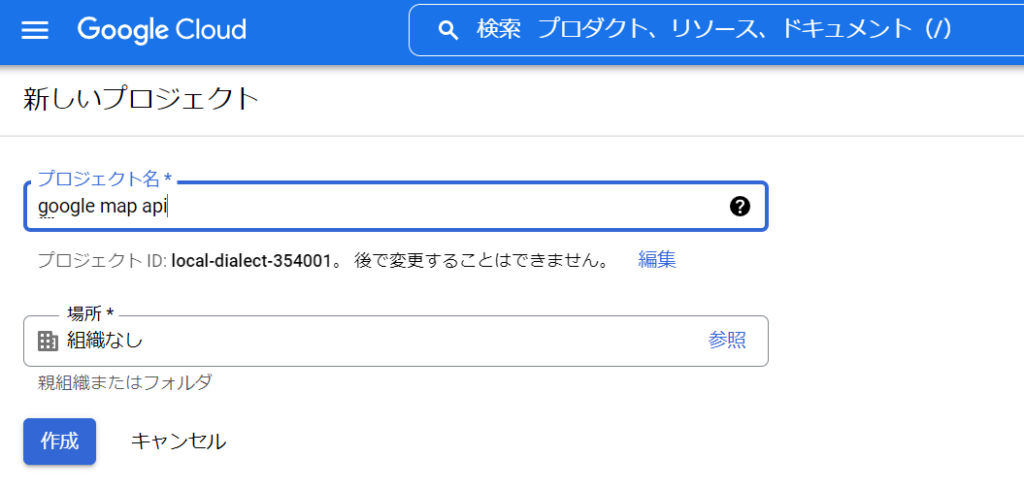
Click New Project.

- Project name - any alphanumeric string
- Location - No organization
Set it and click the [Create] button.
A notification will appear in the upper right corner, so click on "Select Project".

If you miss the announcement, you can expand the ▼ you first clicked and select the project.

OAuth consent screen settings
Expand the hamburger menu on the left
- APIs and Services
- OAuth consent screen
Click.

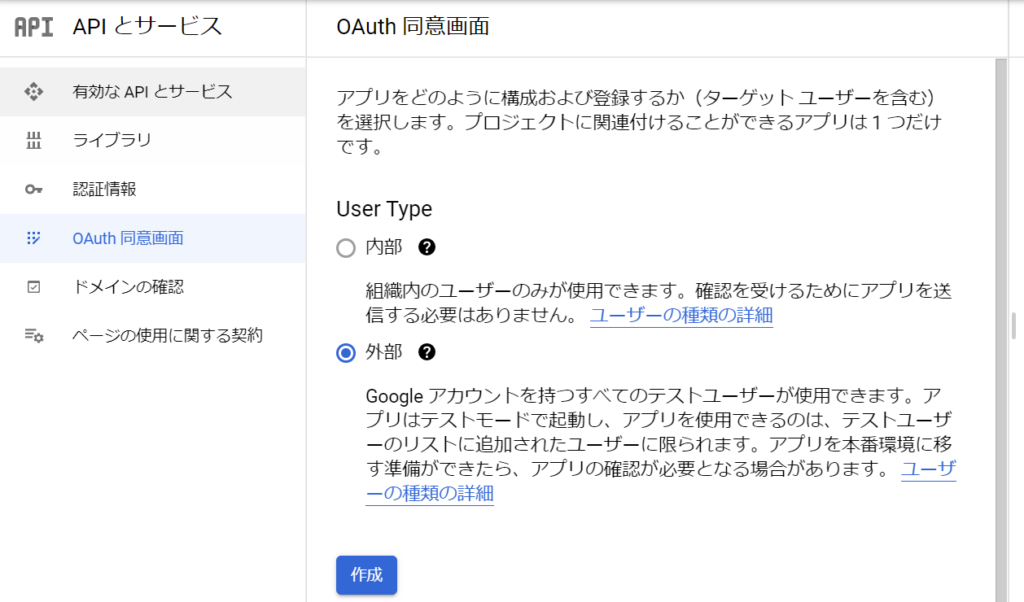
Select Outside
First, on the first screen, select [External] and click the Create button.
Enter required information
On the next screen, enter the required information.
- App Name - Enter any characters
- User email address
- Add domain - Add the domain of this site. [xxx.com] This part is called the domain.
- Developer Contact
Once you have entered the above four items, click [Save and Next]. After that, click [Save and Next] and finally [Return to Dashboard] to return to the Dashboard.

Publish your app
This is a very important task. Currently, it is in test mode,Click [Publish the app] to publish it.Please change it to.

Add API
Add the API for maps from the library.
- Places API
- Geocoding API
- Maps JavaScript API
There are three types.


Click on all of them and click [Enable] to enable them.

Create an API key
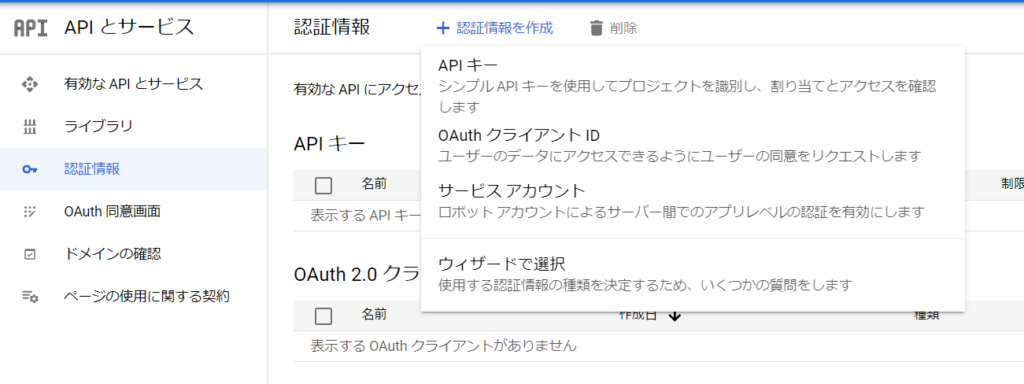
The key has been created.

Restricts applications
Next, we will set the key restrictions. Click the [Edit API key] text link.
In the application restrictions, select [HTTP Referrer] and add the domain where the site is operated.

API Limitations
Next, under API restrictions, check [Restrict key], select the three types of API you just added, and click the [Save] button.

Set the Google Maps API key on your site
Once you set the issued key in HivePress, you're done.
- HivePress
- Integration
- Google Maps
Enter the issued key in the API key field.

Credentials Settings
Next, set the authentication information.
- Person information
- OAuth client ID
Go to and issue your ID and secret key.
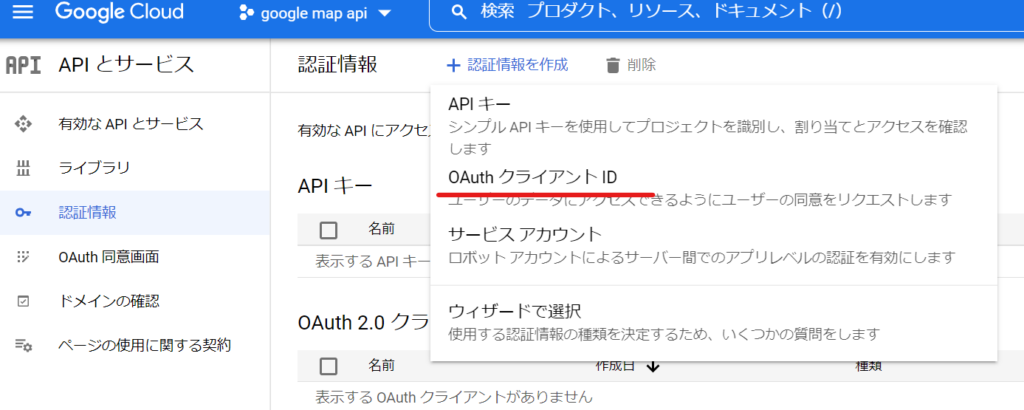
Key issuance
There are three places to enter information.
- Application Type – Web Application
- Name - any string
- Approved Redirect URLs - These can be found in your HivePress settings.

Authenticated redirect URL verification
This is a WordPress site.
- HivePress
- setting
The redirect URL is listed in the attachment, so copy it and paste it into the API settings.

Two types of keys are issued
When you click the [Create] button, two types of keys will be issued.

Each key
- Client ID
- Client Secret
Enter and save.

Released as soon as the next morning! Weekends and holidays are also available!
Super rush website creation plan
We offer a rush website creation plan for those who need a website in a hurry!
We can publish your content as soon as the next morning, even on weekends and holidays! If you have any questions, please check the details below!
Latest Articles


