How to create a website using WordPress/How to use plugins/No-code construction blog


How to create a matching homepage using WordPress! Plugin [HivePress] listing settings
At HanamiWEB Online School,
●Ask questions in real-time in the virtual study room!
●Ask as many questions as you want via chat!
●E-learning materials that you can learn as much as you want, 24 hours a day!
All included for just 2,500 yen/month!
We explain HivePress, a free plugin that allows you to create a matching site using WordPress.
When a user offers a service for sale, it is called listing, and we will explain how to set up this listing.
Setting location
- HivePress
- setting
- listing
We will set it up in here.

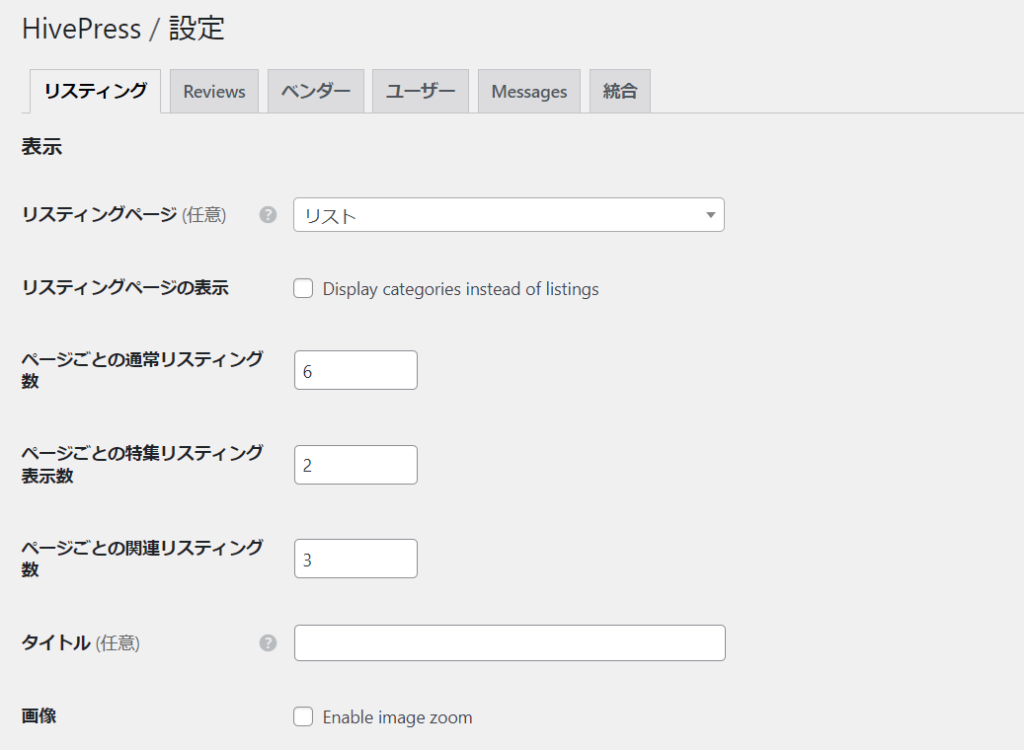
Listing display settings
At the top, choose your listing's visibility settings:
- Listing Page - Specify the static page to display your listings
- Display on Listing Page – Check this box if you want to display the category list on your listing page.
- Regular listings per page - set the number of listings to display per page
- Featured listings per page - Set how many featured services you want to display per page
- Related Listings Per Page – Set how many related services you want to display per page
- title
- Image - Check if you want to zoom in on the image
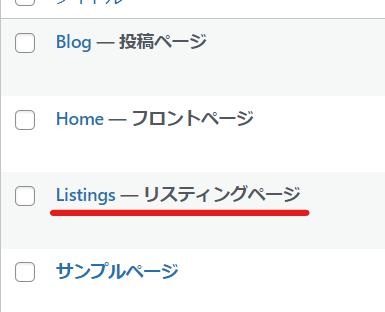
1. Listing page
If there is no listing page in static pages, create a listing page by clicking [Static Pages] > [Add New] and link it to the settings.If the linking is successful, the text “Listing Page” will be displayed.
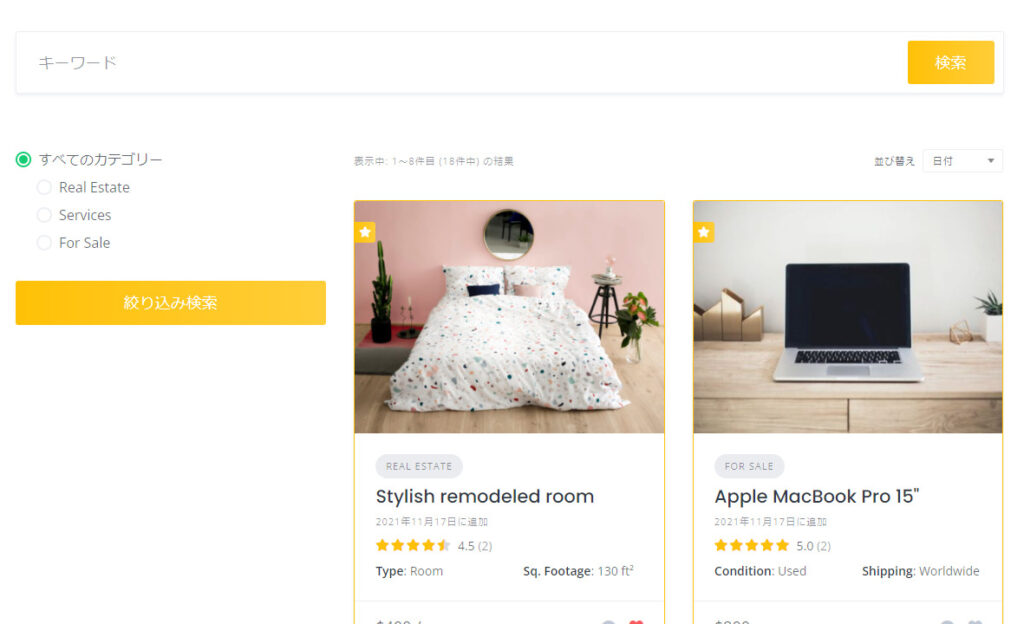
2. Display of listing page
If unchecked, the search items and list of listing services will be displayed.
If you check this box, a screen will appear asking you to select a category first.
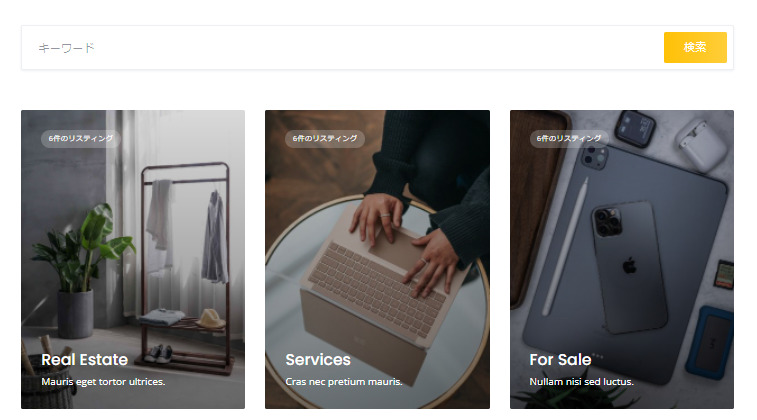
The process is as follows: Select category → Search within the category.

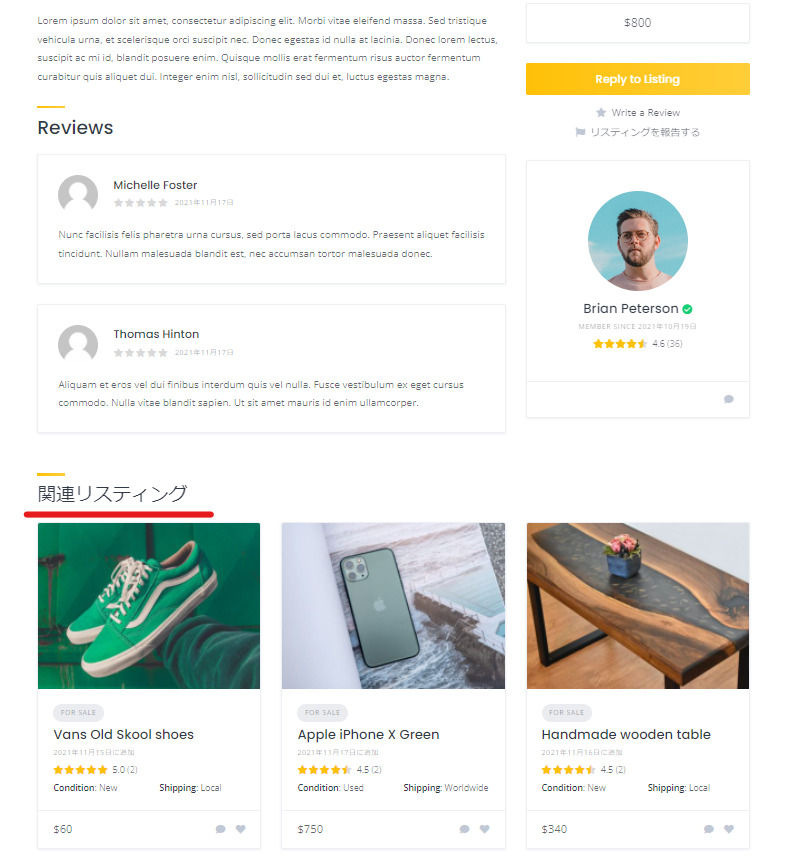
5. Related Listings
At the bottom of the listing details page, there is a Related Listings section. You can set the number of listings to display.
Since there are three pieces lined up horizontally, we recommend multiples of three.
Listing search settings
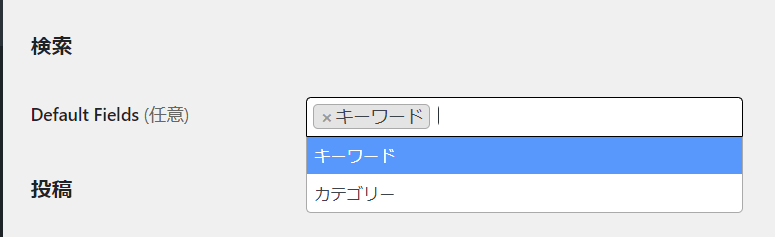
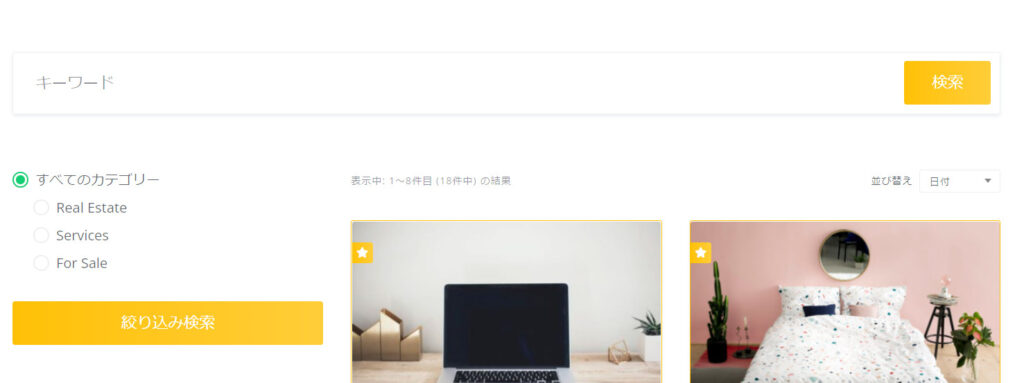
Keywords only
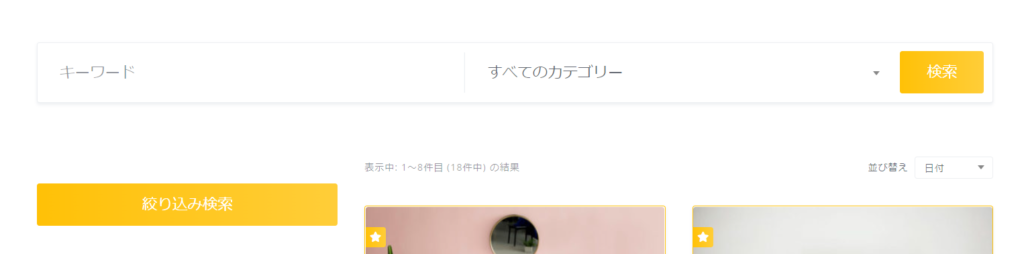
If you set keywords and categories
Listing Posting Settings
- Terms of Use Page - Create and set up a static page for your terms of use in advance. When you post a listing, a check box and link to the terms of use will be automatically added.
- Posting – Check Allow users to post new listings to allow them to post their services freely.
- Moderation - Check this box if you want to require administrator approval. If you check this box, the service you have listed will not be displayed on the site unless an administrator approves it.
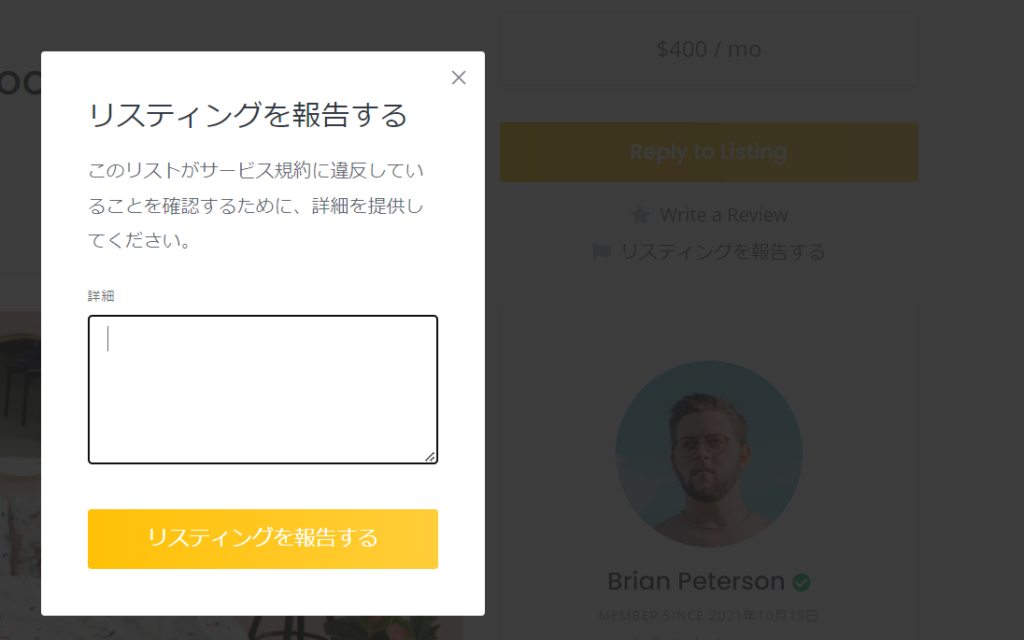
- Report – If you check Allow listing reporting, the option to report fraud will appear.

Report a listing
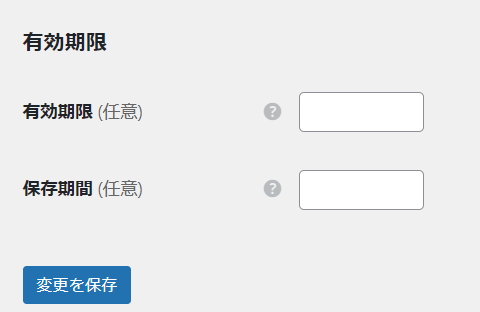
Listing expiration date
- Expiration date - You can set an expiration date for your listing. For example, if you set it to 30, your listing will no longer be displayed on the site after 30 days.
- Keep for – Set the number of days before inactive listings are deleted.

We are available on weekends and holidays!
Please contact us if you have any problems with your website!

- Unable to log in to WordPress
Malware infection?
- The homepage suddenly stopped displaying!
- A PHP error is occurring.
We also offer support on weekends and holidays for those who need assistance.
If you are in a hurry, please call us now at 03-6694-7024.
Latest Articles
Timing and Process for Renewing Your Recruitment Website | Key Points to Review to Increase the Number of Applications
7 Key Points for Creating a Recruitment Website | How to Create a Recruitment Site That Job Seekers Will Choose
What is the average cost of a recruitment website? A thorough explanation of pricing by production method.
5 Benefits of Creating a Recruitment Website with WordPress | Explaining Why It's Easy for the Person in Charge to Update