How to create a website using WordPress/How to use plugins/No-code construction blog


Build a matching site with WordPress! PremiumPress Microjob theme static page settings
At HanamiWEB Online School,
●Ask questions in real-time in the virtual study room!
●Ask as many questions as you want via chat!
●E-learning materials that you can learn as much as you want, 24 hours a day!
All included for just 2,500 yen/month!
This is an illustrated guide on how to build PREMIUMPRESS's MicroJob theme, which allows you to easily create a matching website using WordPress.
This time, we will explain the static pages that are added automatically.
Automatic output of fixed pages
Once you install the PremiumPress Microjob theme and enter your license, a static page will be automatically output.
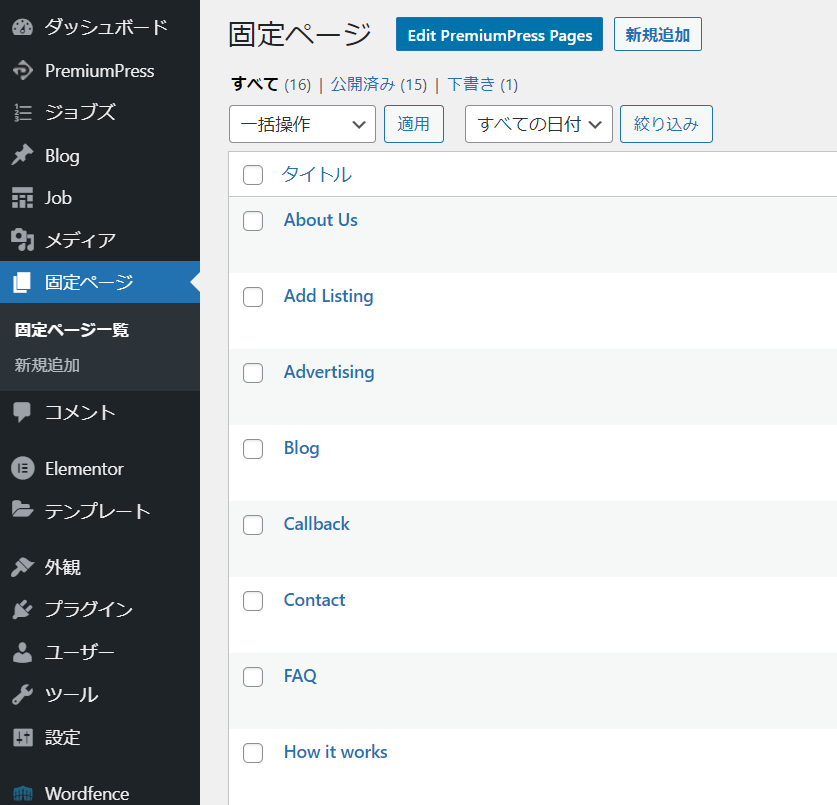
The following page is automatically generated:
- About us - Company overview, operator information, etc.
- Add Listing - Service listing page
- Advertising – Promotional landing page for buying advertising space
- Blog-Blog (Automatic content output)
- Callback - A detailed page after purchase to thank you for your purchase
- FAQ-QA page
- How it works - How to use guide page
- Memberships - Membership registration page
- My Account - My Page (Automatic Content Output)
- Privacy - Privacy Policy Page
- Terms - Terms of Use page
- Testimonials - Testimonials page
- Top Listing - Category List Page
Caution Required
The static page above was automatically generated after installing PremiumPress, and the URL is linked to the system.
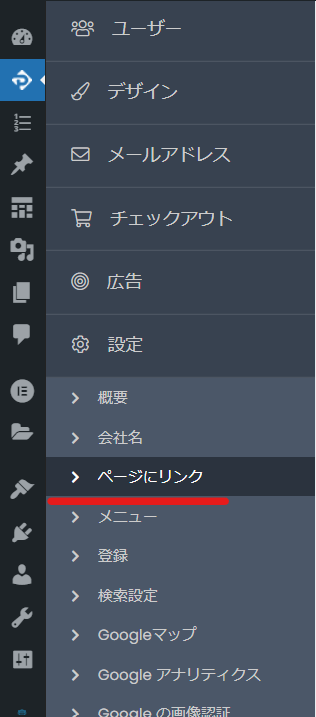
In PREMIUMPRESS, go to [Settings] > [Link to page]
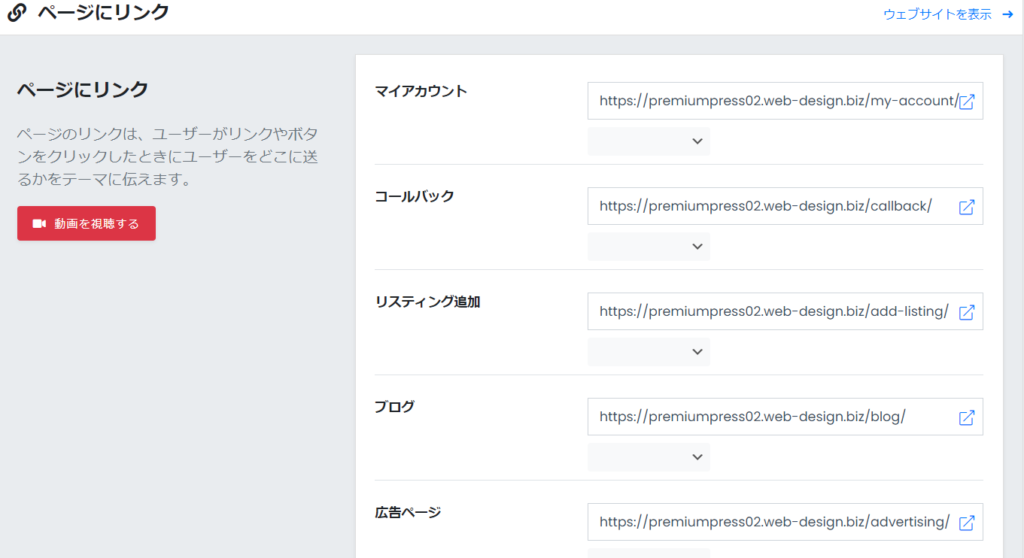
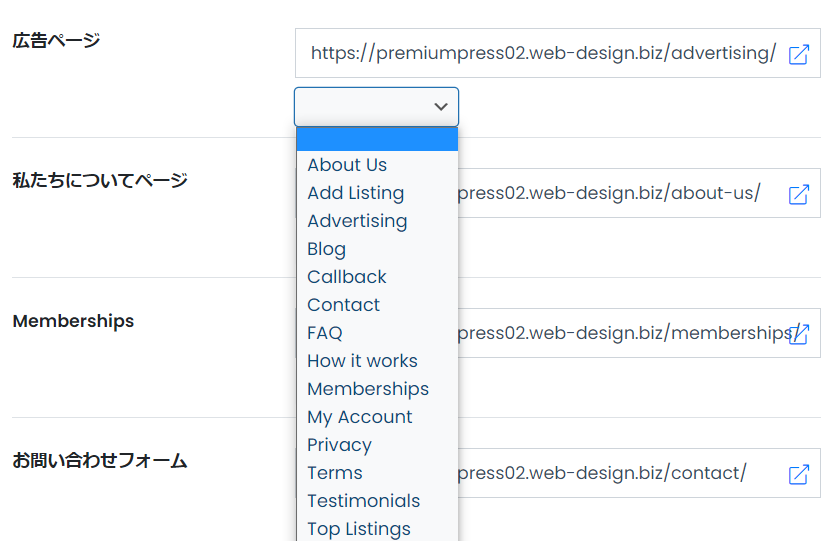
As you can see, there is a URL input field after each function. Some pages are automatically output, so if you change the URL of a static page, be sure to change the settings here as well!
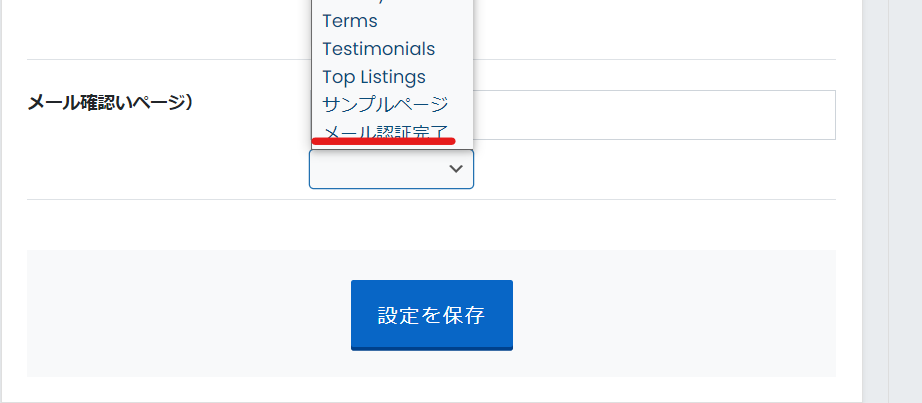
If you created a different page, expand the dropdown and select the correct static page.
Pages that you must add yourself
If you look at the link to the PremiumPress page, you will see two empty spaces.
- Category list page
- Email Verification - Email Verification Page
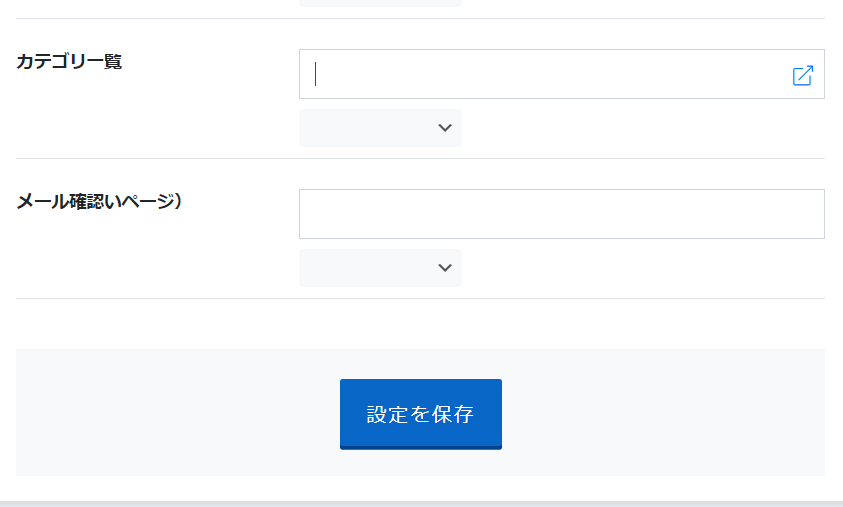
Category list page
Link the category list page.
Since the newly added static top-listing page was not being used, I used it for the category list page this time.

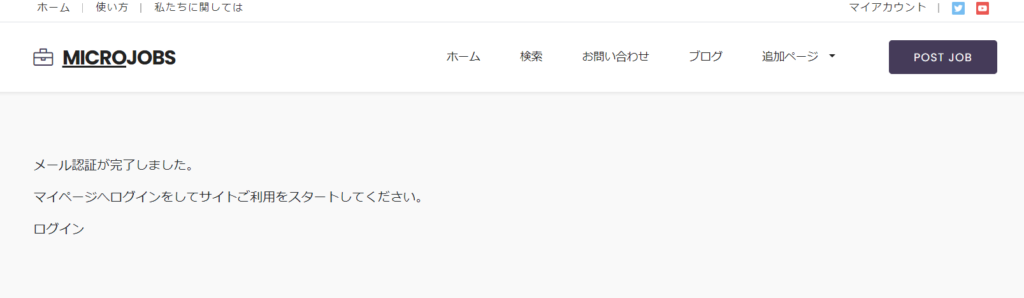
Email Verification Page
When is this page displayed?
- Member registration
- You will receive an automatic reply email with the URL for email authentication.
- Click the URL to view the page
If you do not set this page, the English page will be displayed.
I created a simple new static page as shown below.
Once you have created a new static page, set the static page in the email confirmation section under [Settings] > [Link to Page] in PREMIUMPRESS.
summary
Simply activate PremiumPress and the necessary pages will be automatically generated.
Just translate this page into Japanese and modify the content to suit your services.
Released as soon as the next morning! Weekends and holidays are also available!
Super rush website creation plan
We offer a rush website creation plan for those who need a website in a hurry!
We can publish your content as soon as the next morning, even on weekends and holidays! If you have any questions, please check the details below!

Latest Articles
How to Enhance EEAT with WordPress | Settings and Design Improvements Necessary for AI-Driven Traffic
[2026 Latest] How to check the number of visits from generated AI using GA4's exploration function
Error message: Allowed memory size of 268435456 bytes exhausted (tried to allocate 14684160 bytes) Error: On Lollipop