How to create a website using WordPress/How to use plugins/No-code construction blog


")
A video explanation of how to sync the paid version of the WordPress reservation system plugin Amelia with Google Calendar and how to link it to the Zoom app!
At HanamiWEB Online School,
●Ask questions in real-time in the virtual study room!
●Ask as many questions as you want via chat!
●E-learning materials that you can learn as much as you want, 24 hours a day!
All included for just 2,500 yen/month!
WordPress booking system pluginAmelia(Links to the Amelia official website) The paid version includes a video explaining how to sync with Google Calendar and how to link with the Zoom app.
Fully automated from online reservations to issuing Zoom URLs!
A video explaining how to set up the paid version of the WordPress reservation system plugin Amelia to sync with Google Calendar and Zoom app!
How to sync Google Calendar and link the Zoom app (illustrated)
By syncing with Google Calendar, you can automatically add reservations from the reservation management system to your calendar, or set it so that reservations are not accepted during times when you already have plans. Also, by linking with the Zoom app, it automatically issues a zoom URL.
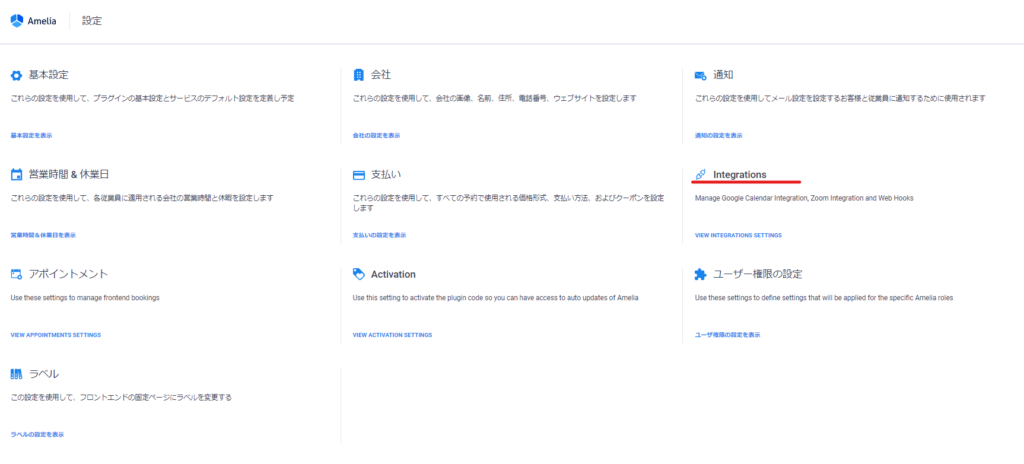
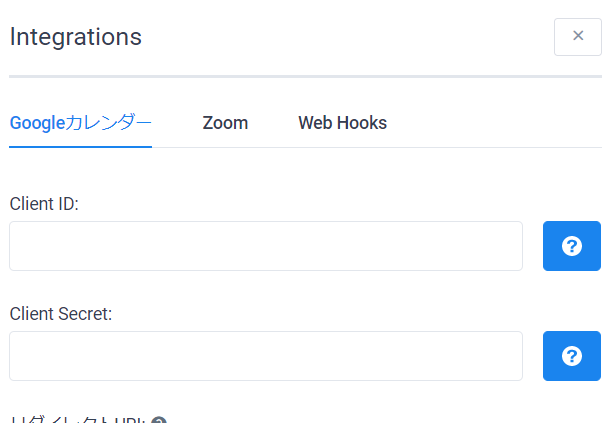
Integration Settings
[Amelia] > [Settings]
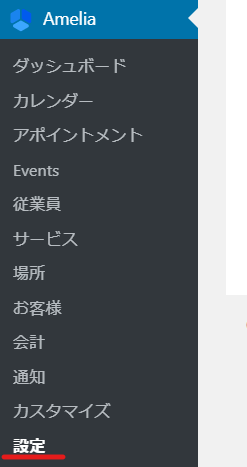
Make the settings in [Integration].
Google Calendar settings and video details
Google Calendar sync settings (illustrated)
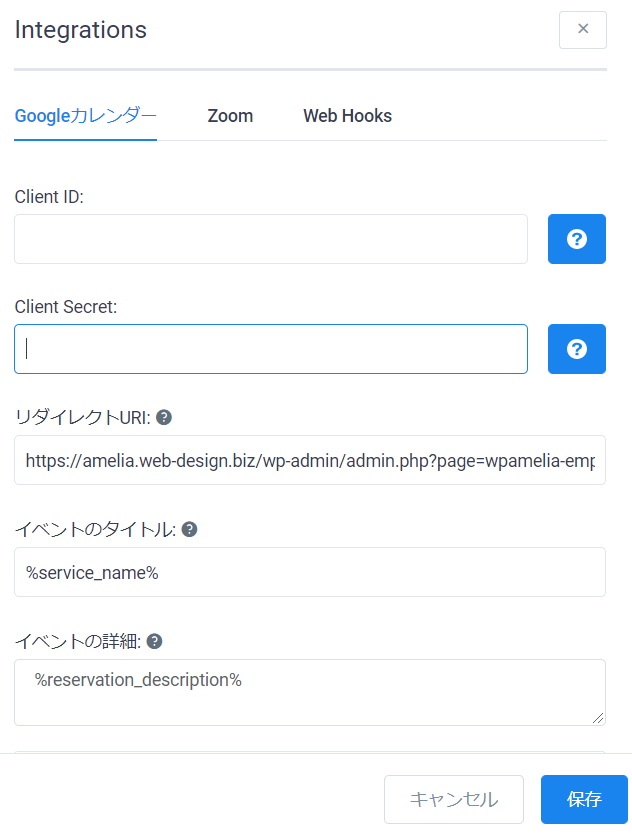
Set up [Google Calendar]
- Client ID/Client Source
- Event title
- Event details
Set the following:
1. Client ID/Client Source
Set your Google Calendar API key.
FirstGoogle Developer ConsoleGo to:
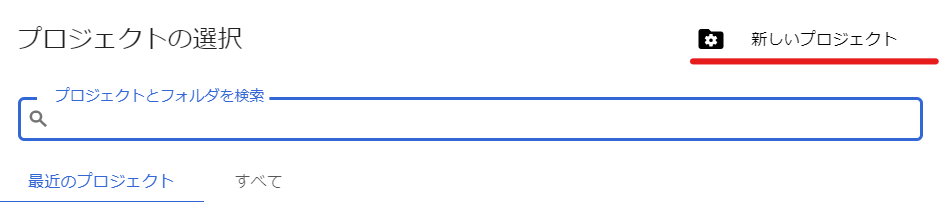
Create a new GoogleAPI project
Click on the ▼ in the red line.
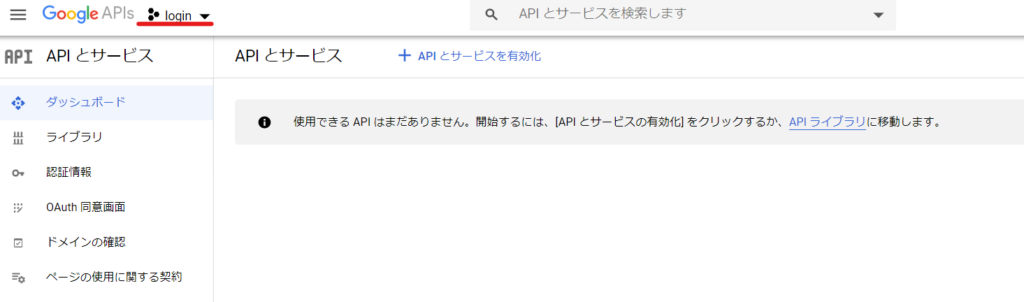
[Create a new project]
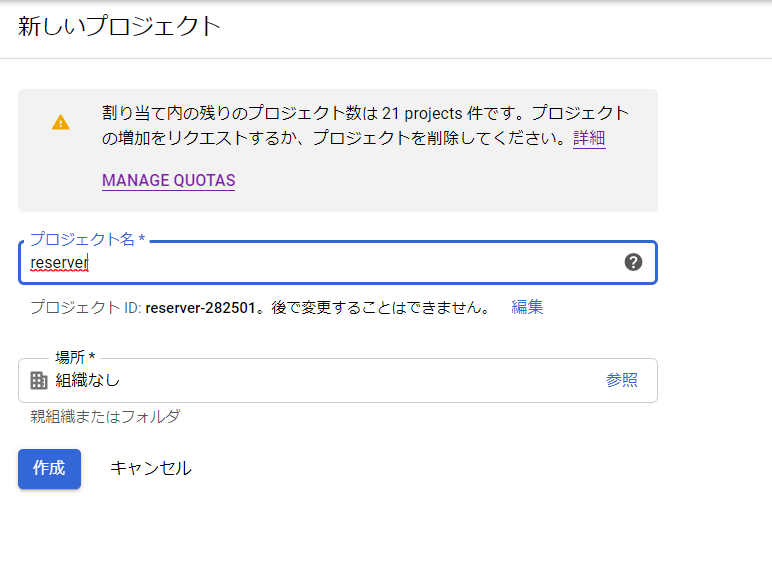
Creating a Google API project
- Project Name – Name it whatever you like
- Location – No organization
Click the [Create] button.
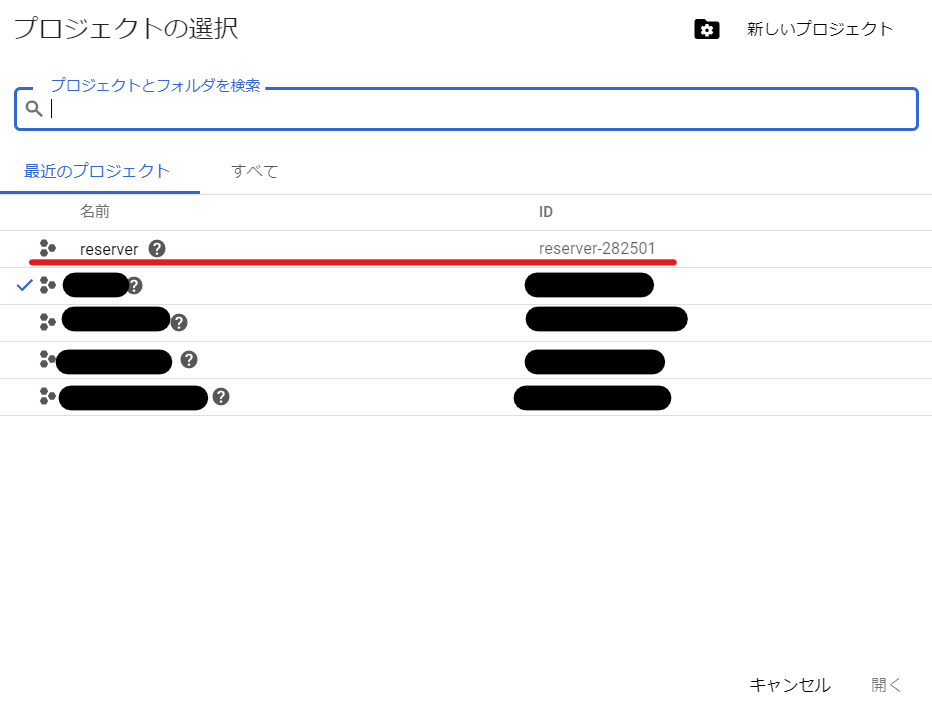
Open GoogleAPI Project
When you create a notification, it will appear in the upper right corner. Click [Show]

The red underlined area lists the projects you have created. Click ▼ to
Click on the name of the project you created.
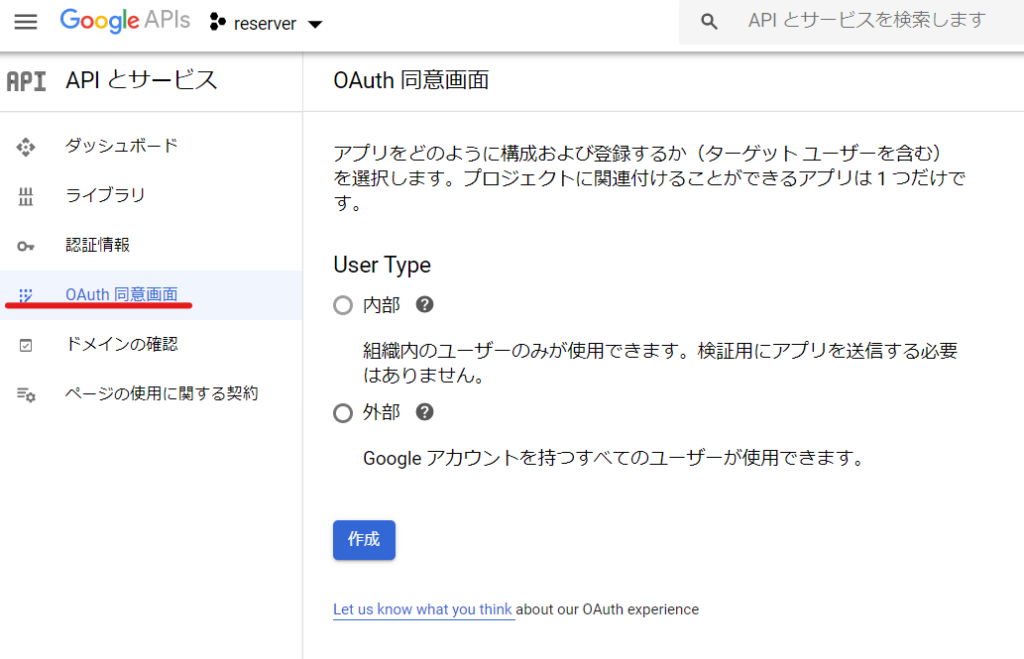
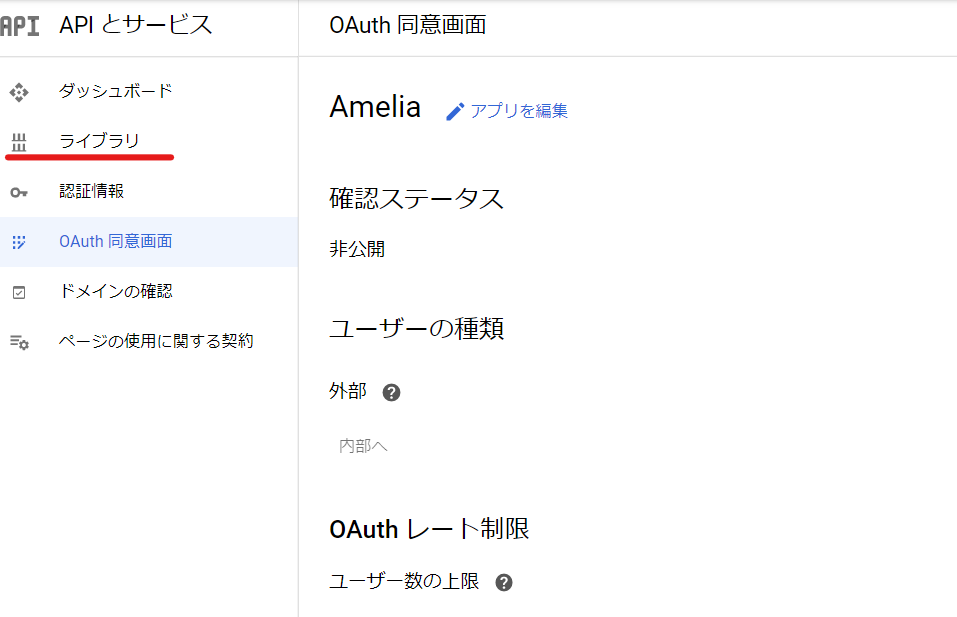
OAuth consent screen
Click [OAuth Consent Screen] on the left sidebar.
external
Select and click the [Create] button.
OAuth consent screen settings
Click the Create button to move to the next screen. The settings to be made here are as follows:
- Application Name
- Verified Domains

1. Application name
Here we will use the application Amelia, so enter [Amelia].
2. Verified Domains
Enter the domain you want to use here. For example, in my case, hanami-web.tokyo.jp
http://, https://, or the final / are not necessary. Also, be sure to press [Enter] after entering the address. The domain you entered will not be set.
Configure the Google API library.
Click [Library].
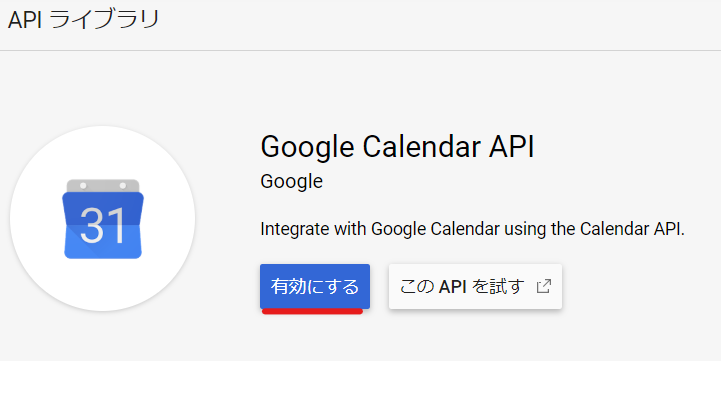
Search the library
Search for [Google Calendar API].
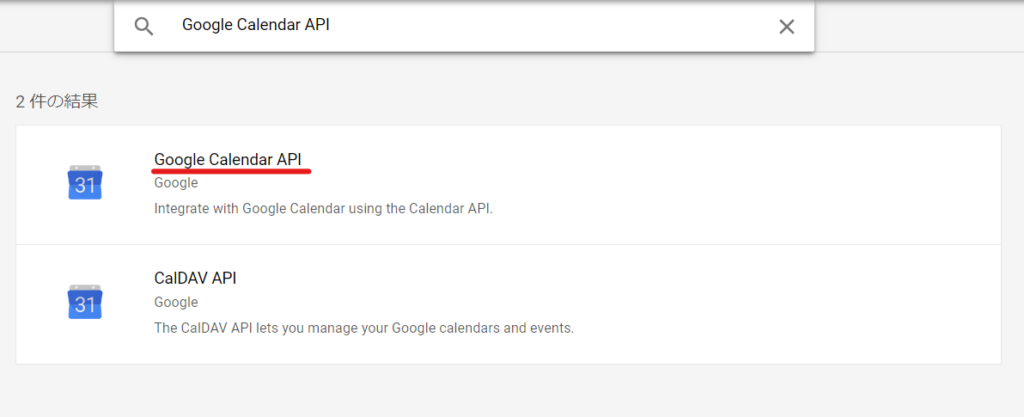
Click [Enable].
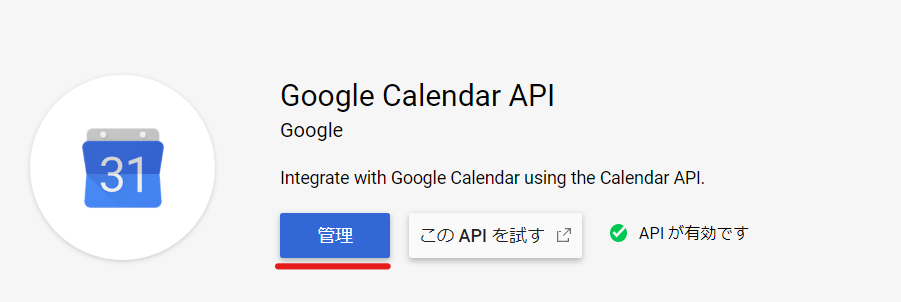
Create Google Calendar API credentials
Click [Create approval information].
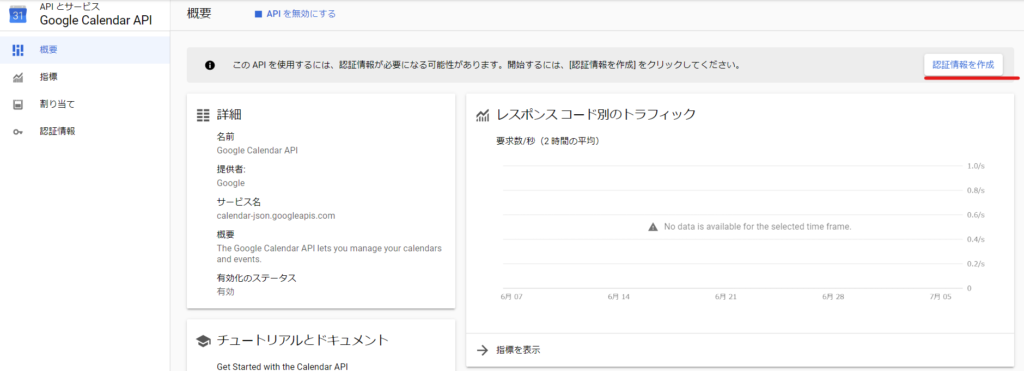
If you have accidentally moved away from this screen, click [Library] again and search for [Google Calendar API] on the Application API screen.

You can return to the original screen by clicking the [Manage] button.
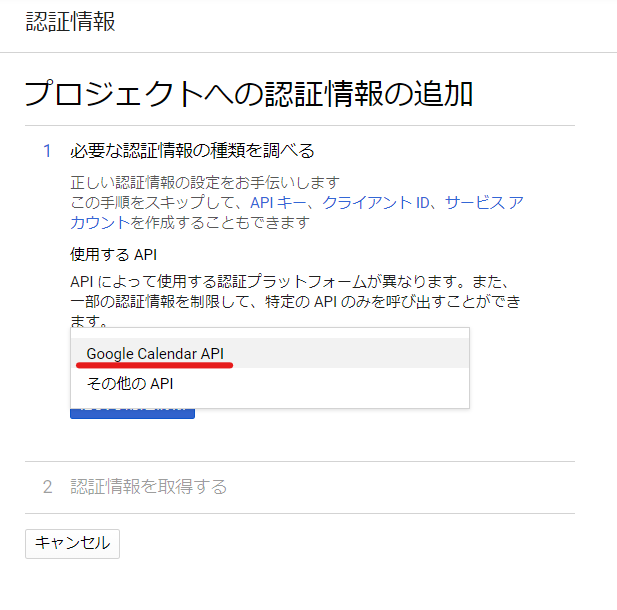
Set Google Calendar API authorization information
1. Find out what type of credentials you need
Google Calendar AIP
Choose.
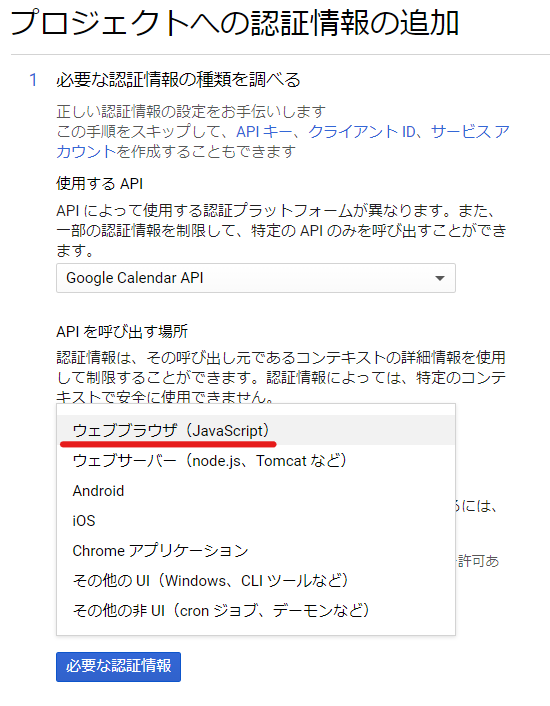
Where to call the API
Select Web Browser (JavaScript).
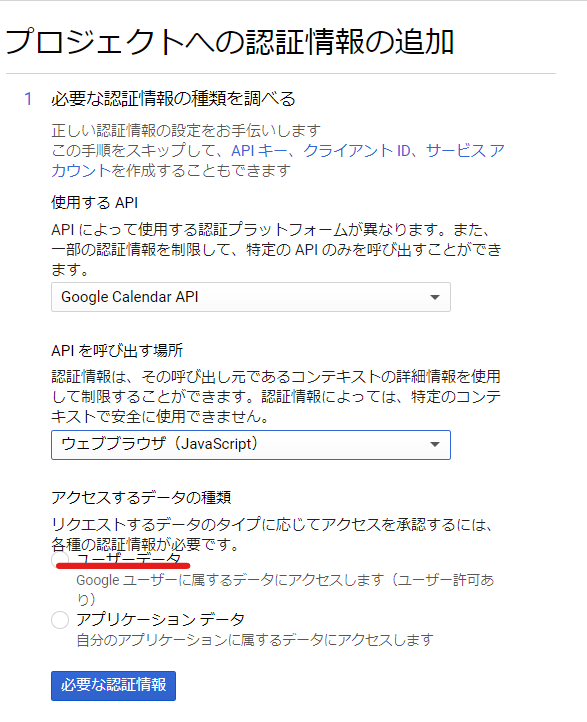
What types of data do we access?
User Data
Finally, click the [Required Credentials] button.
Create an OAuth 2.0 client ID
The items to be set are
- name
- Authorized Redirect URI

1. Name
Give it a name of your choice.
2. Approved Redirect URIs
The value to enter here is the URL listed in [Amelia] > [Settings] > [Integration] > [Google Calendar] in the WordPress dashboard.
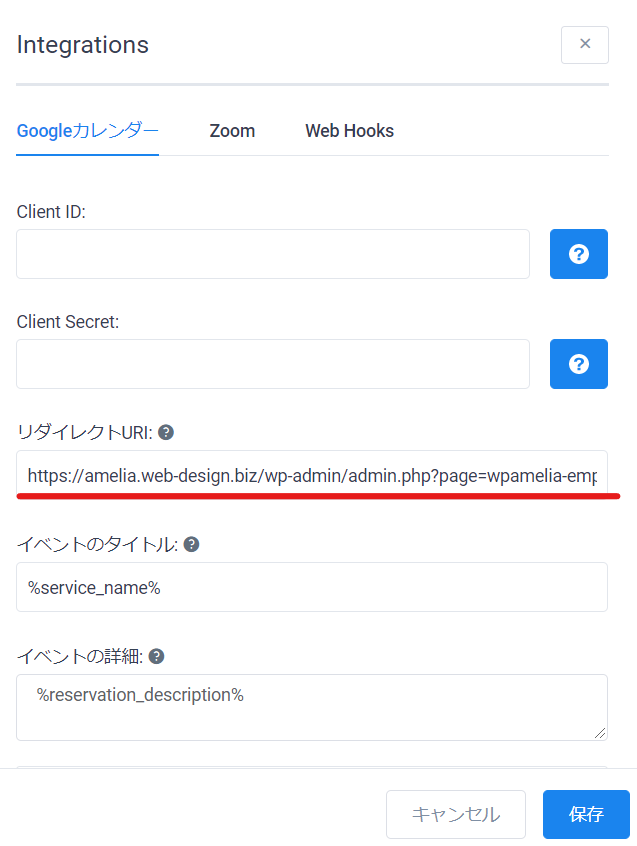
Paste it.
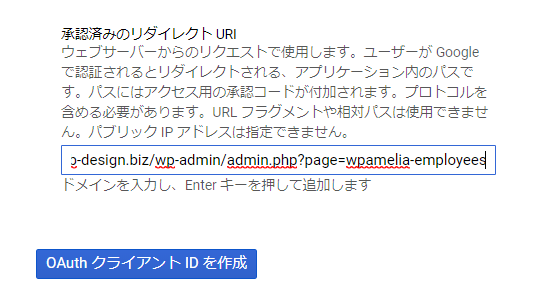
Create an OAuth client ID
Click the [Finish] button.

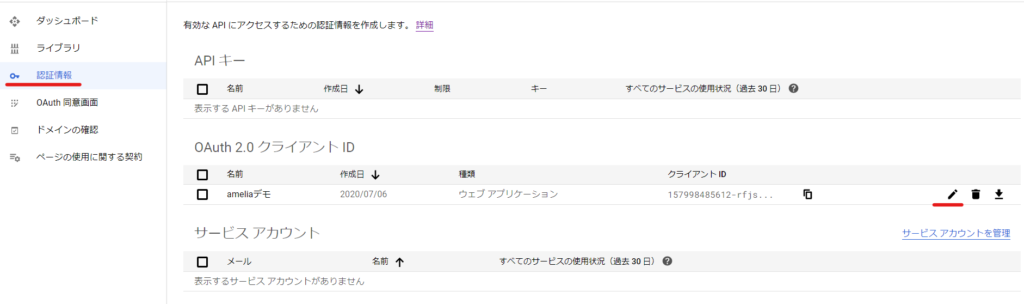
Verifying your client ID and secret key
It will be added to [Authentication Information] > [OAuth2.0 Client ID] in the dashboard.
Click the pencil icon to view your Client ID and Secret Key.
Set the client ID and secret key
Enter the client ID and secret key confirmed in Google API in the WordPress admin panel [Amelia] > [Settings] > [Integration].
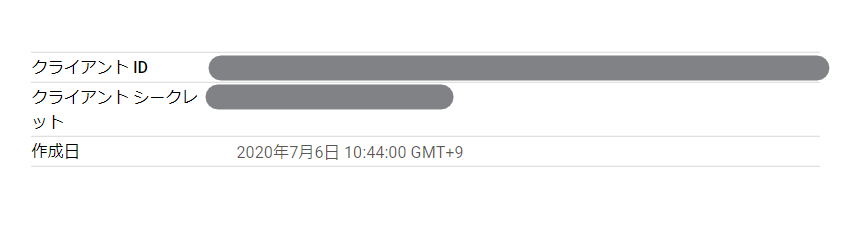
Enter the client ID in Client ID and the client secret in Client Secret.
This completes the integration with the Google Calendar API.
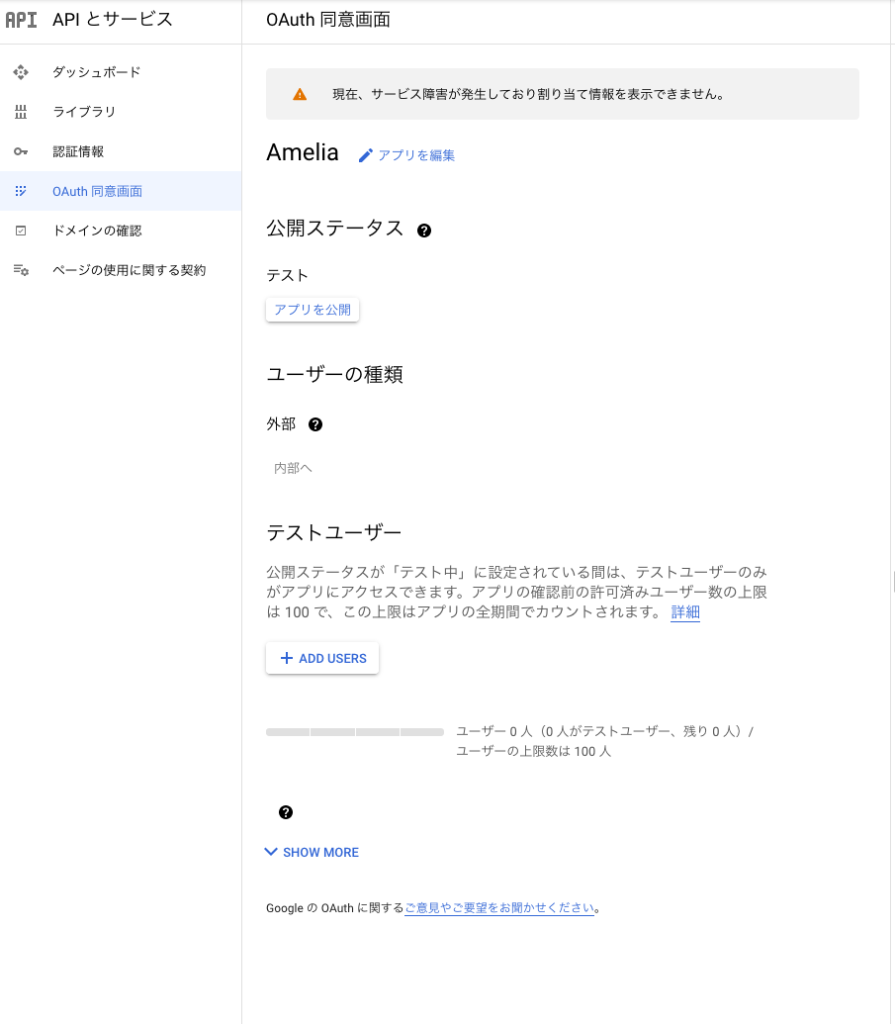
[Update: December 2020] The app is now available
In December 2020, we received contact from several people reporting that they were unable to link the Google API with Amelia. After investigating the matter, we discovered that the API had been in test mode after it was registered.
Click the [Publish App] button on the [OAuth consent screen]. You will now be able to connect successfully.
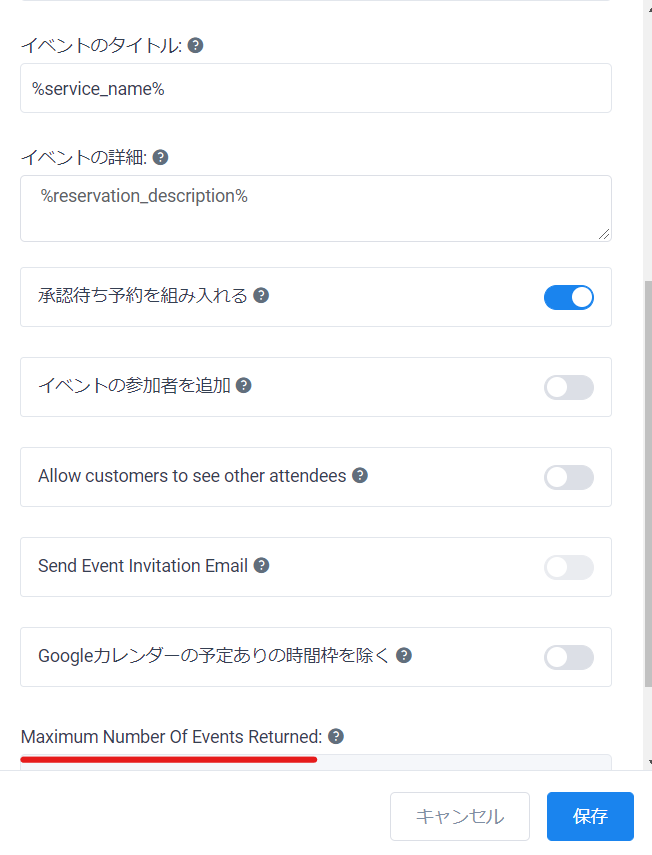
Event title
Set the event title when the reservation is automatically registered to Google Calendar.
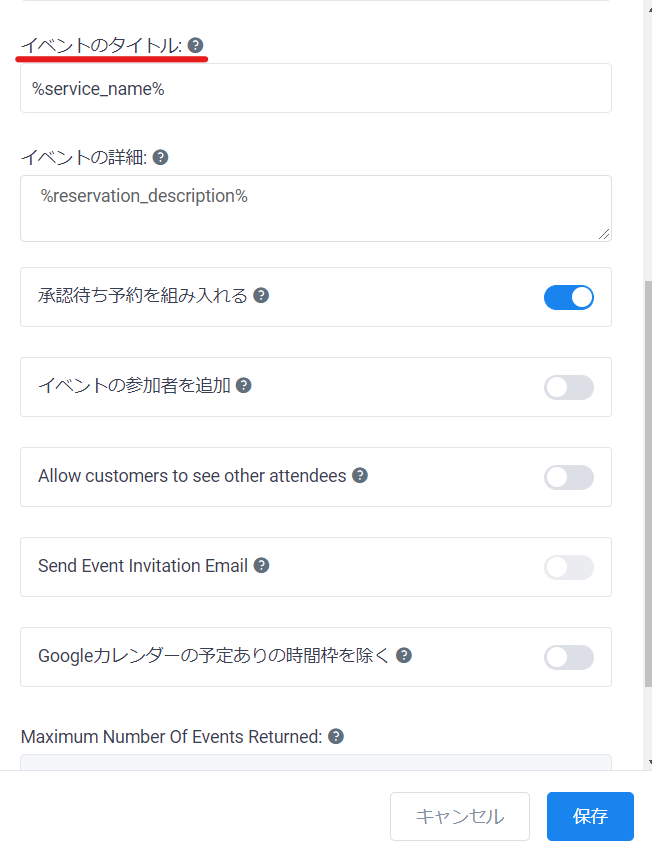
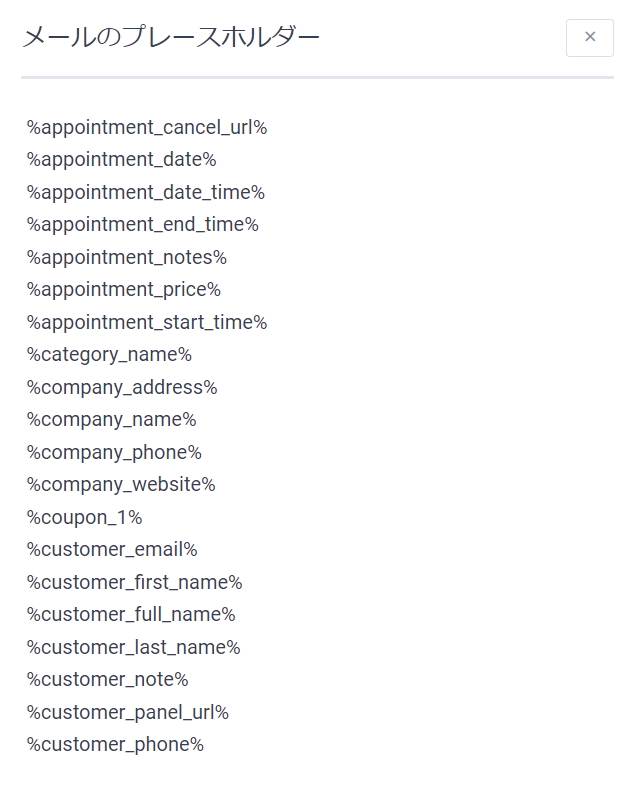
You can use the string contained in [Show Email Placeholders] in [Amelia] > [Notifications].
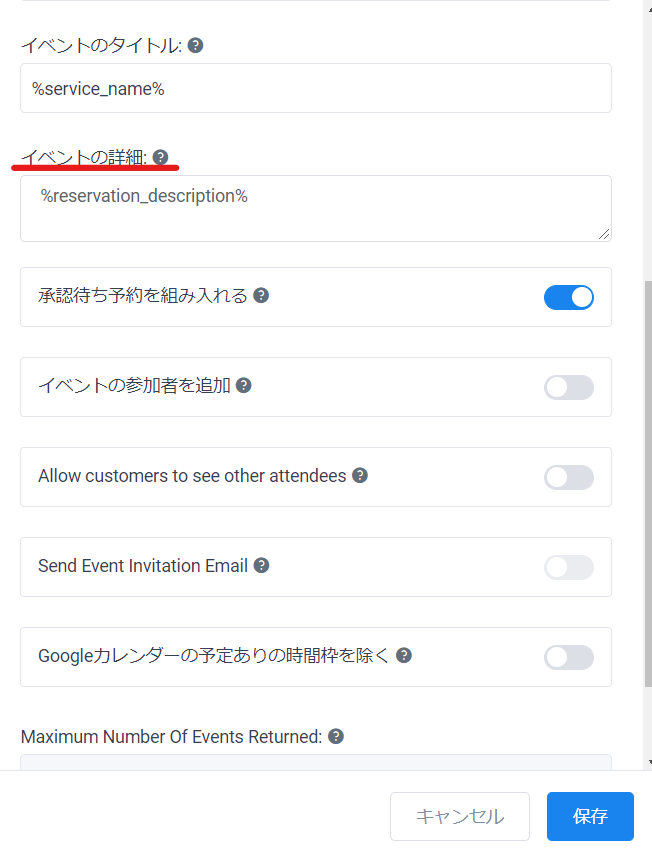
Event details
These are the details you will enter when automatically registering to Google Calendar.
Select this from [Show Email Placeholders] as well.
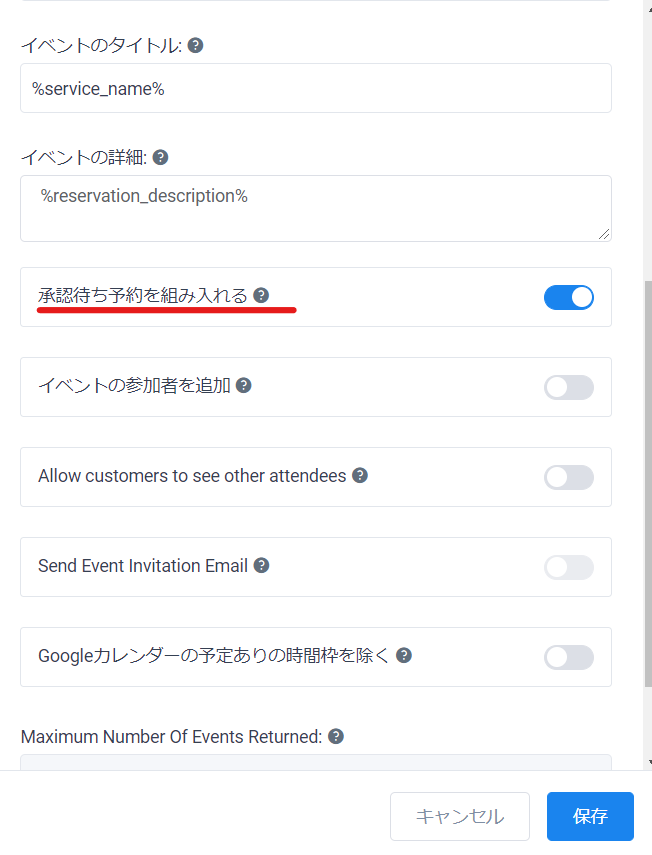
Include pending bookings
When a customer makes a reservation online, this setting determines whether the reservation will be automatically registered in Google Calendar even if the status is set to [Waiting for approval].
If you do not turn it ON, you may end up with a double booking even if the reservation is only tentative.
Add participants to an event
Turn this setting ON if you want employees to be able to check on the calendar which customers will be attending the event.
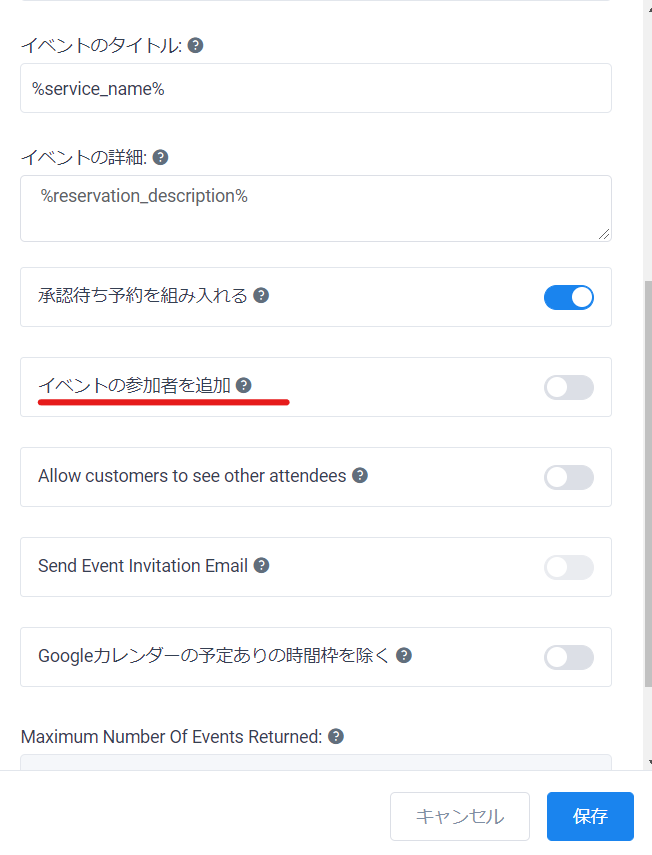
When turned ON, a list of employees and customers will be displayed on Google Calendar.
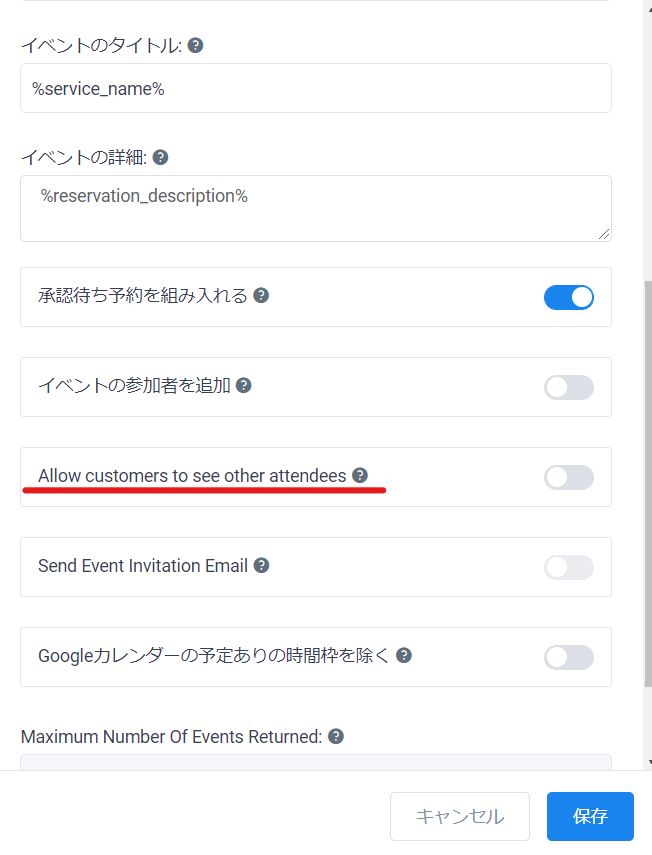
Allow customers to see other attendees
Turn it ON if you want your customers to be able to see other participants in the attendee list.
If you turn this on, participants other than yourself will be displayed on Google Calendar.
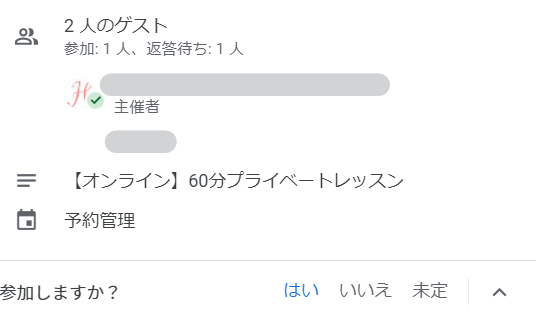
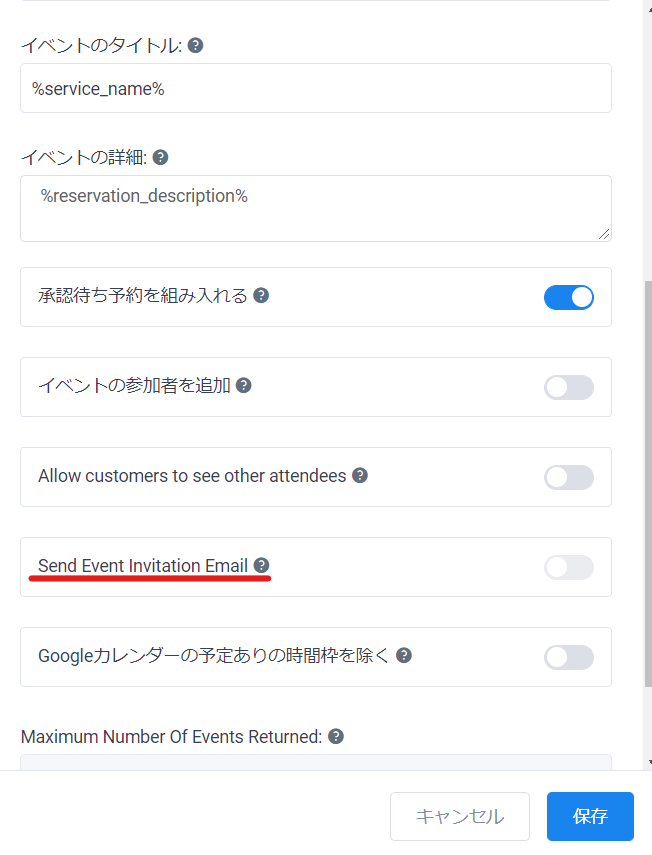
Send Event invitation Email
If the [Add event participants] button is turned on, you can send event invitation emails to customers.
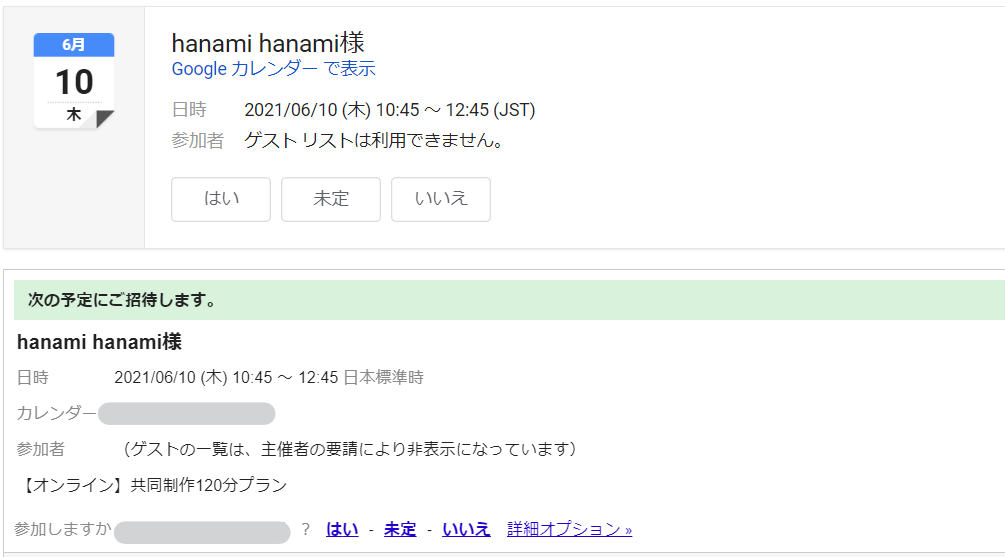
The image below is waiting for a reply. It means you are being invited.

You have received an invitation email like this. If you click [Yes] in this email, the schedule will be added to your Google Calendar.
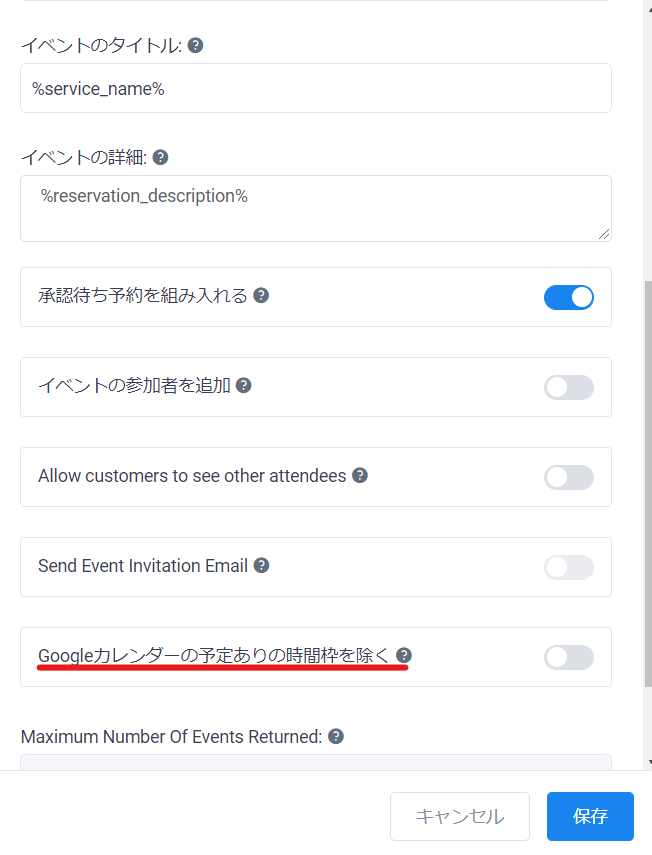
Exclude time slots with Google Calendar appointments
If you do not turn this setting on, customers will be able to make reservations even during times when you have reservations on your calendar.
Calendar sync
If you turn on Exclude busy times in Google Calendar, you can set the maximum number of events to sync.
If you have multiple employees, the default number of 50 may not be enough. If you feel that events after a certain date are not being synced, try increasing the number of syncs a little.
However, if you increase it too much, it will put a strain on the server, so please increase it little by little and adjust it accordingly!
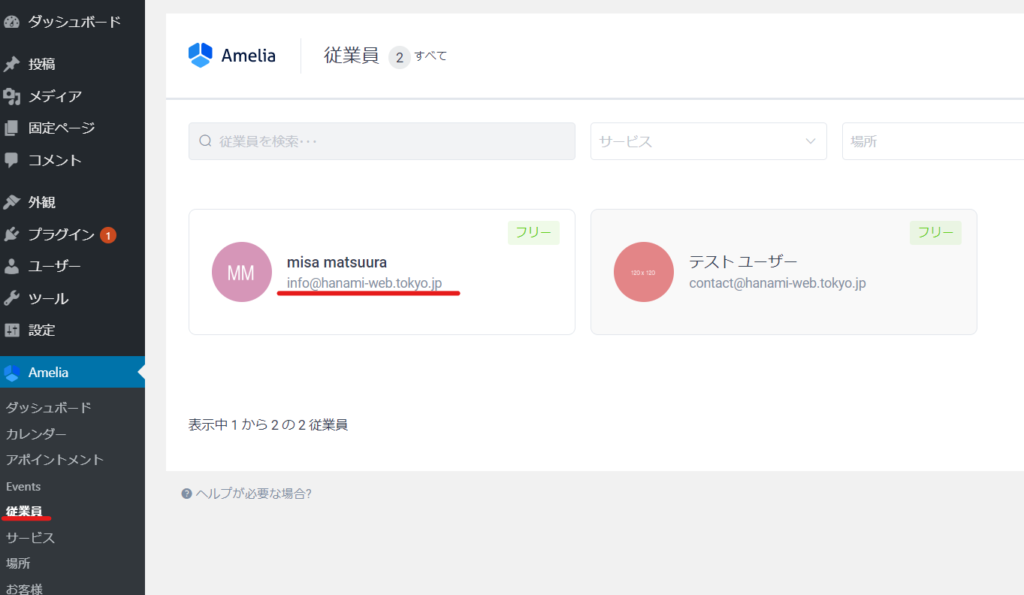
Employee Google Calendar Registration
Once you have linked it to Google Calendar, register a Google Calendar for each employee.
Editing an Employee
Click [Amelia] > [Employees] and click the employee for whom you want to register a Google Calendar.
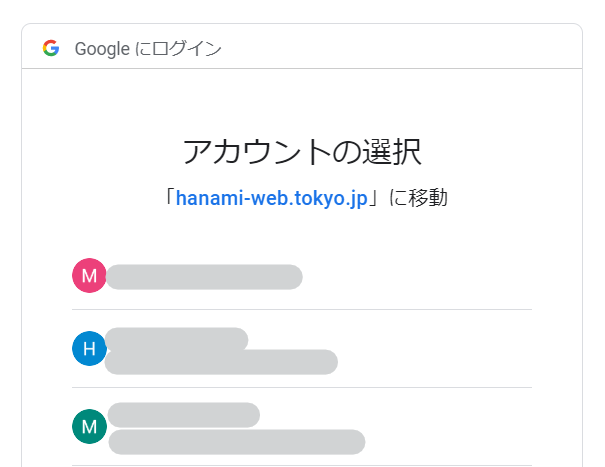
Sign in with Google
Sign in with the Google account that manages the Google Calendar you want to sync.

Click on the account you want to log in to
If you see the following message, click on "Go to unsafe page".
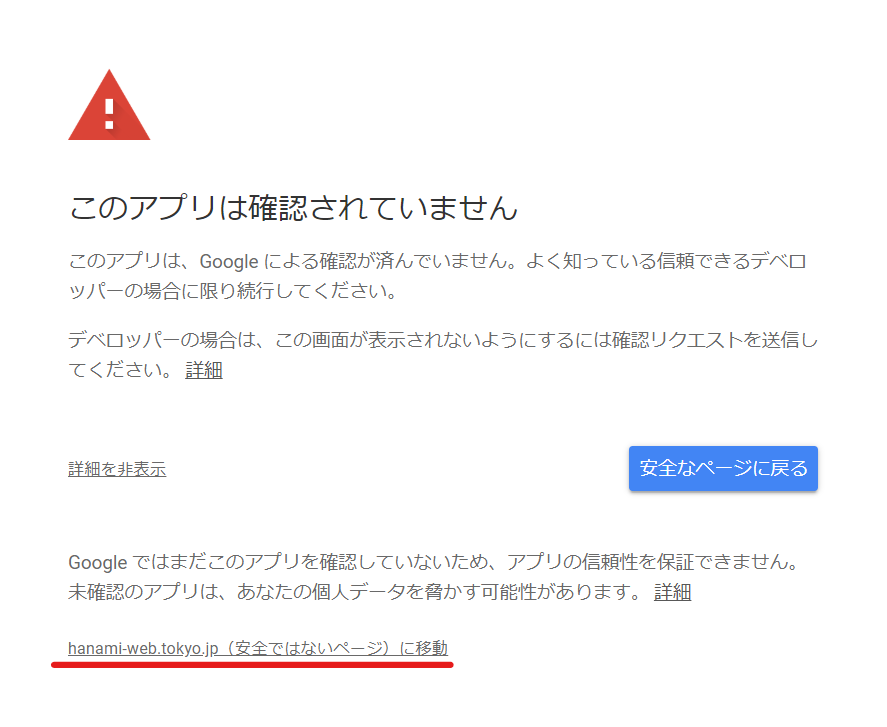
Give permission

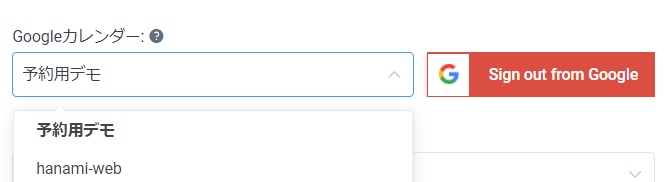
Select the calendars you want to sync
Select the calendar you want to sync with Google Calendar and click "Save" to finish.
[Error resolved] Unable to connect to calendar
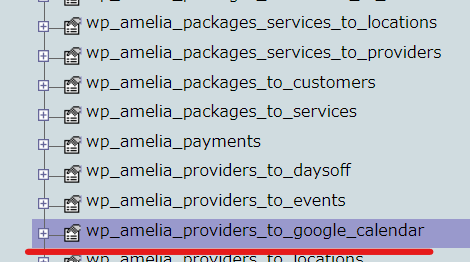
If you log in to Google from the employee settings, but are ultimately unable to connect to the calendar, it is possible that information about previously connected calendars remains in the database and causes problems.
In this case, the problem can be resolved by accessing the database, deleting the data of the relevant employee in [wp_amelia_providers_to_google_calendar], and then reconnecting.
[Error resolved] Amelia reservations are not reflected on Instabase
We've received many inquiries from people who use Amelia to reserve rental space about their reservations from Amelia not being reflected on Instabase, so we've added a solution!
→ [Solved] Amelia reservations are not reflected on Instabase
Zoom app settings and video details
As of September 2023, JTW settings have been discontinued.
Please refer to the explanatory article below.
Zoom URL automatic generation Server to Server setting explanation
Zoom app settings (illustrated)
Next, we will introduce how to set up the Zoom app.
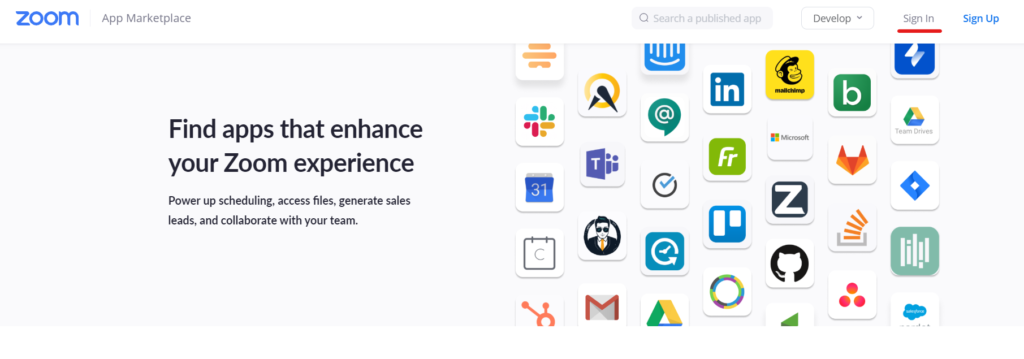
FirstZoom App MarketplaceGo to:
[Sign In]
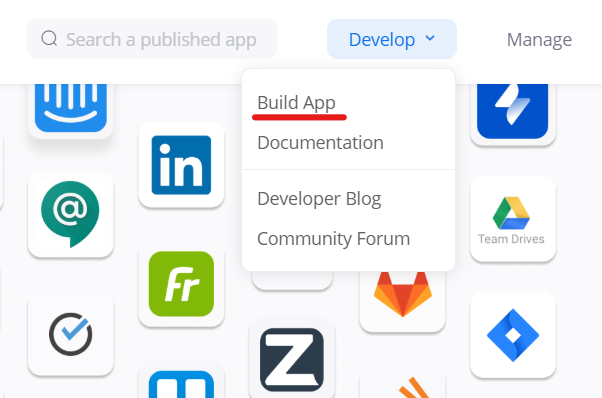
Build the Zoom app
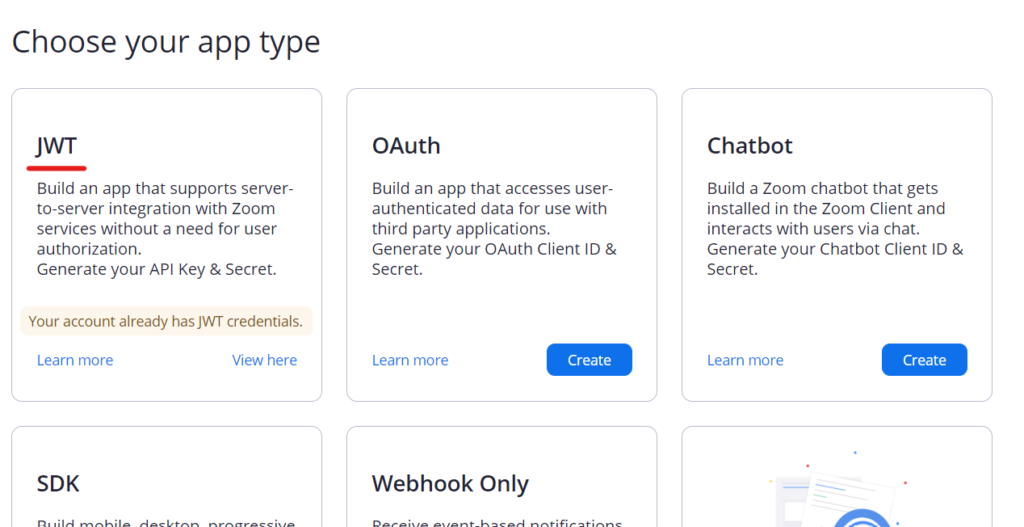
Click [Develop] > [Build App].
Create JWT
The display will be different since you have already linked the Zoom app, but click the [create] button under [JWT], register your name, and create it.
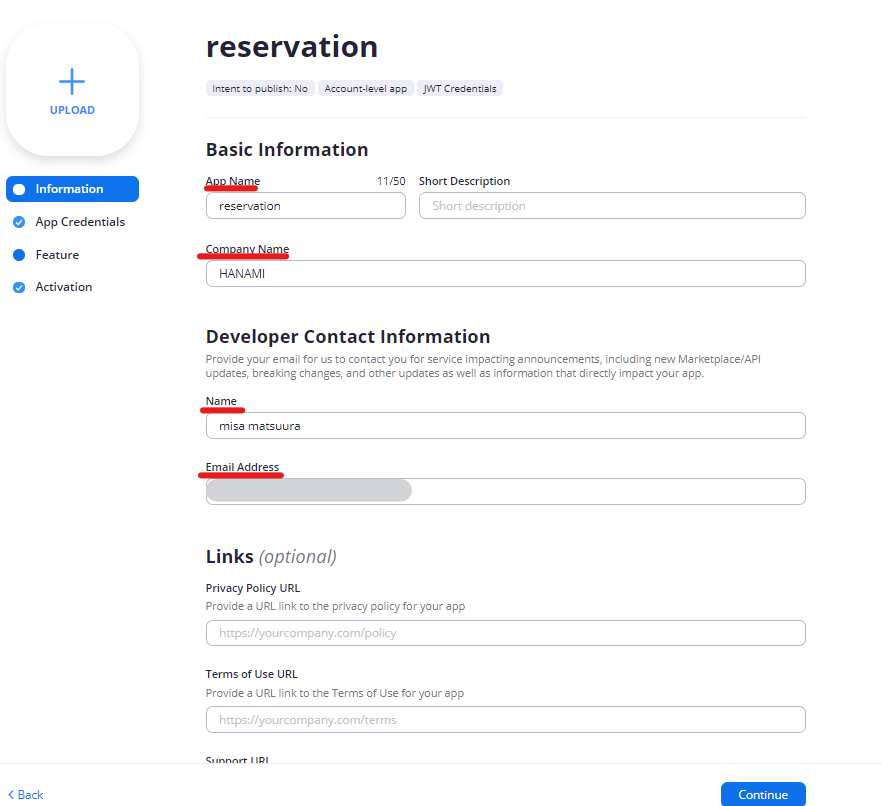
Enter required information
- App Name – The name you registered earlier should be displayed.
- Company Name
- Name - Name of person in charge
- Email Address – Contact email address
Once this is done, click the [Continue] button.
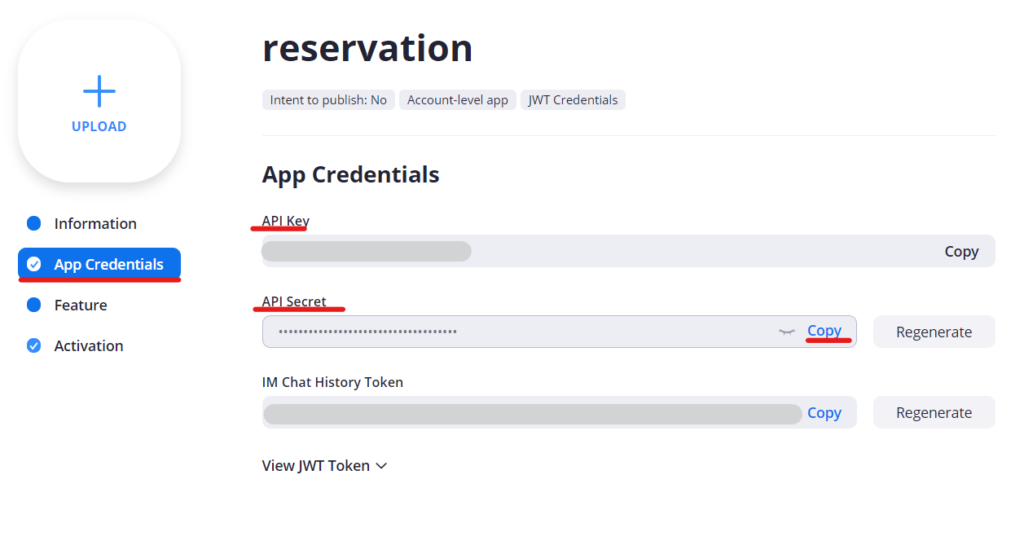
Registering API Key and Secret Key
Click [App Credentials] and enter the API Key and API Secret into Amelia.
Enter your AIP key and secret key
[Amelia] > [Settings] > [Integrations] > [Zoom]
Enter the Client Key and Client Secret in the fields below.
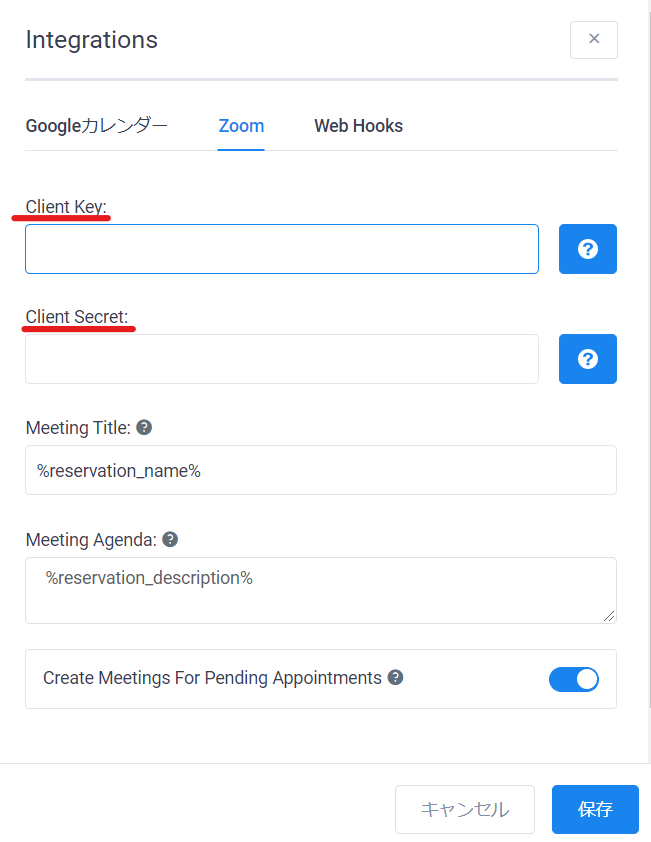
Meeting Title
Just like Google Calendar, you can set the email placeholders under [Notifications].
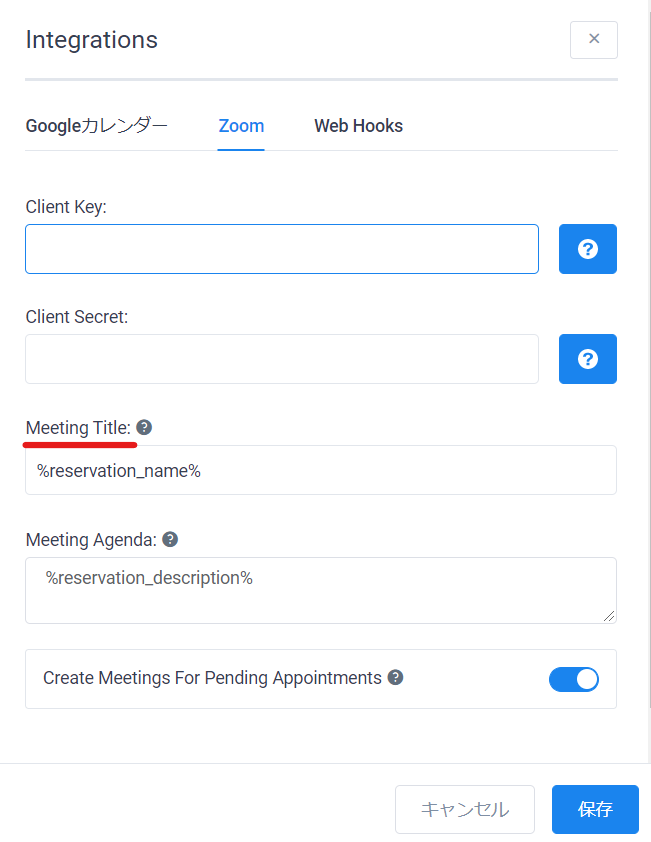
Meeting Agenda
This is the reservation details. You can also set this by selecting it from [Email Placeholder] under [Notifications].

Create Meeting For Pending Appotintments
This setting determines whether to issue a meeting URL for pending reservations.

This completes the synchronization with the Zoom app.
How to connect each employee to Zoom
Employees will need to configure additional settings in the Zoom App to connect to their respective Zoom accounts.
Access the Zoom App Marketplace again
The above URL is the user management page, so please log in to access it.
First, enter the required information.
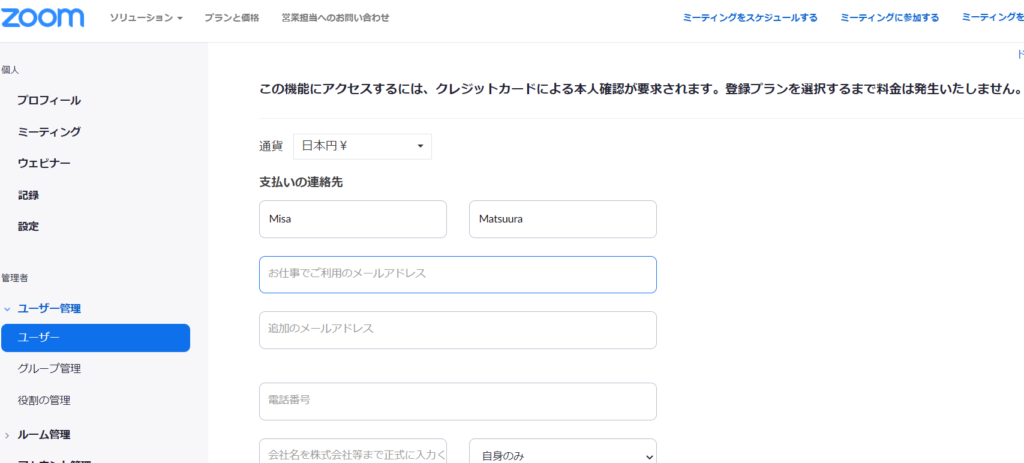
Once authentication is complete, you will be redirected to the user list page, where you can click Add User.
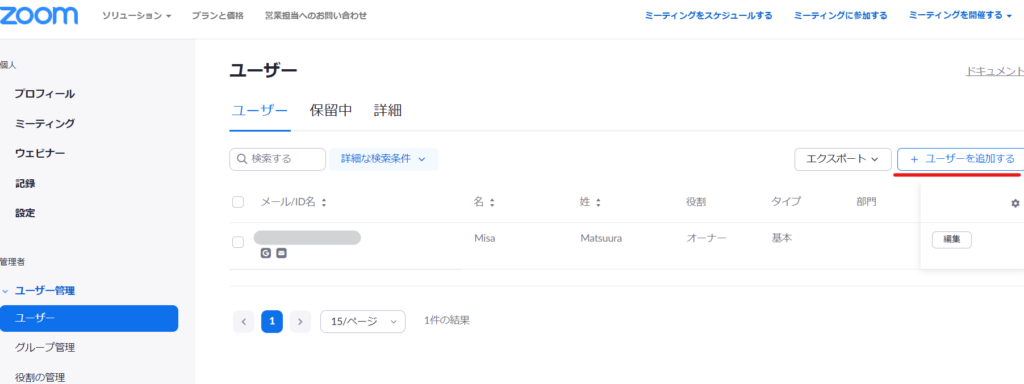
Add User
Add users.
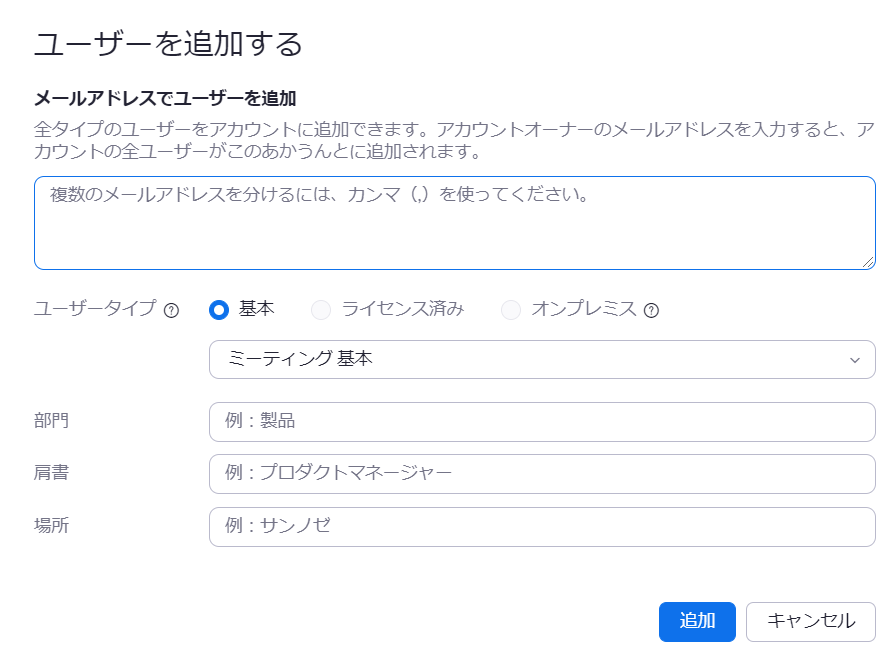
Once you have finished adding users, link your Zoom account in Amelia's employee settings.
Link your Zoom account with Amelia
Connect Zoom for each employee. [Amelia] > [Employee] Click the employee you want to set up.
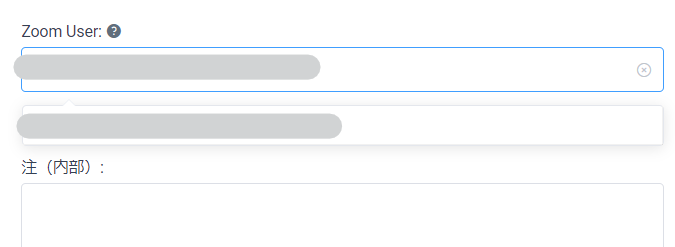
Select Zoom user
The user will be in the drop-down list called Zoom User, so select it and click [Save].
Send the zoom URL via email
By outputting the automatically generated Zoom URL in the body of the email, you can automate the process from issuing the Zoom conference URL to sending notifications.
【Amelia】> 【Notifications】 In the "Show Email Placeholders" section, enter the following:
- %zoom_host_url% - Host URL
- %zoom_join_url%-Customer URL
there is.
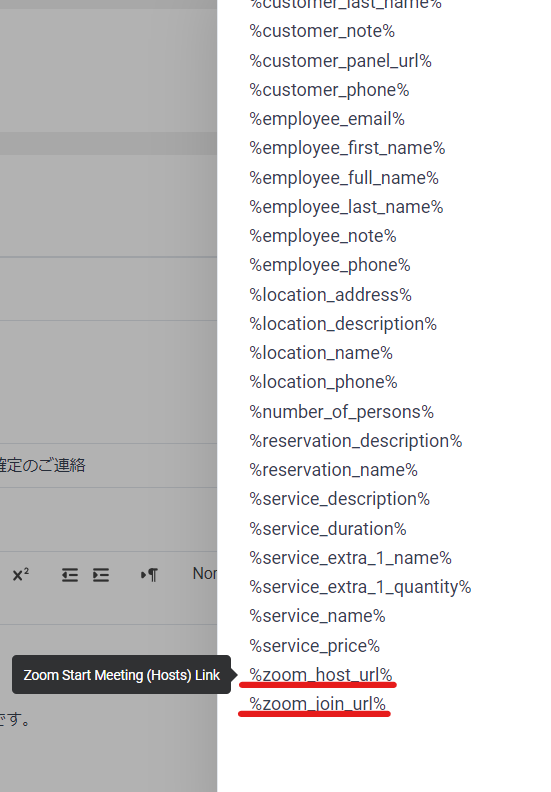
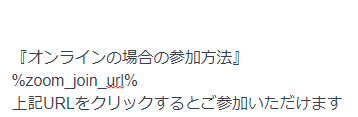
You can automatically send the Zoom URL by pasting the following into the body of the email.
Set up Zoom for your services and events
The Zoom option must be enabled for your service or event.
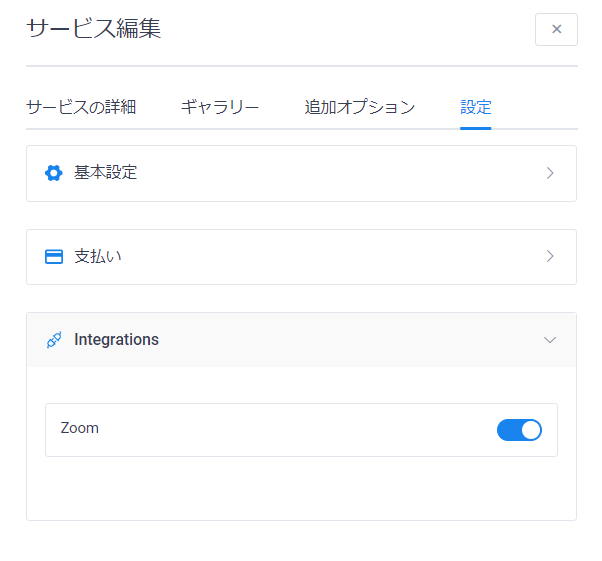
For services
Go to the service editing screen and turn Zoom ON under Integration in [Settings].
In the case of Event
When creating a new event or editing the event, expand the [Zoom User] drop-down list and select the Zoom user to be issued.
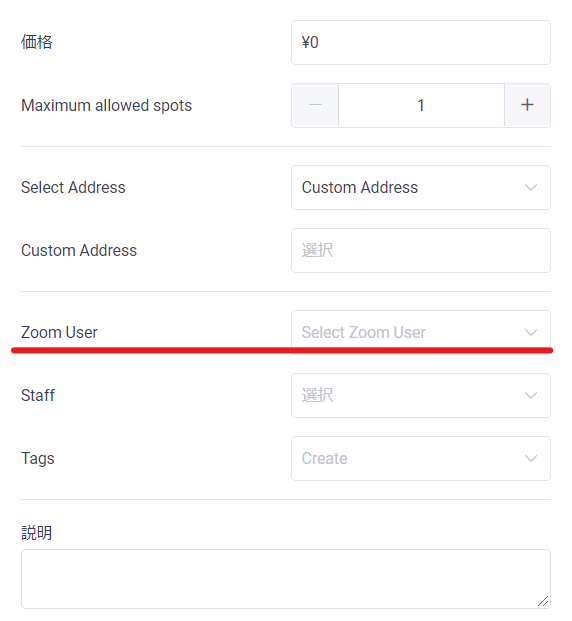
This completes the Zoom setup!
I think setting up Zoom is easier than setting up Google Calendar.
Released as soon as the next morning! Weekends and holidays are also available!
Super rush website creation plan
We offer a rush website creation plan for those who need a website in a hurry!
We can publish your content as soon as the next morning, even on weekends and holidays! If you have any questions, please check the details below!

Latest Articles
How to Enhance EEAT with WordPress | Settings and Design Improvements Necessary for AI-Driven Traffic
[2026 Latest] How to check the number of visits from generated AI using GA4's exploration function
Error message: Allowed memory size of 268435456 bytes exhausted (tried to allocate 14684160 bytes) Error: On Lollipop