How to create a website using WordPress/How to use plugins/No-code construction blog


")
5 security measures that a WordPress teacher seriously considered
At HanamiWEB Online School,
●Ask questions in real-time in the virtual study room!
●Ask as many questions as you want via chat!
●E-learning materials that you can learn as much as you want, 24 hours a day!
All included for just 2,500 yen/month!
A WordPress expert will carefully explain how to set up possible security measures for WordPress!
Recently, more and more businesses are moving online.
- Advance reservation before visiting
- Takeout advance reservation
- Online shop
- An online salon that delivers member-only content
I feel that there are more opportunities to collect member information rather than simply running a website with WordPress.
We will introduce the minimum security measures you should take to prevent information leaks or malicious files from being embedded in your system after an attack.
The following article introduces some actual cases of fraud.
Why is security necessary for WordPress?
On the website
- Unauthorized login to the administration screen, tampering with site information, or stealing information
- Attacks targeting vulnerabilities in WordPress, themes, and plugins
- Attacks that send large amounts of data at once
We need to come up with measures to deal with this.
Why is WordPress said to be more likely to be targeted than other websites such as homepages?
- 70% of the world's translations are made with WordPress, so the large number of users makes it easy to get the impression that WordPress is being targeted.
- The structure of all WordPress sites is the same (same login URL, same admin page URL, etc.)
- It's a free CMS and open source, so hackers can find vulnerabilities.
I think that this is the cause.
For example, let's say a group of hackers finds a vulnerability in WordPress. If they were to carry out the same attack on WordPress sites, which are used by 70% of the world's users, sites that neglect security measures would be attacked. It would be more efficient for hackers to find and attack vulnerabilities in WordPress than to find vulnerabilities in other CMSs, right? It's a case of "the more you attack, the more likely you are to hit something."
The WordPress source code is available for free and has an open license that allows anyone to use it and customize it as they like, which makes it easy for hackers to find vulnerabilities in WordPress.
Also, the file structure of WordPress is the same for everyone. Naturally, you install and use the same WordPress files. But that's where the problem comes in. The URL for the admin page is xxx.com/wp-admin, and the login URL is xxx.com/login.
To the domain (xxx.com) that you actually use
xxx.com/wp-admin
xxx.com/wp-login
Please try entering the following. Do you see the admin page or login page? (If you are using the Site Guard plugin for security, you probably won't see it.)
In the case of cases where a password is repeatedly attempted to break into a login, if you consider whether to attack when the login URL is known or to search for the login URL first, you would be more likely to attack a site where the login URL is known than a site where the login URL is unknown.
This does not mean that you should not use WordPress. We will explain the proper security measures and how to operate WordPress safely and securely!
Now, let's introduce some WordPress security measures so you can actually strengthen the security on your site!
SSL is required for websites. For more information on SSL,
Please refer to this.
Also, please refer to the following article for information on how to use xserver's unique standard security measures!
Install WordPress security plugin Site Guard
There are plugins that can enhance the security of WordPress.Site Guard】
Site Guard official website ↓↓
https://www.jp-secure.com/siteguard_wp_plugin/

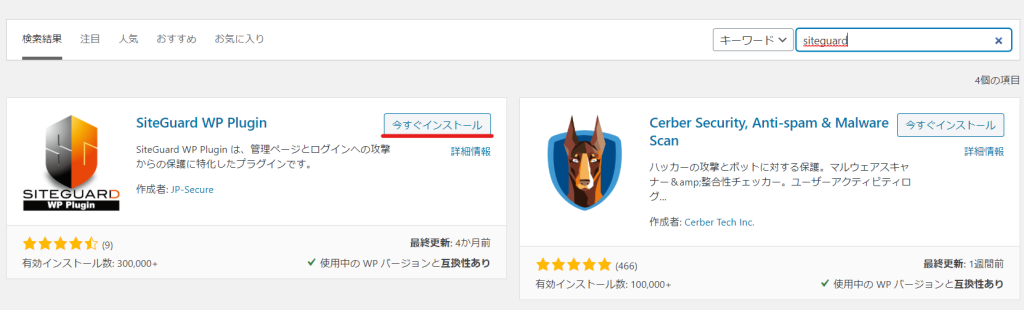
Search for [siteguard] when adding a new plugin in WordPress.
Click [Install now] and then [Activate].
1. Change the login URL to strengthen WordPress security
First, change the common WordPress login URL.
xxx.com/wp-login.php
If you add [wp-login] or [wp-login.php] to your own domain, such as xxx.com/wp-login.php, it will switch to the login screen.
Change the login URL using the Site Guard security plugin
I think it would be difficult to change the login URL by modifying the source code of worpdress, soSite Guard] plugin to change the WordPress login URL.
Check the login URL
Once you activate the Site Guard plugin, the login URL will change. If you have bookmarked your site or output the login URL using wp-login, please be careful.
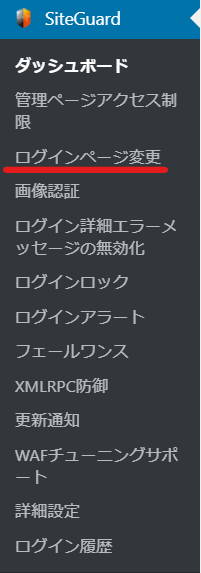
Check what the login URL has changed to. Click on [Change login page] in the [SiteGuard] item that was added after activating the Site Guard plugin.
How to set up the Site Guard security plugin on the login page change screen
- Set it to 【ON】. - It is set to ON by default.
- Changed login page name - Use the automatically generated login URL or specify the login URL with any string.
- Optional - If you leave it as it is, when you access wp-admin, it will redirect you to the login URL, so there is not much point in changing the login URL. Check this box.

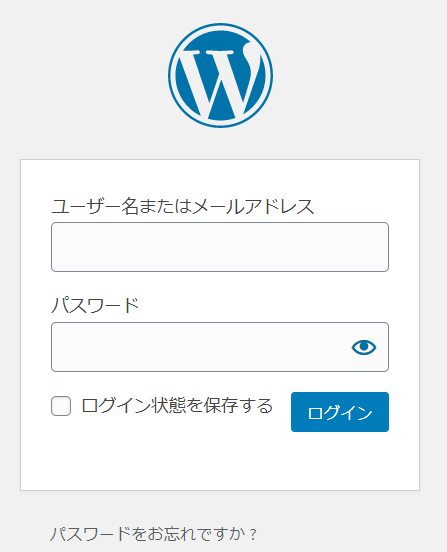
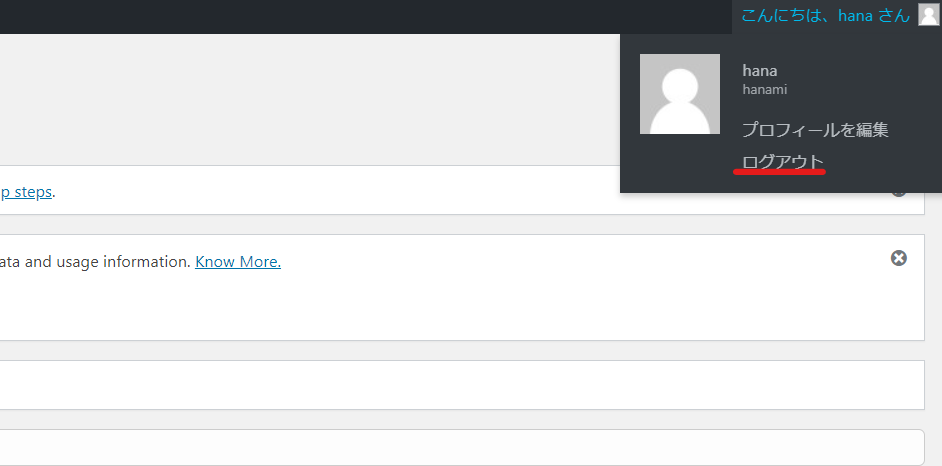
Try accessing the login URL.
Please log out and try accessing the URL you set.
Please bookmark the login URL displayed here or make a note of it.
You have now changed your WordPress login URL.
There are other settings you may want to make in Site Guard.
Add image authentication to the WordPress login screen using the Site Guard security plugin
The wordpress login URL has been changed, so it is no longer easy to access the login URL, but if someone still logs in, if they try to log in by attacking a large number of arbitrary passwords, if image authentication is enabled, they will not be able to log in unless they attack the password + image authentication, which further strengthens security.
Click [Image Verification] in the [Site Guard] plugin.

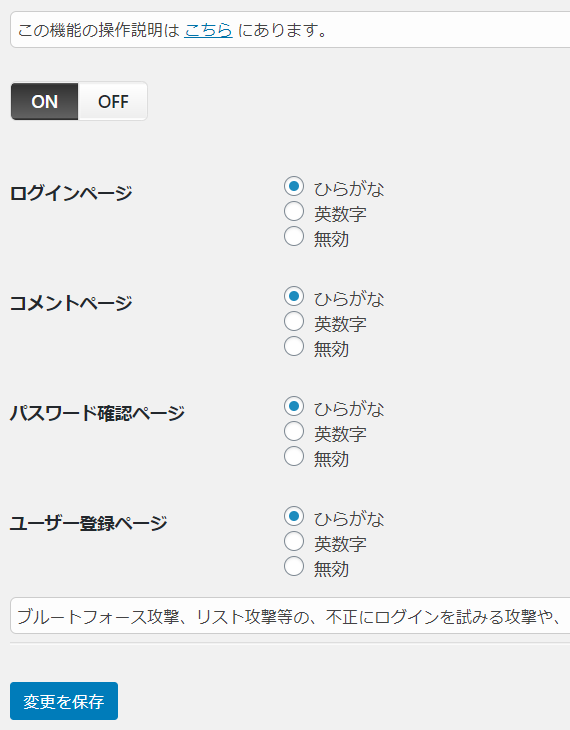
Turn on image authentication on the login screen
First, make sure the setting is set to [ON].
- Login page
- Comments page
- Password confirmation page
- User registration page
You can add image authentication using hiragana or alphanumeric characters.

Use the Site Guard security plugin to control unauthorized access to the wp-admin administration screen.
Like wp-login, the URL of the administration screen is also determined by wp-admin. When a user who is not logged in accesses wp-admin, a 404 error message "page not found" may be displayed.
This feature is turned off by default.
Click [Site Guard] > [Administration page access restriction]
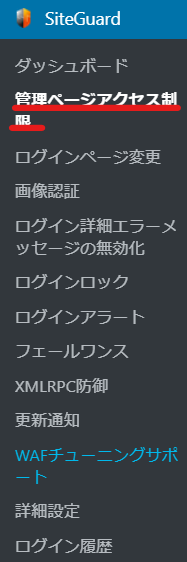
Enable the admin page access restriction function
Change it to [ON].
2. Apply basic authentication (password protection) to pages you don't want to allow access to
This time, I will explain using xserver.
- Login URL
- Management page URL
This page will perform basic authentication from the server.
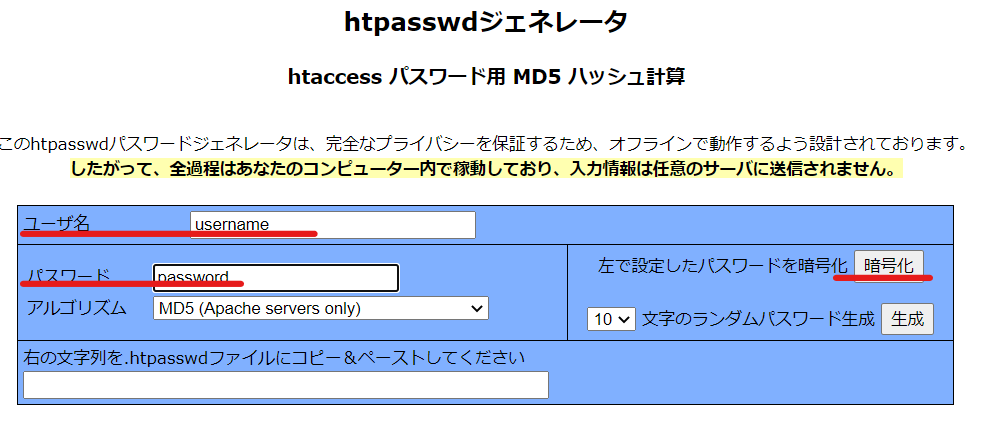
Generate htpasswd password
htpasswd generatorFirst, generate the htpasswd.
- Enter your username
- password
- encryption
Generate htpasswd using the procedure above.
The code will be generated
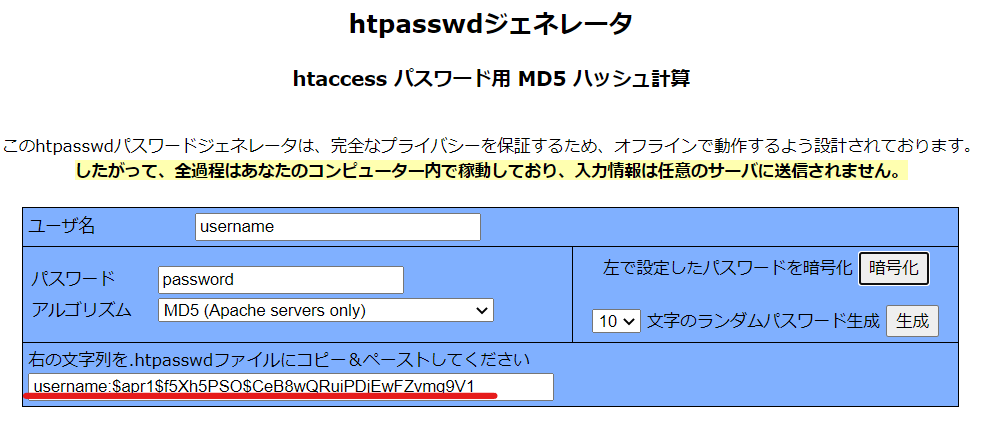
Create a .htpasswd file
Create a file called .htpasswd using Notepad or similar and enter the code you just generated. I used TeraPad this time.
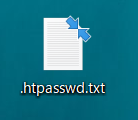
Copy and paste the information and save it as [.htpasswd].

If the file ends up with a text extension like .htpasswd.txt as shown in the image, rename it and delete the .txt part.
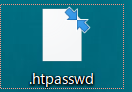
The following file formats are valid: You can rename the file after uploading it to the server.
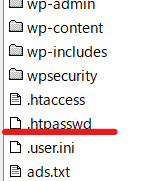
Upload .htpasswd in your file manager
The top level where WordPress is located. Upload .htpasswd to the level where the .htaccess file is located. Now you are ready to set the password for basic authentication.
Apply basic authentication using the .htaccess file
Download the .htaccess file at the same level and save it on your PC.
The .htaccess file is an important file for displaying a website. If you write it incorrectly, you may not be able to view the website, so be sure to save the unedited file on your PC.
In the unlikely event that something goes wrong, you can revert to the original state by uploading the unmodified .htaccess file.
Please write the following code before #BEGIN WordPress.BEGIN WordPressHowever you write it, there is a risk that it will be rewritten by an update or something.
AuthType Basic AuthUserFile /*Server path*/.htpasswd AuthGroupFile /dev/null AuthName "Please enter your ID and password" require valid-userAuthentication is added when accessing the login URL
Once you have set this up, an authentication screen will appear on the login screen.
You will then be prompted to enter your username and password. Once you have entered them, you will remain logged in with basic authentication until you close your browser.

3. View the log of access to the administration screen
Is there really no unauthorized access? You may be wondering. The Site Guard plugin also has an access log function.
By regularly checking the access log, you can detect any unauthorized access.
[Site Guard] > [Login History]

- Access date and time
- Access results
- login name
- IP address
- Login Screen Type
If you see a different IP address than usual or many unsuccessful attempts that you do not remember, please change your login password.

After this explanation, the WordPress security measures will be a little more difficult. I can also work with you in private lessons, so if you want to set it up but are worried or unable to do it alone, feel free to come and see me.inquiryplease.
Change file permissions
Files have restrictive capabilities called permissions.
- Read permission
- Write permission
- Execution permission
The combination of these three is determined by a three-digit number.
- Self - Administrator
- Group - All users who can use the server
- Others – Third parties
As you can see, the three digits from the left indicate your authority, the group's authority, and the authority of others.
- 7 - Write, read, and execute
- 6 - Readable and writable
- 5 - Readable and executable
- 4. Readable
- 0 - All added
The most commonly used permissions are
- 777 - Anyone can read, write, and execute
- 755 - Anyone can read and write, but only you can execute
- 666 - Everyone can read and write
- 644 - admin can read, group and others can only read
It's a little complicated, so it might be hard to understand.
How to change permissions
If you are familiar with FFTP, you can change it from there. This time, we will show you how to change it from the xserver administration panel.
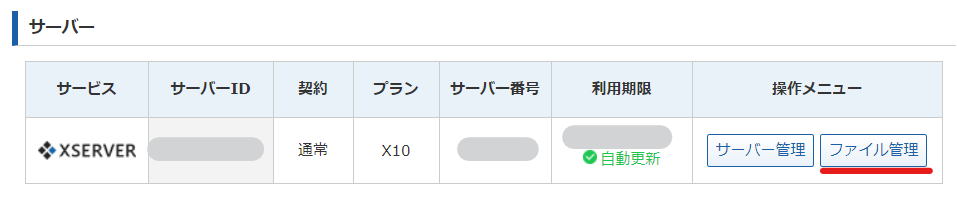
Log in to the xserver account panel. Click [File Management].
Please note that this is separate from the server administration panel.
You will see a list of files on the server, so click on the [Domain] you want to configure. After clicking on the domain, click on [public_html].
.htaccess file is 606
Some of you may have operated the .htaccess file to enable always-on SSL. It is an important file for operating the server. If someone writes to it without permission, it can be attacked. The setting is that the administrator and others can read and write, but the group does not have any permissions.
First, I will explain how to change the permissions of the .htaccess file using an example.
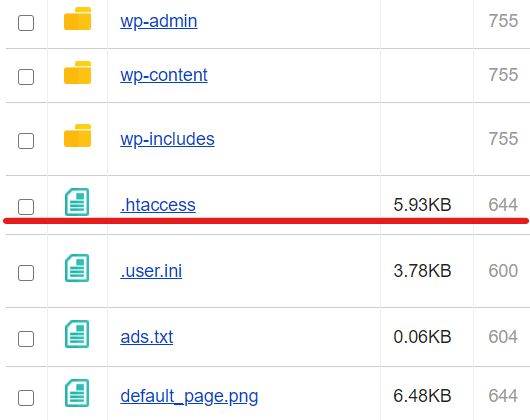
Default is 644
The [.htaccess] file is located directly under [public_html] or directly under the folder where WordPress is installed.
The default is 644, which means that the user can read and write, but the group and others can only read. Set this to 0 to give the group no permissions, and change it to 604.
Check the .htaccess file
The procedure for changing file permissions is the same for all files. If you want to change the permissions of another file, check the file or directory you want to change.
Click Change Permissions
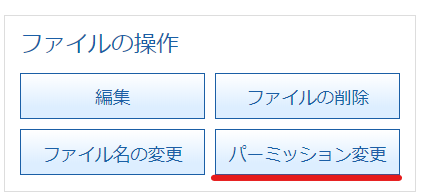
Enter the permissions you want to set.
Enter the new permissions you want to set and click [Change Permissions] to complete the changes.

wp-config.php file is 400
The wp-config.php file contains information such as database login information. This is also a very important file for operating WordPress.
It is located directly below the file containing wordpress, in the same hierarchy as the wp-admin/wp-content/wp-include folder.
If it is not 400, change it. Only administrators can read it, and all others can append it.

Other directories (folders) are 705
In addition, folders that can be seen in the file manager, called directories, are set to 705. The administrator is given all permissions, but the group is denied all permissions. Others are only allowed to read and execute, so the 705 setting is used.
Set [themes] and [uploads] to 707.
Other files are 604
Change each file in the directory to 604. The administrator has read and write permissions, and the group has none. Others have read-only permissions.
4. Enhance security with .htaccess files
The .htaccess file is a file that controls the files and pages on your server.
When you first install WordPress it will look like this:
# BEGIN WordPress RewriteEngine On RewriteBase / RewriteRule ^index\.php$ - [L] RewriteRule ^index\.rdf$ /feed/rdf/ [L,R=301] RewriteCond %{REQUEST_FILENAME} !-f RewriteCond %{REQUEST_FILENAME} !-d RewriteRule . /index.php [L] # END WordPressIn fact, the .htaccess file is a very delicate file.
- I erased one character by mistake.
- Writing in full-width characters
This can cause your site to not display properly. Before modifying the .htaccess file, be sure to download the file to your PC, and in the unlikely event that something goes wrong, upload it so that you can restore it to its original state before proceeding.
Refuse to display file lists
For example, when you access a directory, a list of files may be displayed. You may be able to see what files exist on the website. Add the following to the .htaccess file.
Options -IndexesJust add one line.
In the case of WordPress, the list is often not output. This setting may not be necessary.
wp-config.php andwp-cron.php Restrict access to
The wp-config.php file contains database login information and is vulnerable to attack. In addition, we will add access restrictions to wp-cron.php, which is used for time-based processes such as posting and update notifications. We have changed the permissions for the wp-confing.php file, but we will also add further access restrictions. Add the following to the .htaccess file.
order allow,deny deny from all5. Hide different versions of WordPress
Anyone can check the version of WordPress. Also, by looking at the source code, it is possible to see whether the site is using WordPress, what plugins are being used, and what theme is being used.
If this information leaks to the outside, and it becomes clear that you are using outdated versions of WordPress, plugins, or themes, they may exploit these vulnerabilities in an attack.
Add the following to the function.php of the theme you are using.
Go to function.php
Directly under the file where WordPress is installed
The installed theme files are contained in [wp-config] > [themes].
Go to the activated theme file and edit [function.php].
Before editing, please click [functino.php] to free load the file onto your PC.
To change it, check the checkbox and click the [Edit] button.

Enter the code
Enter the following code at the bottom of function.php:
// generator remove_action( 'wp_head', 'wp_generator'); // rel="shortlink" remove_action( 'wp_head', 'wp_shortlink_wp_head', 10, 0 ); // WLW(Windows Live Writer) wlwmanifest.xml remove_action( 'wp_head', 'wlwmanifest_link'); // RSD xmlrpc.php?rsd remove_action( 'wp_head', 'rsd_link'); // Removes the WordPress version number (e.g. ?ver=4.4.2) added to JavaScript and CSS. function remove_src_wp_ver( $dep ) { $dep->default_version = ''; } add_action( 'wp_default_scripts', 'remove_src_wp_ver' ); add_action( 'wp_default_styles', 'remove_src_wp_ver' );Some WordPress security settings are a little difficult, but they are essential for anyone building a membership site or online shop!
This involves server-side operations, so if you find it difficult to set up security settings by yourself, feel free toinquiryPlease feel free to contact us! Online private lessons are also available!
How to use the SiteGuard plugin
If you want to strengthen your security with a plugin, we recommend SiteGuard! Here is a video guide on how to set it up!
Released as soon as the next morning! Weekends and holidays are also available!
Super rush website creation plan
We offer a rush website creation plan for those who need a website in a hurry!
We can publish your content as soon as the next morning, even on weekends and holidays! If you have any questions, please check the details below!

Latest Articles
How to Enhance EEAT with WordPress | Settings and Design Improvements Necessary for AI-Driven Traffic
[2026 Latest] How to check the number of visits from generated AI using GA4's exploration function
Error message: Allowed memory size of 268435456 bytes exhausted (tried to allocate 14684160 bytes) Error: On Lollipop