How to create a website using WordPress/How to use plugins/No-code construction blog

[SEO measures] Explaining the steps to use xserver's free proprietary SSL! November 2019
At HanamiWEB Online School,
●Ask questions in real-time in the virtual study room!
●Ask as many questions as you want via chat!
●E-learning materials that you can learn as much as you want, 24 hours a day!
All included for just 2,500 yen/month!
I performed SSl on a site that is run on xserver.
![]() Run your homepage with xserver
Run your homepage with xserver![]() I use WordPress
I use WordPress![]() Considering the free custom SSL provided by xserver
Considering the free custom SSL provided by xserver
The settings were made under the above conditions.
If you are considering enabling SSL on your xserver, please use this as a reference!
xserver management screen
xserver SSL configuration
Click "SSL Settings"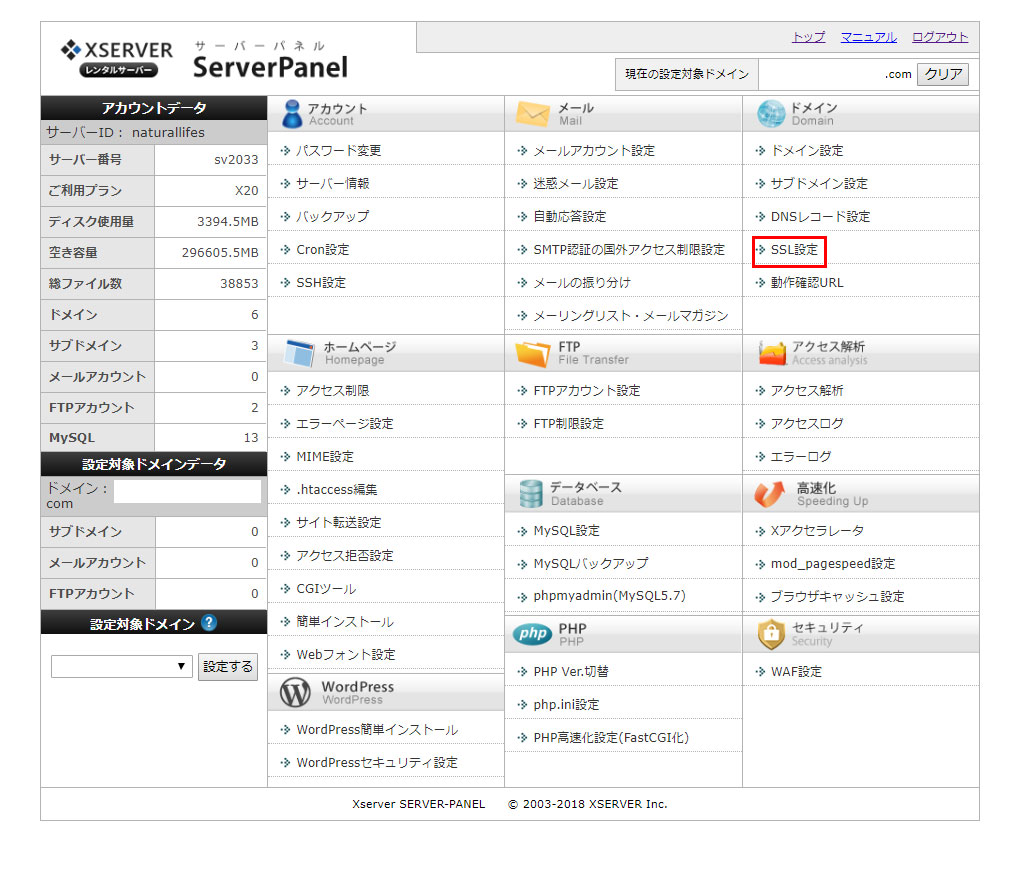
xserver Add your own SSL settings
Click "Add custom SSL settings"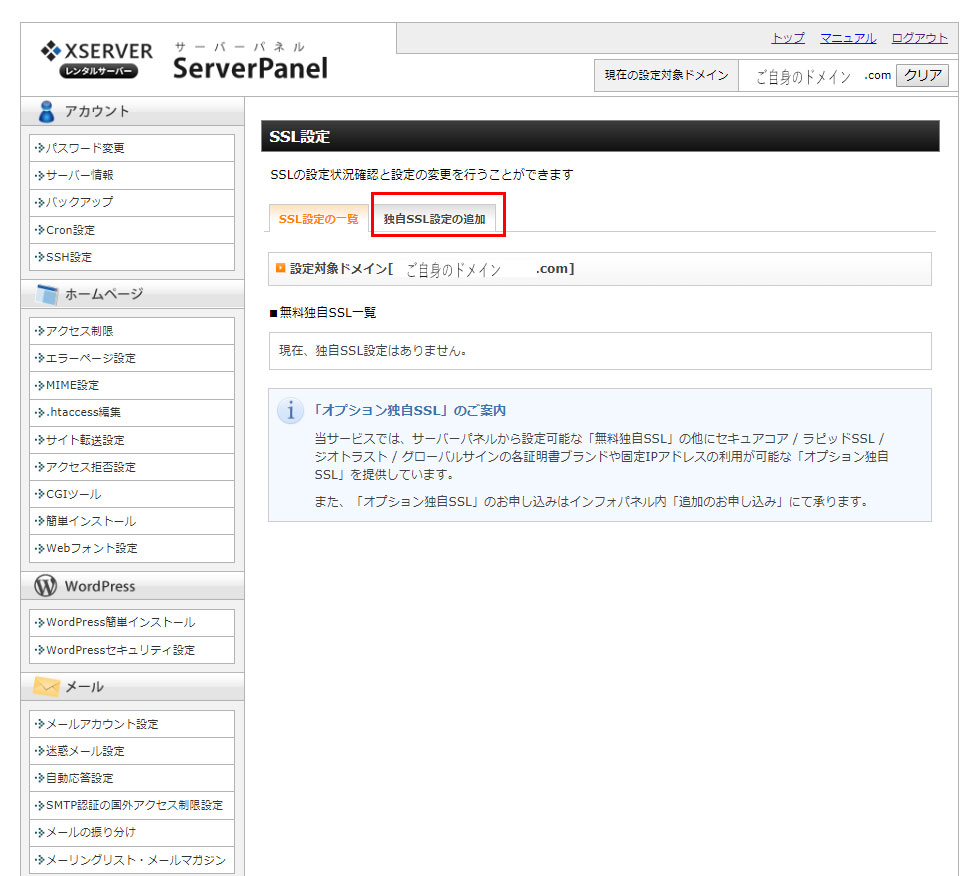
Add your own SSL settings to xserver
Select the URL address to which you want to add a free custom SSL and click "Add custom SSL settings"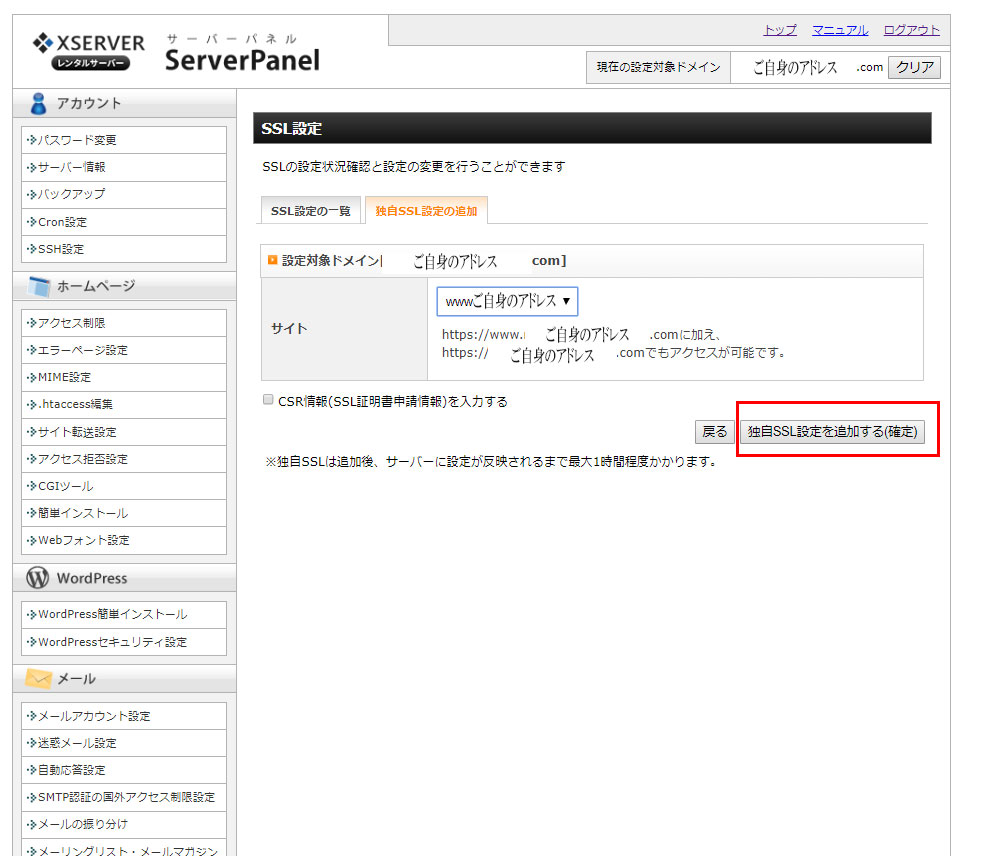
xserver unique SSL setting application in progress
Your custom SSL settings will be applied in no time. Please wait about an hour until it is reflected.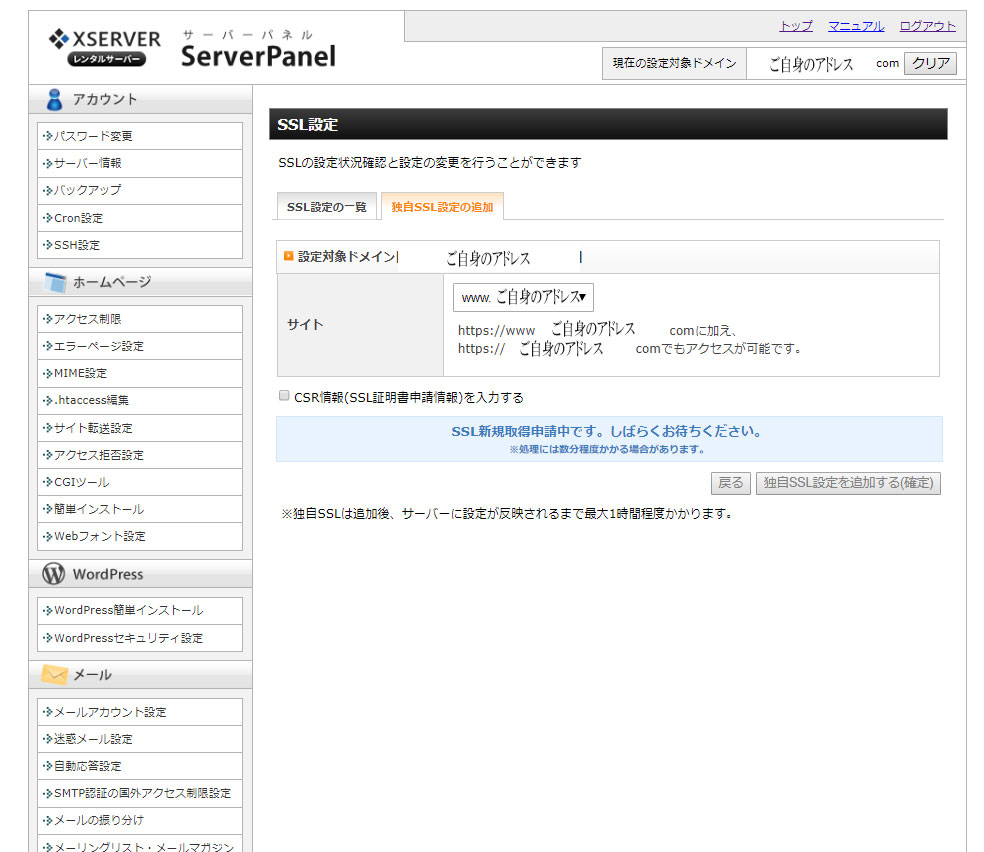
Once you have completed the free SSL setup on xserver
How can I check if the SSL settings are set up?
If you have been accessing the site at →→http://hanami-web.tokyo.jp until now, try accessing it at 【https://hanami-web.tokyo.jp】 and if the site displays correctly, then you're good to go.
In this case, please check whether the URL including www, such as [https://www.hanami-web.tokyo.jp], is displayed.
Once your site is displayed correctly at these two URLs, you will need to edit the .htaccess file.
Redirect to SSL site using .htaccess
If you write the .htaccess file incorrectly, a fatal error will occur and your site will not be displayed, so first make a backup.
①Download the .htaccess file on the site.
②Copy the downloaded files so that there are two files on your computer.
③You will probably have two files, one called .htaccess and one called .htaccess copy, so open the .htaccess file and add a redirect.
It is written like this.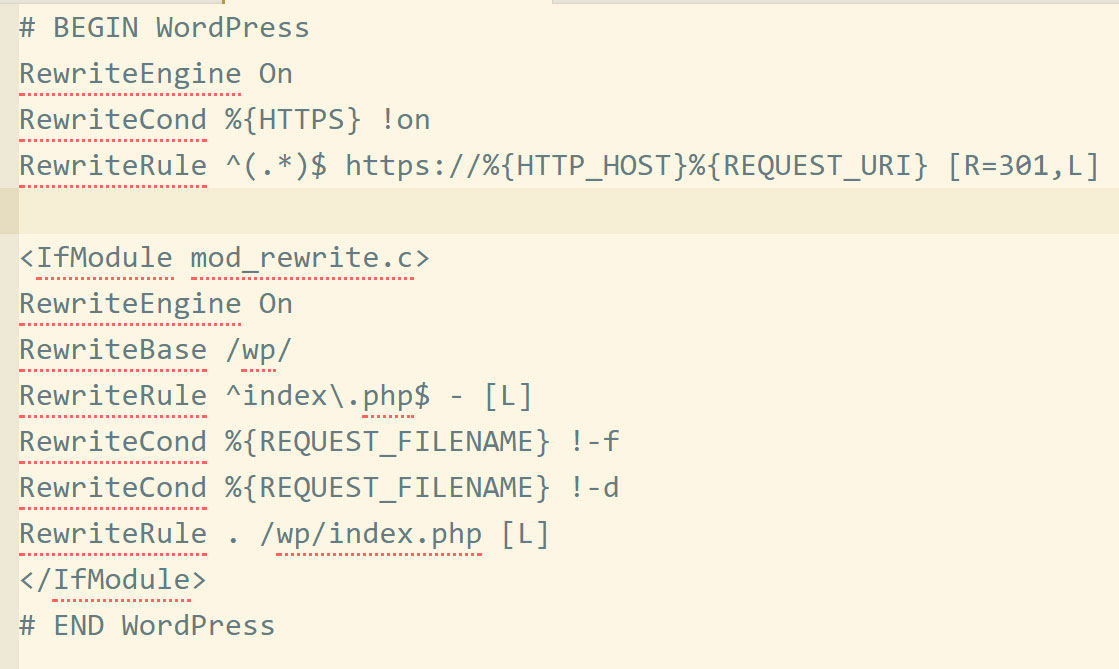
④Upload it to the server and overwrite the original .htaccess file to complete the process.
Setting in WordPress admin screen
In the left sidebar of the WordPress admin screen, go to [Settings] > [General Settings] and change [WordPress Address] and [Site Address] from http to https.
Finally, save the file.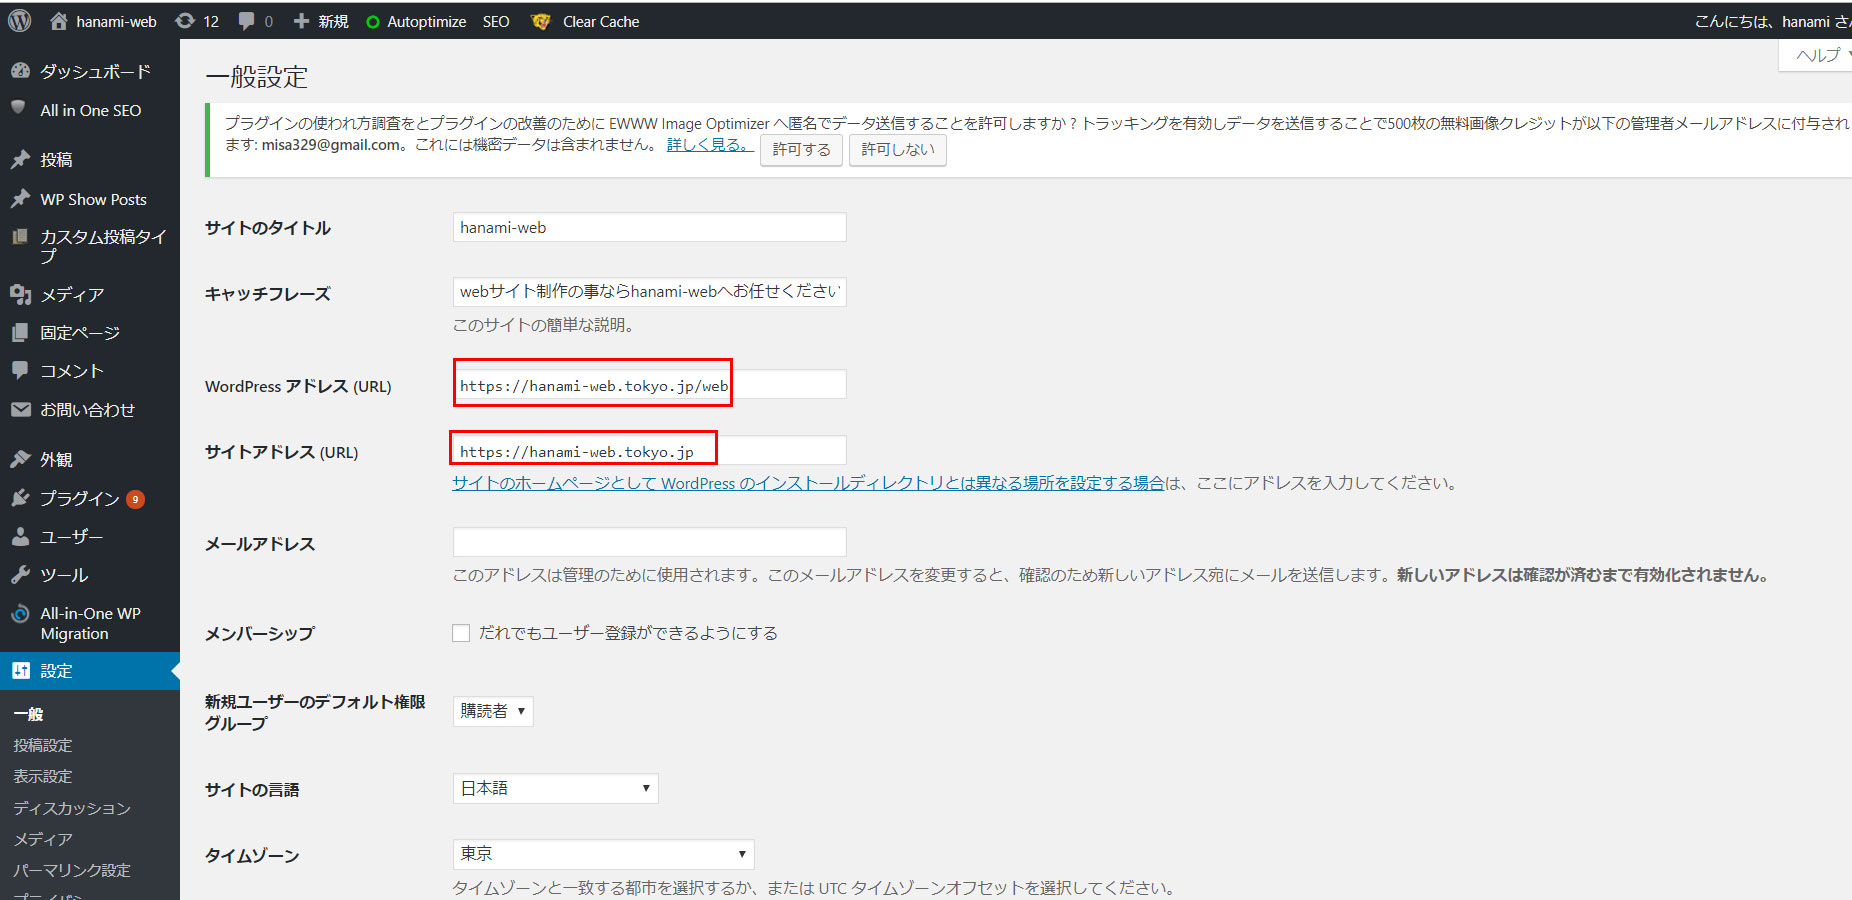
Log in
Once saved, you will be redirected to the WordPress login screen, so enter your usual WordPress login username and password to log in and you're done!
[New service] Server migration service in as little as 5 minutes
Xserver has launched a service that allows individuals to easily transfer servers in as little as five minutes. Recently, rental servers have tended to place importance on ease of use for users.
Good news for those who are having trouble with server migration!
Finally
Since this involves editing .htaccess, it is not recommended for those who are not confident in using computers.
In this regard, Sakura Rental Server provides a free SSL plugin, and you can easily enable SSL by activating the plugin.
As expected, for beginners, we recommend the cheap and easy-to-use Sakura rental server.
How to get started with WordPress! First, compare hosting services!
Security settings you must make after switching to Always-On SSL
After switching to Always-On SSL, be sure to strengthen your security settings!
Released as soon as the next morning! Weekends and holidays are also available!
Super rush website creation plan
We offer a rush website creation plan for those who need a website in a hurry!
We can publish your content as soon as the next morning, even on weekends and holidays! If you have any questions, please check the details below!
Latest Articles


