How to create a website using WordPress/How to use plugins/No-code construction blog

Measuring your thank you page with goals
At HanamiWEB Online School,
●Ask questions in real-time in the virtual study room!
●Ask as many questions as you want via chat!
●E-learning materials that you can learn as much as you want, 24 hours a day!
All included for just 2,500 yen/month!
Do you measure how many inquiries you receive per month, which pages people view before making an inquiry, and which paths lead to the most dropoffs?
Using Google Tab Manager, you can set up GA4 conversion measurement without any coding.
Recommended for these web managers
- I want to increase the number of enquiries
- What page did you visit before contacting us?
- I want to improve the page before I contact you.
This is an explanatory article recommended for web managers who have such concerns!
Differences from the goal settings available in Universal Analytics
The goal setting that exists in Google Analytics Universal Analytics does not actually exist in GA4. Therefore, we will use Google Tag Manager to set up conversions so that we can measure goal conversions.
In GA4, conversion rate cannot be measured unless conversion (old goal) is set! It is actually a very important setting.
Pay attention to when conversions occur
Please note that in Google Analytics' Universal Analytics, even if multiple conversions occurred during a single visit, they were counted as one, but in GA4, this has changed to counting one conversion as one.
If the same person has two or three conversion-related events, they will all be counted!
First of all, what is conversion?
For those of you who are not sure what conversion is, here is a detailed explanation.
- There was an inquiry
- There was a request for information
This indicates that the site's goal has been achieved. The specific conversions we have set are
- When the inquiry was completed and the thank you page was displayed
- When a request for information was made and a thank you page was displayed
is set as the conversion.
Explains how to set up conversions using Google Tag Manager
Now, I will explain how to set up conversions using Google Tag Manager. Log in to Google Tag Manager.
Trigger Settings
First, set the trigger. Click Trigger on the left sidebar.

Click [New] in the upper right corner to create a new trigger.

Give it a meaningful name and proceed with creating your trigger.
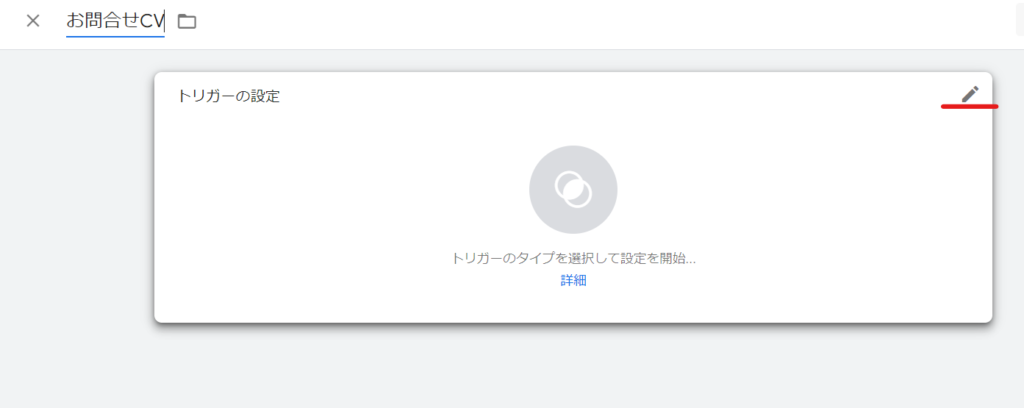
Trigger type: DOM Ready
For Trigger type, select Link Only.

Some DOM Ready events
The trigger is when the thank you page is displayed.
- Page Path
- include
- (Thank you page URL)

Once you have completed the settings, click Save.
Tag configuration
Next, we will set up tags. Click Tags on the left sidebar.

Create a new tag by clicking [New] on the far right.
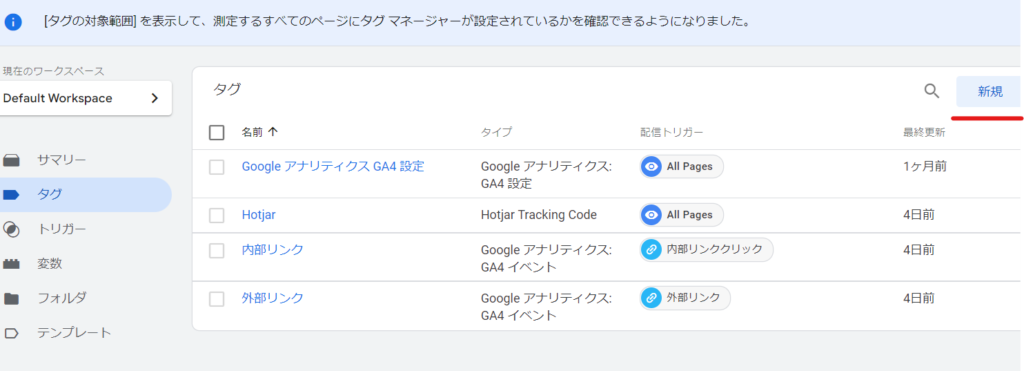
Give it a name
Give it an easy-to-understand name and create a tag.
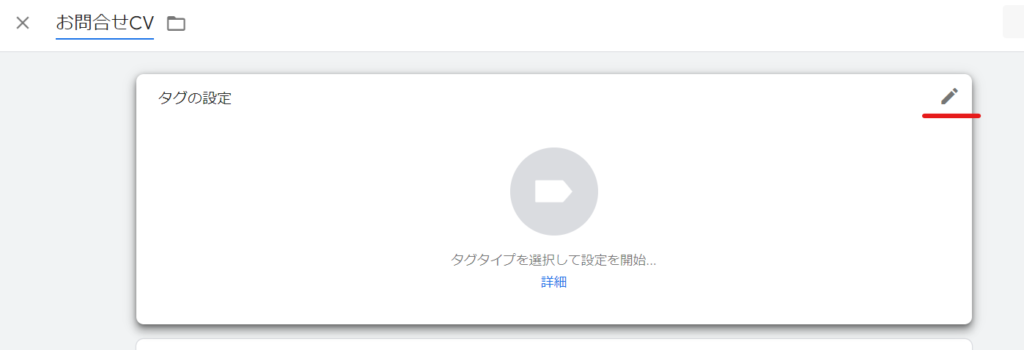
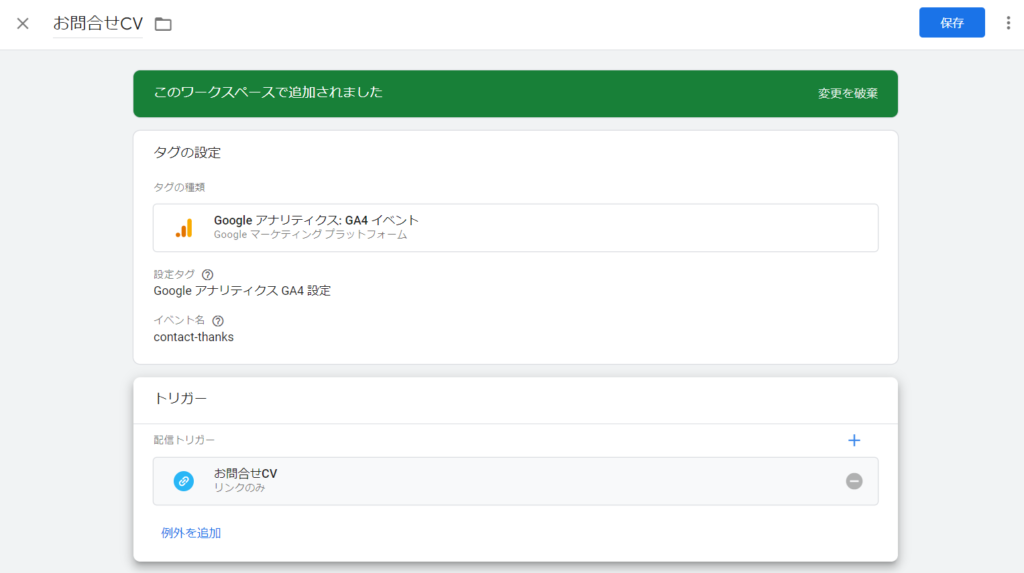
Tag Type: GA4-Event
For Tag Type, select GA4 Event.

Configuration Tags
Select [Google Analytics GA4 Settings] as the setting tag.

event name
You can choose any name that is easy to understand. In this case, I named it [contact-thanks] because I want to use the thank you page for inquiries as a conversion page.

Setting up triggers
First, select the trigger you have set up and set it.

Finally Save
Once you have completed the settings, click Save.
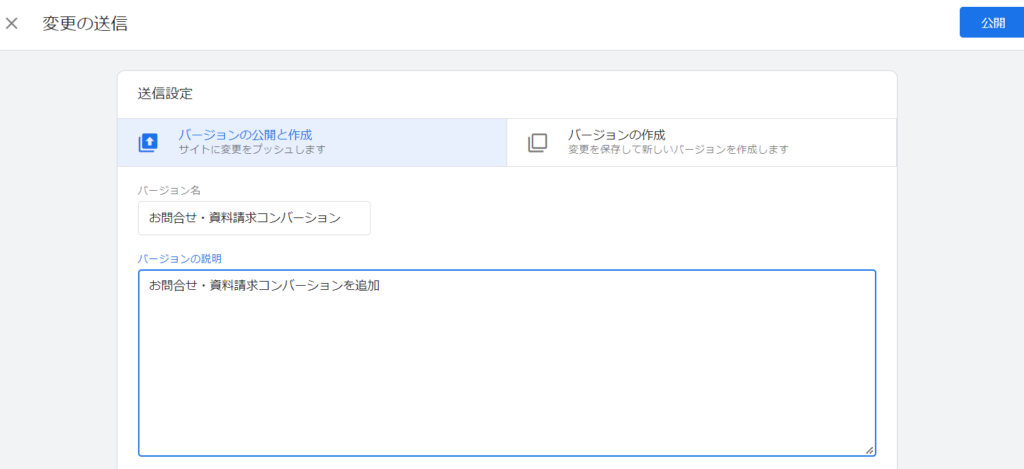
Release
Finally, click the Publish button to publish it.

Make a note of what changes you made and publish it.
Setting up GA4
We will continue with the settings in GA4.
Click [Settings] from the GA4 admin screen.

Event Creation
Go to Events and create a new event by clicking on [Create Event].

create

Enter event information
- Custom event name - enter your own name
- Parameter - event_name
- Operator - Equals
- Value - Enter the event name you gave it in Google Tag Manager
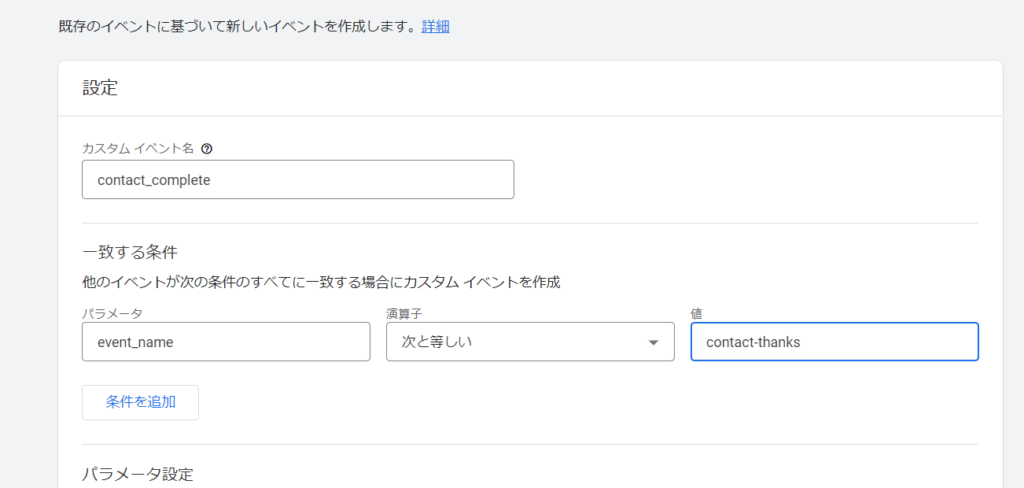
When creating a tag in Google Tag Manager, I gave the event name [contact-thanks].

Finally, click the [Create] button.
Conversion Creation
Once you've created your events, click Conversions > New Conversion Event to create your conversions.
The conversion "purchase" was included by default.

Conversion event name
Give the conversion event a name. Enter the event name you created in the previous event.

Once you turn on the Mark as conversion switch, you're done.

summary
Now you can measure conversions for specific pages in GA4!
It may take up to 48 hours for the measurement to start, so please wait a little while until it starts.
Released as soon as the next morning! Weekends and holidays are also available!
Super rush website creation plan
We offer a rush website creation plan for those who need a website in a hurry!
We can publish your content as soon as the next morning, even on weekends and holidays! If you have any questions, please check the details below!
Latest Articles


