How to create a website using WordPress/How to use plugins/No-code construction blog


")
How to set up the free heatmap Microsoft Clarity
At HanamiWEB Online School,
●Ask questions in real-time in the virtual study room!
●Ask as many questions as you want via chat!
●E-learning materials that you can learn as much as you want, 24 hours a day!
All included for just 2,500 yen/month!
We will explain how to connect Microsoft Clarity, a completely free heatmap tool, to your WordPress site using Google Tag Manager.
What is Microsoft Clarity?
While many heatmaps are basically free, but require a fee if you have a large number of visitors, Microsoft Clarity is attracting attention as a completely free heatmap tool.
- Know where to click
- Know where to view
- Recording function allows you to see the user's real movements
- Link with Analytics to get an overview of your access analysis
Even though it has all these features, it's free!
How to set up Clarity using Google Tag Manager
Using Google Tag Manager, you can easily connect to Clarity without writing any code, so I always set up Google Tag Manager before installing Clarity.
Connect your WordPress site to Google Tag Manager
First, connect your WordPress site to Google Tag Manager.
The following blog post explains how to connect your WordPress site to Google Tag Manager without any coding.
→How to Integrate Google Tag Manager with Your WordPress Site
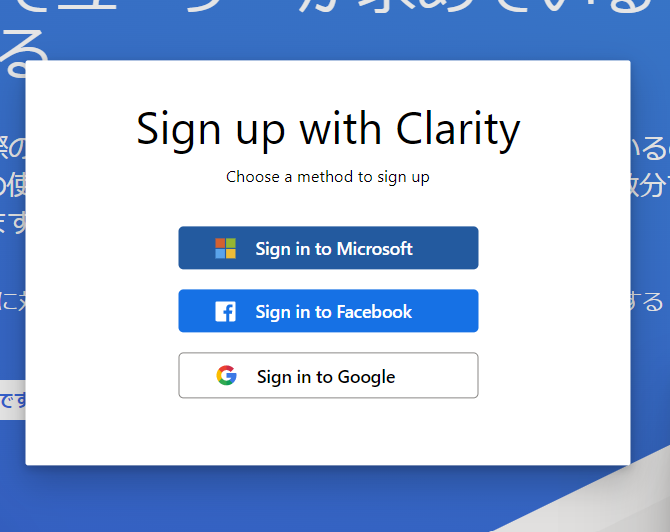
Log in to Microsoft Clarity
Click the "Sign up is free" button to create a new account.
Since you will want to set up site measurement via Google Tag Manager, it will be much smoother if you create a Clarity account with your Google account.
Project Creation
Create a new project for the site you want to measure.
- Name – Enter a friendly identifying name
- Website URL – Enter your domain as shown in the example

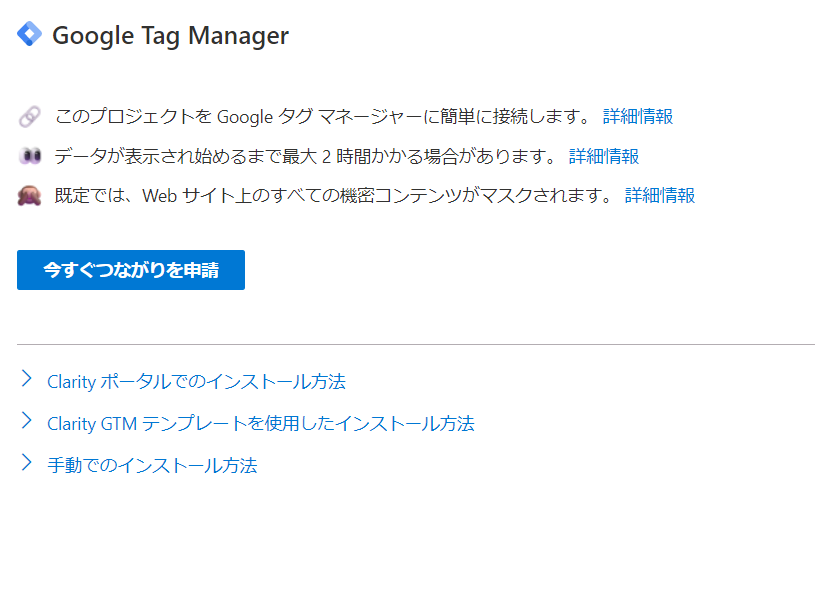
Connect to your site with Google Tag Manager
When you create a project, there is an option to install using Google Tag Manager, which should be marked as [Detected]. You can connect from here. Click [Start Setup].

Apply to connect now
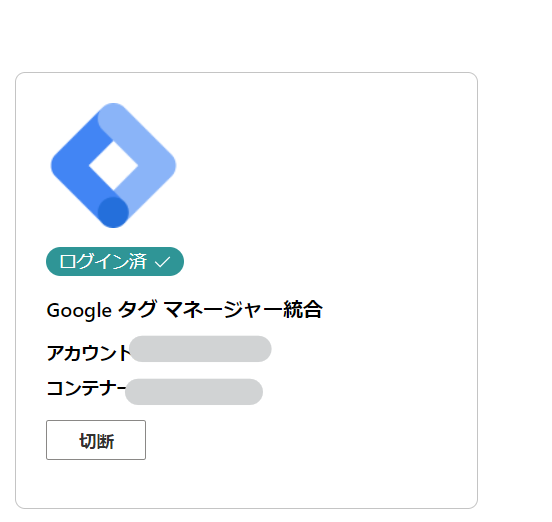
- GTM Account
- GTM Container
Select to connect to a previously created GTM account.

Setup is complete.
Analytics integration
We will continue to link with Analytics. Click [Get Started].
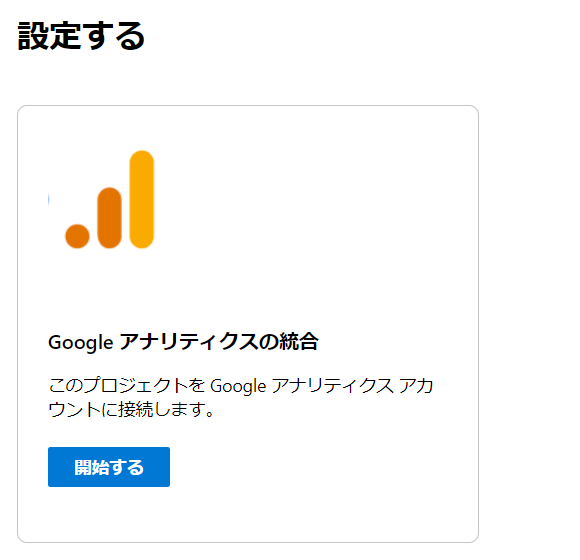
Select the Analytics account you want to connect to. Make sure you connect to the one that is marked as GA4.
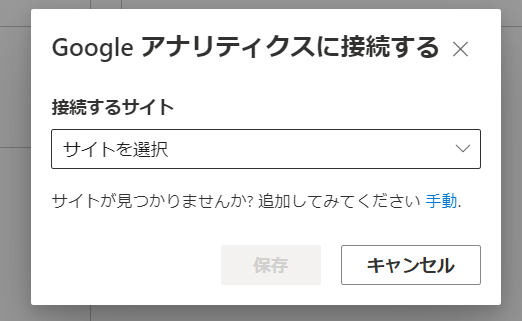
Connection complete.

Introducing the main features of Clarity
Here are some of Clarity's key features:
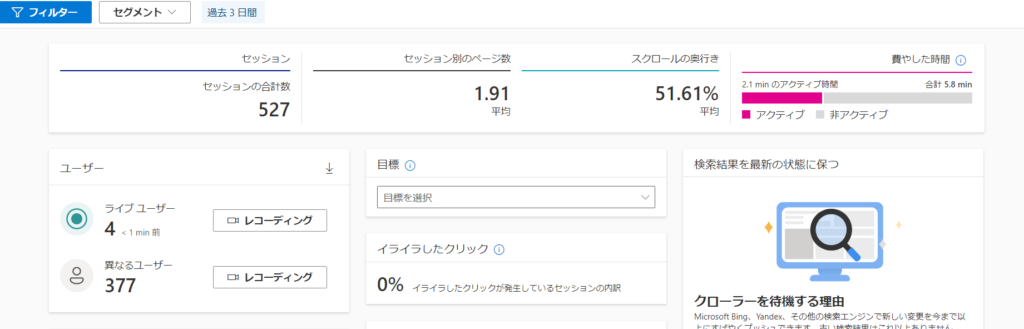
Clarity Dashboard
You can also find out the number of users currently accessing your site in real time. It also shows you which pages are most viewed and detects errors.
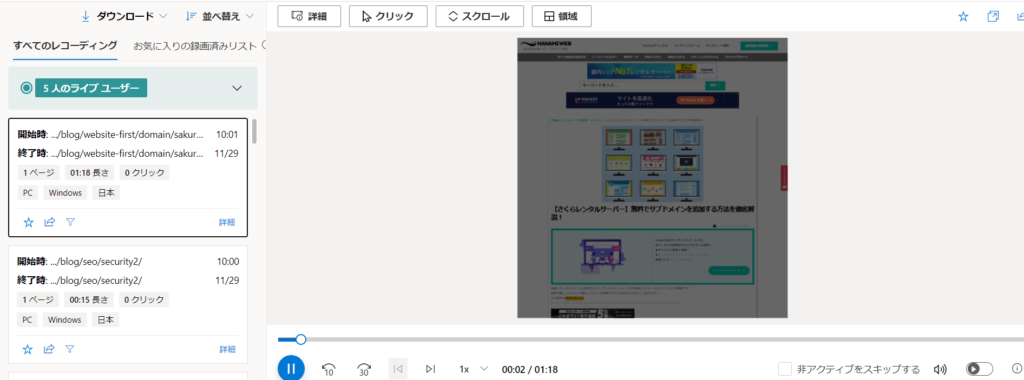
Clarity Recording Function
User actions are recorded. Using this function, you can check what the actual user was doing.
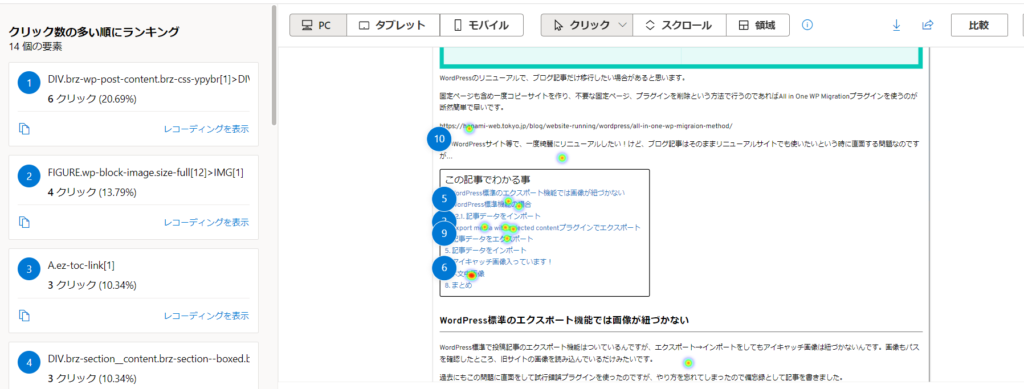
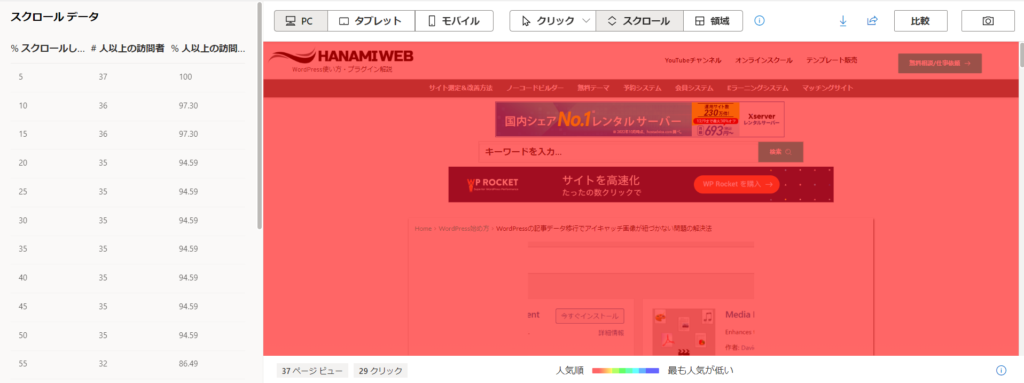
Clarity's Heatmap Feature
Check where you click
Check the scroll rate
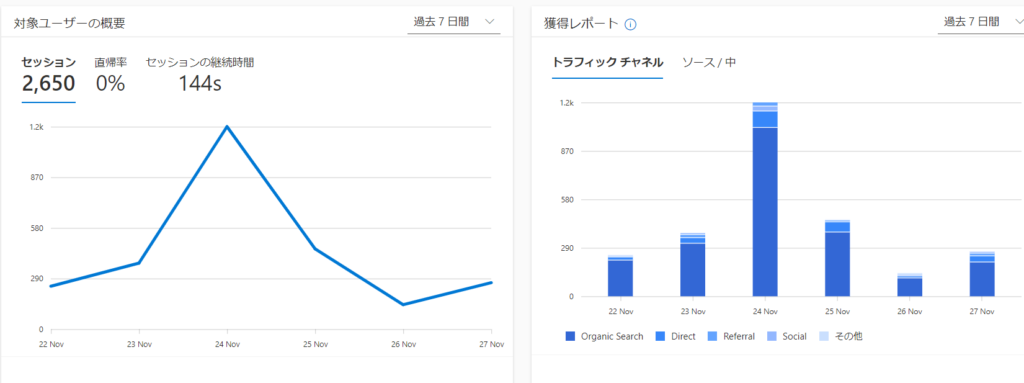
Clarity Analytics Data
You can check the number of sessions, referring channels, popular pages, number of sessions by country, and number of sessions by device.
summary
By using heat maps, you can efficiently make hypotheses about which parts of a page need improvement and make improvements.
There is no 100% correct method, but I think it is more efficient than just trying to improve things haphazardly!

We are available on weekends and holidays!
Please contact us if you have any problems with your website!

- Unable to log in to WordPress
Malware infection?
- The homepage suddenly stopped displaying!
- A PHP error is occurring.
We also offer support on weekends and holidays for those who need assistance.
If you are in a hurry, please call us now at 03-6694-7024.
Latest Articles
A PHP error is displayed on my WordPress site, preventing the site from displaying (wp-includes/block-patterns.php on line 38).
Nerima Ward: Ranked 2nd in website creation | Explanation of how to create a website that gets cited by AI
What is website update outsourcing? A clear explanation of costs, market rates, and how to request their services.