How to create a website using WordPress/How to use plugins/No-code construction blog


(Updated for 2022) Emails created with xserver are being assigned to spam
At HanamiWEB Online School,
●Ask questions in real-time in the virtual study room!
●Ask as many questions as you want via chat!
●E-learning materials that you can learn as much as you want, 24 hours a day!
All included for just 2,500 yen/month!
We received a consultation from a client who said that emails sent through a WordPress contact form (in this case, Contact Form 7) were always being sorted into the spam folder.
Email address created with xserver
私の場合、hanami-web.tokyo.jpというドメインを利用しているので、info@hanai-web.tokyo.jpなどxserverで作成してお問い合わせフォームなどで利用をしています。
I think many people use email addresses created on this server to send emails, but if they are identified as spam they won't reach the customer.
Until recently, this issue was resolved by configuring SMTP in WordPress, but this article explains a slightly more advanced configuration method for those who are unable to resolve the issue with just the SMTP settings.
(Overall flow) Settings to prevent emails from being classified as spam
- Login to the xserver administration panel
- Check host name and IP address
- DNS record settings
Do the above.
Access to xserver
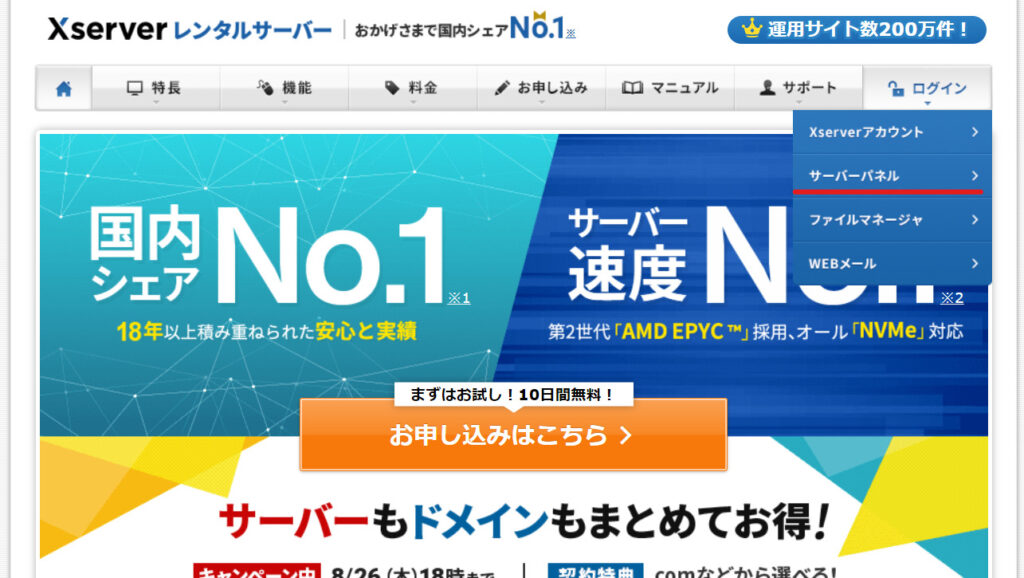
For those who do not know the login screen for the xserver server panel, we will start by explaining how to log in.
First, access the xserevr TOP page.
Log in to the server panel
After logging in to the xserver TOP page, select [Server Panel] from [Login] on the far right.
This is the server panel login screen.
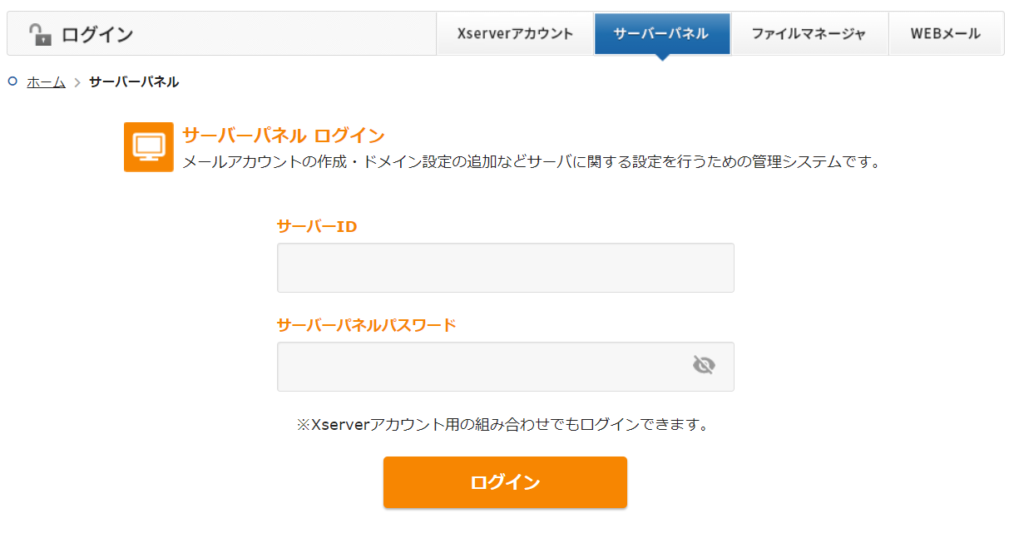
Just to be safe, I've also included a link to the xserver server panel login screen.
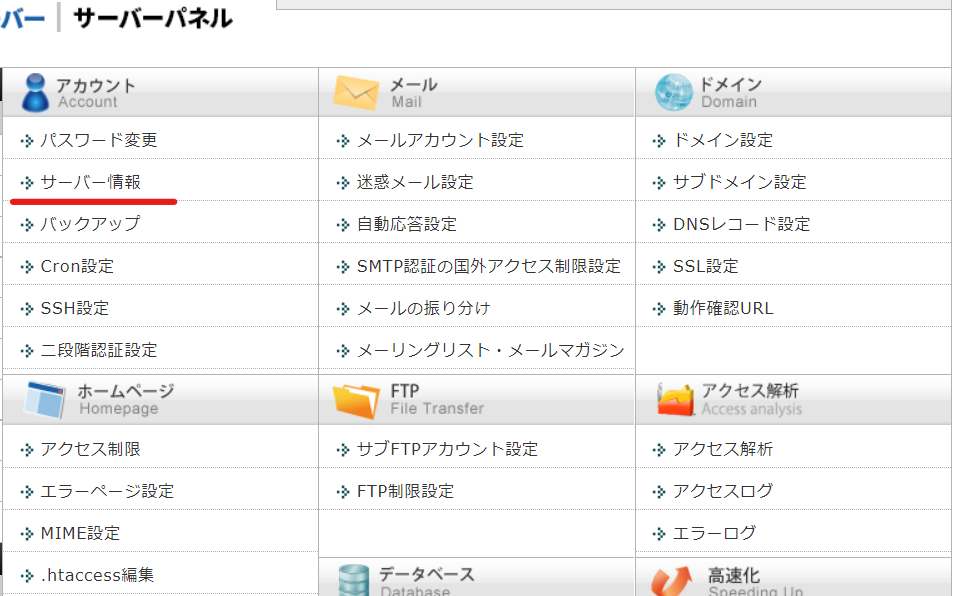
Access server information
After logging in to the xserver server panel, click [Server Information] to display the information.
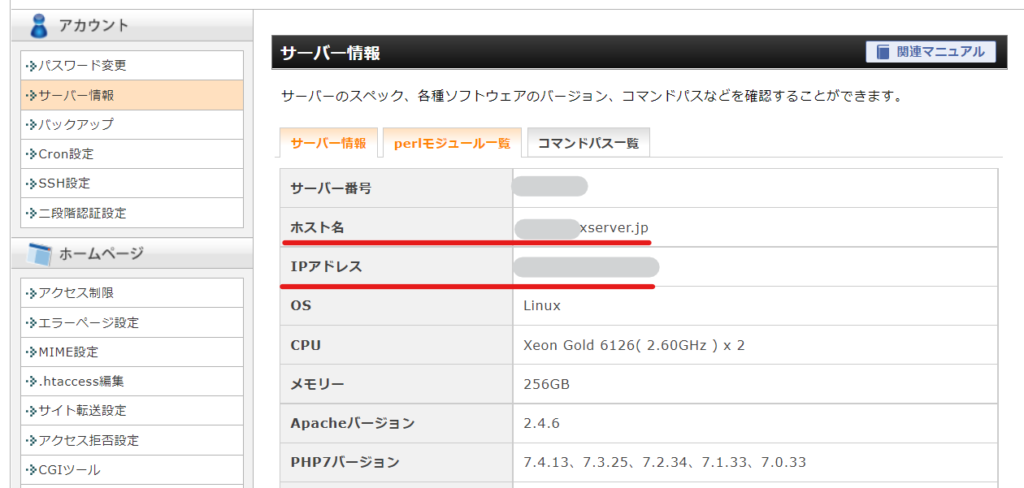
Note down the host name and IP address
Required for DNS settings
- hostname
- IP address
I will save these two pieces of information.
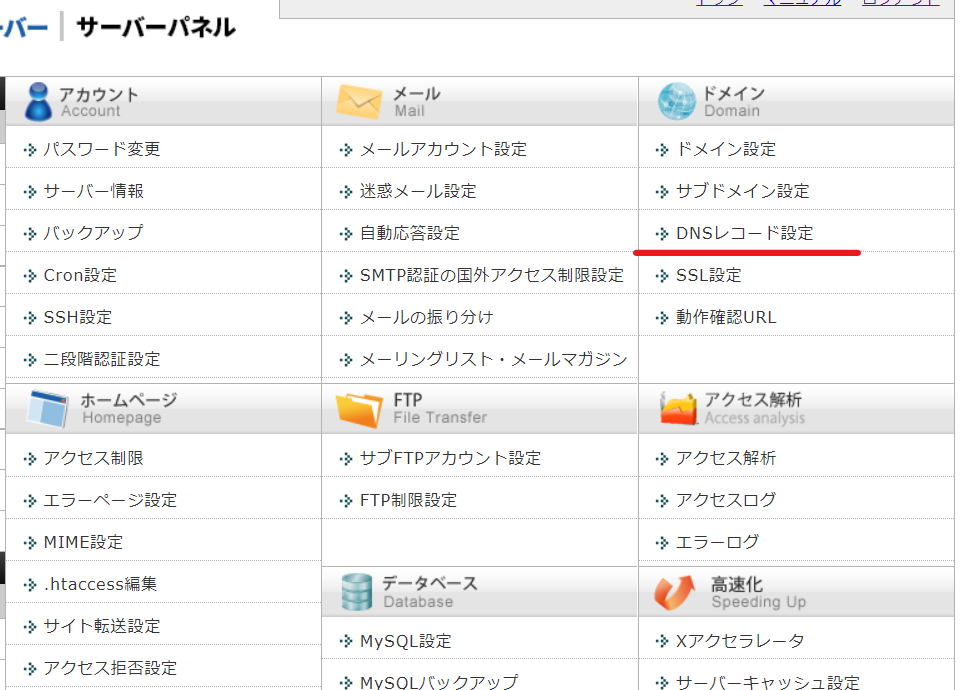
Access DNS record settings
Go to [DNS record settings].
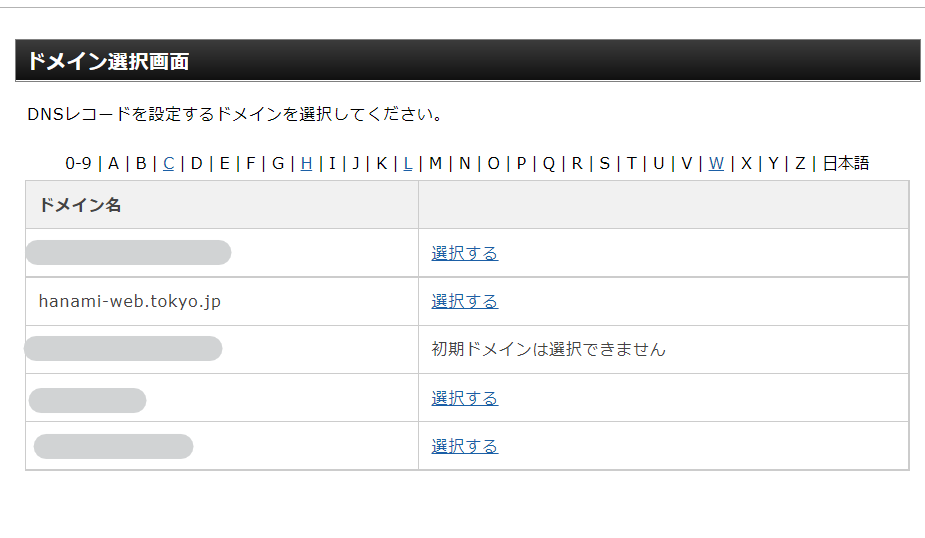
Select the domain you want to configure
If you manage multiple domains, select the domain you want to configure and proceed.
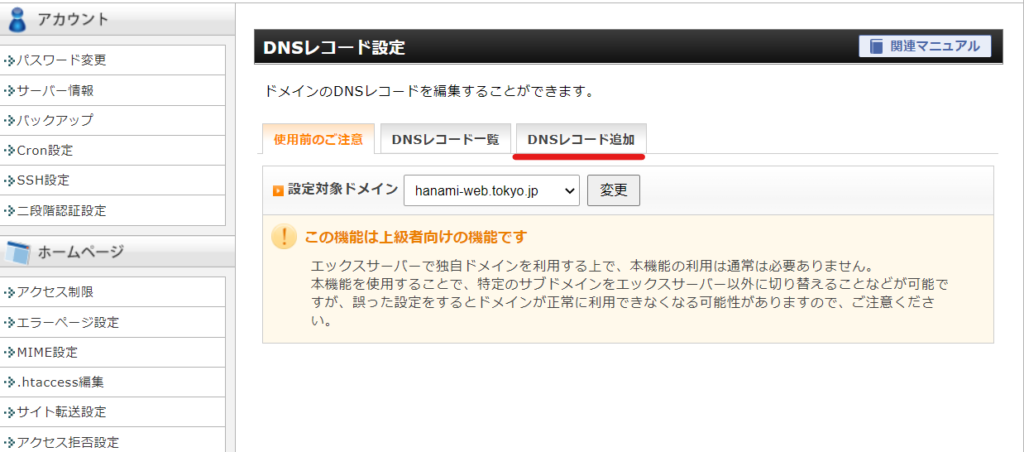
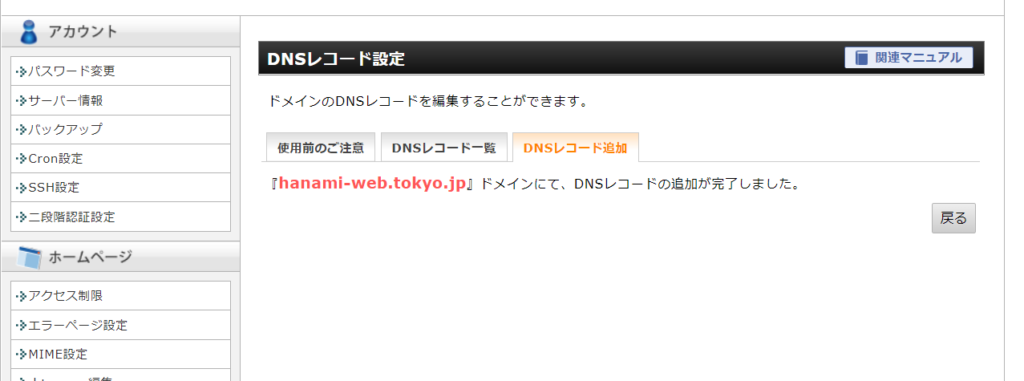
Add DNS record
Add settings by clicking [Add DNS record].
The items to be set are the attached items below.
- Hostname ⇒ leave blank
- Type ⇒ TXT
- Contents ⇒ "v=spf1 +a:(Hostname Number) .xserver.jp + a:(Domain name) +mx include:spf.sendar.xserver.jp ~all"
- Priority ⇒ Remains at 0
We will explain the contents in more detail.
Replace the information in red with your own information.
example
Host name number: sv12345
Domain name: sample.com
If
v=spf1 +a:sv12345.xserver.jp +a:sample.com +mx include:spf.sender.xserver.jp ~allIt will be.
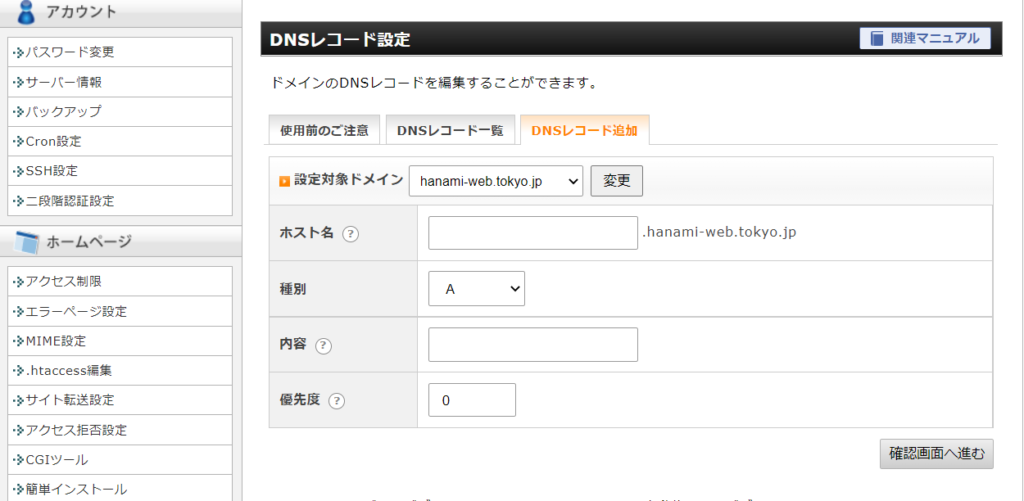
Finally, click [Proceed to confirmation screen] to complete the setup.
summary
Whether or not your email will be classified as spam will depend on the settings on the receiving side, but if you want to adjust the settings as much as possible, we recommend you give it a try!
If you do not know your xserver server panel login information, you can access it from [Server Information] after logging in to your xsever account.
Add DKIM settings
In March 2023, the email settings and DKIM settings of xserver became standard features for new contract servers.
When this DKMI function is turned on, it is a technology that prevents tampering and spoofing, so it is expected to improve the reliability of sent emails and improve email delivery rates.
Existing members can change the setting to ON from the server administration panel.
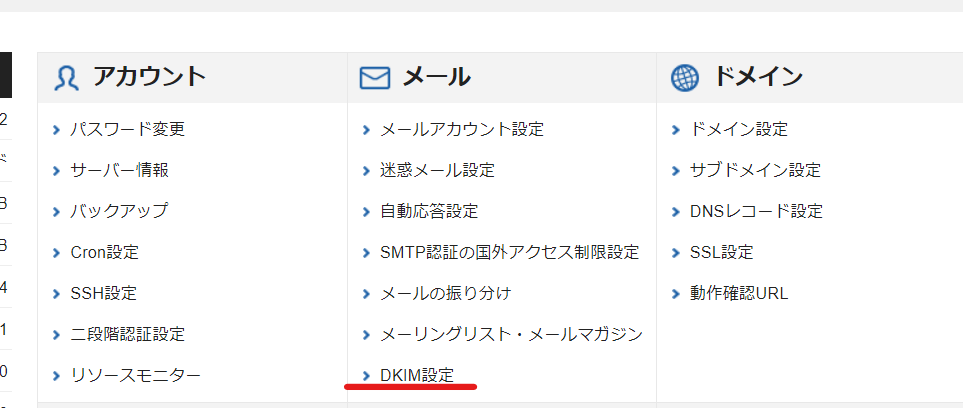
Log in to the Xserver server panel and click Mail > DKMI Settings.
If this option is not present, it means that the server is not yet ready.
Select the domain you want to configure.

Select the domain managed by xserver from Add DKIM Settings, and finally click the Set button.
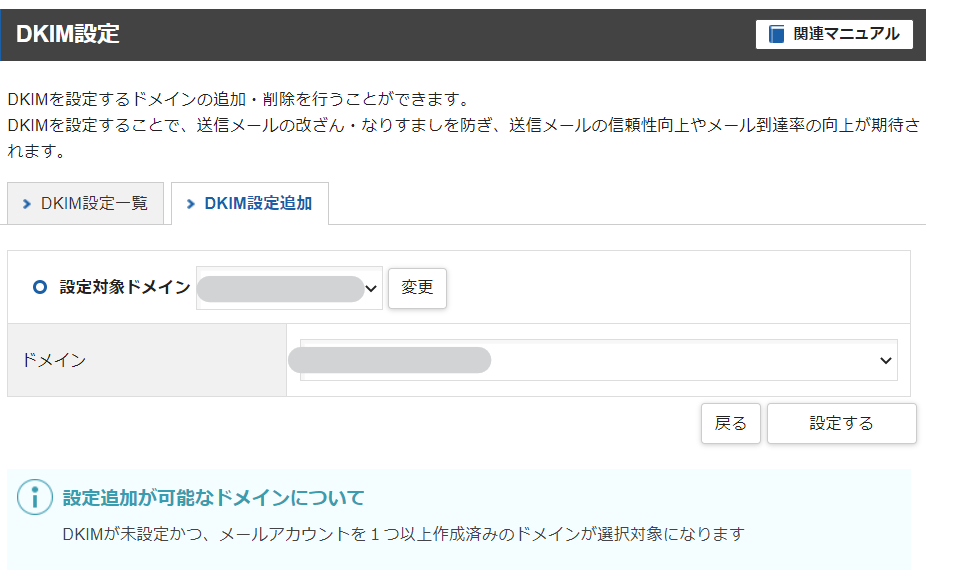
If it has been added to the DKIM settings list on xserver, the setup is complete.


We are available on weekends and holidays!
Please contact us if you have any problems with your website!

- Unable to log in to WordPress
Malware infection?
- The homepage suddenly stopped displaying!
- A PHP error is occurring.
We also offer support on weekends and holidays for those who need assistance.
If you are in a hurry, please call us now at 03-6694-7024.
Latest Articles
Timing and Process for Renewing Your Recruitment Website | Key Points to Review to Increase the Number of Applications
7 Key Points for Creating a Recruitment Website | How to Create a Recruitment Site That Job Seekers Will Choose
What is the average cost of a recruitment website? A thorough explanation of pricing by production method.
5 Benefits of Creating a Recruitment Website with WordPress | Explaining Why It's Easy for the Person in Charge to Update