How to create a website using WordPress/How to use plugins/No-code construction blog


To combat labor shortages and cut labor costs! Automatically register and manage emails received via Gmail in a spreadsheet
At HanamiWEB Online School,
●Ask questions in real-time in the virtual study room!
●Ask as many questions as you want via chat!
●E-learning materials that you can learn as much as you want, 24 hours a day!
All included for just 2,500 yen/month!
How do you manage your emails?
Are your registration emails and emails from customers mixed up in your inbox, or are you having trouble finding old emails?
Why not use Zapier, a free task automation tool, to automatically register emails received via Gmail (you can also use it if you receive emails from your own domain via Gmail) into a Google spreadsheet and manage your customers properly?
Also, for those who have been manually entering customer inquiries into Excel, you can expect to reduce labor costs and alleviate labor shortages by automating email management with the free task automation tool Zapier!
What is Zapier?
As of 2020, it is a very popular task management tool across the United States that can connect with over 2,000 apps to automatically manage various tasks.
The reason for its popularity is that it is an excellent tool that allows you to easily connect various apps without the need for code and automate task management!
Even better, it's basically free to use!
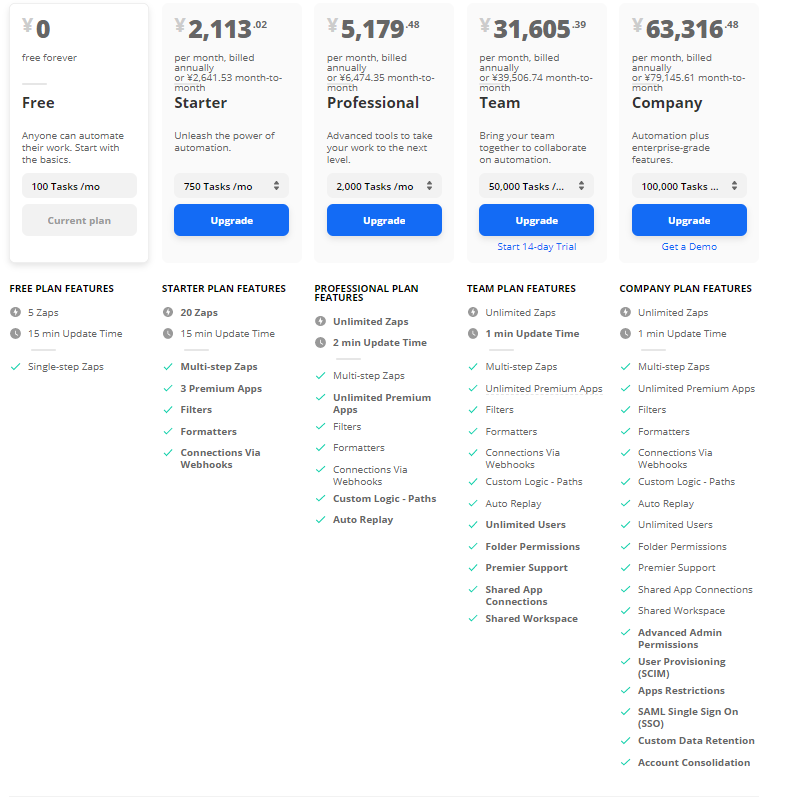
Differences between Zapier's free and paid pricing
There are five different plans available, ranging from free to approximately 63,000 yen per month.
The free plan allows you to manage up to 100 tasks per month. Data is updated every 15 minutes.
The plan you need to sign up for will depend on your usage, such as the number of tasks you want to manage per month and the apps you want to use, which may be available only to paid subscribers.
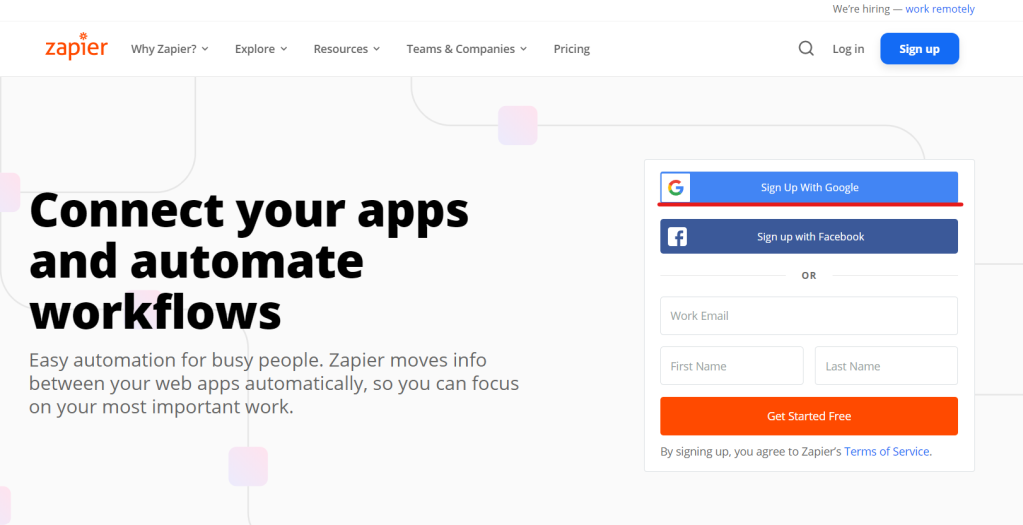
How to register for Zaiper
You can easily complete the new registration by clicking [Sign Up with Google].
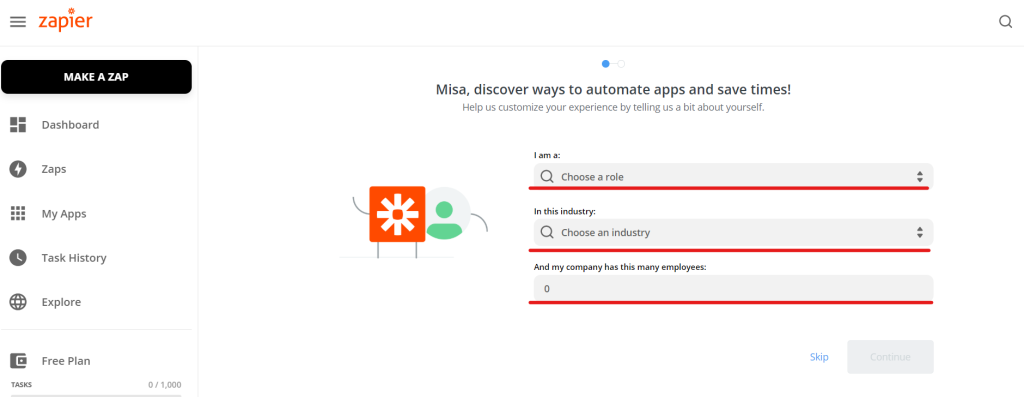
Enter the required information when registering with Zapier
- Choose a role
- Choose an industry
- And my company has this many employees
Finally, click [Continue]. You can also [Skip] without registering now.
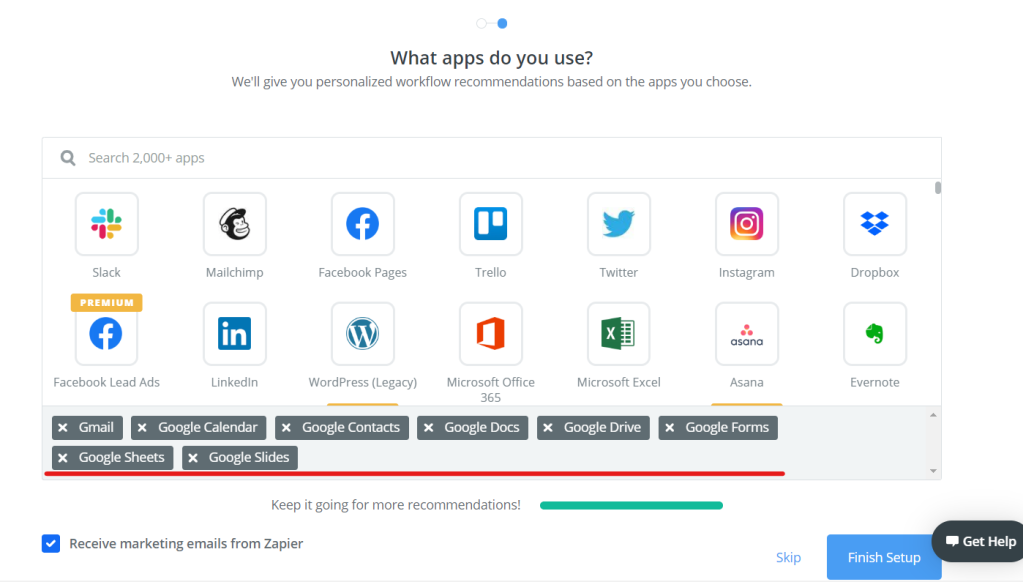
Register an app to connect to Zapier
Gmail/Google Calendar/Google Contacts... are already selected, so first delete any you don't need with an "X", and then select the icon of the service you integrated with Zapier.
Finally, click 【Dinish Setup】 to complete the initial setup!
Now let's set up the tasks we want to automate!
The free plan only has 5 options, so start with
How to automatically add emails received in Gmail to Google Spledsheet as tasks
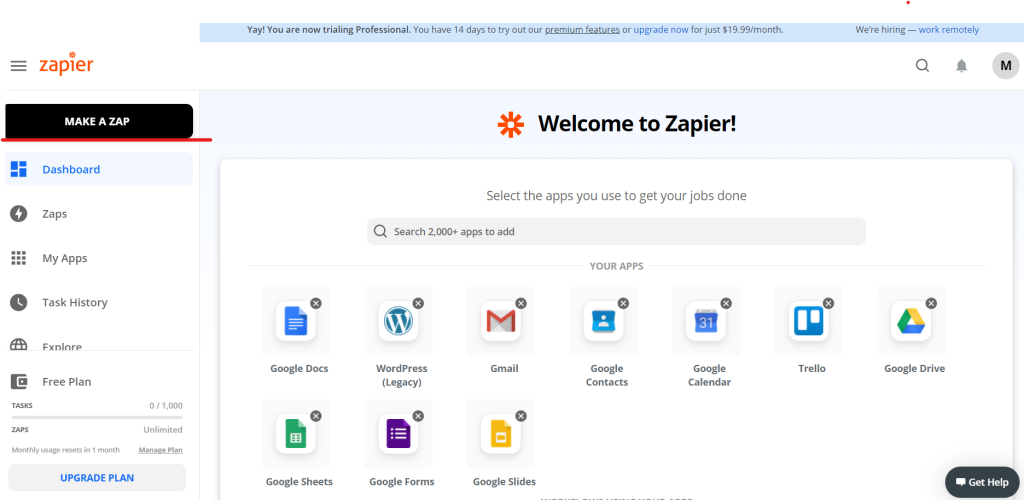
Click [MAKE A ZAP] to register a new task.
1. Select the app you want to start the task with in Zapier
When this happens. Register the action that will occur when Zapier automatically starts the task.
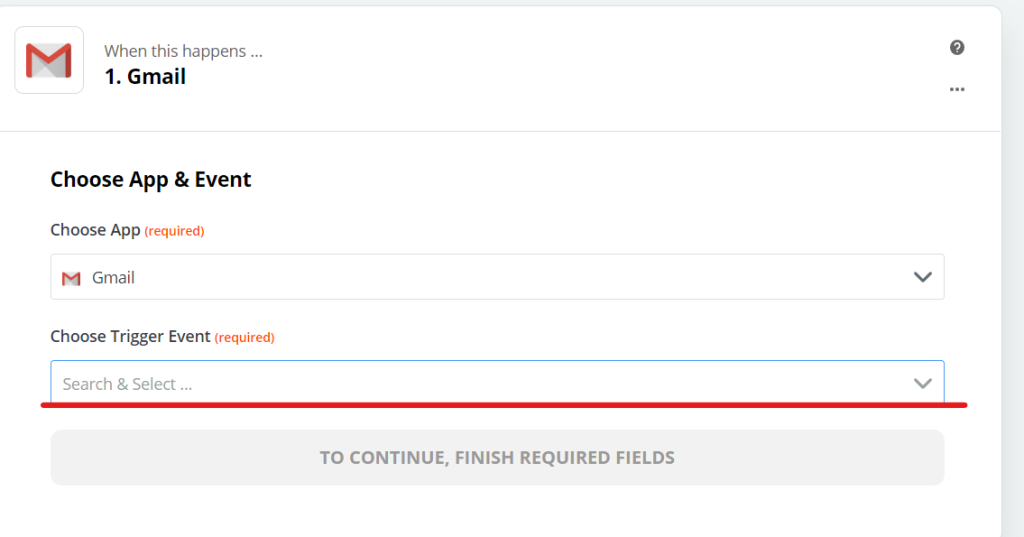
The app used is Gmail.
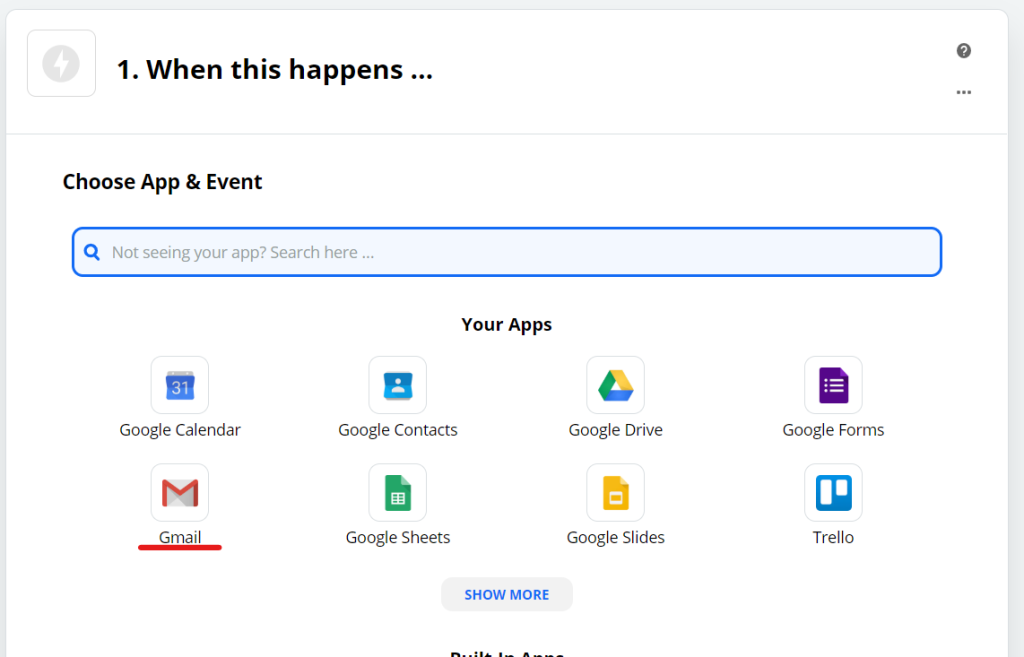
Select an event in the app of your choice
Since I have some unnecessary emails, instead of managing all emails, I set it up to start when a label is added with [New label Email].
Click [Continue].
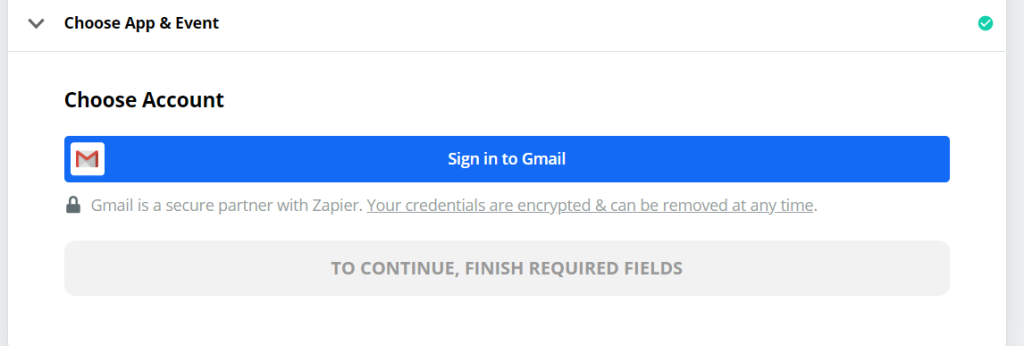
Sign in to Gmail
Select the Gmail account you want to link tasks with via Zapier and click [Continue].
Zapier will run a test to see if it can connect to Gmail.
Click [Test trigger].
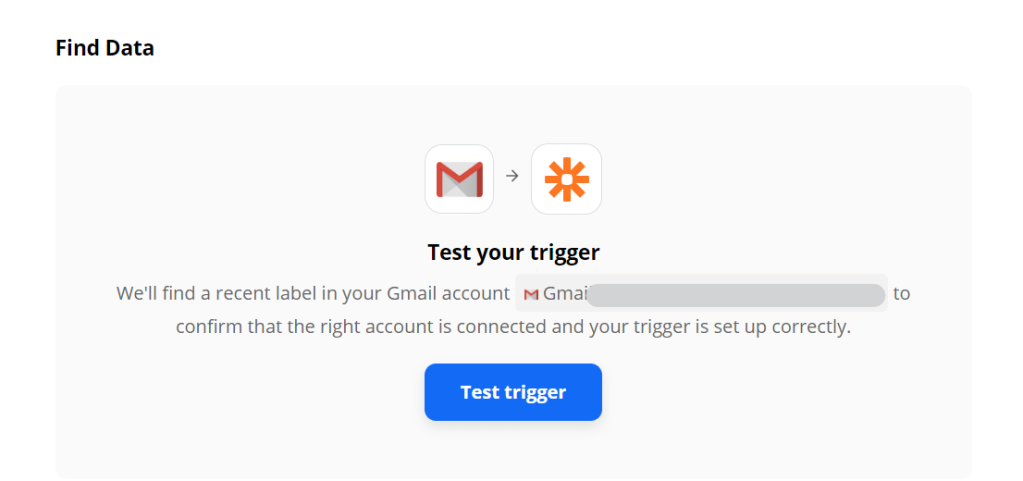
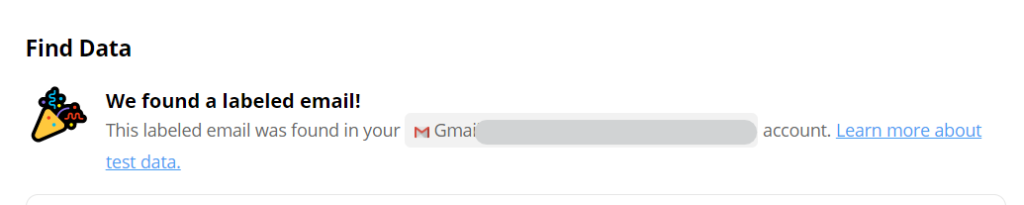
The message 【Find Data】 was displayed, confirming that the target data exists.
Click [Continue].
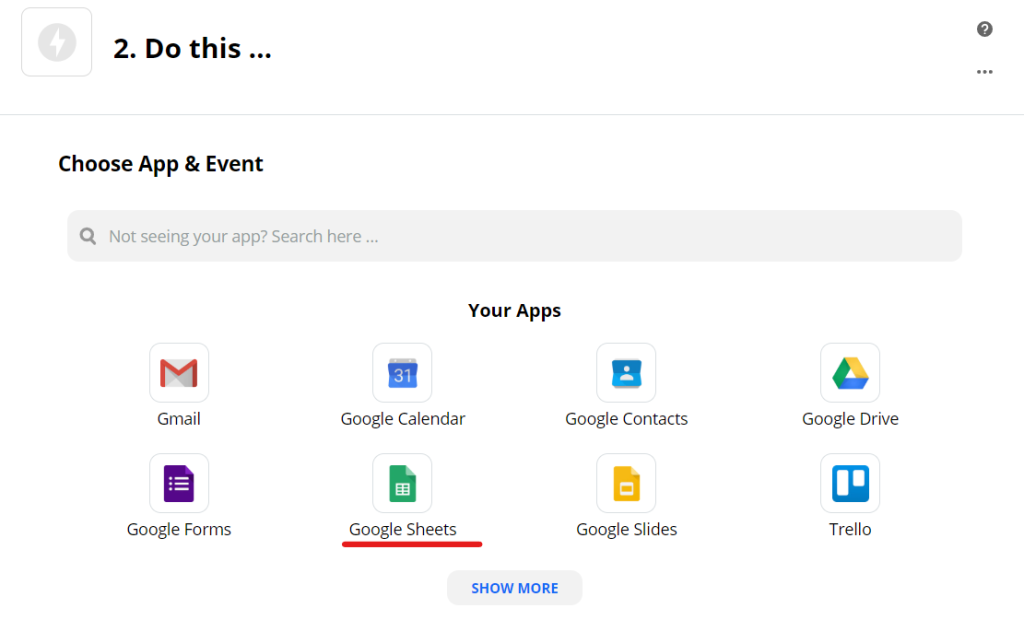
2. Set which app to automatically link the started task to
Select which app you want to link the launched Gmail app with.
This time, select Google Sheets.
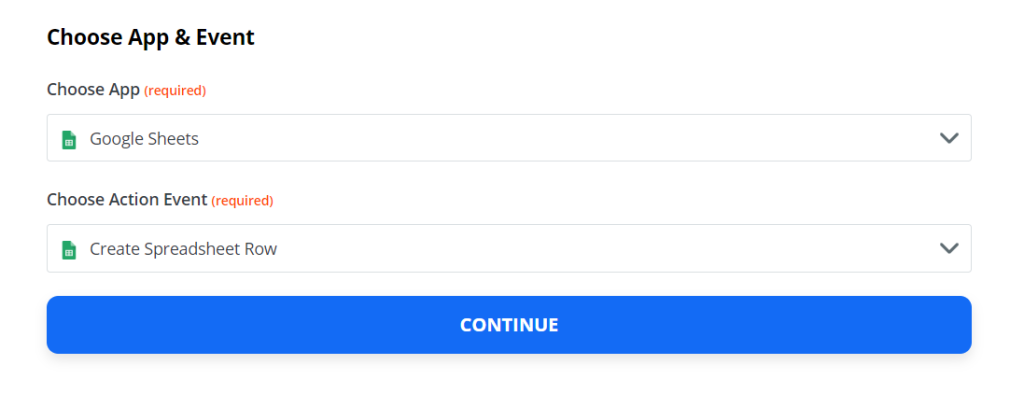
Select the event to be held on Google Sheets
This time, we will set it to add a new row to the spreadsheet. [Create Spredsheet Row]
Click [Coninue].
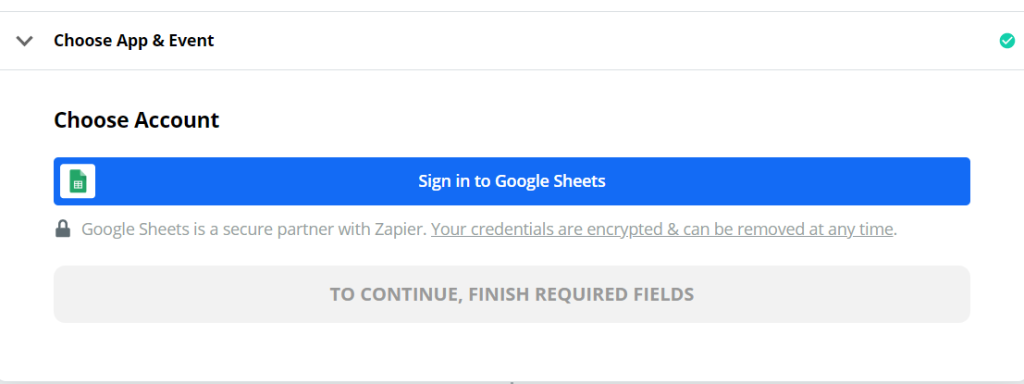
Sign in to Google Sheets
Sign in to Google Sheets.
Once you've signed in, click Continue.
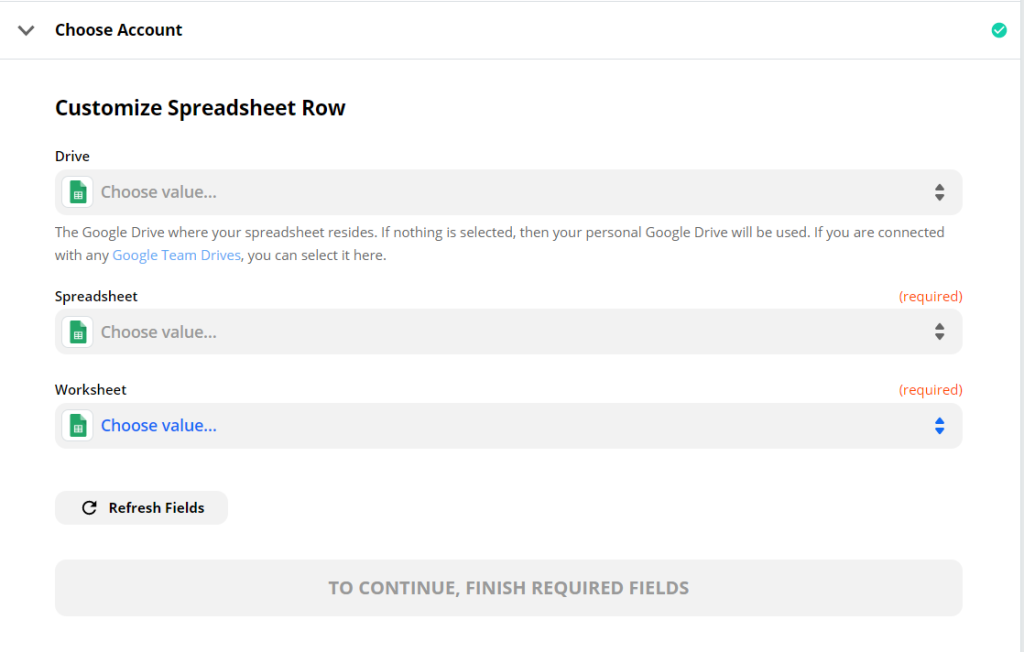
Select the sheet to which you want to automatically add tasks via Zapier
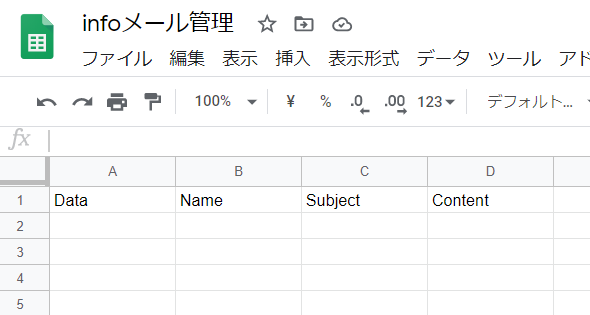
Prepare a spreadsheet in advance
- Create a new spreadsheet
- Change the sheet names in the spreadsheet to make them easier to understand (optional)
- Add a heading to the first line – in this case I used Data/Name/Subject/Content.
Once your spreadsheet is ready, you can set it up in Zapier.
- Drive - Select the drive containing the sheet you want to automatically add
- Spredsheet - Select file name
- Worksheet - Select a sheet
This time, I created a Spredsheet named Info Email Management and created a sheet named 202008. When September comes, I plan to create a 202009 sheet and make changes so that it is automatically added to the new sheet.
Finally, click [Continue].
Finally, click [Done edit] to finish the settings.
summary
This was my first time using Zapier. The reason was that the instructions for using webhooks in WordPress included instructions on how to connect with Zapier.
Recently, with the trend towards non-face-to-face meetings and working from home, many jobs need to be automated. Labor shortages are also becoming serious.
In fact, on hanami-web
- Automate reservation management
- Automating email management
I would like to continue sharing information that I find recommended.

We are available on weekends and holidays!
Please contact us if you have any problems with your website!

- Unable to log in to WordPress
Malware infection?
- The homepage suddenly stopped displaying!
- A PHP error is occurring.
We also offer support on weekends and holidays for those who need assistance.
If you are in a hurry, please call us now at 03-6694-7024.
Latest Articles
Timing and Process for Renewing Your Recruitment Website | Key Points to Review to Increase the Number of Applications
7 Key Points for Creating a Recruitment Website | How to Create a Recruitment Site That Job Seekers Will Choose
What is the average cost of a recruitment website? A thorough explanation of pricing by production method.
5 Benefits of Creating a Recruitment Website with WordPress | Explaining Why It's Easy for the Person in Charge to Update