How to create a website using WordPress/How to use plugins/No-code construction blog


")
How to configure email authentication using SPF and DKIM with a valid DMARC policy
At HanamiWEB Online School,
●Ask questions in real-time in the virtual study room!
●Ask as many questions as you want via chat!
●E-learning materials that you can learn as much as you want, 24 hours a day!
All included for just 2,500 yen/month!
If you use email addresses with your own domain, you now need to configure email authentication using a valid DMARC policy along with SPF and DKIM.
独自ドメインを使ったメールアドレスとは、弊社hanami-web.tokyo.jpドメインの場合、お問合せ用の「info@hanami-web.tokyo.jp」などが対象となります。
Starting in February 2024, Google and Yahoo's security policies will change, and in order to combat spam, it will now be necessary to "set up email authentication using a valid DMARC policy in conjunction with SPF and DKIM."
What is DMARC?
DMARC is an abbreviation for Domain-based Message Authentication, Reporting & Conformance, and is a function that protects domains from phishing, spoofing, etc.
The recent changes to Google and Yahoo's security policies make it mandatory for mass email senders to set DMARK.
If you are using your own domain for the email address you use to send email newsletters, etc., you must make the necessary settings, otherwise your email will be classified as spam.
Configure DMARC settings in case a third party uses your email
To set up DMARC, you need to describe how you will respond if your email address is misused by a third party. There are three commonly used patterns.
- do nothing
- Delivered to the junk mail folder
- Do not send email
The tricky thing here is that you have to set it up in stages.
For xserver
For xserver, log in to the server administration panel and
- DMARC Settings
and set it up.

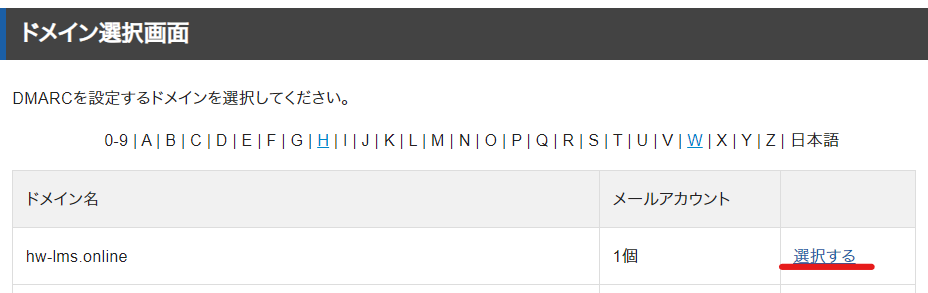
Select the domain you want to configure.
This setting is required for each domain.
When to set up a DMARC record
Regardless of which policy you are setting, we will start by explaining the common parts.
- hostname- Enter _dmarc
- type- Set it as TXT
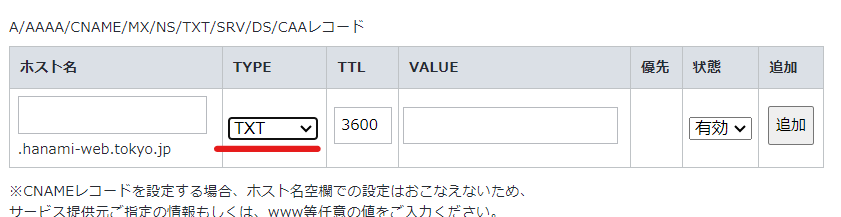
Regarding VALUE, the setting will change depending on the DMARC policy.
First, set it to do nothing
The initial setting is to do nothing.
By setting this up, you will receive an email stating whether authentication was successful or unsuccessful. Once you receive this email, change to the next setting.
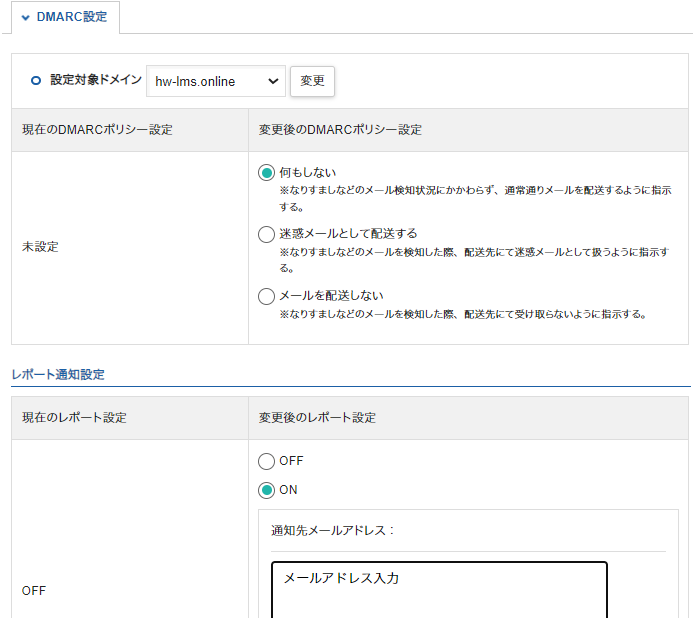
For xserver
- DMARC Policy Settings – Select Do nothing
- Report notification settings - Turn it on and set the email address to receive notifications
Finally, press the "Set" button once to complete the setup.
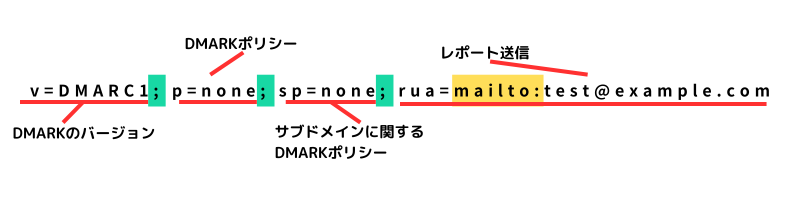
How to write a DMARC record
How to write VALUE.
v=DMARC1; p=none; rua=mailto:test@example.com- v - Set the version of DMARK. Currently it is "DMARK1".
- p - What to set for the DMARK policy. This time, set "none" to do nothing.
- rua - 1 Enter the email address to which the periodic report will be sent. Set it in the format "mailto: email address".
v=DMARC1; p=none; sp=none; rua=mailto:test@example.comIf you are using an email address with a subdomain, add the item "sp".
- Please use half-width alphanumeric characters
- In particular, please be careful that spaces are not full-width because they will not be visible.
- If you want to continue with the next specification, connect it with a semicolon ";" (the green part)
- The email address is "mailto:" and the ":" is used, so please make sure you do not make a mistake (yellow)
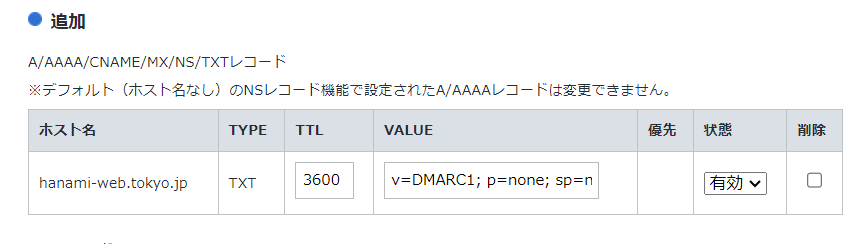
This is the actual setting screen. The default TTL of "3600" is fine.
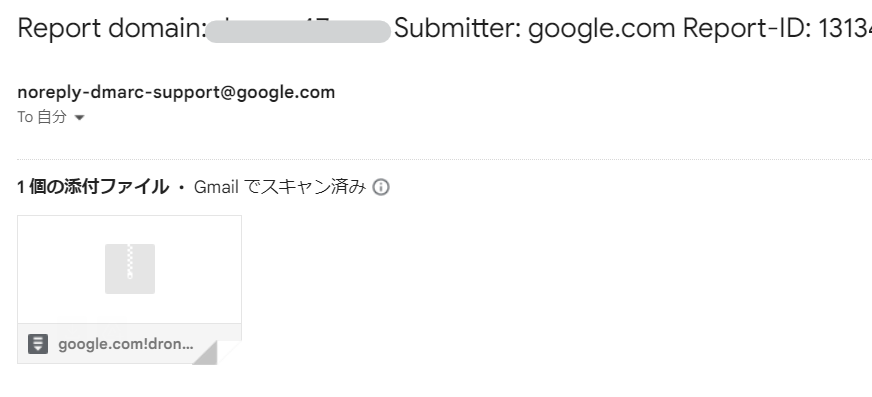
The report email will be sent in English.
It's easy to overlook this, but the email arrives in English and the domain includes "dmarc."
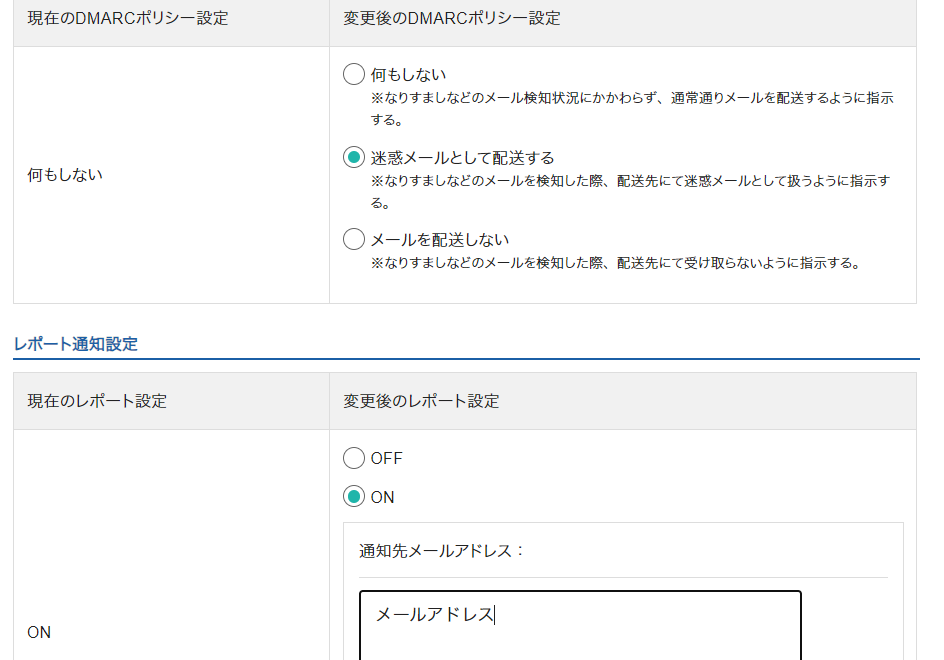
When you receive a report email, change the settings to send it as spam.
After the initial setting of doing nothing if authentication fails, when you receive the report email, change the setting to "Deliver as spam."
For xserver
Change your DMARC policy to "Deliver as spam".
For DMARC records
In the case of DMARC records, the two places to change are "p=none" and "sp=non". Change them to "quarantine".
v=DMARC1; p=quarantine; sp=quarantine; rua=mailto:test@example.comrua can also be used to set up notifications for when authentication fails (if spoofing is attempted) for sending certain reports. Set this in the same way as rua, using the tag "ruf".
v=DMARC1; p=quarantine; sp=quarantine; rua=mailto:test@example.com; fur:mailto:test.example.comSetting not to deliver at the end
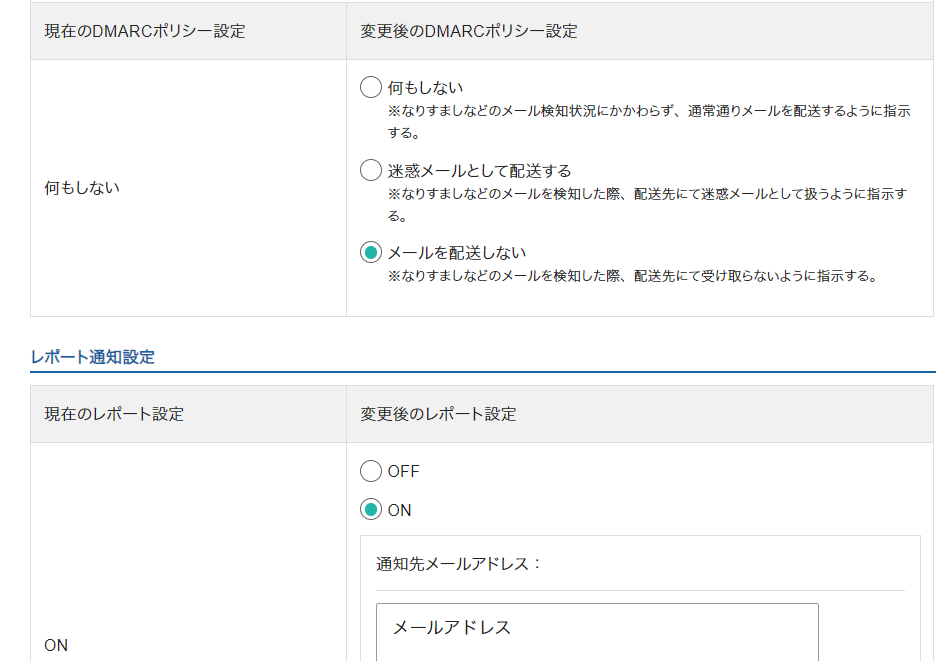
If you are able to exchange emails without any problems even with the settings set to send emails as spam, then finally change the settings so that spoofed emails are not sent.
For xserver
Change the setting to "Do not deliver email."
For DMARC records
For DMARC record, change it to "reject".
v=DMARC1; p=reject; sp=reject; rua=mailto:test@example.com; fur:mailto:test.example.comThis completes the DMARK setup.
Stripe will switch to Stripe domain email if DMARC authentication is not performed
What prompted me to set up DMARC this time was a notice sent by Stripe stating that anyone who sends email using their own domain and has not set up DMARC will be forced to switch to Stripe email.
It would be helpful if there was a server that provided an environment where DMARC could be easily configured, such as xserver.
Released as soon as the next morning! Weekends and holidays are also available!
Super rush website creation plan
We offer a rush website creation plan for those who need a website in a hurry!
We can publish your content as soon as the next morning, even on weekends and holidays! If you have any questions, please check the details below!

Latest Articles
How to Enhance EEAT with WordPress | Settings and Design Improvements Necessary for AI-Driven Traffic
[2026 Latest] How to check the number of visits from generated AI using GA4's exploration function
Error message: Allowed memory size of 268435456 bytes exhausted (tried to allocate 14684160 bytes) Error: On Lollipop