How to create a website using WordPress/How to use plugins/No-code construction blog


Introducing Loco Translate, a translation plugin that can be used when you want to correct the translations of plugins and themes made overseas!
At HanamiWEB Online School,
●Ask questions in real-time in the virtual study room!
●Ask as many questions as you want via chat!
●E-learning materials that you can learn as much as you want, 24 hours a day!
All included for just 2,500 yen/month!
- The translation of the WordPress main body does not match my site
- The translation of the foreign theme/translation is wrong!
- I want to change the text expression of the plugin!
Have you ever thought this?
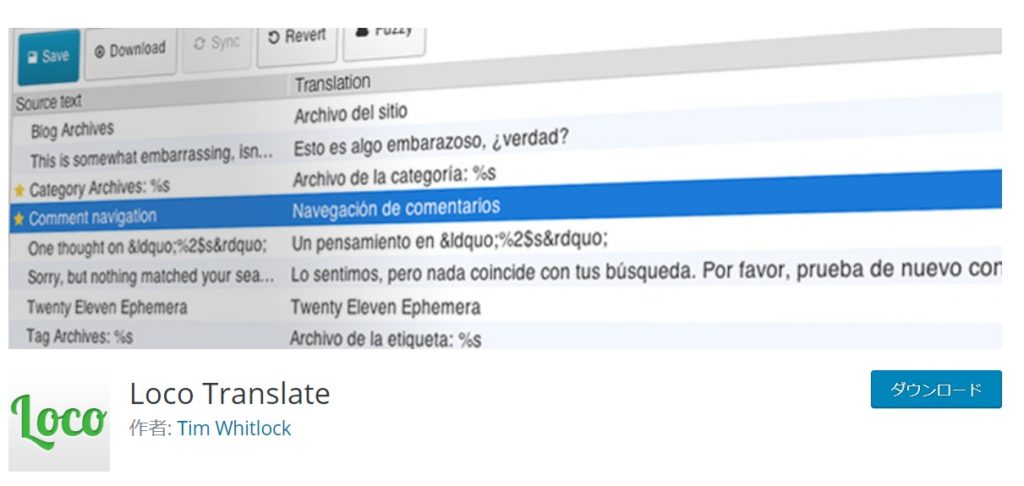
How to correct a traditional translation
In general
- Download translation files (po and mo files) from the server
- Use the translation software Poedit to correct any parts you want to edit.
- Upload the corrected translation file to the server
Follow these steps to correct the translation.
WordPress updates, theme updates, and plugin updates can cause translation files to revert to their original state.
If you think it might be difficult to edit the files on the server directly, don't worry!
We would like to introduce a plugin that allows anyone to easily correct translations from the dashboard.
We will introduce how to translate using the Loco Translate plugin.
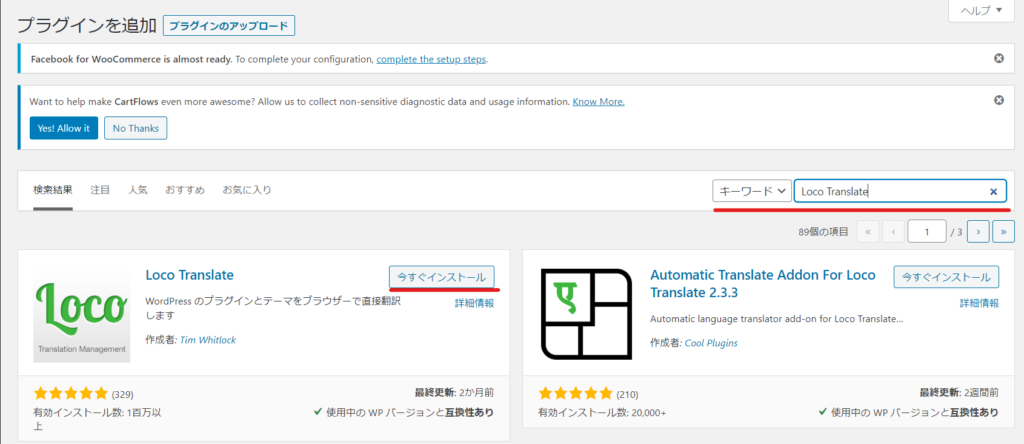
Install the Loco Translate plugin
On the dashboard, click [Plugins] > [Add New].
- Enter 【Loco Translate】 in the keywords
- Click [Install now]
- 【activation】
To do.
[Loco Translate] has been added to the left sidebar.

First, the basic settings
Go to [Settings] in Loco Translate.
Site settings
Unless you want to make special settings, you can leave the settings in [Settings] as default. We will only introduce the [Site Settings] section.
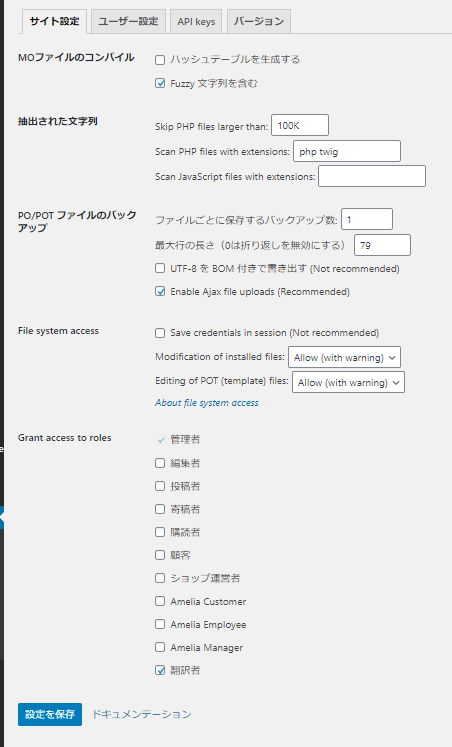
Compiling MO files
- Generate hash tables - WordPress does not generate them by default, so it is generally fine to leave this set to OFF.
- Include fuzzy strings - This is a setting to display the original English, so turn it ON
Extracted string
- Skip PHP files larger than: Skip PHP files larger than the specified file size. Default is 100K.
- Scan PHP files with extensions: Translates only the file extensions you specify. By default, php twink
- Scan JavaScript files with extensions: - Includes javascript extensions for translation. By default, this is blank, so it is OFF.
Backing up your PO/POT files
- Number of backups to keep per file: - How many backup files to keep. By default it is set to 1, so that old files are deleted as new ones are created.
- Maximum line length (0 disables wrapping) - Specifies how PO/MO files will be wrapped. By default, the line breaks at the 79th character.
- Write UTF-8 with BOM - This setting is recommended unless there is a special reason to do so to avoid garbled characters.Do not turn ON.
- Enable Ajax file uploads - Turning this on will improve file loading speed.
File system access
- Save credentials in session - unless you need to operate remotelyDo not turn ONDefault is OFF
- Modification of installed files: - Warns you about files that may be overwritten/deleted by a WordPress update. The default is Allow.
- Editing of POT (template) files - warns you if you are potentially corrupting template files. The default is Allow.
If you enable this option, file modifications will be reflected without warning even if there are errors. If you enable this option, file modifications will be prohibited even if there are errors.
Grant access to roles
Controls who can modify the Loco Translate plugin.
Theme/Plugin Select the type you want to translate
First, choose whether you want to translate a theme or a plugin.
This time we will translate the plugin.
Select the plugin (theme) to translate
A list of installed files will be displayed, so click on the file you want to translate.
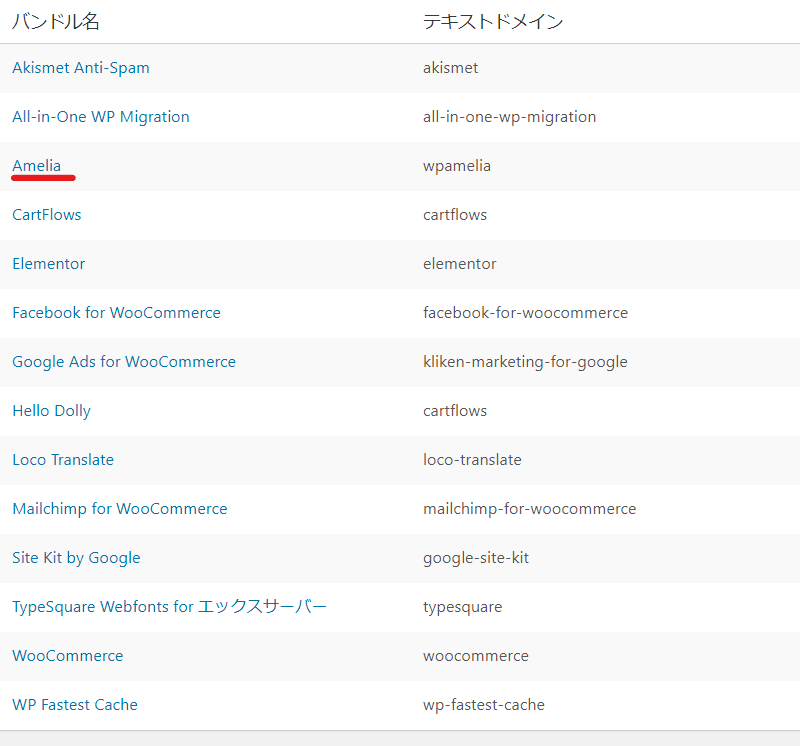
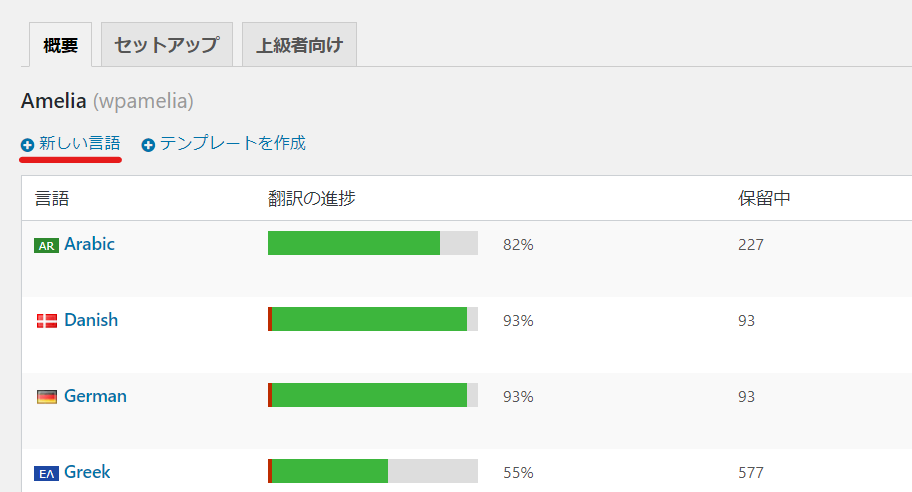
This time we will translate the reservation management system plugin Amelia.
Add a new language
There may already be Japanese files present, but we will always add a new language to prevent them from being overwritten by the update.
Under "Overview," click "New Language."
There is no special setup or advanced settings required, so we will not introduce them this time.
Set the new language details so they are not overwritten by updates
If you see a message that says there are no templates, click Skip Templates.

- Select language - choose Japanese
- Choose a location – choose Custom
Choose a location
- System - where translation files are overwritten by updates
- Author - This is the place that will be overwritten by updates
- Custom - A place that is not affected by updates
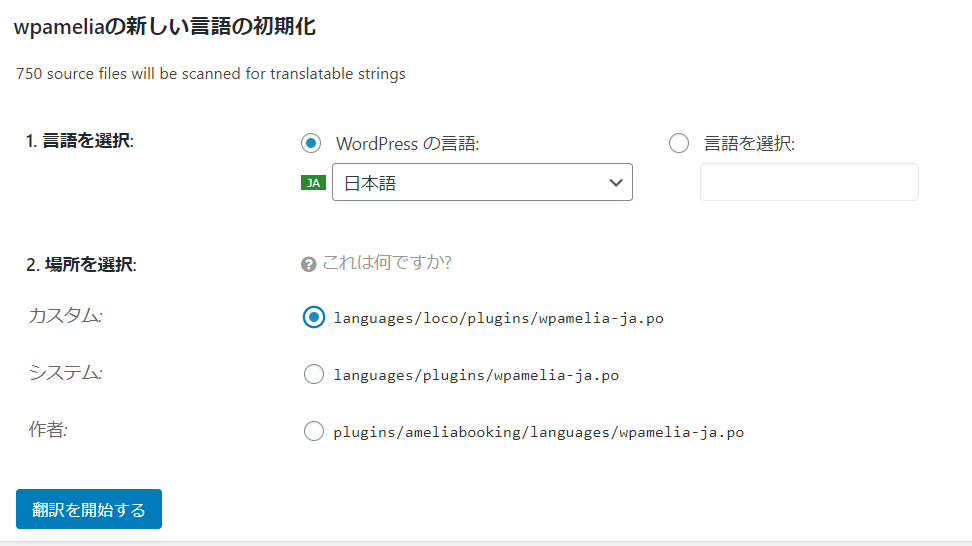
A new file will be created in the hierarchy where WordPress is installed: [wp-content] > [language] > [loco].
This is a separate location from the plugin's translation files, so you can safely modify the files.
Notes on translation
One thing to note here is that when you add a new language you have to start translating from scratch.
This shouldn't be a problem if the theme or plugin does not provide a Japanese translation, but if there is already a Japanese translation, you will need to use a little ingenuity.
It's easier to just fix the existing Japanese translation file, but if you don't translate it in the new language, the translation will be reverted when you update, so work hard on the translation!
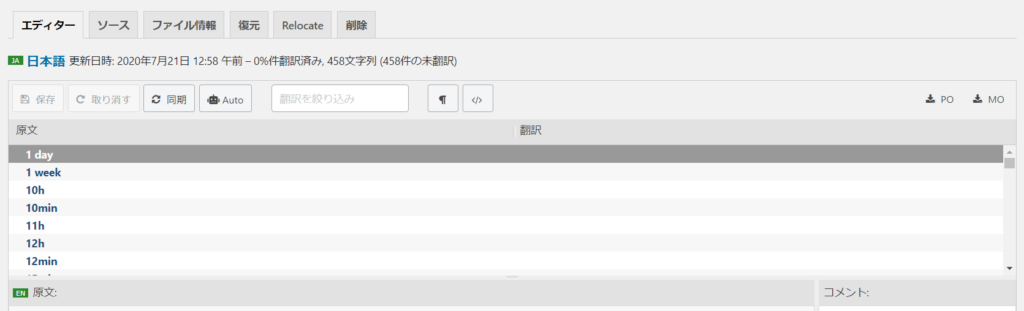
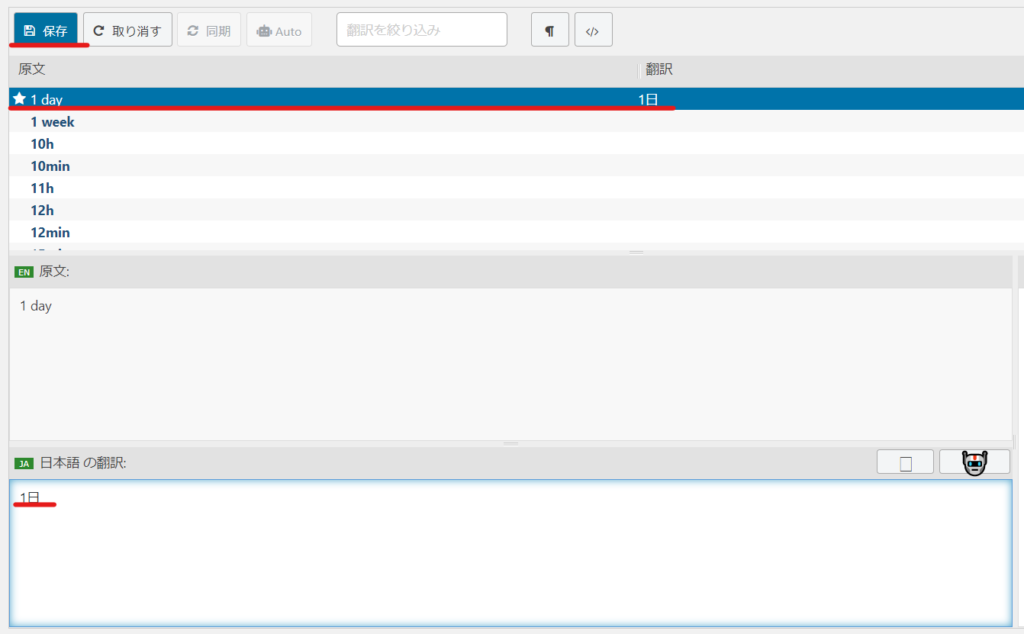
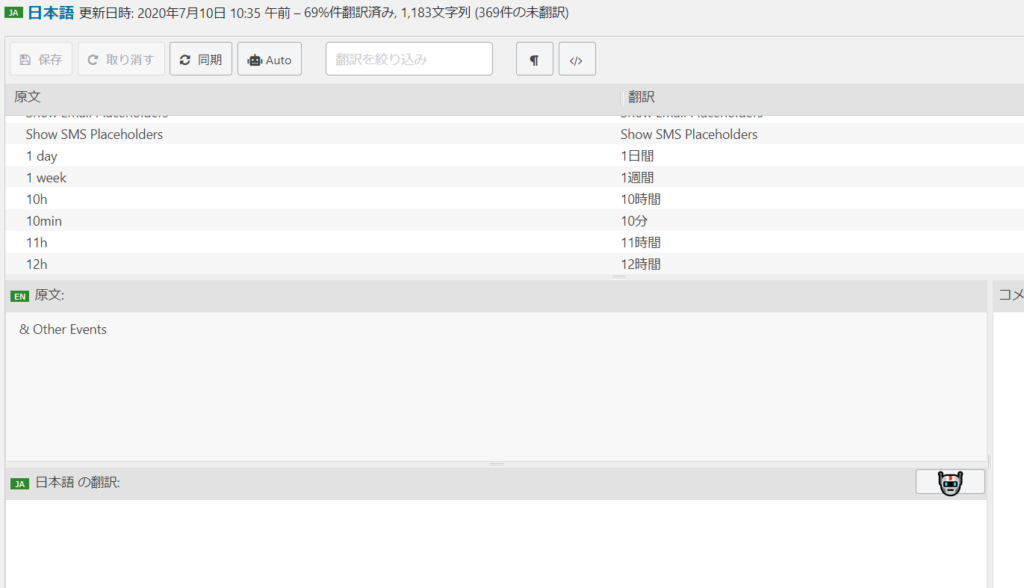
How to translate
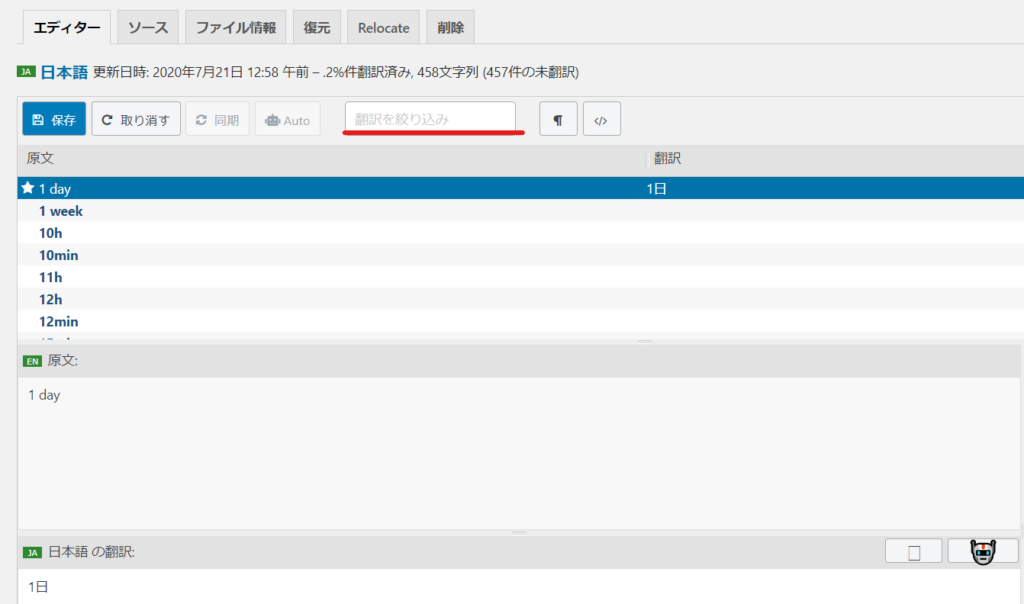
- Select the item you want to translate
- Enter your translation in the [Translate to Japanese] field.
- Click [Save]
That's it. Very easy, right?
How to translate when a Japanese translation file already exists
If a Japanese translation file already exists, the text will have already been translated into Japanese, making it difficult to understand the original text from the site.
You have to find the original text and then put in the translation that corresponds to the original.
Open the existing Japanese translation edit screen in a separate tab
Open the WordPress dashboard in a new tab in your browser, select the theme or plugin you want to modify with Loco Translate, and click Edit existing Japanese files.

There are lots of translations listed.
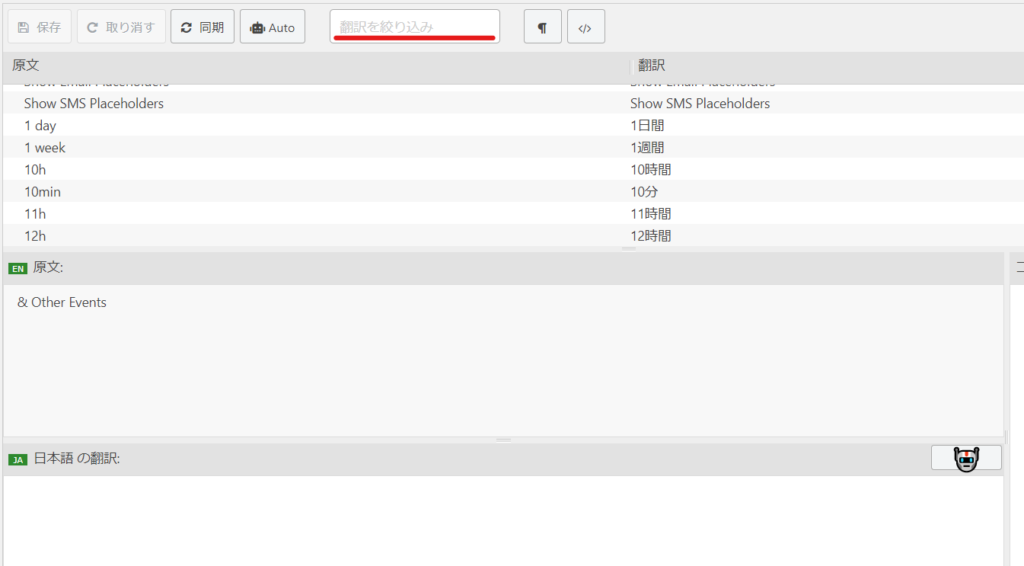
Refine translations to search for the translation you want and look up the source text
Copy and paste the Japanese text displayed on the site into the [Narrow translation] section. Even differences in full-width/half-width characters, spaces, etc. may result in no hits in the search.
This will give you the original text. Now it's time to copy the original text.
You may not be able to find the Japanese you want to translate in the translation files of the theme or plugin you are trying to translate. This is often the case with plugins, but it may also be translated independently by the theme that is linked to the plugin. Try looking in various places!
Search source text in new translation file
In the new translation file you are creating, paste the original English text you copied earlier into the section titled [Narrow translation].
Select the original text that appears and enter it into [Japanese Translation].
This is a bit of work, but it's necessary to ensure that translation files don't get reverted after updates!
Finally, click [Save].
Don't forget to click [Save], otherwise your changes will not be reflected.
summary
We discovered this plugin after receiving many requests from users wanting to change the Japanese translations in the reservation management system Amelia to suit their own services.
Mail Poet, a plugin that allows you to send step emails, also has many strange Japanese translations.
In addition, even if Japanese is output through controls in places that cannot be found on the dashboard, such as PHP files, there is an applied technique that allows you to turn the Japanese into your own unique expression by translating it into Japanese in a new language.
Translating Japanese plugins into Japanese. It's a bit of a novel idea, but have you ever thought, "I wish I could express things in a more nuanced way!"? Give it a try!
Can't sync?
1 file was skipped because it was 211.3 KB (max is 100 KB). Please make sure all strings are present before saving.

If you get an error like this and the synchronization is not working properly, it is highly likely that the synchronization is not working properly if you get an error and cannot find the Word you want to translate.
Change the maximum sync size
- setting
- Site settings
- Extracted string
Skip PHP files larger than this is set to [100KB]. Changing this value will enable synchronization.
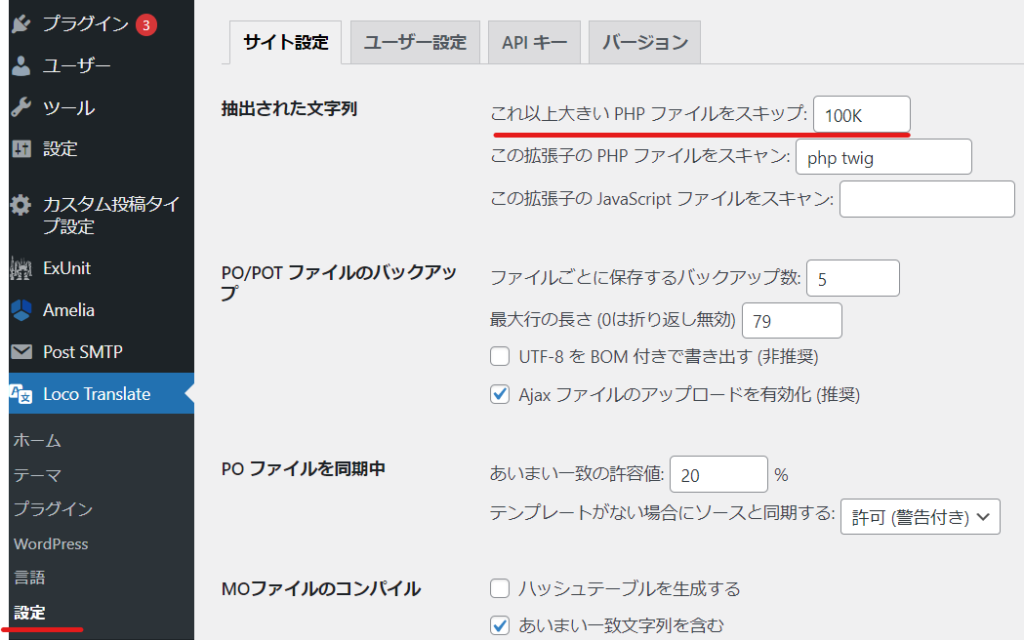
Why is it limited to 100KB?
The default size seems to be 100KB because syncing files that are too large can cause errors.
Released as soon as the next morning! Weekends and holidays are also available!
Super rush website creation plan
We offer a rush website creation plan for those who need a website in a hurry!
We can publish your content as soon as the next morning, even on weekends and holidays! If you have any questions, please check the details below!

Latest Articles
How to Enhance EEAT with WordPress | Settings and Design Improvements Necessary for AI-Driven Traffic
[2026 Latest] How to check the number of visits from generated AI using GA4's exploration function
Error message: Allowed memory size of 268435456 bytes exhausted (tried to allocate 14684160 bytes) Error: On Lollipop