How to create a website using WordPress/How to use plugins/No-code construction blog

How to output Advance Custom Fields without coding
At HanamiWEB Online School,
●Ask questions in real-time in the virtual study room!
●Ask as many questions as you want via chat!
●E-learning materials that you can learn as much as you want, 24 hours a day!
All included for just 2,500 yen/month!
"Advance Custom Field" is a plugin that allows you to add input fields to WordPress. Although the plugin is easy to set up, outputting it requires a bit of advanced settings such as using PHP code. If you use Brizy pro, you can output custom fields without coding, so I will show you how.
How to output Advance Custom Field without coding
First, I used the no-code page builder Brizy to output the items set in Advance Custom Field without any coding.
This is a Brizy Pro feature. Please note that it is not offered in the free version.
- Advanced Custom Fielding
- Brizy
Using these two plugins, we will create a system that outputs custom fields without any coding.
Install the Advanced Custom Field plugin
- Plugin
- New additions
- Enter "Advanced Custom Field" in the keywords
- Install now
- activation
To do.

Create a new Field group
Once you activate the plugin, a new section called “Custom Fields” will be added to the left.
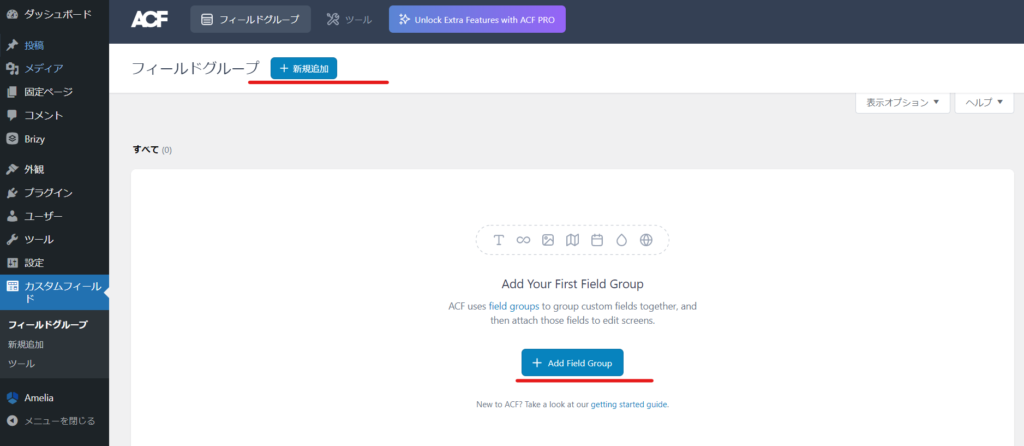
First, create a field group.
Click [Add New] or [Add New Group].
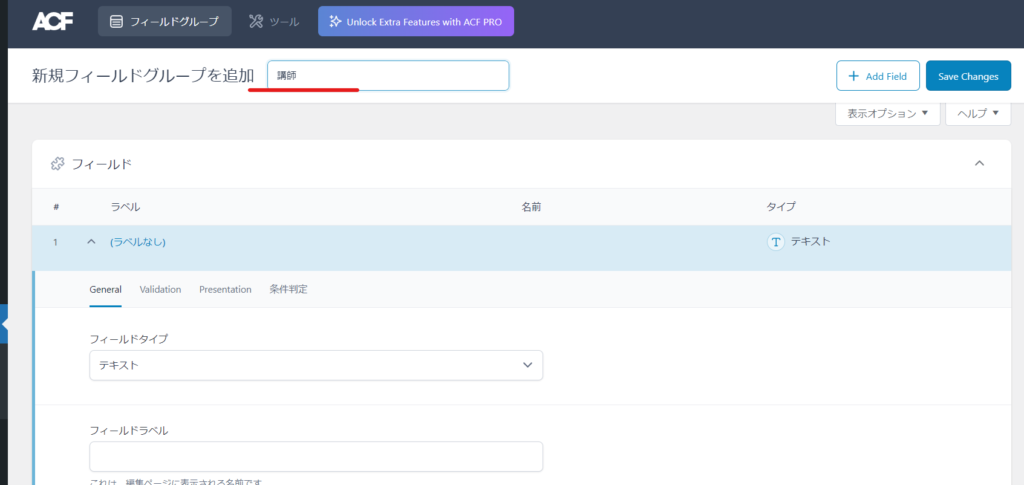
Give it a name.
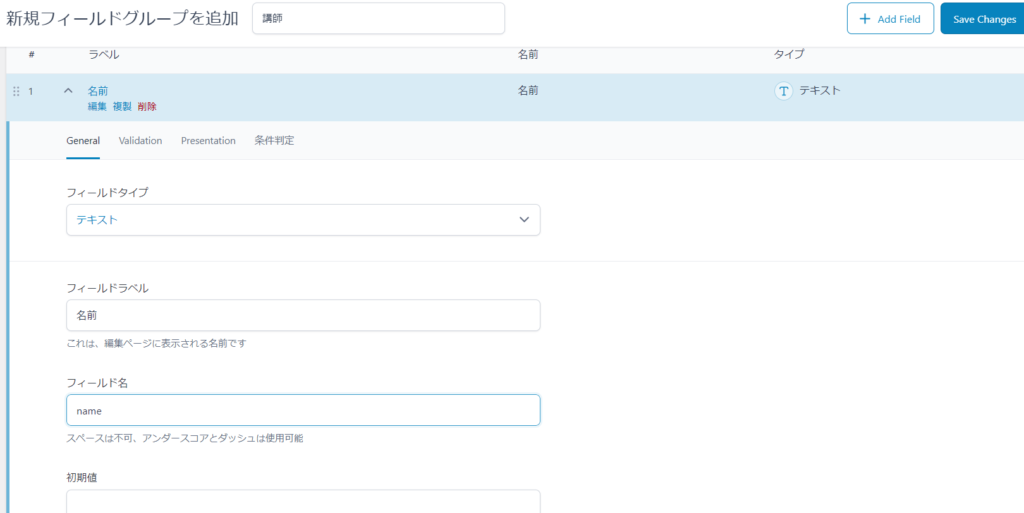
Create a custom field item
Once you have named it, you can create your custom field items.
this time
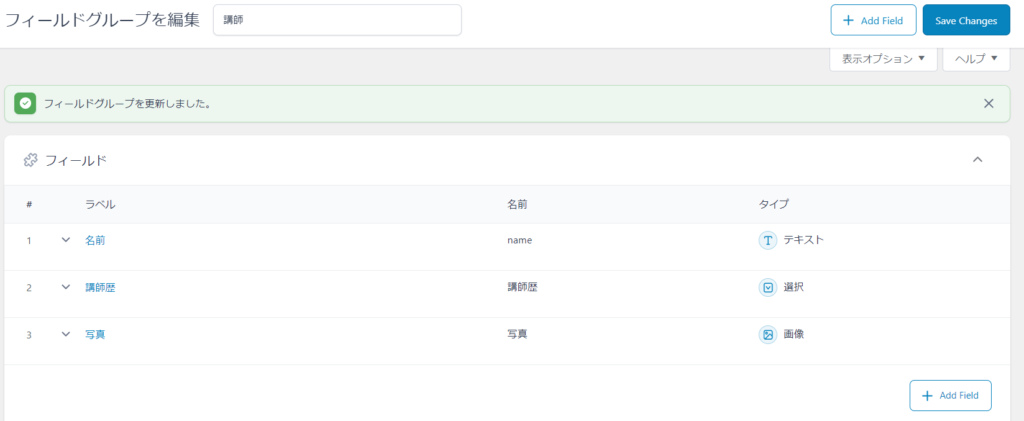
- Name – text field
- Teaching Experience - Select Field
- Photos - Media upload field
I'll add three items:
Here are the fields I created:
Set which pages the custom field will be used on
Set which page the created field will be used on. In this example, we will output it to a blog post.
A common setup is to create a custom post type and output custom fields to the custom post type.
The plugin that allows you to create custom post types without coding is "Custom Post Type UI"

Check the submission page
I'll check out the submission page.
The input fields are being printed.
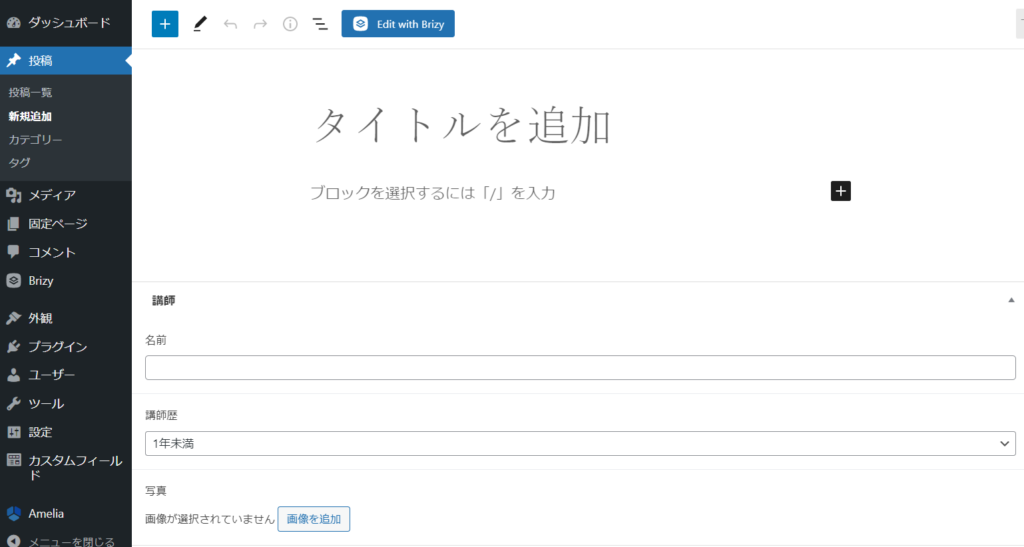
When you enter information into the input field and update it,
Let's quickly enter some information into the input fields and refresh the page.
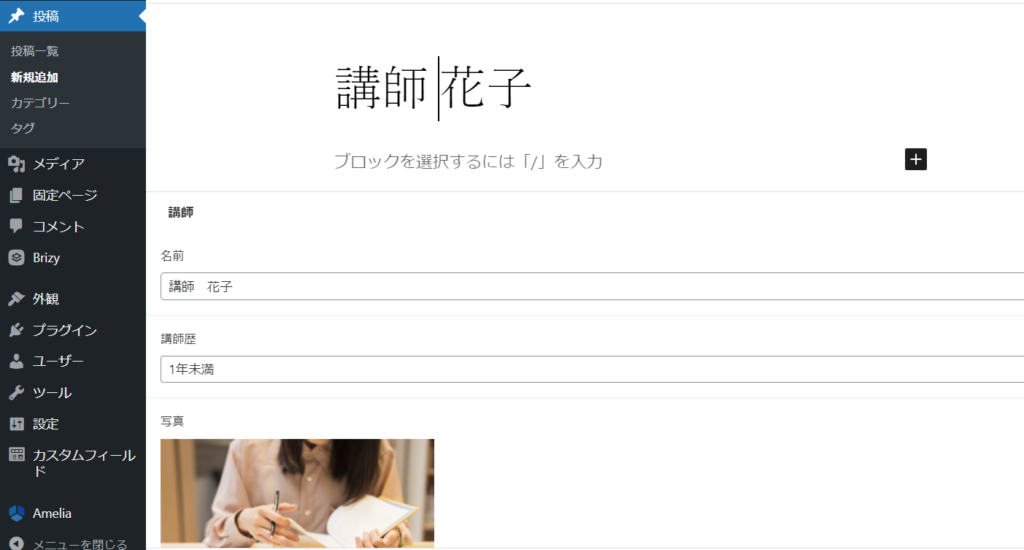
Nothing is displayed...

Normally, if you create a custom field using the Advanced Custom Field plugin, it will not be output unless you modify the PHP file and configure the output.
Add Brizy
I use the page builder plugin Brizy.
This is not a plugin just for Advanced Custom Field output!
- Plugin
- New additions
- Enter "Brizy" in the keyword field.
- Install now
- activation
Please note that Brizy Pro is required to output custom fields.

Launch Brizy Builder on your post page
Reopen the page where you just entered the custom fields and click the [Edit with Brizy] button.
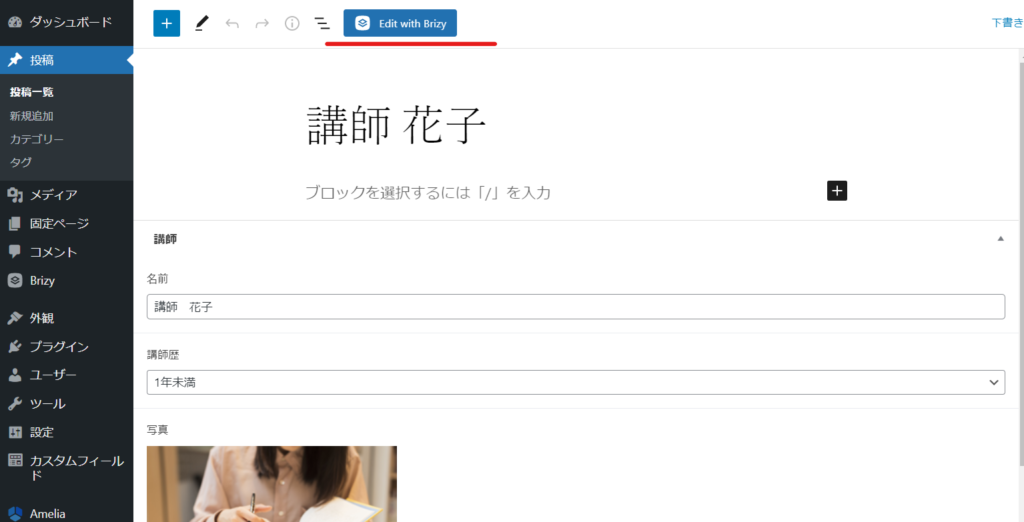
You will need to load the header and footer, so please change your template back to the default.
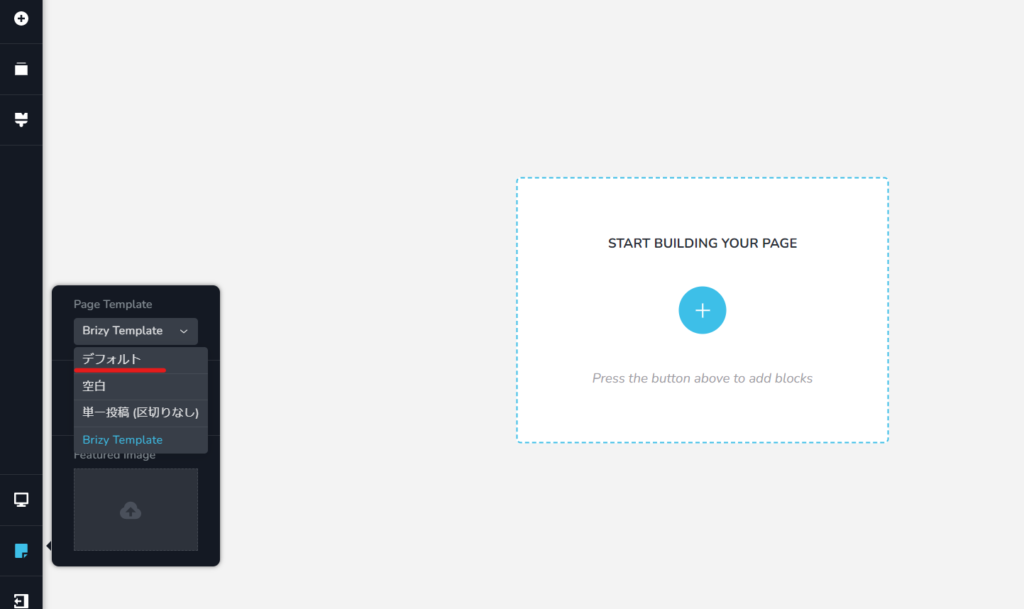
Use Brizy to compose your pages
Click the plus button.
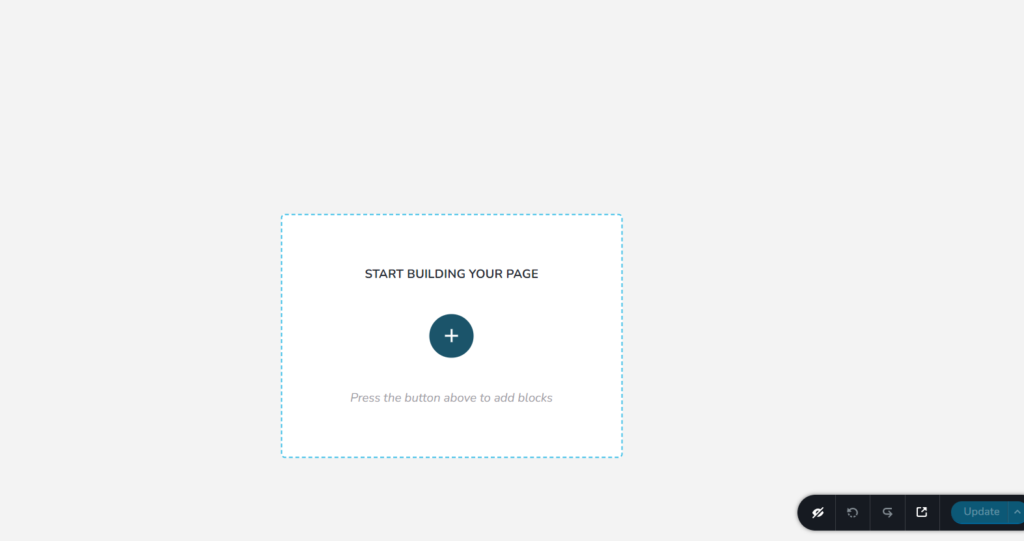
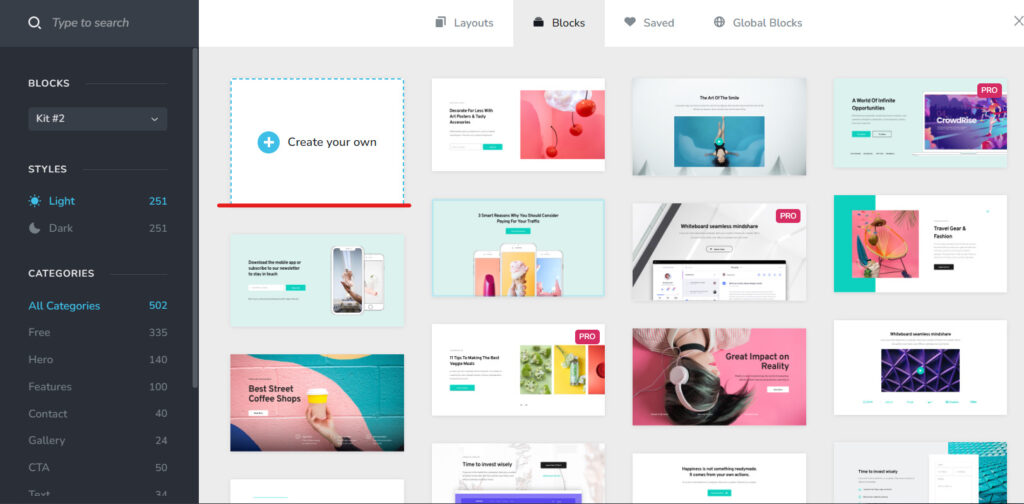
Any part will do, but this time we will use "Create your own".
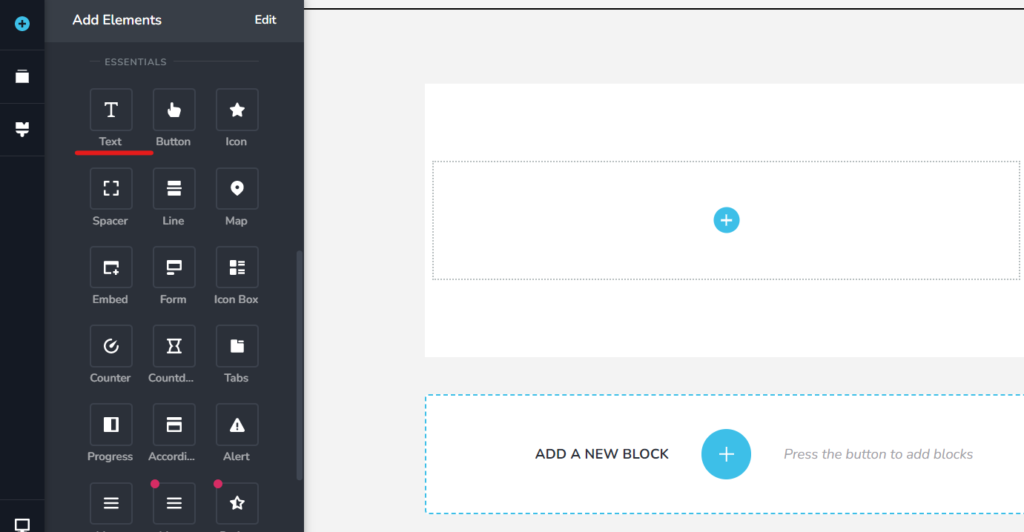
Drag and drop the text parts you want.
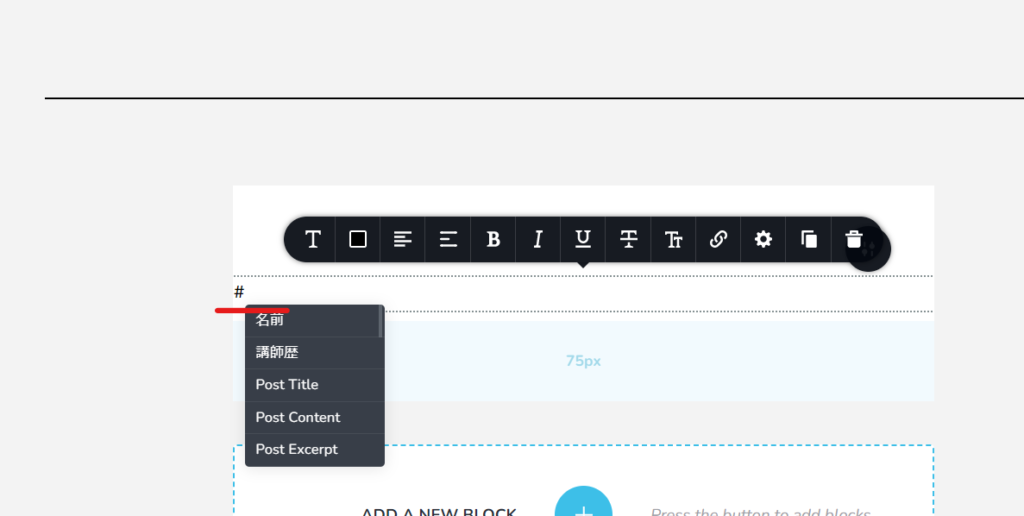
When you enter the half-width characters [#], the name of the custom field you created earlier will appear, so select it.
The image uses parts of the image.
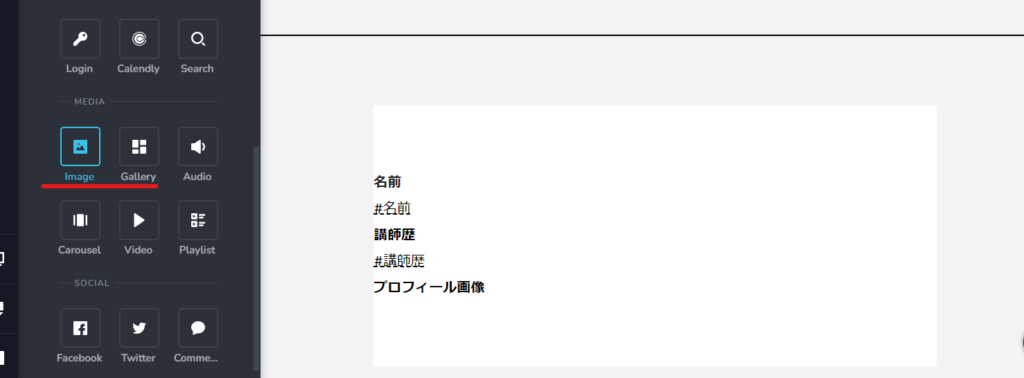
Click on the three lines and you'll be able to select the custom field you just created.

Check the output with custom fields
Finally, click the Publish button and you will see that the custom fields have been output.

Alternatively, you can use Brizy templates.
With the method we just introduced, you have to enter the values into the custom fields and set the output each time, but by using Brizy templates, you can automatically output the values of the custom fields.
- Brizy
- template
and configure it.

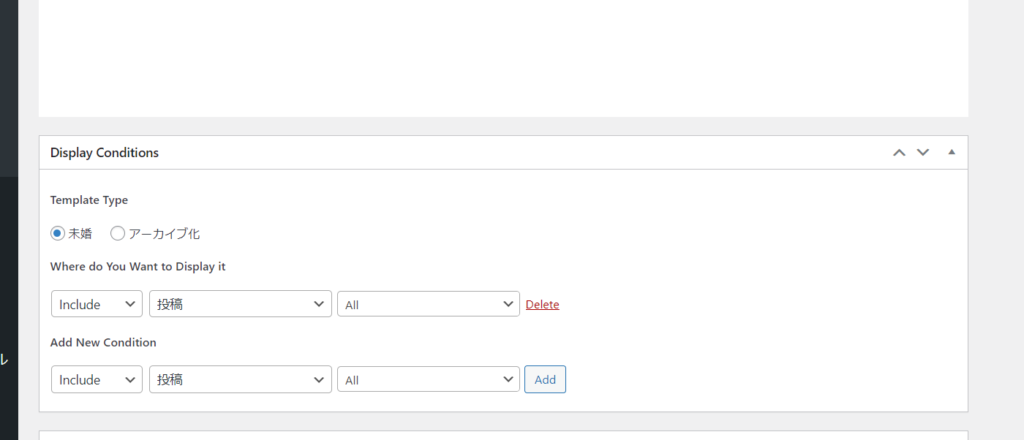
First, select which page you want to reflect the changes on.
Set which page the template you are about to create will be a template for. In this example, we are assuming that the template will be for the entire blog, so
- include
- Posts
- All
After that, click Edit with Brizy and create the page in the same way.
Released as soon as the next morning! Weekends and holidays are also available!
Super rush website creation plan
We offer a rush website creation plan for those who need a website in a hurry!
We can publish your content as soon as the next morning, even on weekends and holidays! If you have any questions, please check the details below!
Latest Articles


