How to create a website using WordPress/How to use plugins/No-code construction blog


[OceanWP Explanation] How to set custom fonts such as Japanese fonts
At HanamiWEB Online School,
●Ask questions in real-time in the virtual study room!
●Ask as many questions as you want via chat!
●E-learning materials that you can learn as much as you want, 24 hours a day!
All included for just 2,500 yen/month!
This time, we will explain how to set custom fonts, such as Japanese fonts, in the WordPress theme OceanWP.
How to add custom fonts to OceanWP
Setting up custom fonts in OceanWP is a setup for intermediate to advanced users.
- Create a child theme
- Download the web font file
- Add the fonts file to your child theme and upload the downloaded file.
- Add the code to the child theme's style.css
- Add the code to function.php in your child theme
- Confirm that the custom font you added can be selected in Appearance → Customize → Typography.
The process is as follows.
Now, let's explain the settings!
OceanWP child theme settings
OceanWP is a theme made overseas, so it does not include many Japanese fonts by default.
To set custom fonts in OceanWP, you must set up a child theme. If you haven't set up a child theme yet, please follow the instructions below to set up a child theme.
Find web fonts
I think the most common one is Google Fonts.
For example, Google Font "M PLUS 1" Let's say you want to use

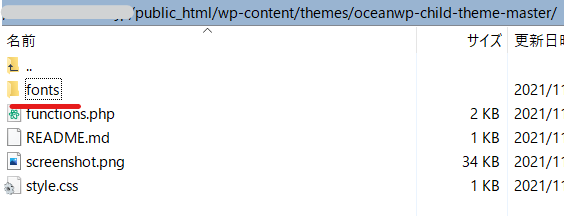
Add fonts folder to OceanWP child theme hierarchy
Add the [fonts] folder to the OceanWP child theme hierarchy.
The child theme file hierarchy is
wp-content/themes/oceanwp-child-theme-master
It will be.
Download the web font file
Return to the screen where you searched for the font you want to use on Google Fonts.
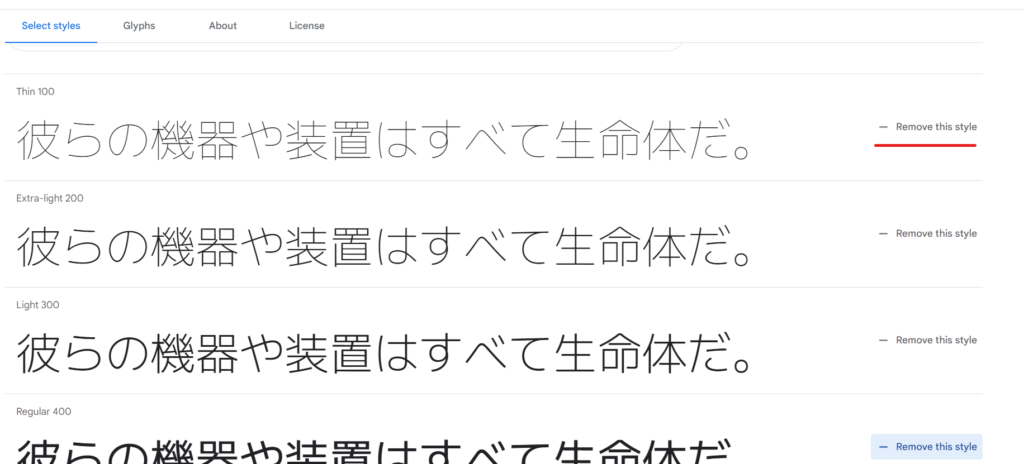
Select a font weight
Click on the text "Select this style" and select the thickness you need.
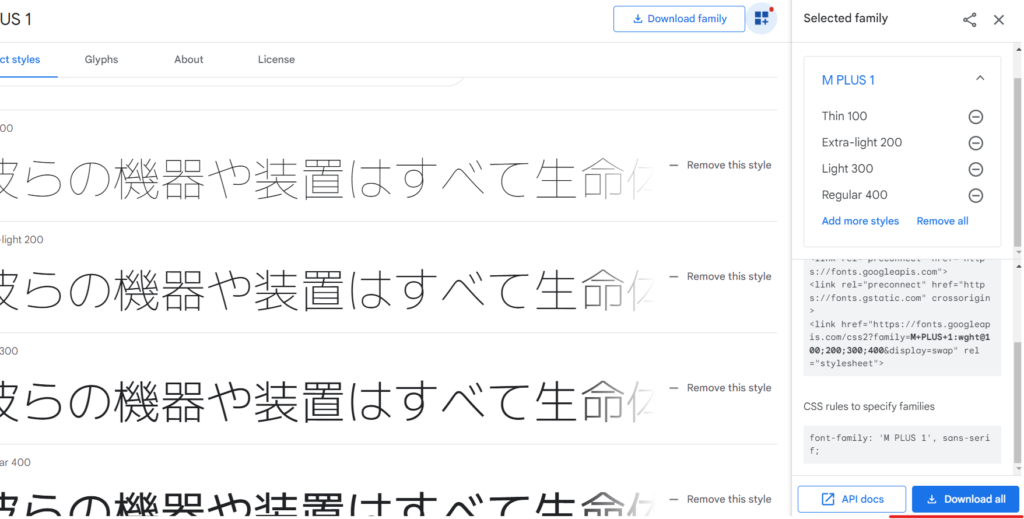
Check the code
Click the icon in the upper left corner of the screen and click the [Download all] button to download the font file.
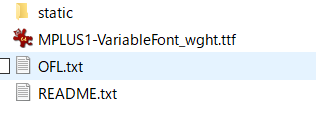
Downloaded web font files
If you check the downloaded font file, it will look like this.
MPLUS1-variableFont_wght.ttf
Here is the font file.
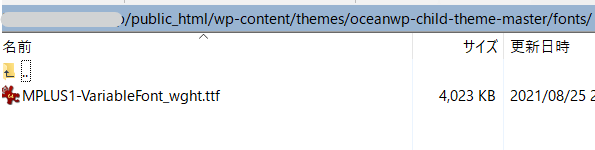
Upload to the fonts folder in the OceanWP child theme hierarchy
Upload the MPLUS1-variableFont_wght.ttf file into the fonts folder.
Go to style.css in your OceanWP child theme
Add code to sytyle.css so that the fonts can be used in OceanWP.
style.css is in the child theme.
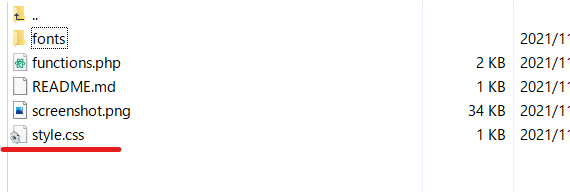
The attached image is the screen that appears when connecting from FTP or the server's file manager.
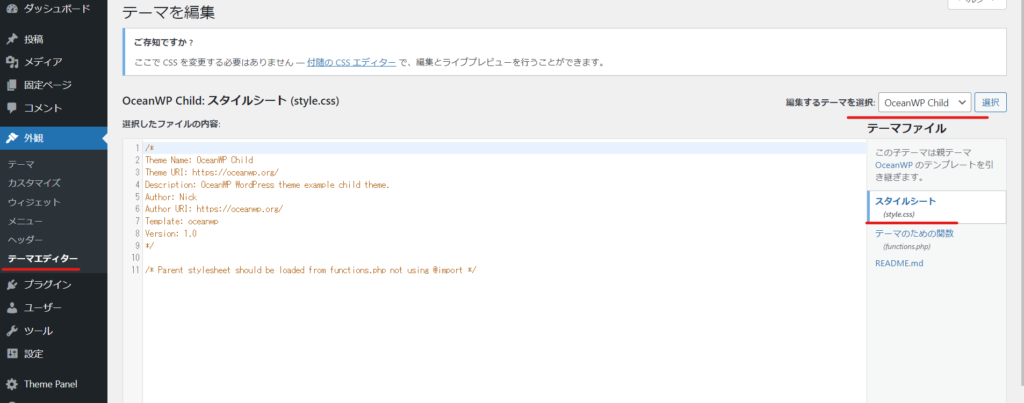
If you want to add it from the WordPress dashboard:
It is [style.css] located in [Appearance] > [Theme Editor].
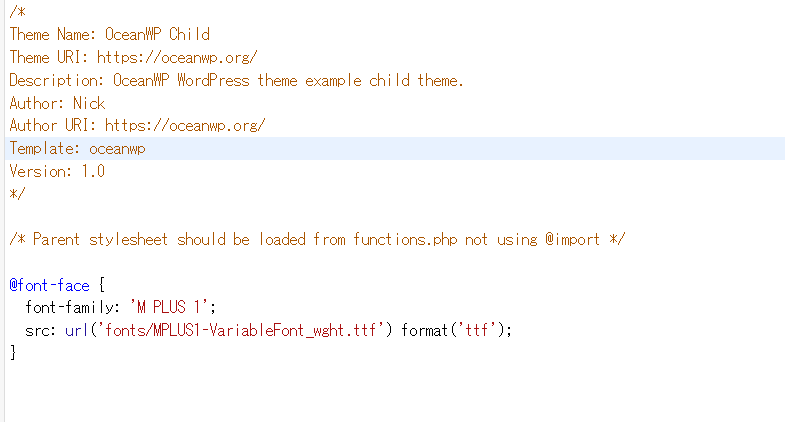
Add the code to style.css
Add the @import code that you checked earlier with Google Fonts to style.css.
@font-face { font-family: 'M PLUS 1'; src: url('fonts/MPLUS1-VariableFont_wght.ttf') format('ttf'); }I added it to style.css like this.
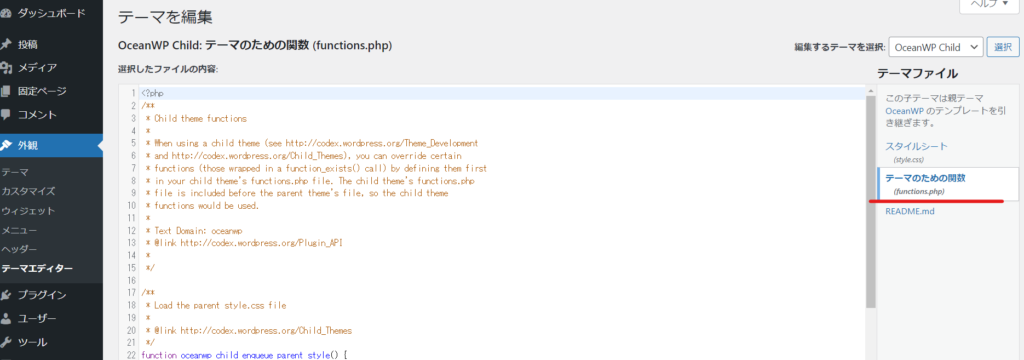
Add to function.php
Next, add the code to function.php of your OceanWP child theme and set it up so that the font can be selected in [Appearance] > [Customize] > [Typography].
If you want to make edits from the WordPress dashboard, open the function.php file, which is next to style.css.
The code to enter is
function ocean_add_custom_fonts() { return array( 'M PLUS 1' );I added it at the very end.

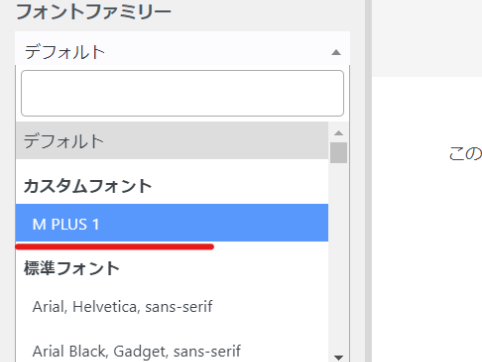
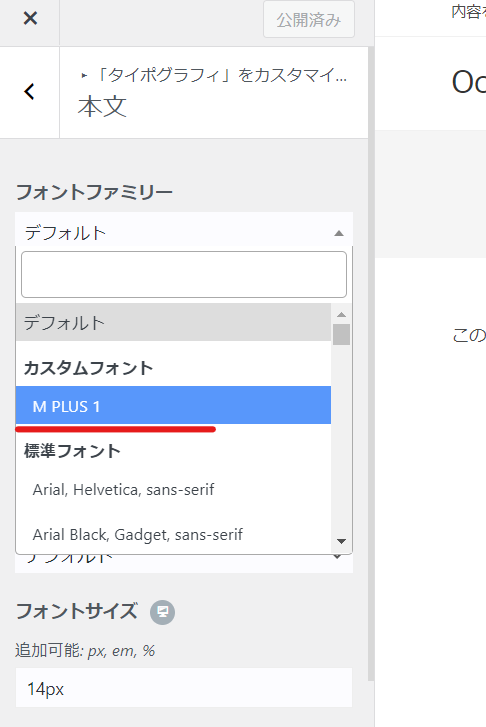
Check if it was added to customization
Finally, let's check that the configuration is OK.
In the WordPress dashboard, go to Appearance > Customize > Typography
Go to. Either one will do, but try selecting [Body text], and if the font family you added appears in the font family selection area, then it's OK!
My impressions after setting a custom font
Setting up custom fonts in OceanWP can be quite a hassle.
However, once you set it up, it's easy to use and reflects the changes.
Released as soon as the next morning! Weekends and holidays are also available!
Super rush website creation plan
We offer a rush website creation plan for those who need a website in a hurry!
We can publish your content as soon as the next morning, even on weekends and holidays! If you have any questions, please check the details below!
Latest Articles


Error message: Allowed memory size of 268435456 bytes exhausted (tried to allocate 14684160 bytes) Error: On Lollipop

Explaining the Meta Pixel feature of the paid version of the WordPress booking system plugin Amelia (9.x and later)