How to create a website using WordPress/How to use plugins/No-code construction blog
WordPress security enhancement plugin All in one WP Security ~ Installation ~ General settings explained
At HanamiWEB Online School,
●Ask questions in real-time in the virtual study room!
●Ask as many questions as you want via chat!
●E-learning materials that you can learn as much as you want, 24 hours a day!
All included for just 2,500 yen/month!
A must-read for those who are concerned about the security of their WordPress site
We explain how to enhance security with the free All in one WP Security plugin.
This time, we will explain how to install and configure plugins > general settings.
For more information, please see the All in one WP Security explanation table of contents!
Install the All in one Security plugin
- Plugin
- Add a new plugin
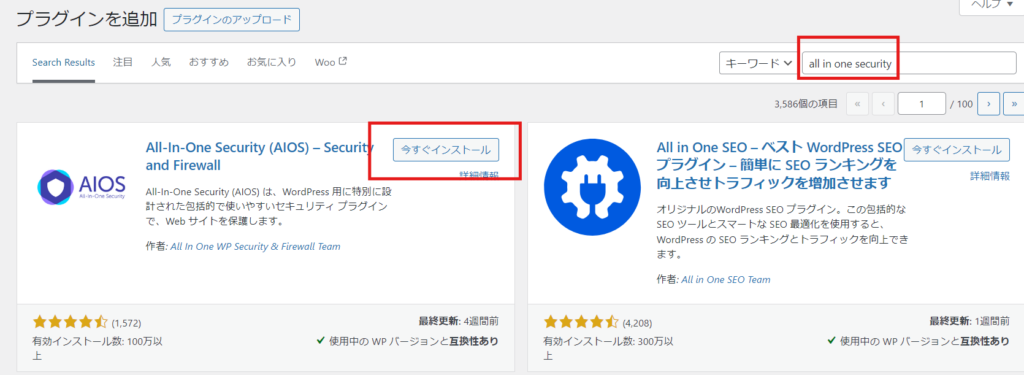
- Enter "All in one Security" in the keyword field.
- The All in one Security plugin is on the left side of the image below, so click "Install now".
- After installation, click the "Activate" button.
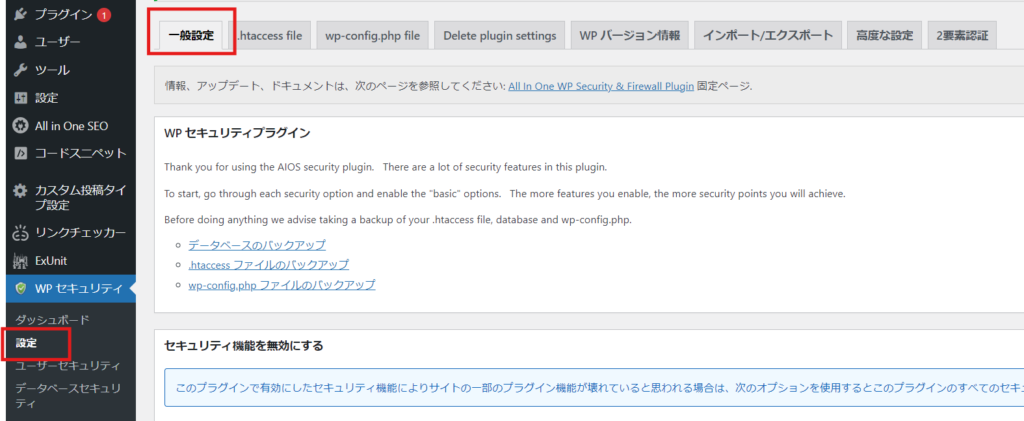
Settings > General Settings
Once enabled, reload the page and a "WP Security" item will be added to the left sidebar. You can configure the settings from there.

First, go to Settings > General Settings.

First, back up your files
As you go through the setup of All in one WP Security, there are functions that will require you to change files, so it’s a good idea to download any important files to your PC first.

When you click on each link text, instructions for manual backup will appear, so download it.


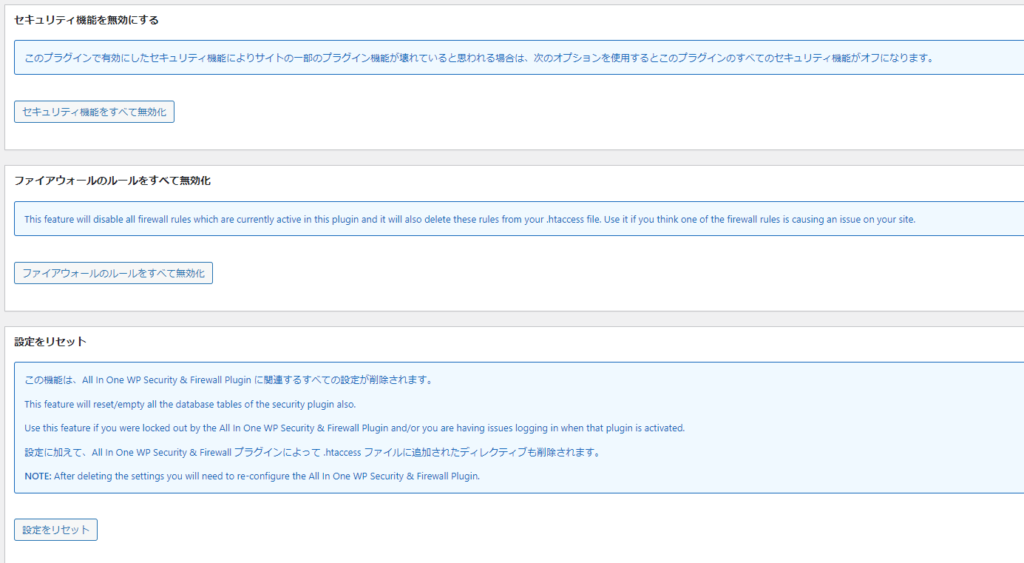
Reset All in one WP Security settings
In the general settings, there is a button to restore your site if it breaks while you are setting up All in one WP Security. Remember that!
Debug mode ON/OFF
Normally, when a problem occurs with a WordPress site, you would modify the wp-config.php file, turn on debug mode, and check for errors, but you can turn debug mode on and off within All in one WP Security.
Once testing is complete, turn this setting off.

PHP-based firewall configuration notification
As you proceed with the setup, a "PHP-based firewall setup notification" will appear at the top of the screen. Click the "Set up now" button.

Released as soon as the next morning! Weekends and holidays are also available!
Super rush website creation plan
We offer a rush website creation plan for those who need a website in a hurry!
We can publish your content as soon as the next morning, even on weekends and holidays! If you have any questions, please check the details below!
Latest Articles
