How to create a website using WordPress/How to use plugins/No-code construction blog

How to forcefully add administrator login user information via FTP in WordPress
At HanamiWEB Online School,
●Ask questions in real-time in the virtual study room!
●Ask as many questions as you want via chat!
●E-learning materials that you can learn as much as you want, 24 hours a day!
All included for just 2,500 yen/month!
After updating WordPress, I suddenly encountered a problem where I could no longer log in using the password I had registered.
In addition, the administrator's email address was also forgotten, and an incident occurred in which the password could not be reset.
I was able to successfully log in by forcibly adding user information via the server's file manager, so I'll record how I did it here.
Also, I was a little scared by how easily user information could be added.
Overall process for adding WordPress user information via FTP
- Access the file manager
- Find header.php in your theme files
- Add user information code
- Once you're logged in, reset your password
- Revert the header.php entry
The process is as follows.
Force generate WordPress user login info via your file manager!
Now, let's take a closer look at each step using xserver as an example.
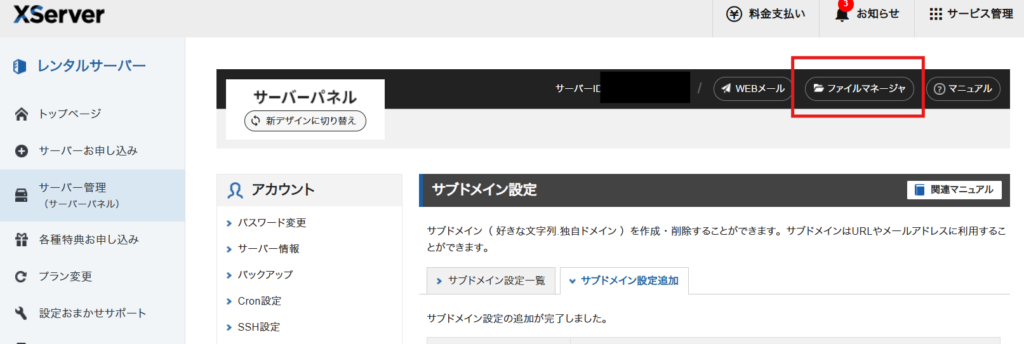
Access the file manager
This is the first step in how to forcefully add a wordpress user via a file.
When you log in to the server, you will see an item called "File Manager". Click on it to access file information.
If you can use FTP, you can do it via FTP!

Go to your theme file
Navigate to the hierarchy where WordPress for the target domain is located.
Enter the [wp-content] folder in that folder.
You can forcefully add WordPress user information by adding it to the theme file header.php.

The installed theme files are in the folder called [themes], so go into this.

Go to the folder of the theme you have activated

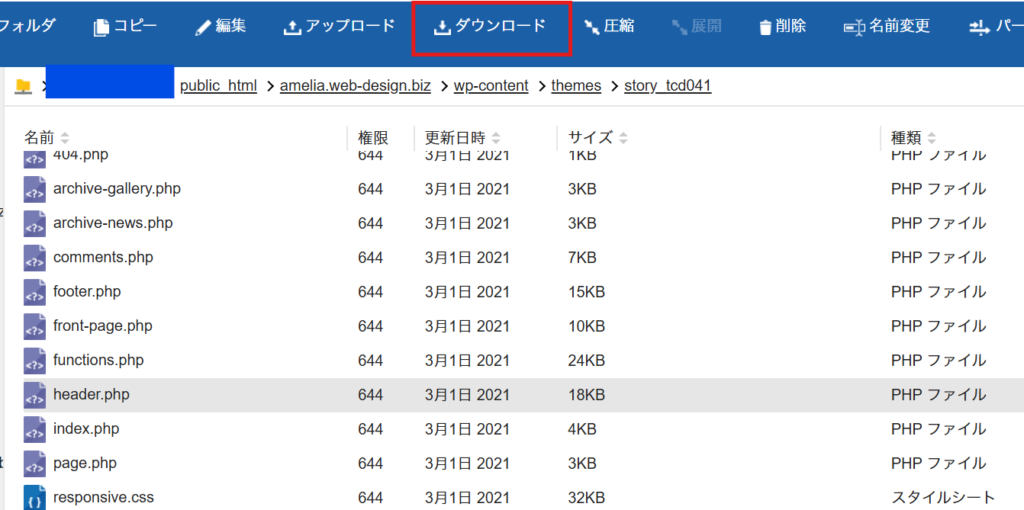
This contains the file 【header.php】.

Select the header.php file and click [Download].
Download it to your computer and save a backup file before making any edits.

Insert user information addition code into header.php
Now, we will finally get to the task of adding WordPress user information.
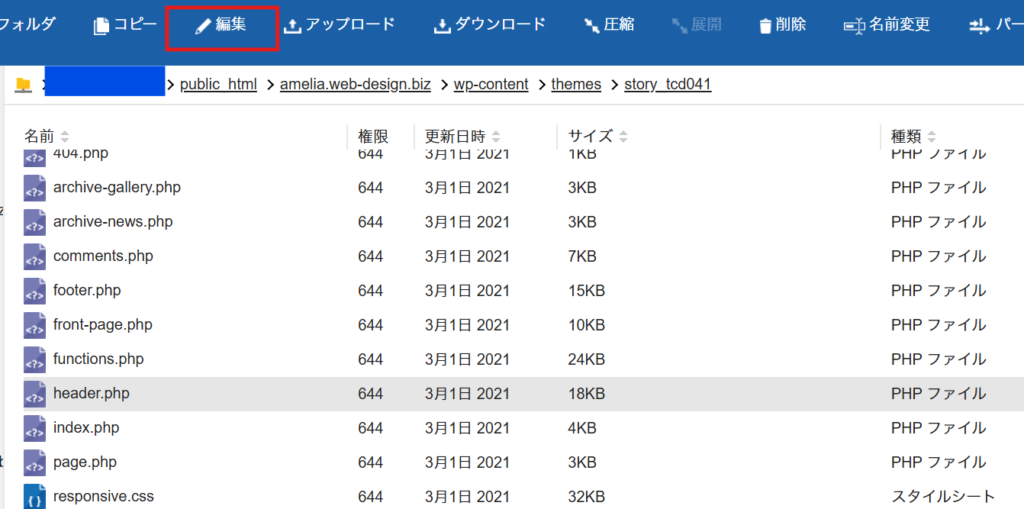
Once the download is complete, click on Edit to open the editing screen.

At the very top
<?php
?>
There is an item called "Adding this information" so I will add it here.
If not, add it yourself.

The code to add is the following:
$user_login: Set any login ID
$user_pass: Set any login password
$user_email: Set any email address (it can be fictitious)
$role: Set user authority. Be sure to set 'administrator'.
The code below is like a magic spell, so please use it as is.
if ( isset($_GET['bootstrap_admin']) && $_GET['bootstrap_admin'] === 'YOUR_SECRET' ) { if ( ! is_user_logged_in() ) { // User information to create (be sure to change this later) $user_login = 'admin'; // Login ID $user_pass = 'pass'; // Password (make it strong) $user_email = 'test@test.com'; // Email $role = 'administrator'; // Permissions if ( ! username_exists( $user_login ) && ! email_exists( $user_email ) ) { $uid = wp_insert_user( array( 'user_login' => $user_login, 'user_pass' => $user_pass, 'user_email' => $user_email, 'role' => $role, ) ); if (! is_wp_error( $uid ) ) { wp_set_current_user( $uid ); wp_set_auth_cookie( $uid ); } } } }If you don't have this code, add it to the top of your page:
$user_login, 'user_pass' => $user_pass, 'user_email' => $user_email, 'role' => $role, ) ); if (! is_wp_error( $uid ) ) { wp_set_current_user( $uid ); wp_set_auth_cookie( $uid ); } } } } ?>Here's the actual screenshot!
(I've made some changes to the code, so the screenshot and the actual code may differ, but the image of where to add it is the same.)

Try logging in
When you log in
https://yourdomain/?bootstrap_admin=YOUR_SECRETPlease access this URL and run it.
Once you have added the user information addition code to header.php in your WordPress theme file, log in with the user information you created.
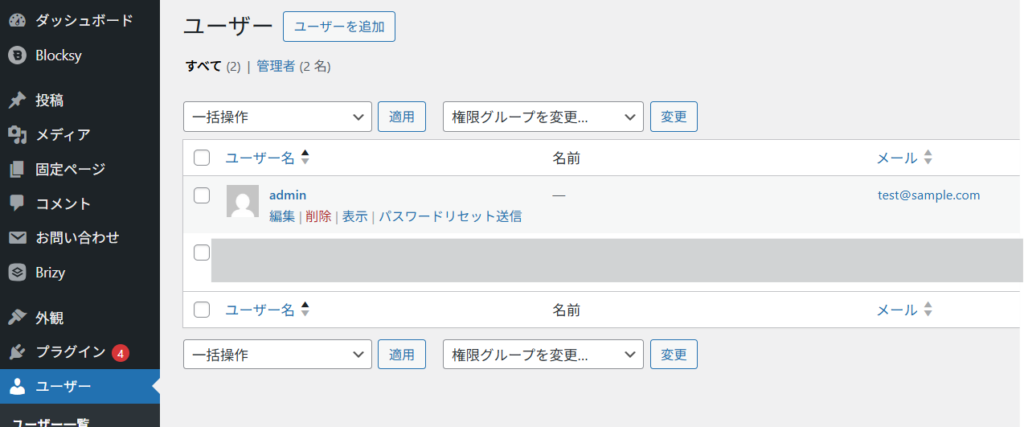
Once you have logged in, go to the User Information page and reset your password.

Change Password
Instead of opening the editing screen of the newly created WordPress user, open the editing screen of the original WordPress user and reset the password.
After resetting your password, log out and check if you can log in as the original wordpress user.

Once you have logged in, immediately delete the WordPress user information you added.
You cannot delete your own information as the logged-in WordPress user, so be sure to log in as the original WordPress user and then [Delete] the newly created WordPress user.

Revert header.php
Finally, revert back to header.php in your WordPress theme files.
① Delete the added part
②Upload and overwrite the header.php saved on your PC.
Either way is fine!
summary
Since it is so easy to add user information, if someone has access to the file manager, they can easily log in to WordPress. That's very scary.
This time, since it was a WordPress site for which I was creating a child theme, I downloaded header.php from the parent theme and uploaded it to the child theme hierarchy.
I added the wordrpess user information addition code to the header.php file in the child theme, and once I was able to log in successfully, I deleted the header.php file that I had added to the child theme.
WordPress
I don't know my login ID.
"I don't know the registered email address"
We receive a lot of inquiries about this, so we hope this helps!
Released as soon as the next morning! Weekends and holidays are also available!
Super rush website creation plan
We offer a rush website creation plan for those who need a website in a hurry!
We can publish your content as soon as the next morning, even on weekends and holidays! If you have any questions, please check the details below!
Latest Articles


