How to create a website using WordPress/How to use plugins/No-code construction blog
How to use the LearnDash Course Builder LMS plugin
At HanamiWEB Online School,
●Ask questions in real-time in the virtual study room!
●Ask as many questions as you want via chat!
●E-learning materials that you can learn as much as you want, 24 hours a day!
All included for just 2,500 yen/month!
We explain LearnDash, a paid LMS (Learning management system) plugin that allows you to build an e-learning system using WordPress.
This time, we will explain how to use the course builder, which is essential for creating courses.
Launch Course Builder
It may be easier to understand the Course Builder if you think of it as the table of contents page at the beginning of a book.
Main heading → Each lesson
This is for creating course content. You can also add tests.
- LearnDash LMS
- course
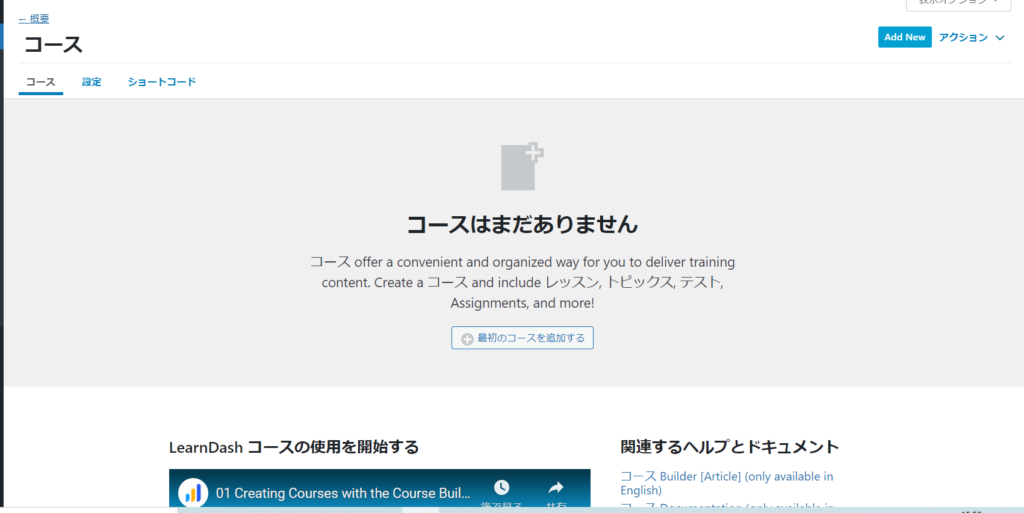
If you haven't created a course yet, add one by clicking on [Add your first course].
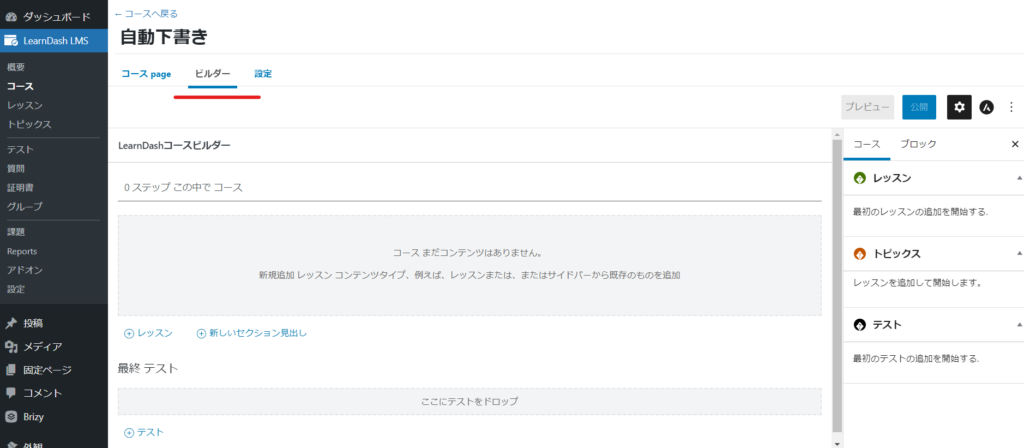
Click the Builder tab.
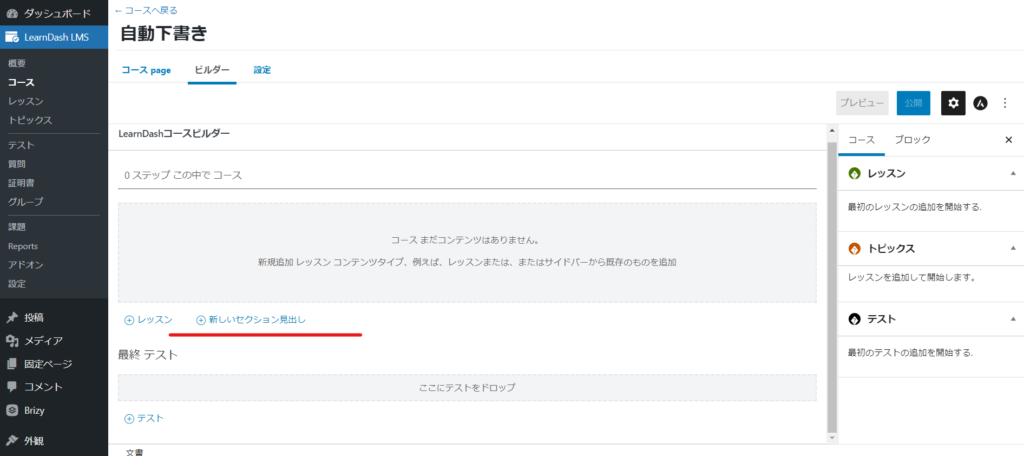
Headline Creation
Create headings for each course. Click [New Section Heading].
Create a heading for each lesson.
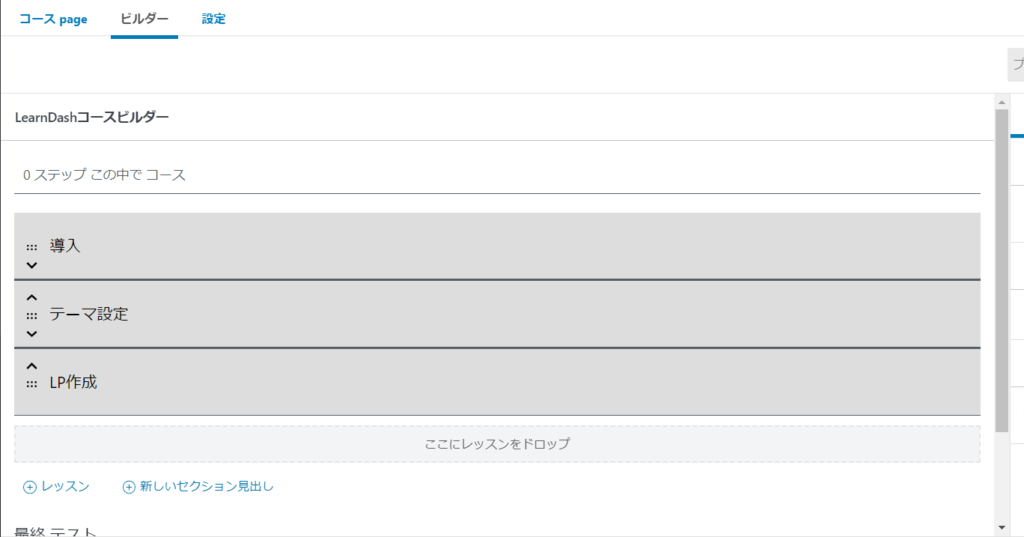
Add Lesson
The lessons are where you put the actual content. Lessons should be placed under the main heading.
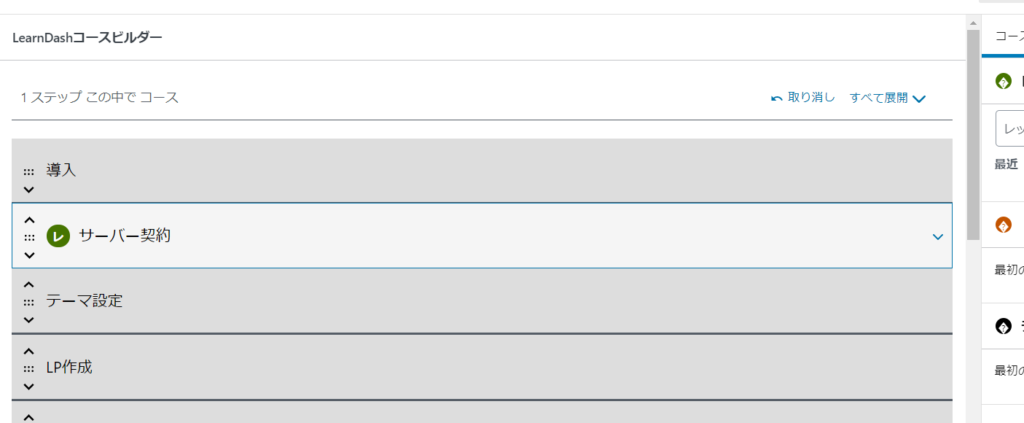
Create tests along the way
You can create tests during the course to gauge students' progress.
You can add [Topics] and [Tests] by clicking the right arrow on the course.
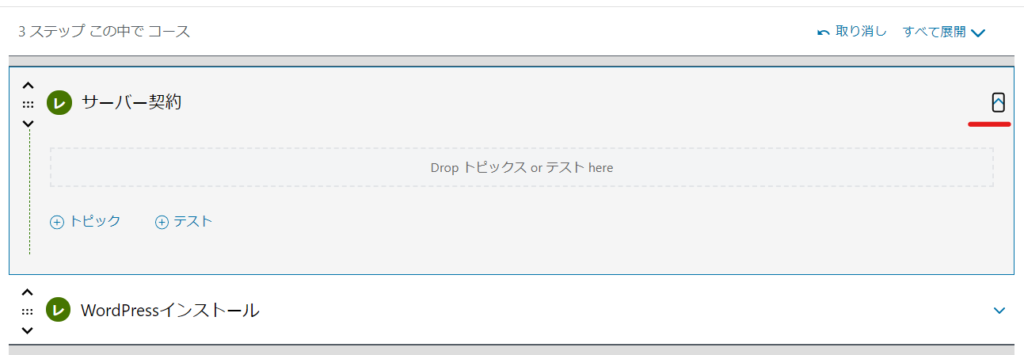
In this way, you can create a sequence of heading → course → test.
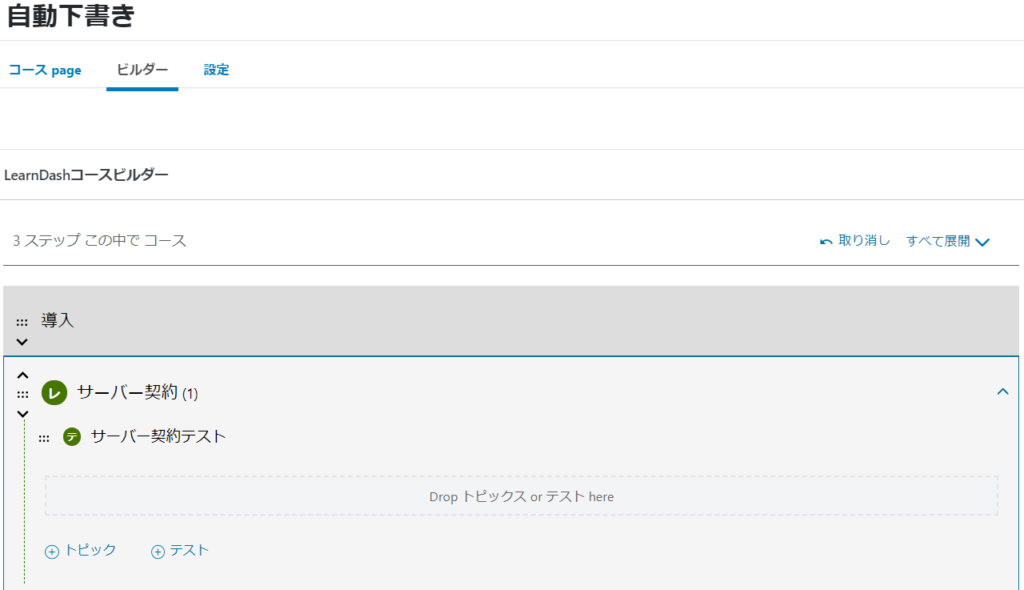
Final test creation
Create a final test to end the course.

Sort
Headings, courses, etc. can be rearranged by dragging.
summary
You can intuitively create course content! It's fun because it's quick and easy!
Released as soon as the next morning! Weekends and holidays are also available!
Super rush website creation plan
We offer a rush website creation plan for those who need a website in a hurry!
We can publish your content as soon as the next morning, even on weekends and holidays! If you have any questions, please check the details below!
Latest Articles


