How to create a website using WordPress/How to use plugins/No-code construction blog


Build a matching site with WordPress! Taxonomy of PremiumPress' Microjob theme
At HanamiWEB Online School,
●Ask questions in real-time in the virtual study room!
●Ask as many questions as you want via chat!
●E-learning materials that you can learn as much as you want, 24 hours a day!
All included for just 2,500 yen/month!
This article explains how to set up the Microjob theme from PREMIUMPRESS, which allows you to build a matching site using WordPress.
This time I will explain about taxonomies. It is a very complex and important topic, so I will explain it in detail!
What is a Taxonomy?
First, I will explain where the taxonomies you set up in PremiumPress are output.
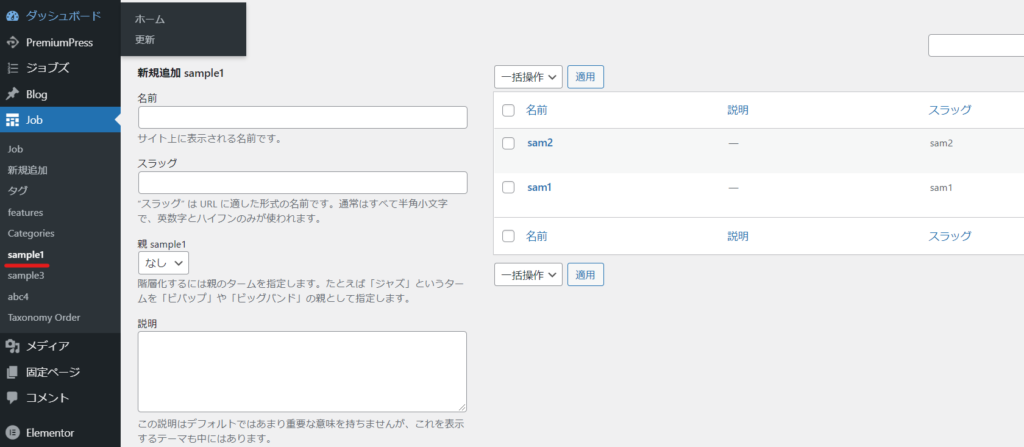
The setting location is PREMIUMPRESS's [Settings] > [Taxonomy].

It is designed to allow you to add taxonomies.
It will be added as a new Job category.
Jobs already contain two types of items: features and Categories, but you can add more items.
Just like a normal category, you can add multiple items to it.
Outputted at the time of listing registration
When registering to sell an item, users can select a taxonomy they have created to sell their item.

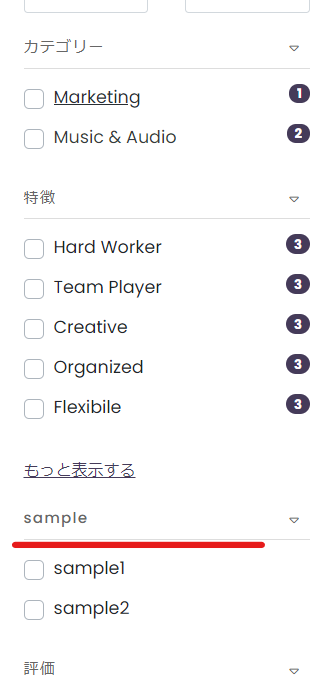
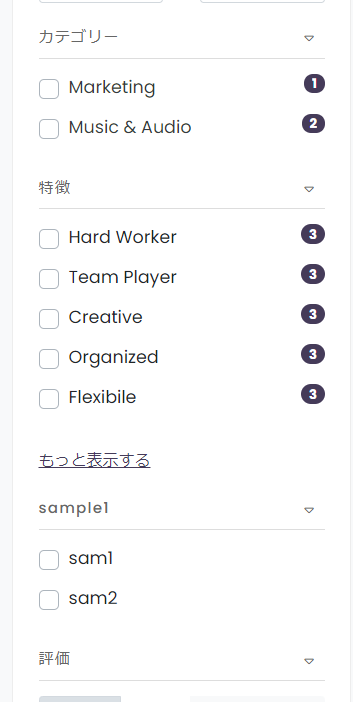
Show up in search
It will be displayed as a search item, so you can search using the taxonomy you created.This allows you to create a system that allows users to efficiently access the information they want.
How to create a taxonomy
Now, let me introduce the process of creating a taxonomy.
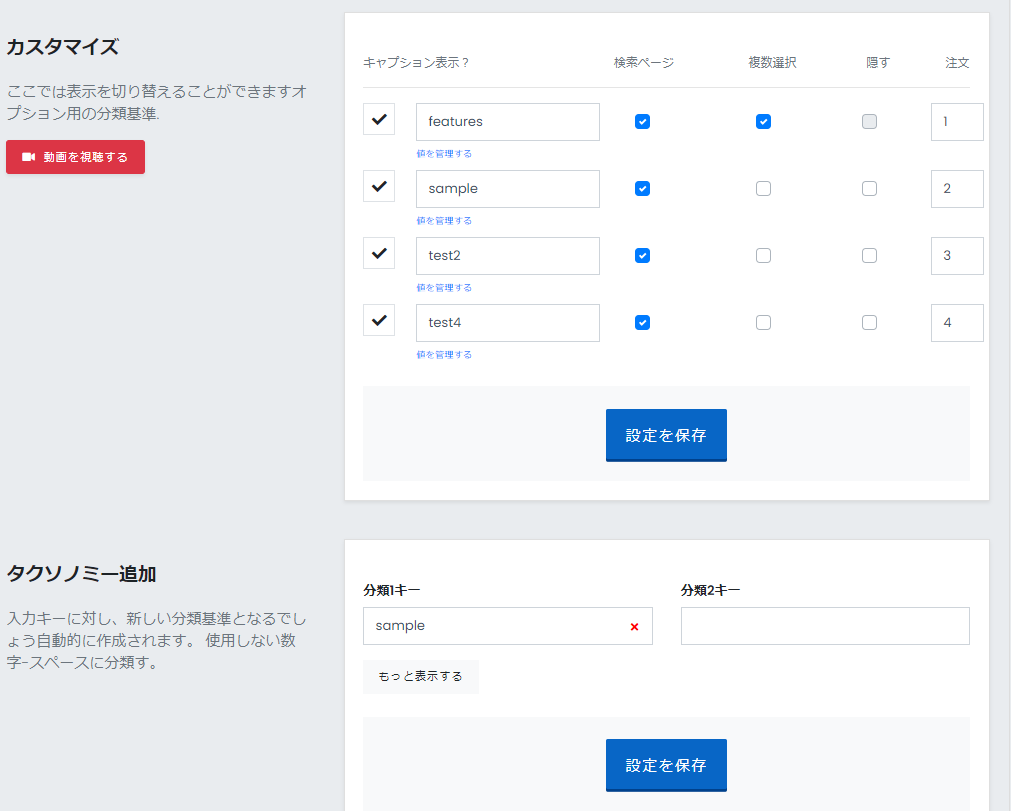
Add original taxonomy
Add it as an original taxonomy in PREMIUMPRESS's [Settings] > [Taxonomy].
Add the original taxonomy name like this.
An alphanumeric string is better
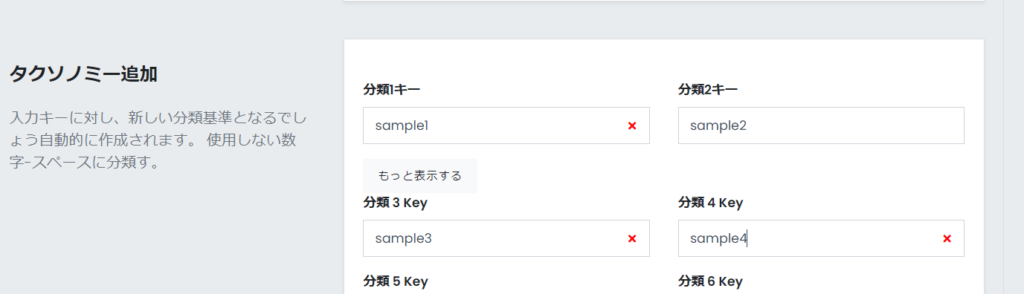
Added
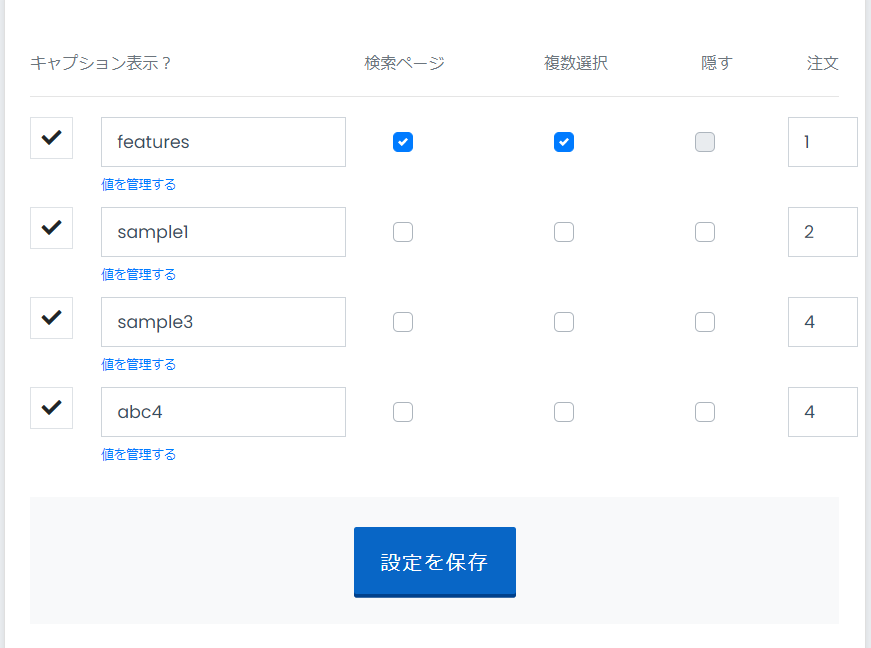
If you want to delete or rename a taxonomy that you have created, update the values of the original taxonomy.
If you want to delete it, just change the name or leave it blank.
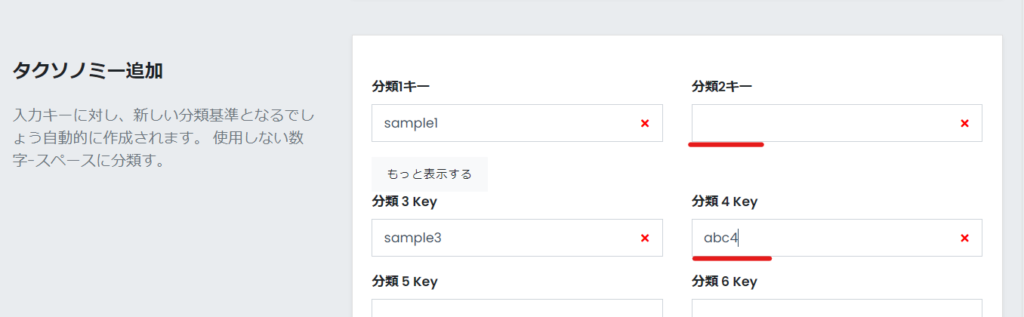
It changes like this.
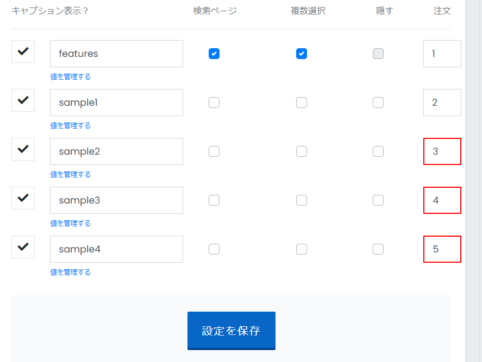
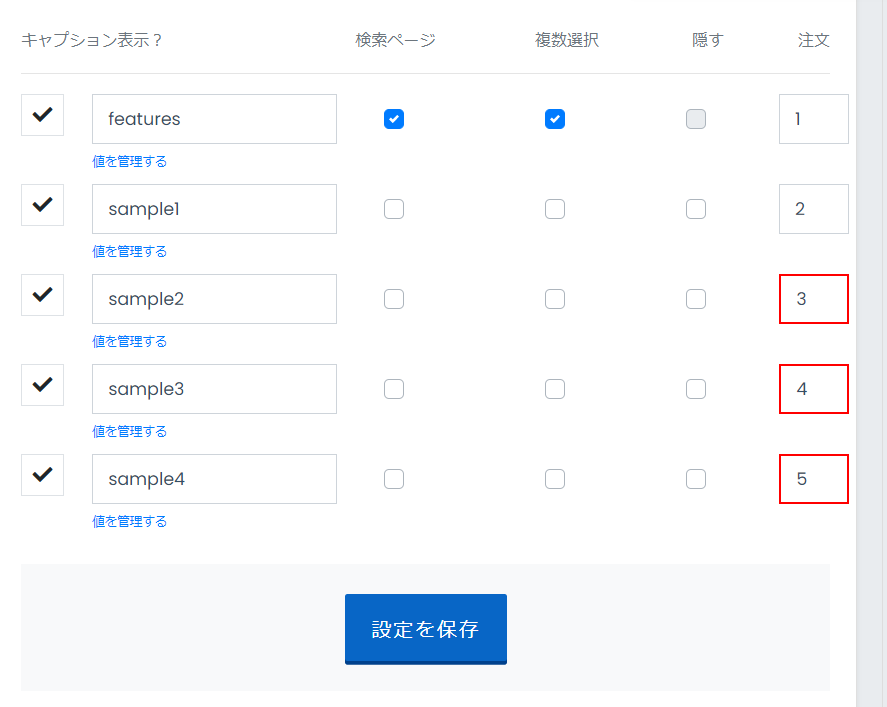
Taxonomy Settings
- Search Page - Check this box if you want to display the page on the search page.
- Multiple selection - Check if not single select
- Hide - Check this box if you have created a file but will not use it.
- Order - In order of arrival
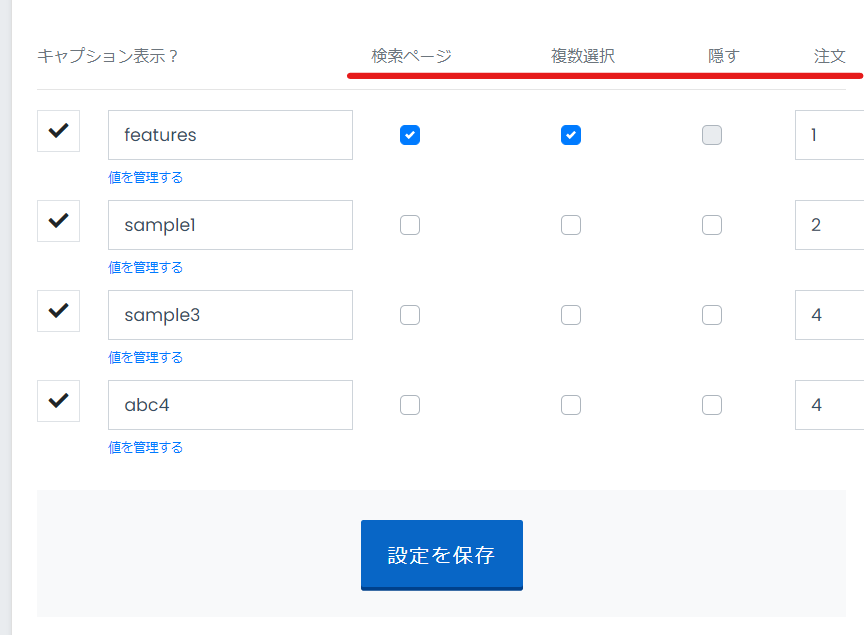
When you add an item to the taxonomy you created, it will appear on the search screen if the search box is checked.
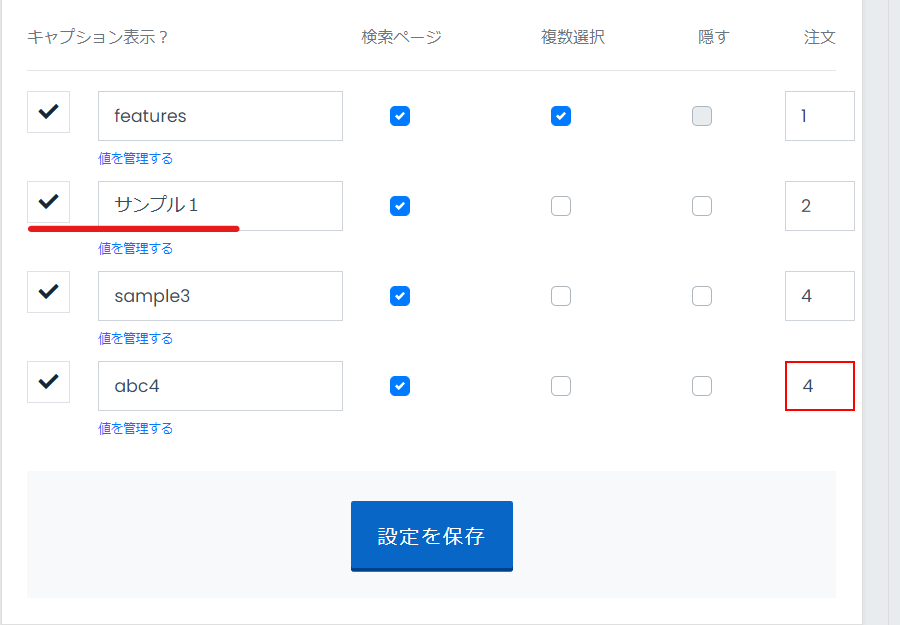
Change taxonomy name to Japanese
I registered the taxonomy in English, but the display was difficult to understand in English, so I changed the language to Japanese after adding the taxonomy.

Search Taxonomy Settings
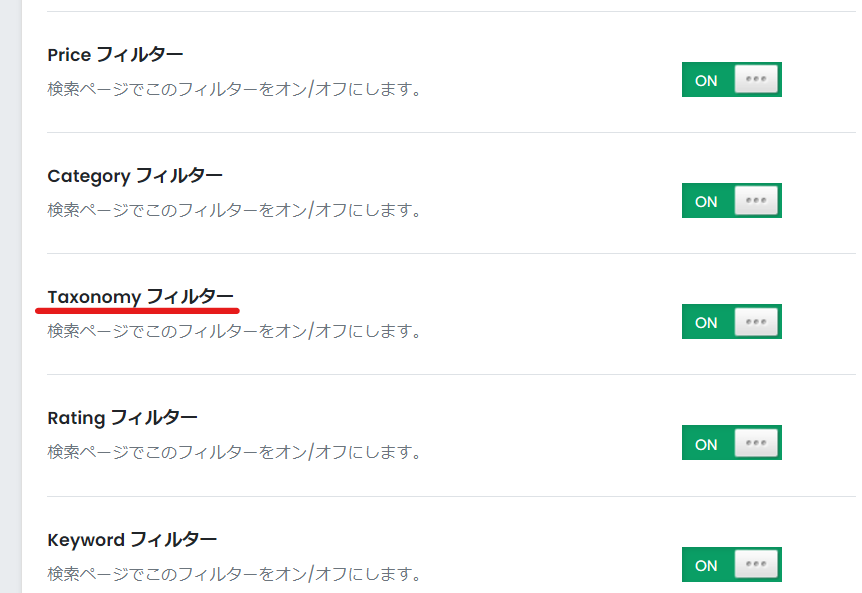
The settings for displaying taxonomies in search fields are actually done in a different place.
The Taxonomy filter must be turned ON in PREMIUMPRESS's [Settings] > [Search Settings].
Taxonomies that have the Taxonomy filter turned ON and the Search box checked in the Taxonomy settings will be displayed in the search field.
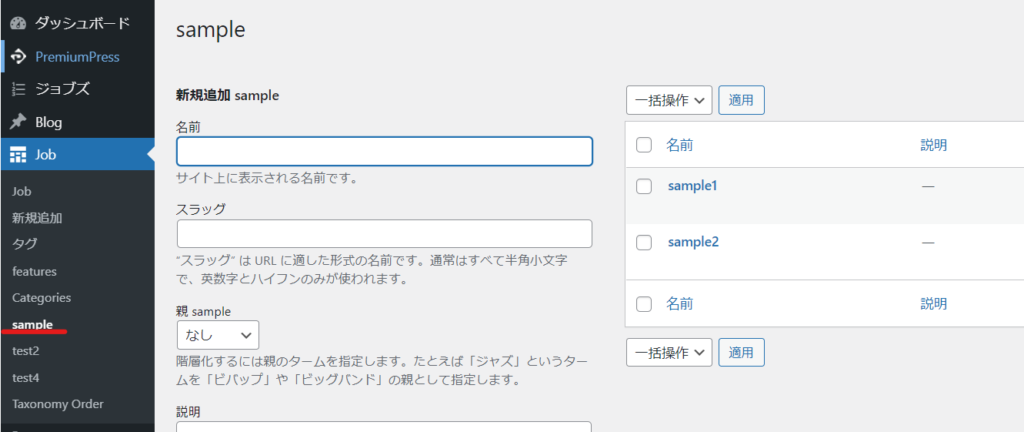
Adding categories to a taxonomy
Add categories to the taxonomy you created. The procedure is the same as adding categories to regular posts.
How to use taxonomies
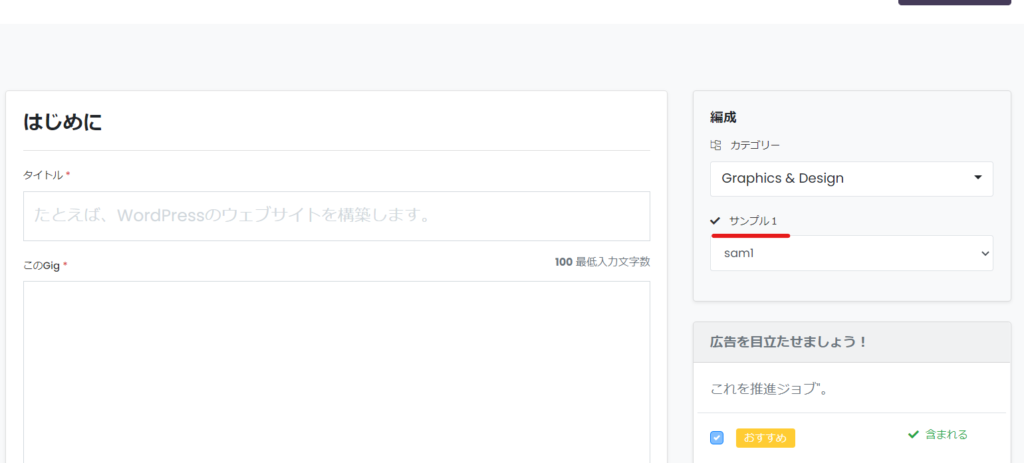
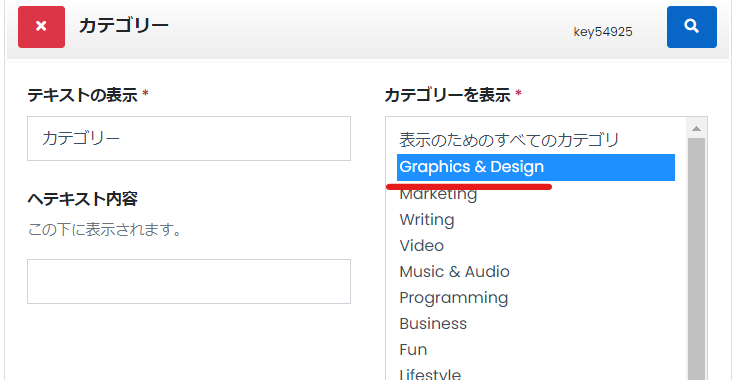
Users select a taxonomy when listing an item.
It will be automatically output in the [Arrangement] section of the listing page.
You can also customize this part.
Taxonomy Customization
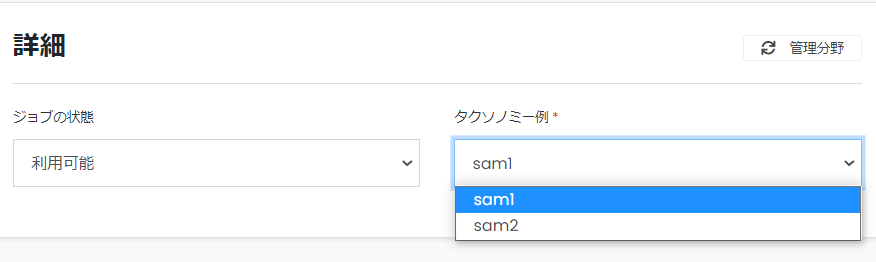
It can be displayed in the details section of the listing page.
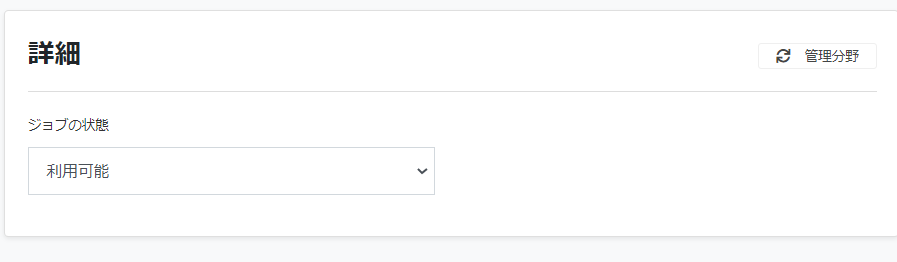
If you display the details, it will result in duplicate registration, so the formation section will be hidden.
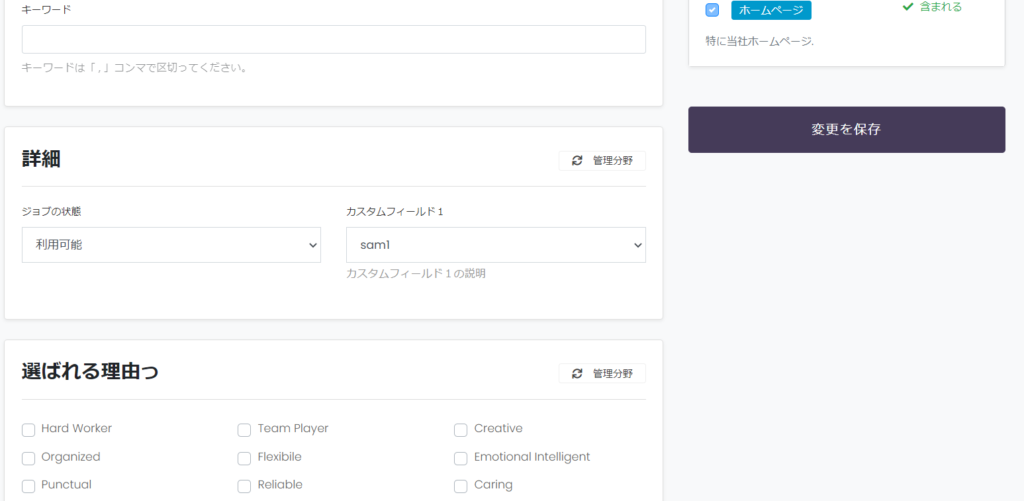
Custom Field Settings
You can set this in the custom fields in the [Add/Edit Job] section of [Job Settings] in PREMIUMPRESS. Click [Add Field] to add it.
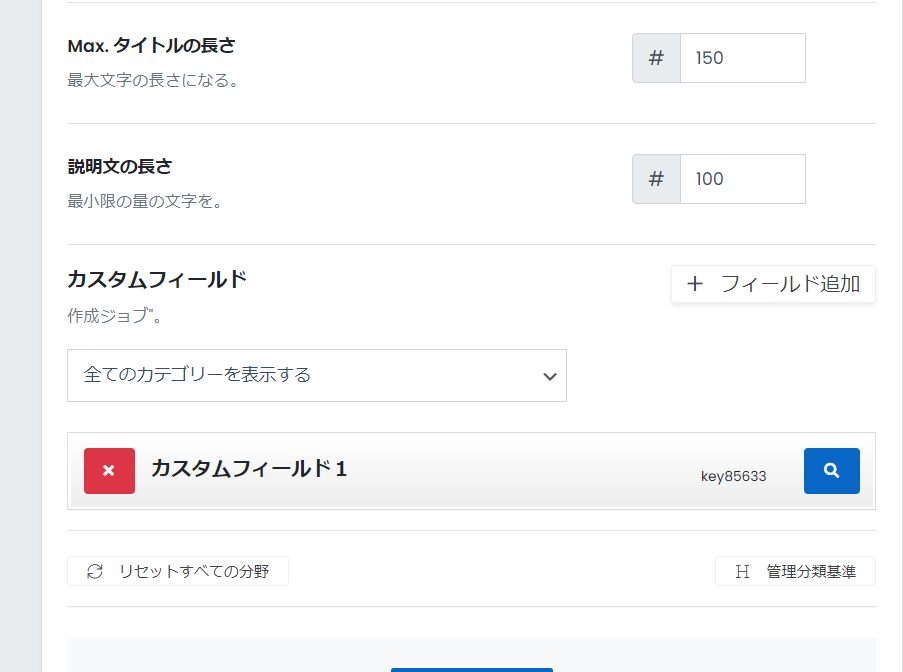
- Display Text – Enter display name
- Enter text content - description
- Show Categories - Set this if you want to set higher level categories
- Field Type – Select Taxonomy here
- Database key - No modification required as it is linked to the database
- Taxonomy - Select which taxonomies to display
- Required - Set whether to make the field required
If you set the above, the taxonomy will be displayed in the details section.
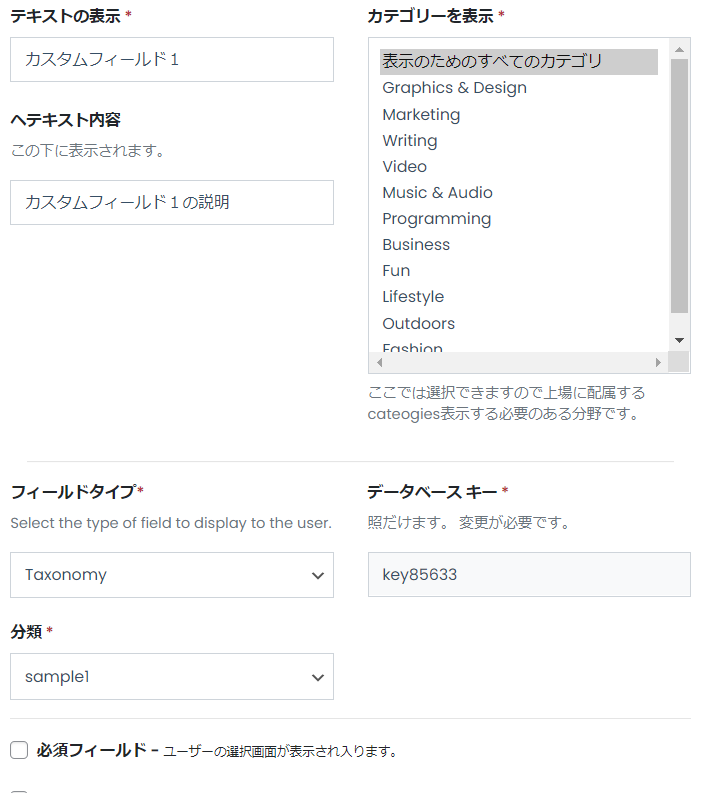
About displaying categories
We will explain in detail how to set up the category display.
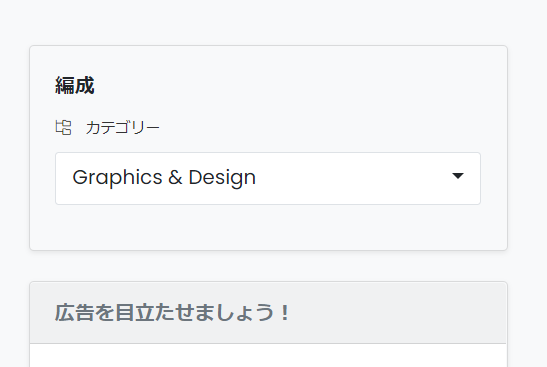
For example, if you select [Graphics & Design] as the category to display
Only if the relevant category is selected in the arrangement
The custom fields you set will be output.
If a different category is selected, it will be hidden.
It took me a while to understand how to set up taxonomies, so I wrote a detailed article about it!
Released as soon as the next morning! Weekends and holidays are also available!
Super rush website creation plan
We offer a rush website creation plan for those who need a website in a hurry!
We can publish your content as soon as the next morning, even on weekends and holidays! If you have any questions, please check the details below!

Latest Articles


Error message: Allowed memory size of 268435456 bytes exhausted (tried to allocate 14684160 bytes) Error: On Lollipop


Explaining the Meta Pixel feature of the paid version of the WordPress booking system plugin Amelia (9.x and later)