How to create a website using WordPress/How to use plugins/No-code construction blog


")
[Diagram] How to set up Google Ads conversion tags with GTM
At HanamiWEB Online School,
●Ask questions in real-time in the virtual study room!
●Ask as many questions as you want via chat!
●E-learning materials that you can learn as much as you want, 24 hours a day!
All included for just 2,500 yen/month!
Conversion settings are essential when running Google Ads. This article explains how to set up conversions using no-code tagging with GTM.
Conversion goals
This time, I would like to set the completion of a request for information from the landing page as the conversion.
Conversion Settings
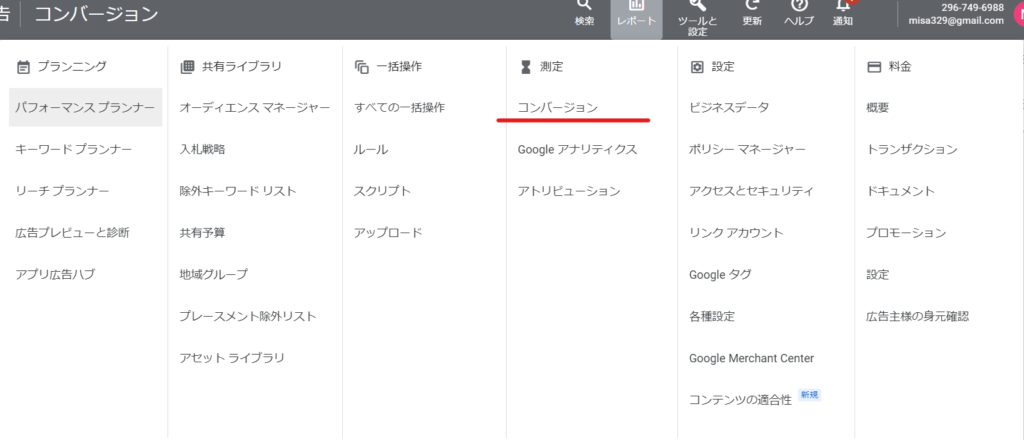
On the Google Ads management screen
- Reports
- setting
- conversion
Click.
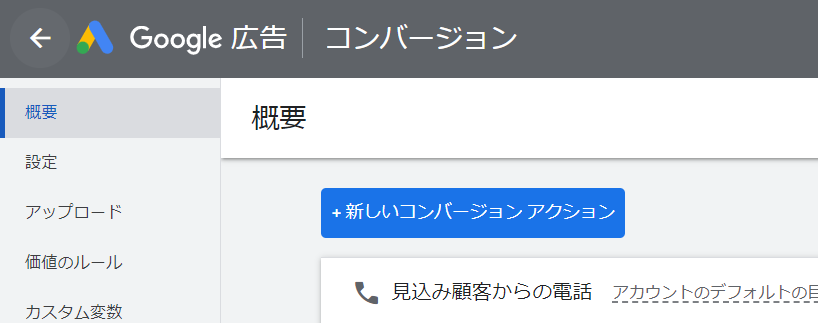
Add a conversion
Click the New Conversion Action button to create a new conversion.
Conversion types
Since we want to measure website conversions, select Website.

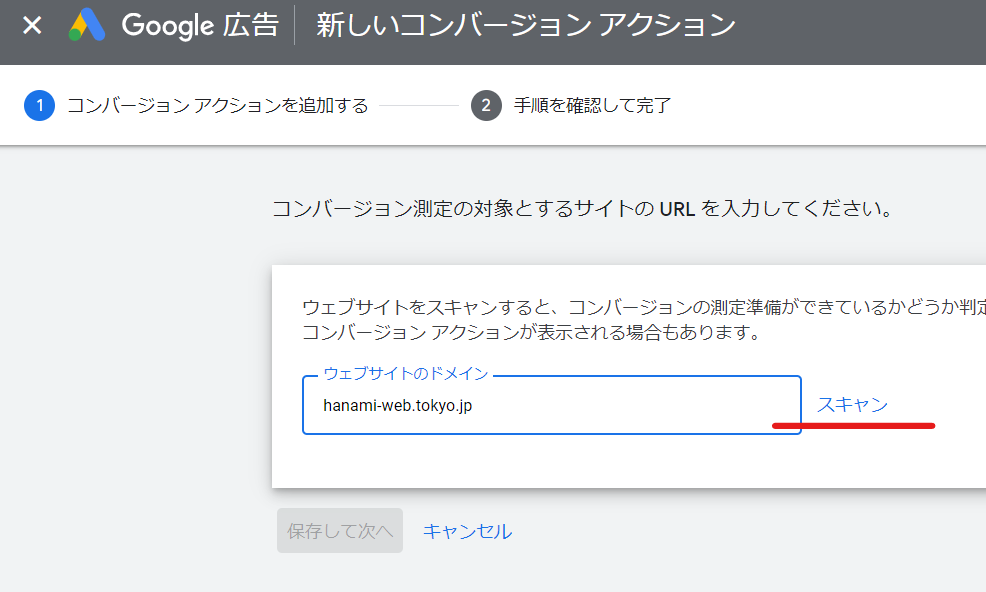
Enter your domain
The part of ●●●.com that does not include https etc. is called the domain. After entering the domain, click Scan.
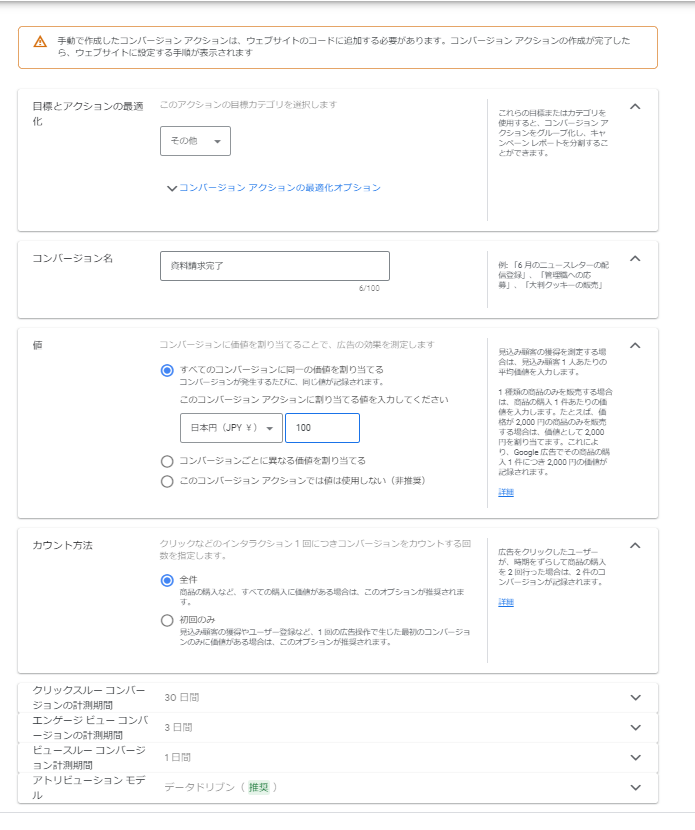
Set up a conversion action
This time, I used [Create conversion actions manually using code]. I did not use [Create conversion actions automatically from website events].
Click the [Add conversion action manually] button to create one.

- Optimizing goals and actions
- Conversion Name
- value
Set the following. This time, I set it as follows. The price is set to 100 yen.
Once you have made the settings, save them and click the Next button.
Setting up Google Tag Manager
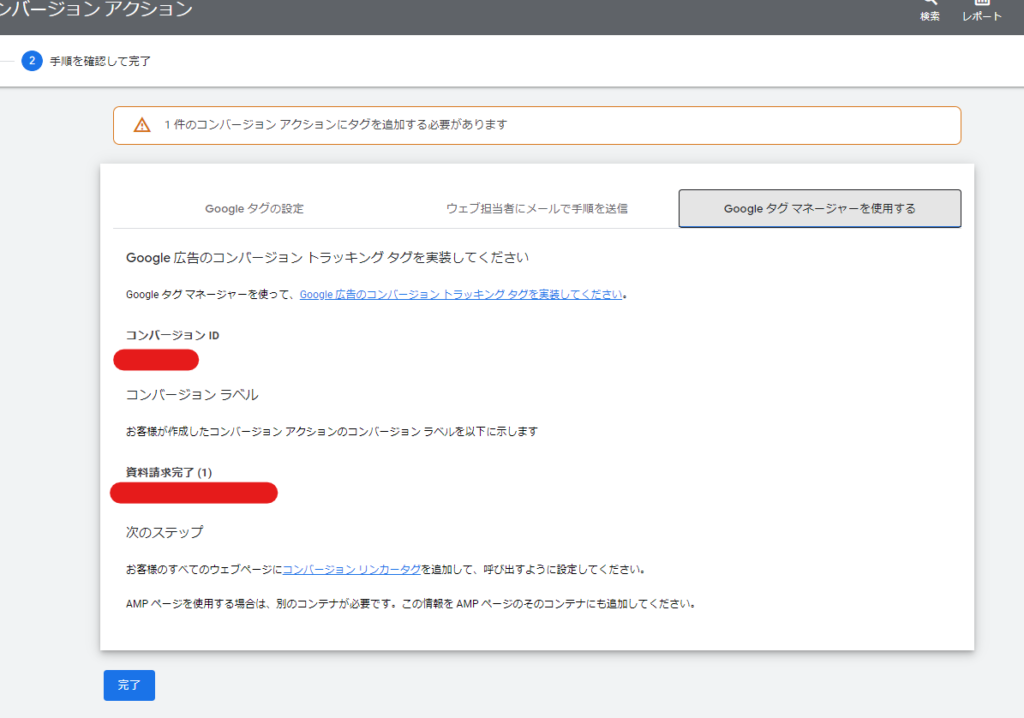
Add the conversion settings you just created in Google Tag Manager.
- Conversion ID
- Conversion Labels
We will use this later.
Conversion settings in GTM
Next, we'll configure it in Google Tag Manager.
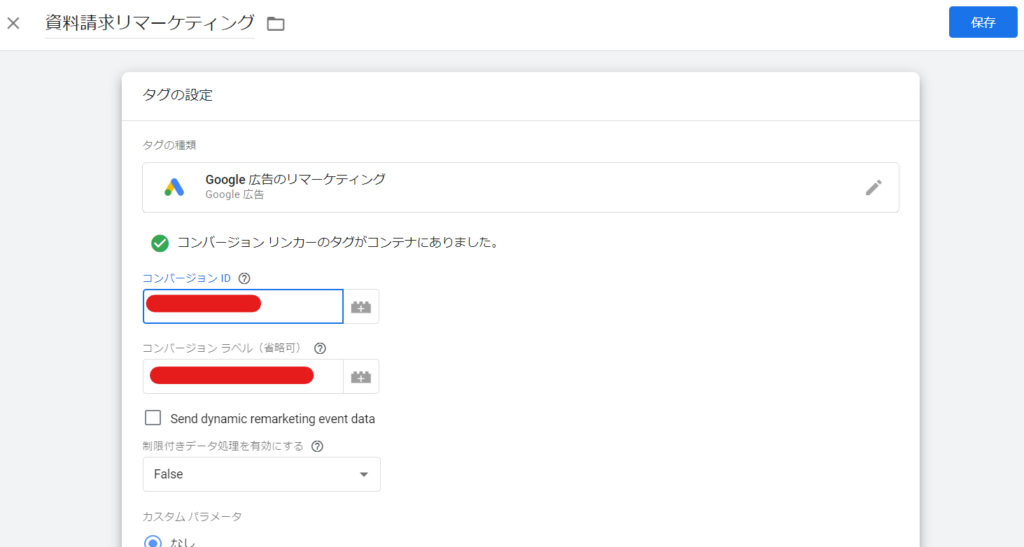
Add a new tag. Enter a descriptive name in the title and click the pencil to create the tag.
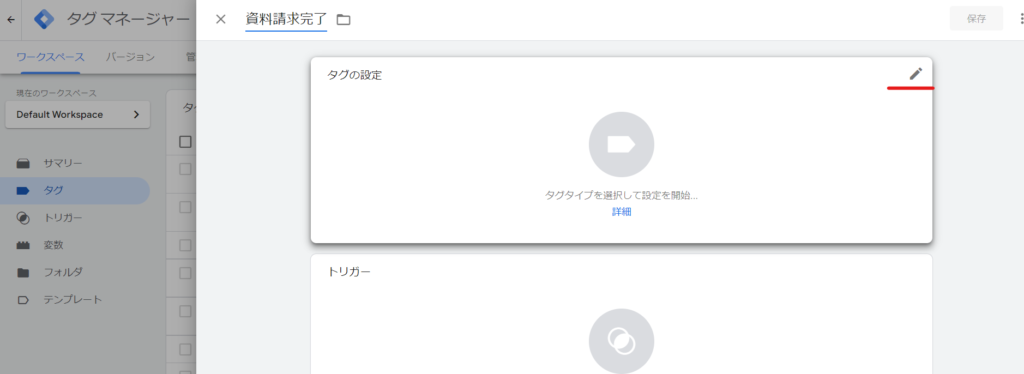
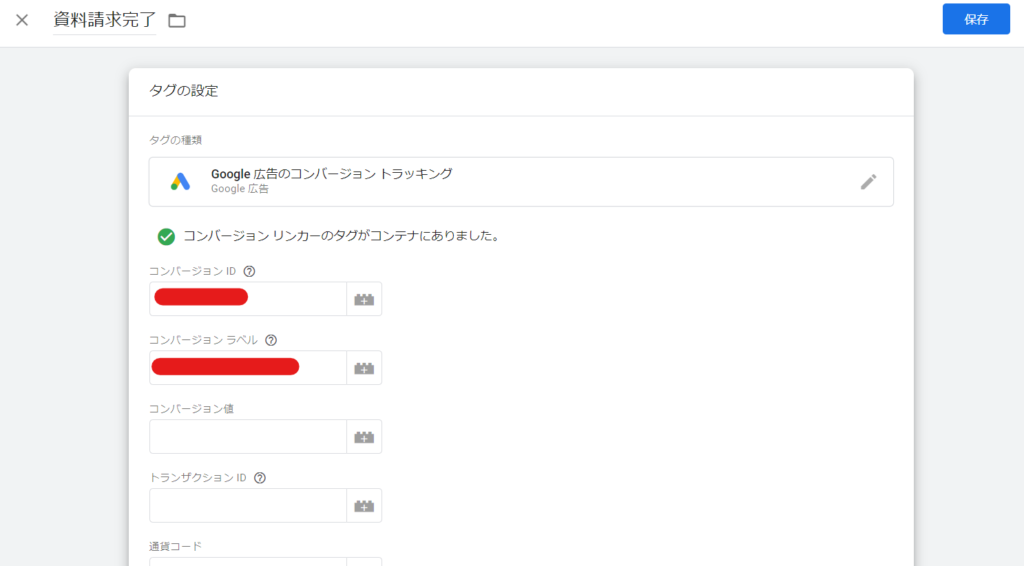
The tag type is [Google Ads Conversion Tracking].

Enter your conversion ID and conversion label
Displayed when adding a conversion on the Google Ads screen
- Conversion ID
- Conversion Labels
Enter the.
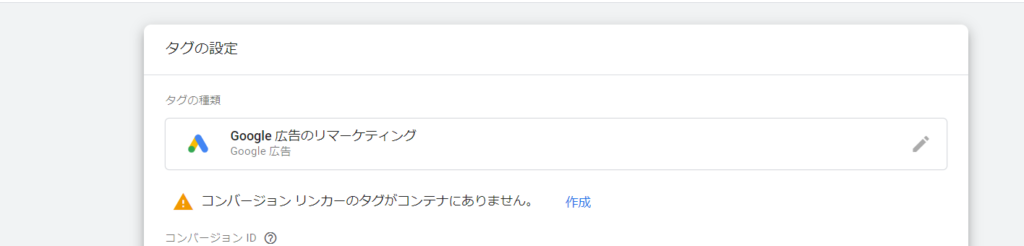
If you are having trouble finding a conversion linker tag in your container, please refer to the following blog post for instructions on how to set it up.
→What does "Conversion linker tag not found in container" mean in GTM (Google Tag Manager)?
Setting up triggers
The trigger will be set when the information request completion page is displayed.
- Trigger Type – Page View
- Trigger location – Some page view (specify thank you page)
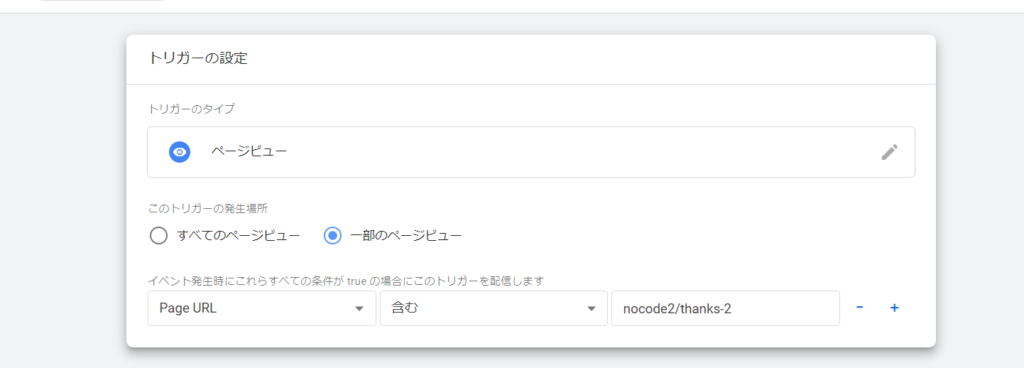
Save the final settings, publish and you're done.
Setting up remarketing tags in GTM
Next, we will set up the remarketing tag in Google Tag Manager.
After entering a title for adding a new tag, select the tag type. In this example, select [Google Ads Remarketing].

Add conversion ID and conversion label
You will also add the conversion ID and conversion label to this screen.
Setting up triggers
This time, we will target all pages on the site, so set the trigger to ALL Pages.
Once you have set it up like this, save it.
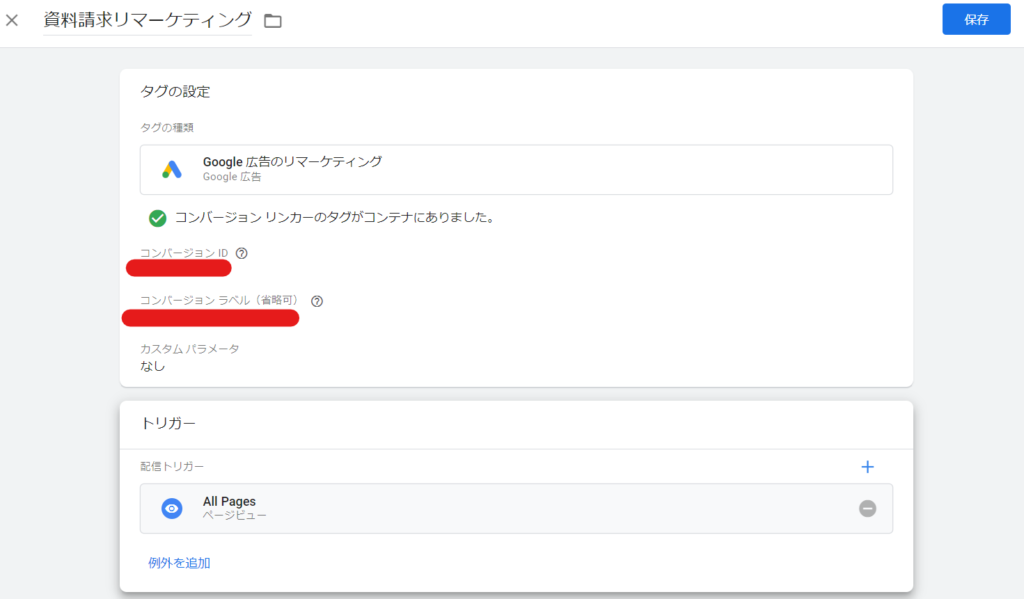
Finally, click the Publish button to publish your settings.
This completes the conversion settings for Google Ads. If you do not set up the conversions, you will not be able to consider areas for improvement, so please make sure to do this before starting Google Ads!
How to check if the settings are correct
Once all the settings are complete, when you view the Google Ads conversion list page, you will see an option for “Troubleshooting” next to the conversion you just created.
Click here.

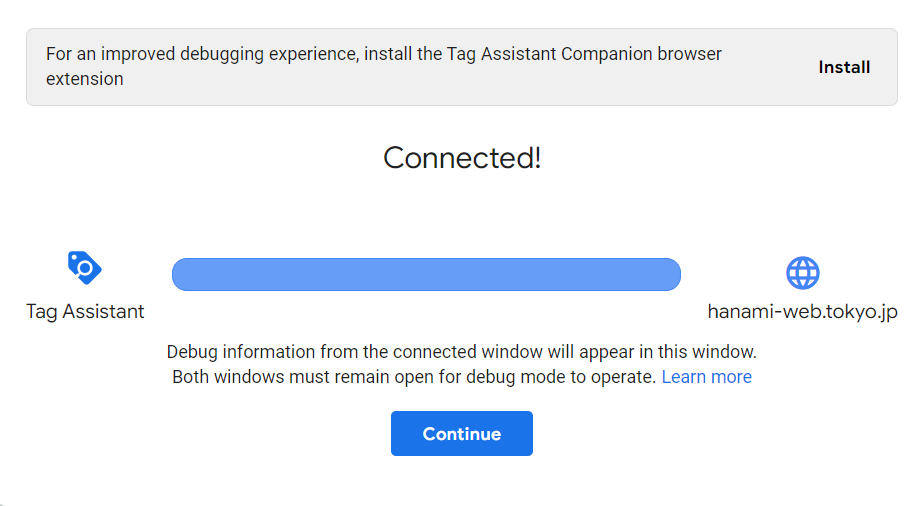
Tag Assistant will launch, so enter the URL of the page that will result in a conversion.
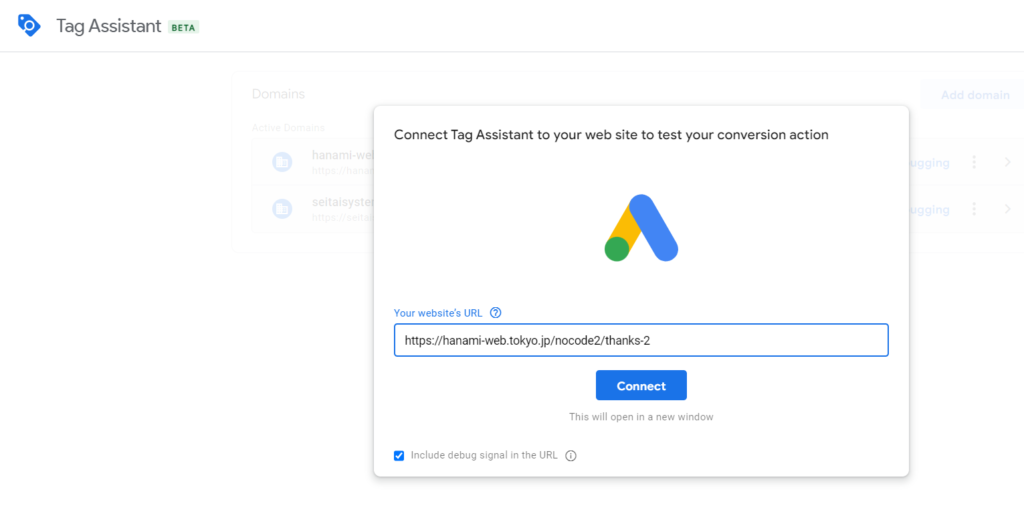
A preview of the page will open in a new window. Keep it open and check the Tag Assistant site, then click the [Continue] button.
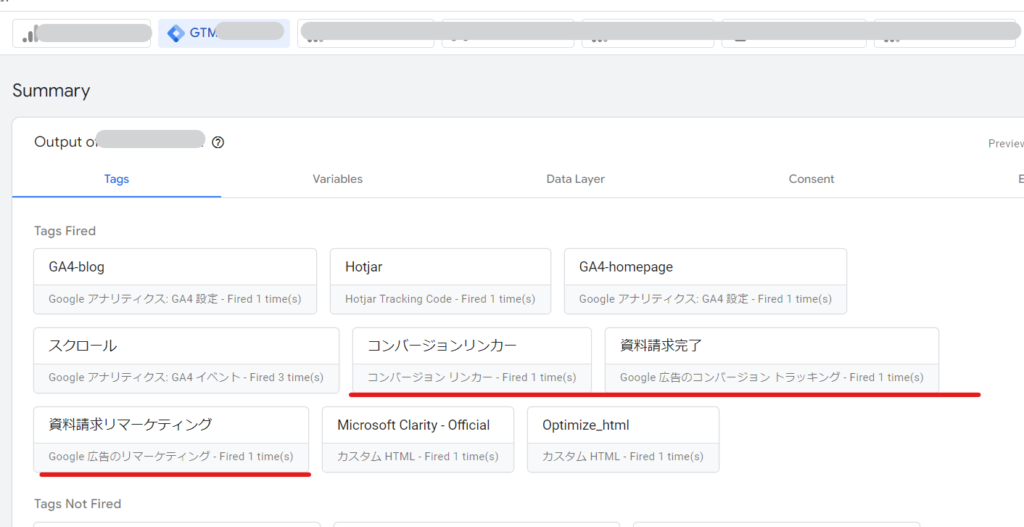
When you switch to GTM tags, a list of active tags will be displayed. This site contains a variety of tags.
- Conversion Linker
- Document request completion conversion tag
- Remarketing Tag
You can confirm that the three types of tags you just set are working properly.
Released as soon as the next morning! Weekends and holidays are also available!
Super rush website creation plan
We offer a rush website creation plan for those who need a website in a hurry!
We can publish your content as soon as the next morning, even on weekends and holidays! If you have any questions, please check the details below!

Latest Articles
How to Enhance EEAT with WordPress | Settings and Design Improvements Necessary for AI-Driven Traffic
[2026 Latest] How to check the number of visits from generated AI using GA4's exploration function
Error message: Allowed memory size of 268435456 bytes exhausted (tried to allocate 14684160 bytes) Error: On Lollipop