How to create a website using WordPress/How to use plugins/No-code construction blog


Create a subdomain email in Google Workspace
At HanamiWEB Online School,
●Ask questions in real-time in the virtual study room!
●Ask as many questions as you want via chat!
●E-learning materials that you can learn as much as you want, 24 hours a day!
All included for just 2,500 yen/month!
I manage my domain with Google Workspace, but when I added a subdomain, I was no longer able to receive emails.I looked into this, but there wasn't much information available, so I thought I'd record it here.
This is the environmental condition that I will explain.
- Manage your main domain with Google Workspace
- Get your domain from Onamae.com
This time, the domain was acquired from Onamae.com, so this will be an explanation of how to set it up on Onamae.com, but I hope it will be of some help to anyone who has added a subdomain to Google Workspace and is having trouble setting up email.
Overall flow of setting up to receive subdomains of domains acquired through Google Workspace via Gmail
The work is complicated, so I will first explain the overall process.
- [Server] Add a subdomain
- [Google Workspace] Add a subdomain
- [Domain management company] Add a TXT record to verify ownership
- [Google Workspace] Add an email address
- [Domain management company] Add MX records to verify ownership
- [Gmail] If the settings are completed correctly, you will be able to receive emails automatically in Gmail using the Gmail mail client that receives emails from the main domain.
- [Gmail] Sending settings for the created subdomain
This process will allow you to send and receive emails via Gmail.
Adding a subdomain on the contracted server
When launching a new website with a subdomain, the process of generating a subdomain by adding "Subdomain" from the normal server settings is the same even if you are using Google Workspace.
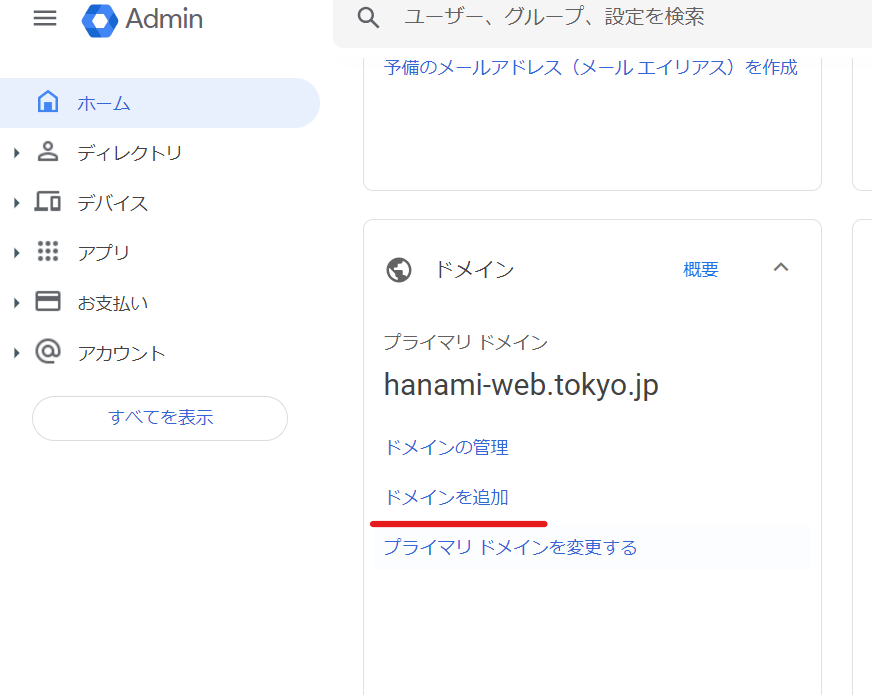
Log in to Google Workspace
Click [Administration Console].
Add a subdomain in Google Workspace
First, create a subdomain in Google Workspace.
We are
- hanami-web.tokyo.jp Company website
- wordpress.hanami-web.tokyo.jp Marketplace sales matching site
I created a subdomain for this purpose.
Once you have logged in to Google Workspace,
- domain
- Add Domain
Click.
Add a subdomain.

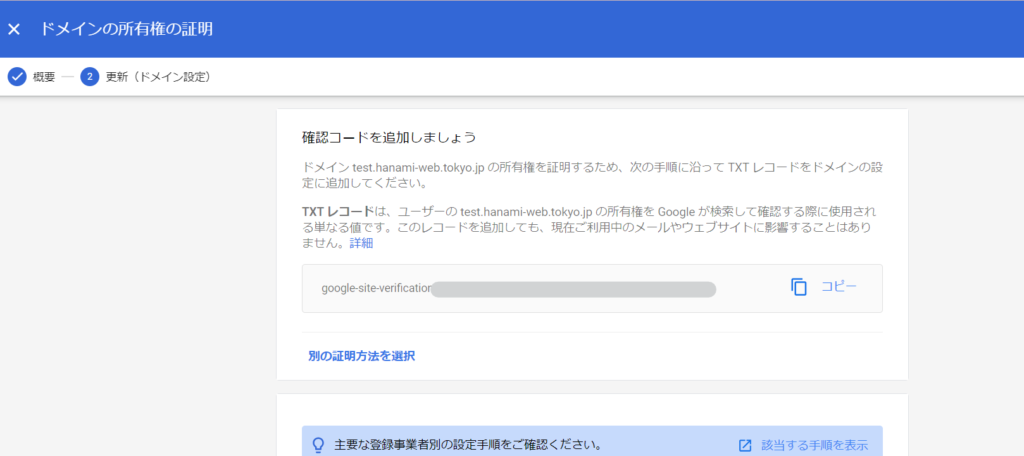
(For the purposes of explanation, we will continue with the explanation assuming that test.hanami-web.tokyo.jp is added.)
When you see this screen, click the [Continue] button.
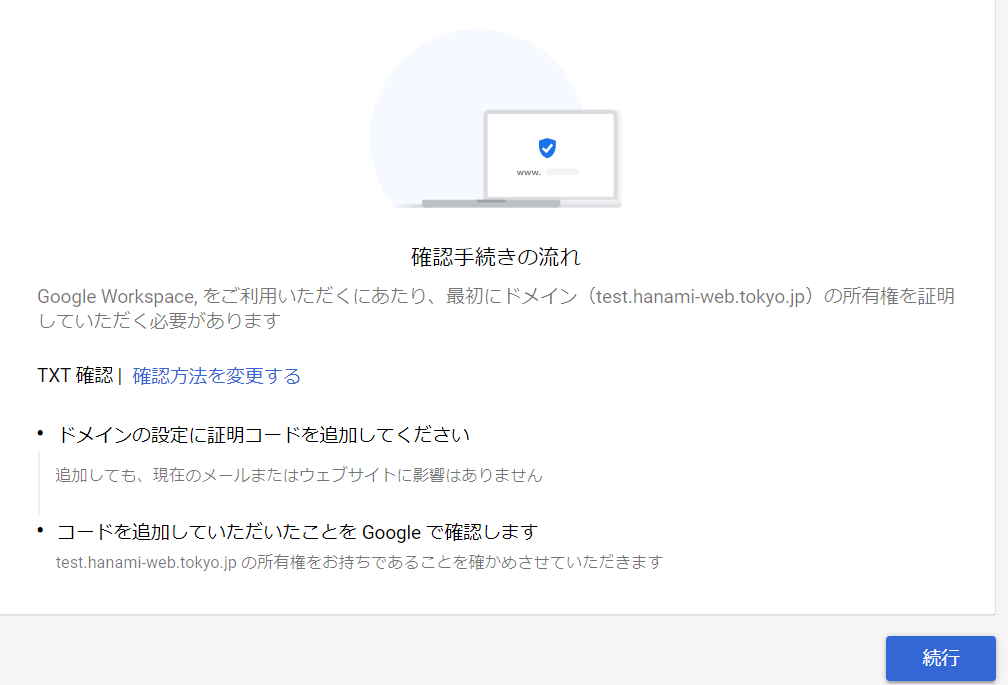
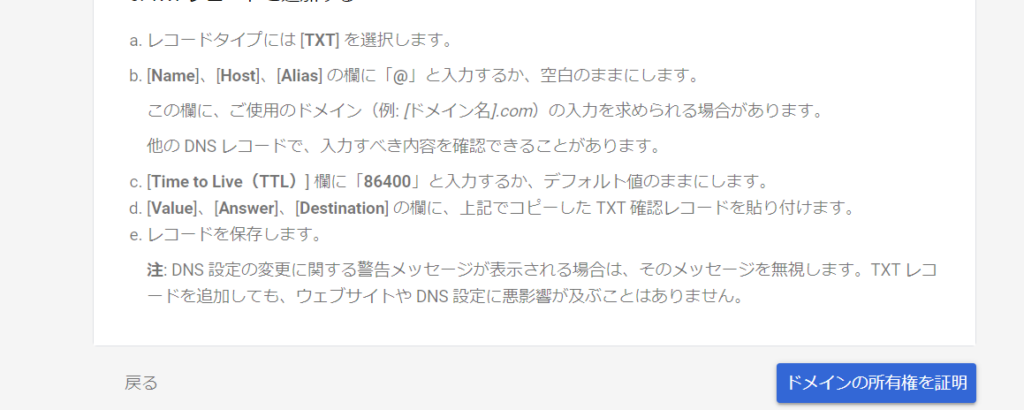
Add the TXT record displayed on the next screen to your domain management screen.
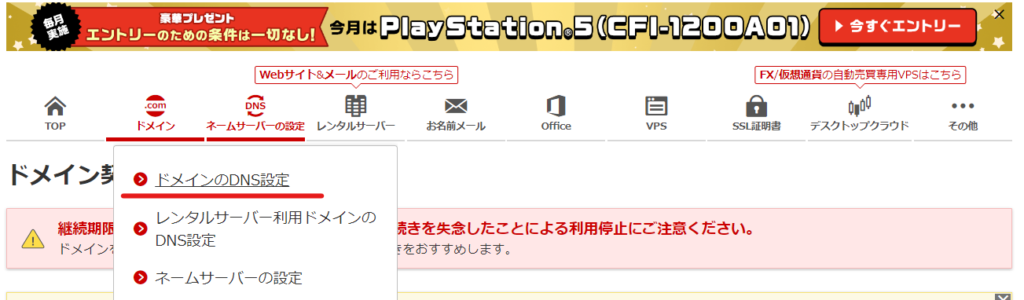
Log in to Onamae.com and verify ownership of the subdomain you added to Google Workspace
Once you log in to the Onamae.com administration page
- Setting up name servers
- DNS settings for your domain
Click.
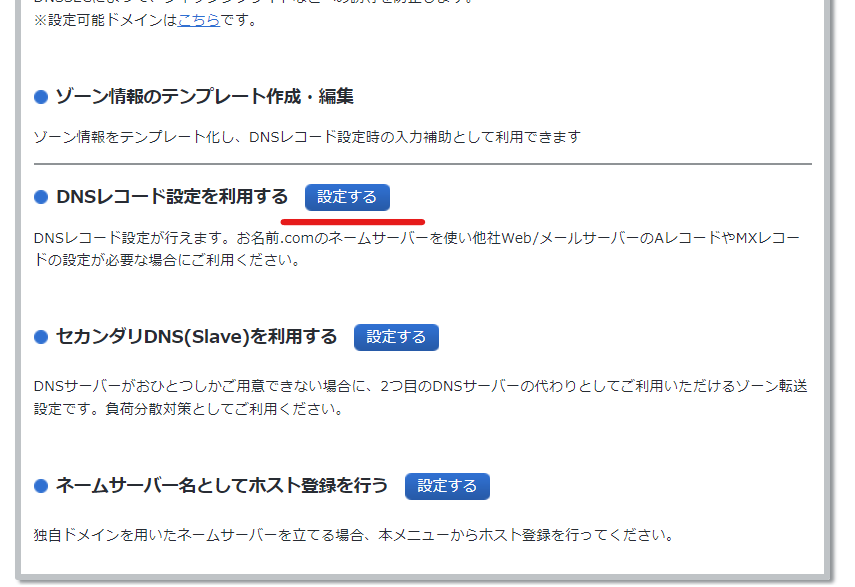
Click "Set up" to the right of Use DNS record settings.
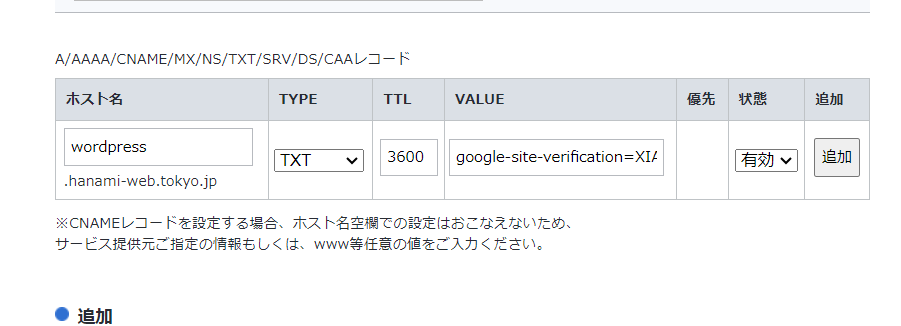
Add TXT record
- Hostname - Subdomain
- TYPE - TXT
- TTL – The default value of 3600 is fine.
- VALUV - Enter the "google-site-varificator......" output in "Add TXT record"
Once you have completed entering the information, click the [Add] button.
Click on [Proceed to the nuclear screen]
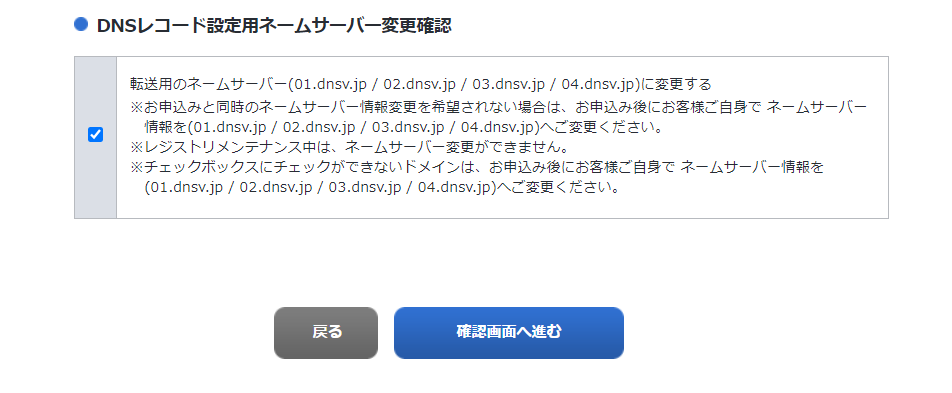
Click the [Set up] button.
Verify authentication with Google Workspace
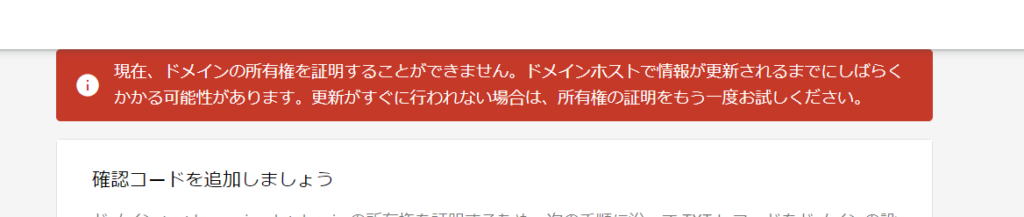
Once you have finished adding the TXT record, click the "Verify Domain Ownership" button in Google Workspace.
*If you have just added a TXT record, you may not be able to confirm it. Please wait a while and try clicking the button several times.
Even if you see this message, it doesn't necessarily mean that your settings are incorrect. If you see this message after more than an hour has passed, please review your settings.
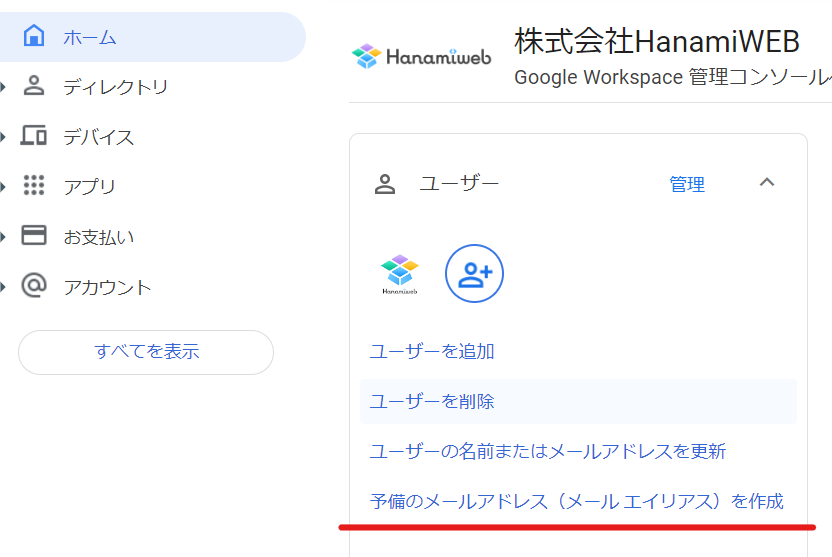
Add an email address from your account
Since Google Workspace has a rule that one account can only have one email address, you can add email addresses using a method called "alias." You can add up to 30 email addresses using this method.
Return to the Google Workspace admin screen.
- user
- Create a secondary email address (email alias)
Click.
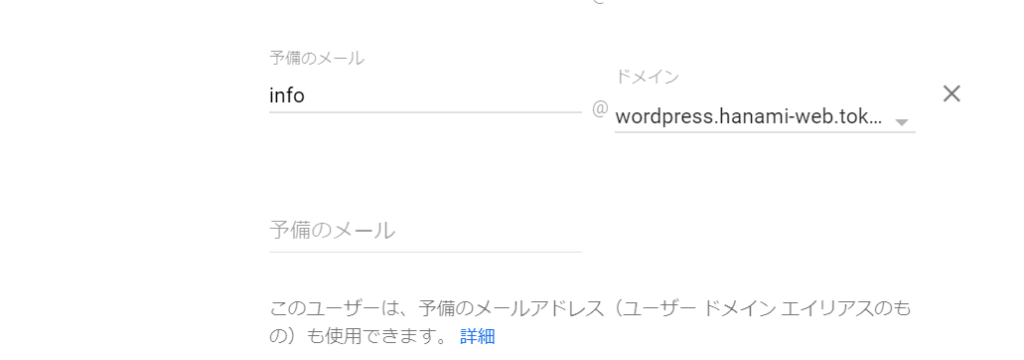
Add a "secondary email address" as shown in the attachment.
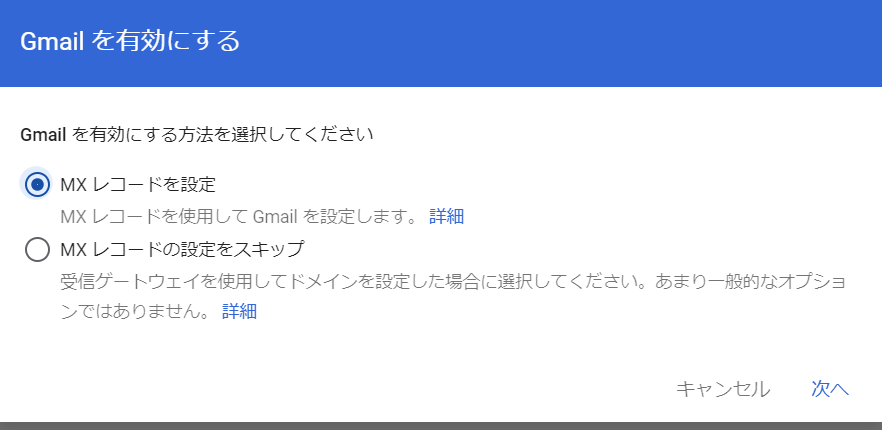
Add MX Record
Next, open the domain you just added again.
- domain
- Managing Domains
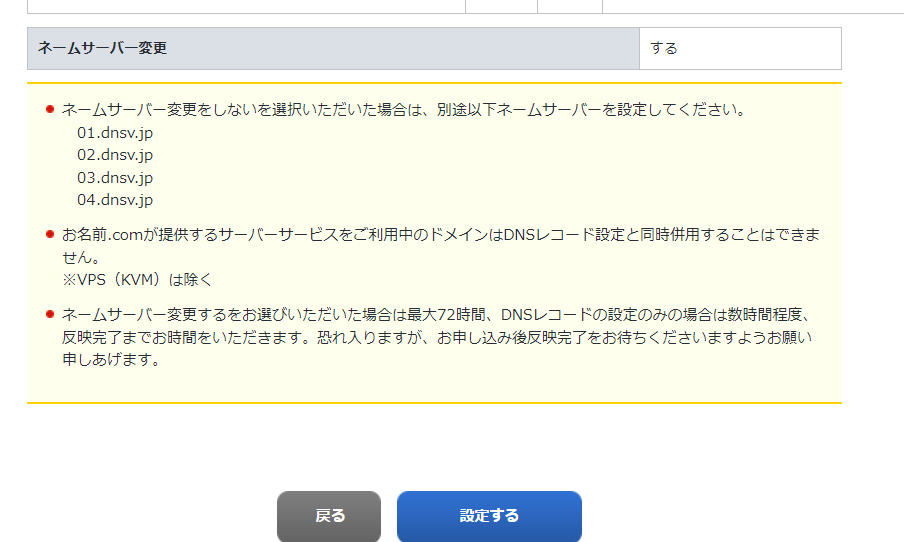
Click [Enable Gmail] (the wording is incorrect because you enabled it) and follow the instructions to set your MX record to Onamae.com again.

Click Set MX Records and click Continue.
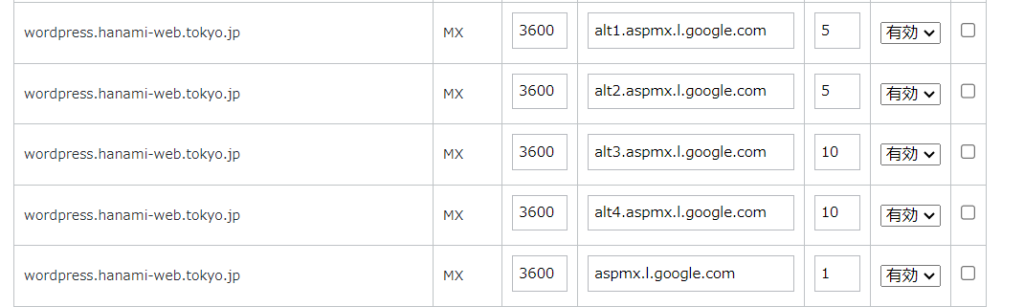
Setting up onname.com
You will be shown what values to set, so follow the instructions and add the record in the same way you added the TXT record earlier.
- Hostname - Subdomain (subdomain is wordpress.hanami-web.tokyo.jp, for example, wordpress)
- TYPE-MX
- TTL – Leave as default 3600
- VALUE - This value can be found on Google
- Priority - Google will also ask you to set this value.
This is the value set by Google.
Save and authenticate with Google Workspace.
*Please note that just like with TXT, it will take some time for the settings to be reflected.
Setting up in Gmail
Once the setup is complete, you will be able to receive emails from the newly created subdomain in the Gmail mail client that receives emails from the main domain without any additional configuration.
Please check by sending a test email.
Finally, configure the sending settings.
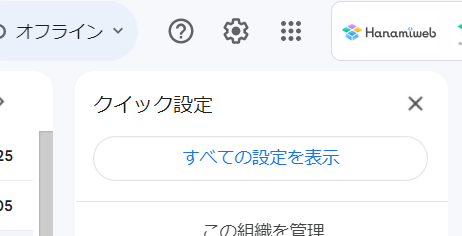
Open Gmail,
- gear
- Show all settings
Click.
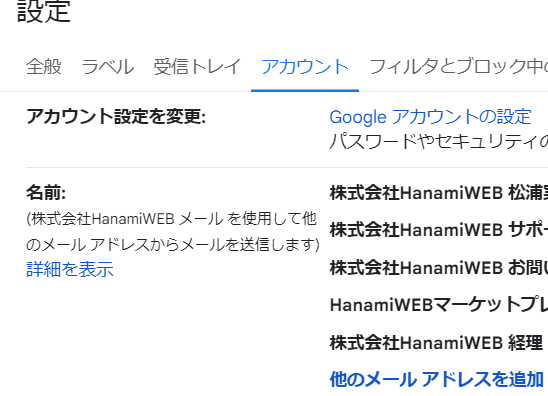
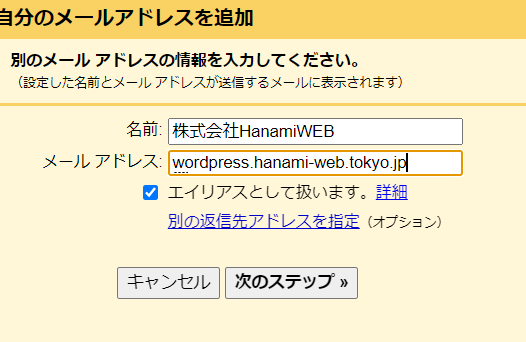
Add an email address by clicking on "Add another email address" in the Account tab.
Do not uncheck Treat as alias.
When you proceed to the next step, you will be sent a verification code. Enter the verification code you received to complete the sending setup.
It is fine to leave the receiving settings blank.

What is the password for the email address I added to Google Workspace?
There is no option to set a password.
Released as soon as the next morning! Weekends and holidays are also available!
Super rush website creation plan
We offer a rush website creation plan for those who need a website in a hurry!
We can publish your content as soon as the next morning, even on weekends and holidays! If you have any questions, please check the details below!

Latest Articles

How to Enhance EEAT with WordPress | Settings and Design Improvements Necessary for AI-Driven Traffic


[2026 Latest] How to check the number of visits from generated AI using GA4's exploration function

Error message: Allowed memory size of 268435456 bytes exhausted (tried to allocate 14684160 bytes) Error: On Lollipop