How to create a website using WordPress/How to use plugins/No-code construction blog


")
WordPress Booking System Plugin Amelia: How to Set Up Custom Notifications (Paid Version) (9.x and later)
At HanamiWEB Online School,
●Ask questions in real-time in the virtual study room!
●Ask as many questions as you want via chat!
●E-learning materials that you can learn as much as you want, 24 hours a day!
All included for just 2,500 yen/month!
This article explains how to use Amelia, a WordPress plugin that allows you to create a homepage with a reservation system.
In the major update in December 2025, the UI of the admin screen changed significantly in versions 9.x and later. We will explain the new version!
This time, we will explain how to set up custom notifications that can be used in the paid version of Amelia.
Standard,Pro,EliteAvailable under license.
Amelia > Feature & Integration > Custom Fields
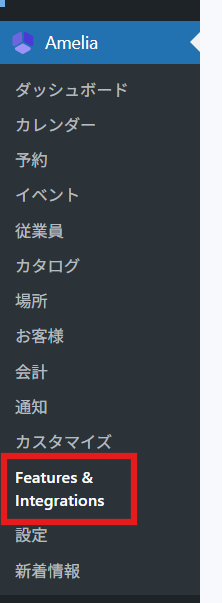
In the WordPress admin panel, click Amelia > Feature & Integration.
Enable custom notifications.
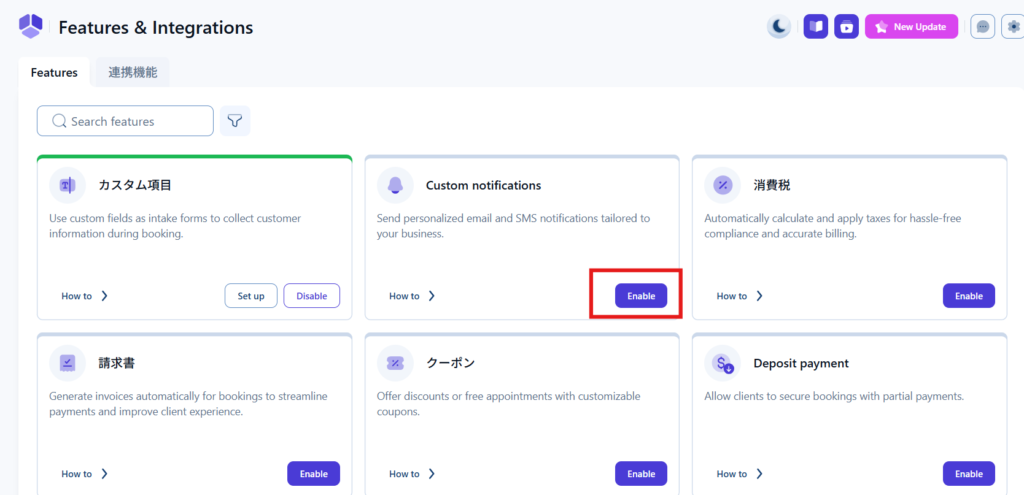
Go to [Setup] to set up.
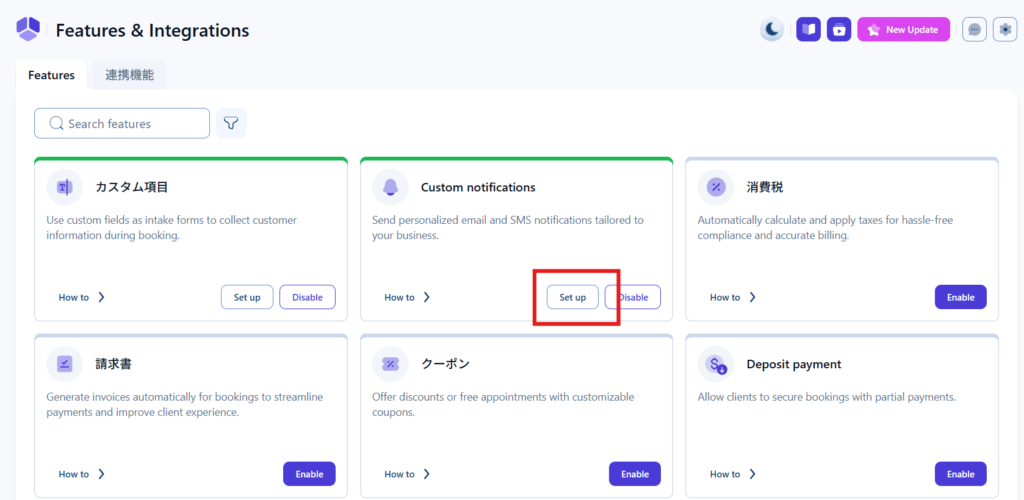
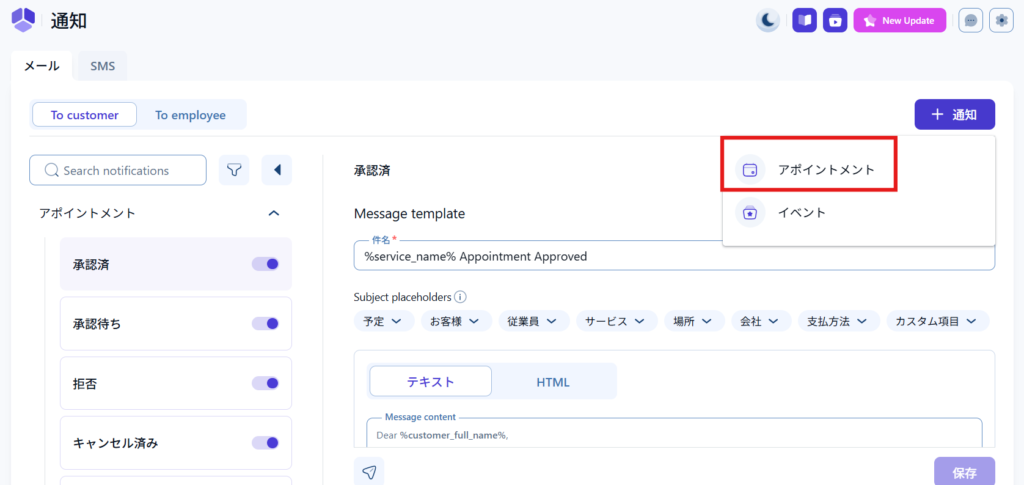
How to add custom notifications
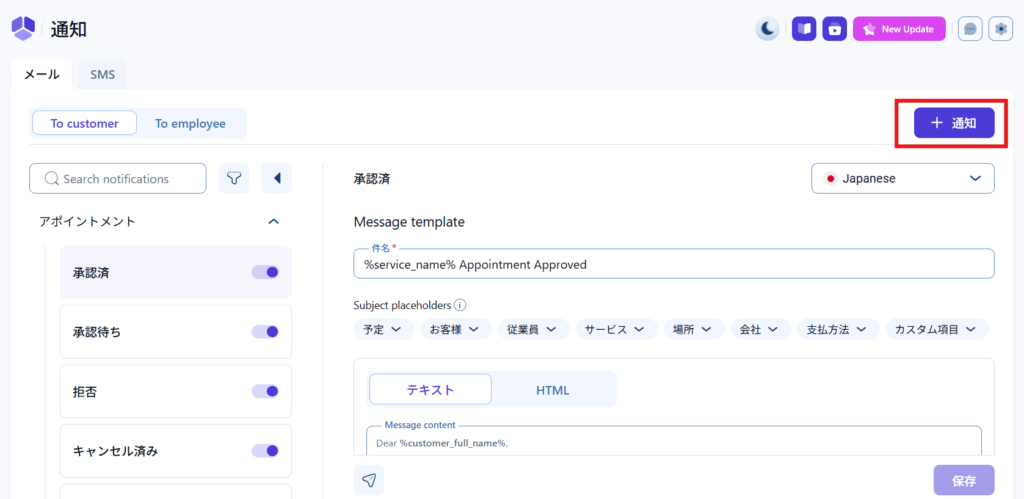
Clicking [Set up] will take you to the notification settings screen.
You can add emails other than the default ones by clicking [Notifications] in the upper right corner.
Select a service/event
First, press the Add button and then choose whether to add a service-related email or an event-related email.
Set the timing of sending
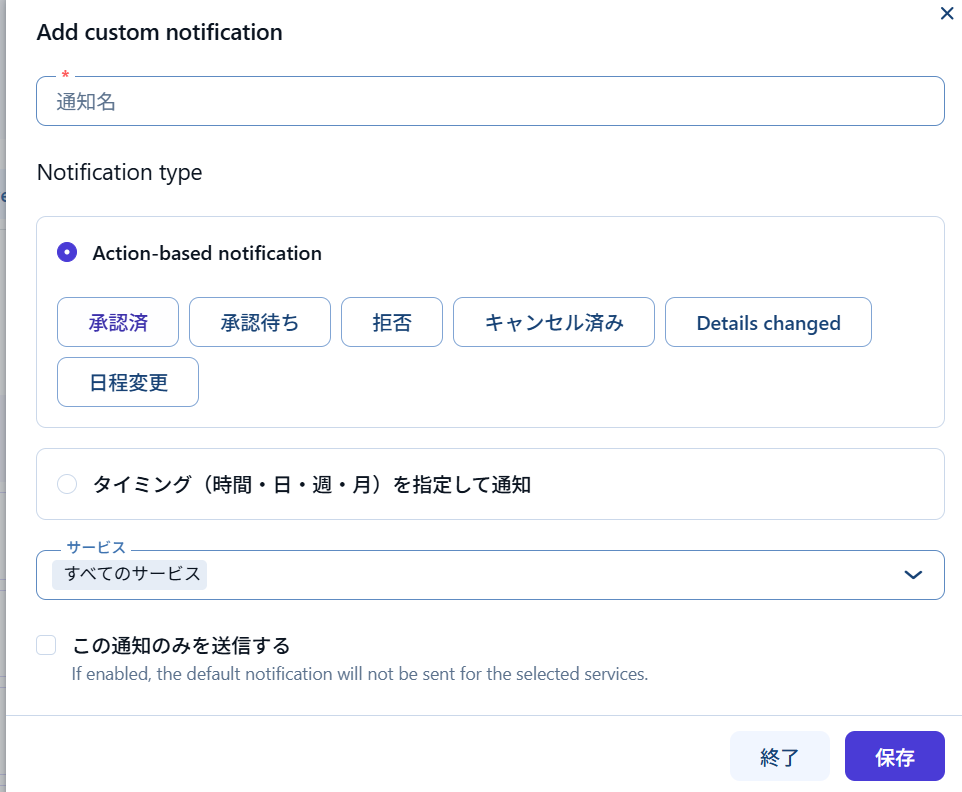
- Notification name – Give it an easy-to-understand name. For example, [Email when online service reservation is confirmed]
- Action-based notification - Set when emails are sent: Approved / Pending / Rejected / Cancelled / Details Changed / Schedule Changed
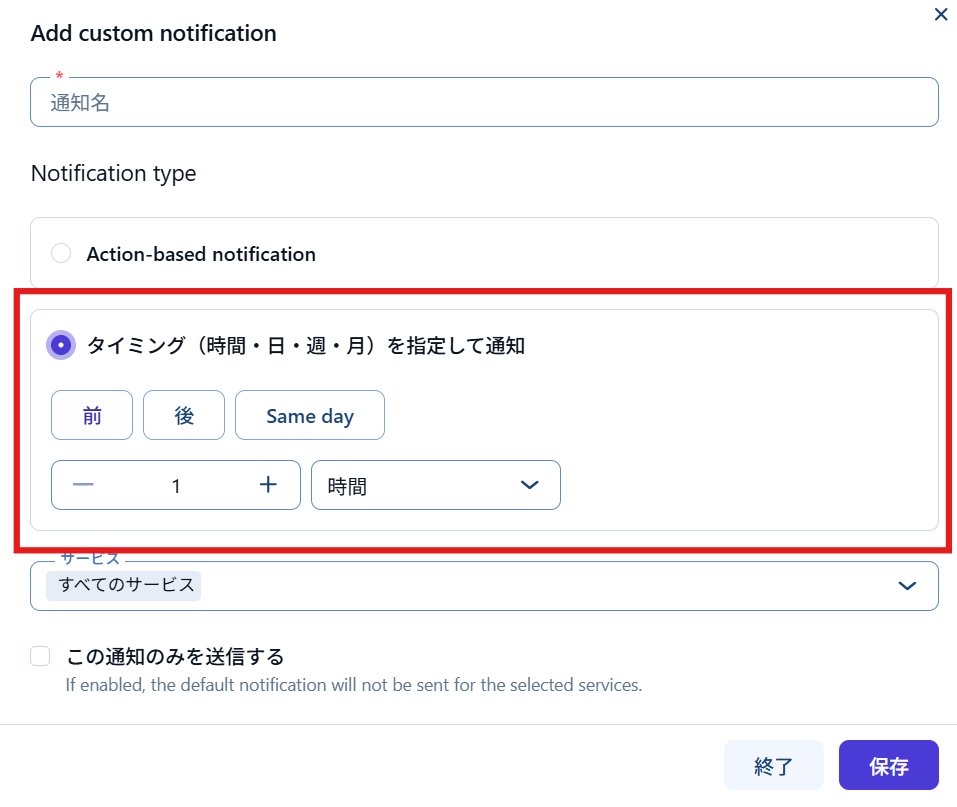
When you set the timing, you can set when the email will be sent, before, after, minutes, hours, days, weeks, or months from the reservation date.
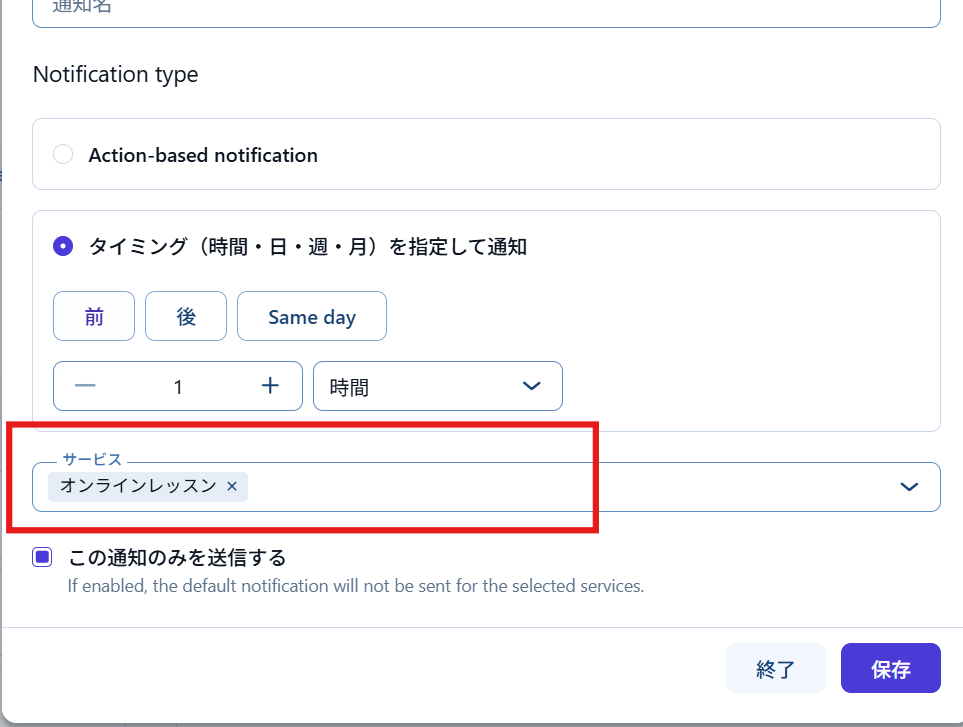
If you want to send emails set up only for a specific service, select that service.
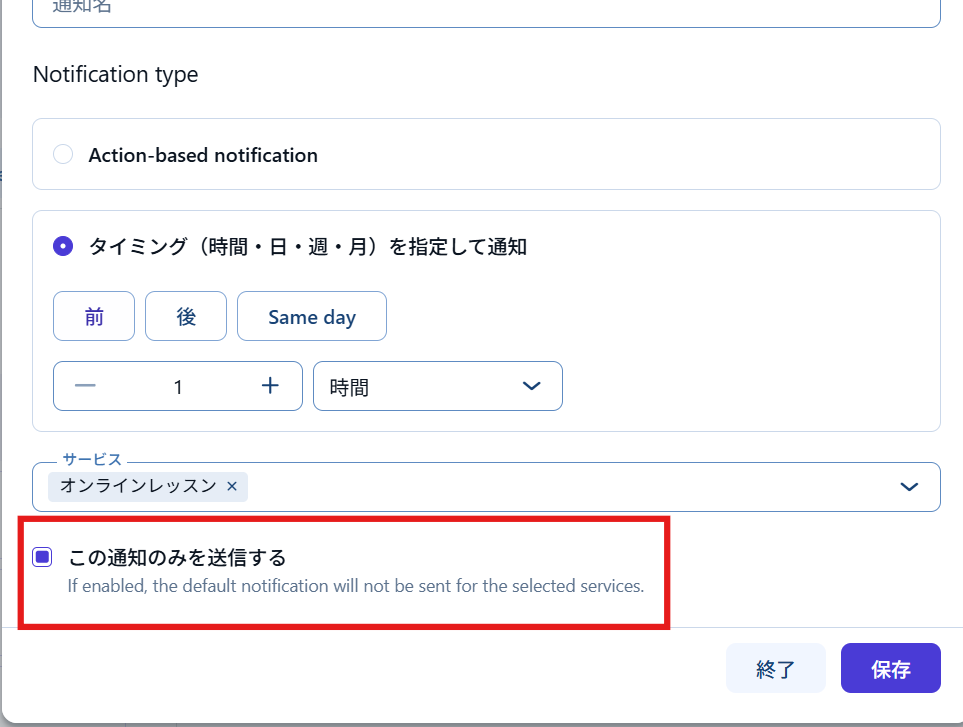
It's a good idea to check Send only this notification so that the default email isn't sent.
Add custom email
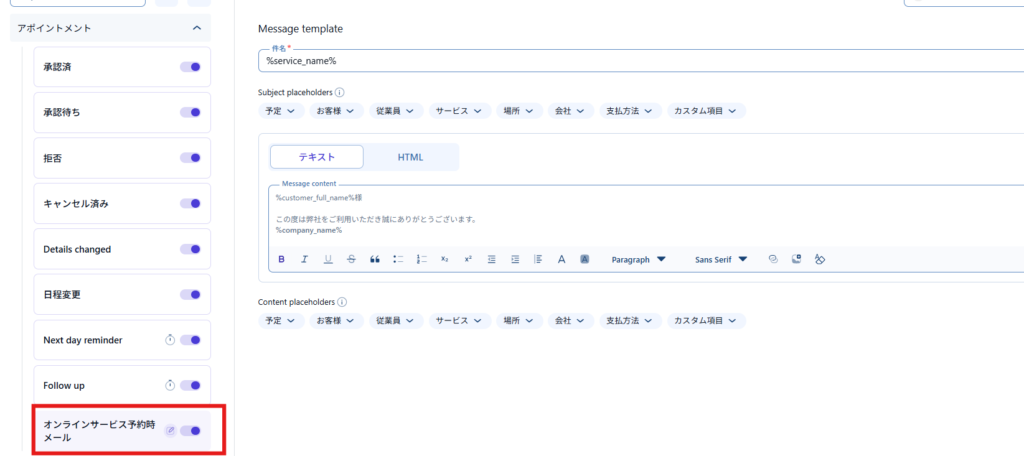
A custom email will be added in this way, so you can create the email text.
Additional settings for schedule emails
You'll need to set up a cron to send scheduled emails for reminders and follow-ups. You can do this with the free WP Crontrol plugin.

- Plugin
- Add Plugin
- Enter "cron" in the keyword field
- Install and activate the free plugin [WP Crontrol].
Add a cron event
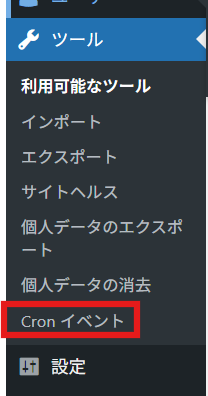
When you enable WP Crontrol, a Cron Events item will be added to Tools > Cron Events.
Adding a Cron Event

Click Add Cron Event
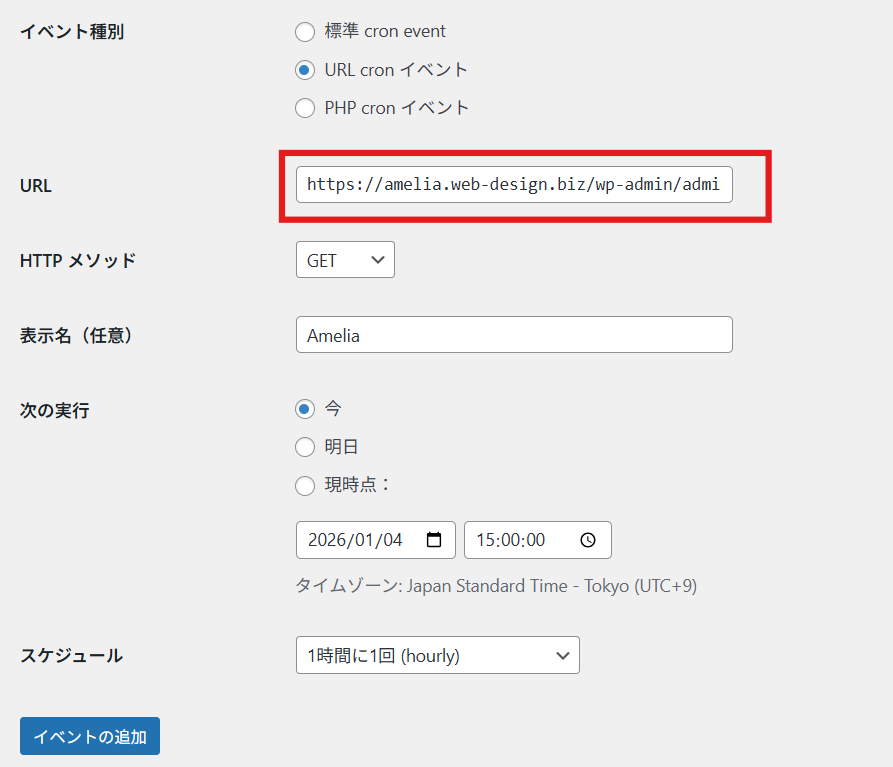
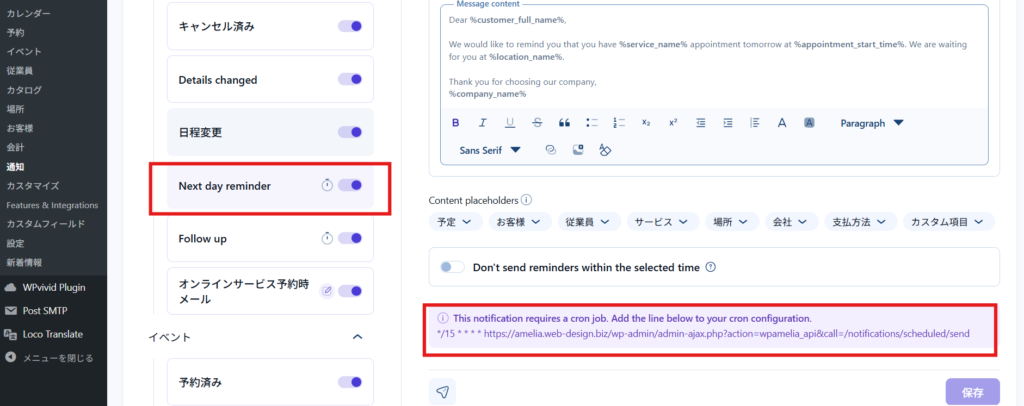
The URL is listed in the bottom right corner when you click Amelia > Notifications > Next day remainder. Enter the URL starting with https.
- Event Type - URL Cron Event
- URL - URL listed in the notification
- Display Name – A friendly name
- Next Run - Now
- Schedule - Once an hour (Choose your preferred time)

We are available on weekends and holidays!
Please contact us if you have any problems with your website!

- Unable to log in to WordPress
Malware infection?
- The homepage suddenly stopped displaying!
- A PHP error is occurring.
We also offer support on weekends and holidays for those who need assistance.
If you are in a hurry, please call us now at 03-6694-7024.
Latest Articles
Timing and Process for Renewing Your Recruitment Website | Key Points to Review to Increase the Number of Applications
7 Key Points for Creating a Recruitment Website | How to Create a Recruitment Site That Job Seekers Will Choose
What is the average cost of a recruitment website? A thorough explanation of pricing by production method.
5 Benefits of Creating a Recruitment Website with WordPress | Explaining Why It's Easy for the Person in Charge to Update