How to create a website using WordPress/How to use plugins/No-code construction blog


Build a matching website with WordPress! Illustrated guide to user settings in PremiumPress' MocroJob theme
At HanamiWEB Online School,
●Ask questions in real-time in the virtual study room!
●Ask as many questions as you want via chat!
●E-learning materials that you can learn as much as you want, 24 hours a day!
All included for just 2,500 yen/month!
I wanted to build a matching website using WordPress! I tried out a Micro job theme from an overseas theme company called PREMIUMPRESS, and this article explains how to build it.
This time, we will explain the user settings.
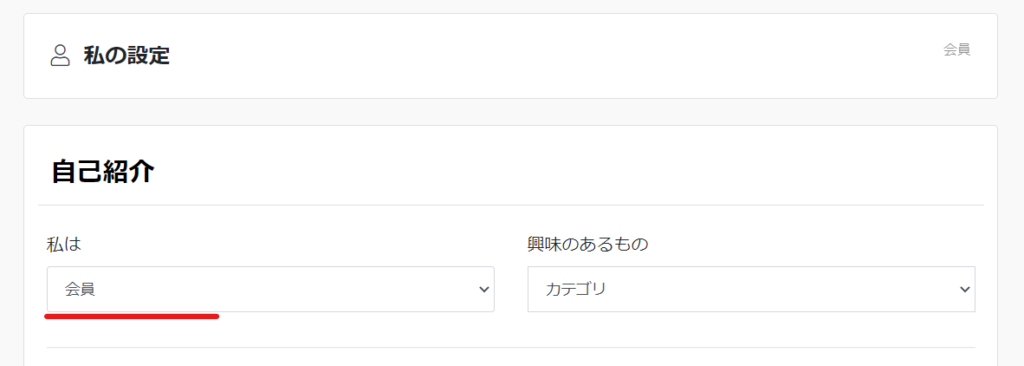
What are user settings?
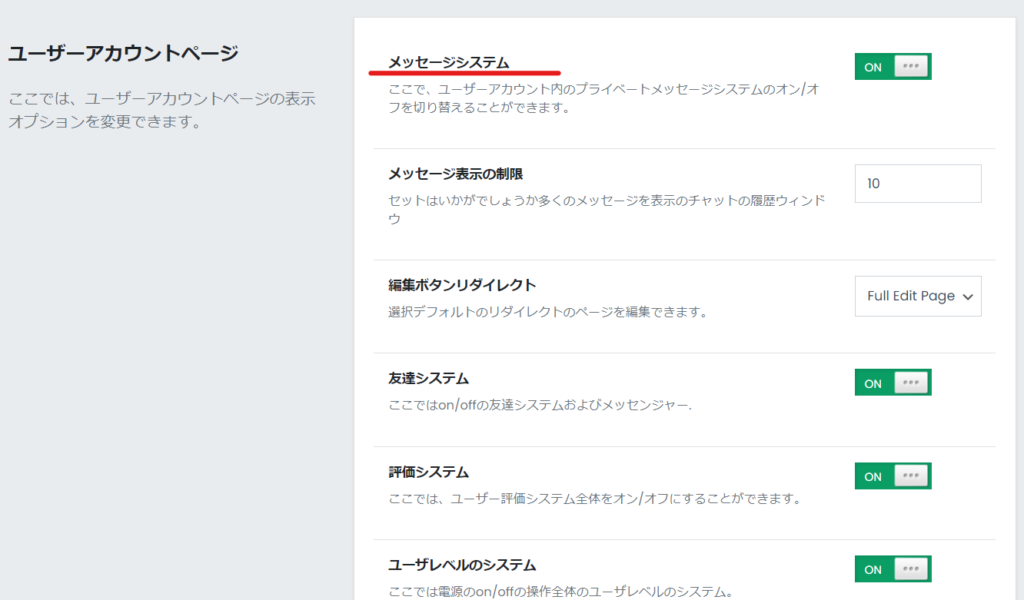
Open PremiumPress [Settings] > [User Settings].

Message System
This setting determines whether or not users can use the private chat feature.
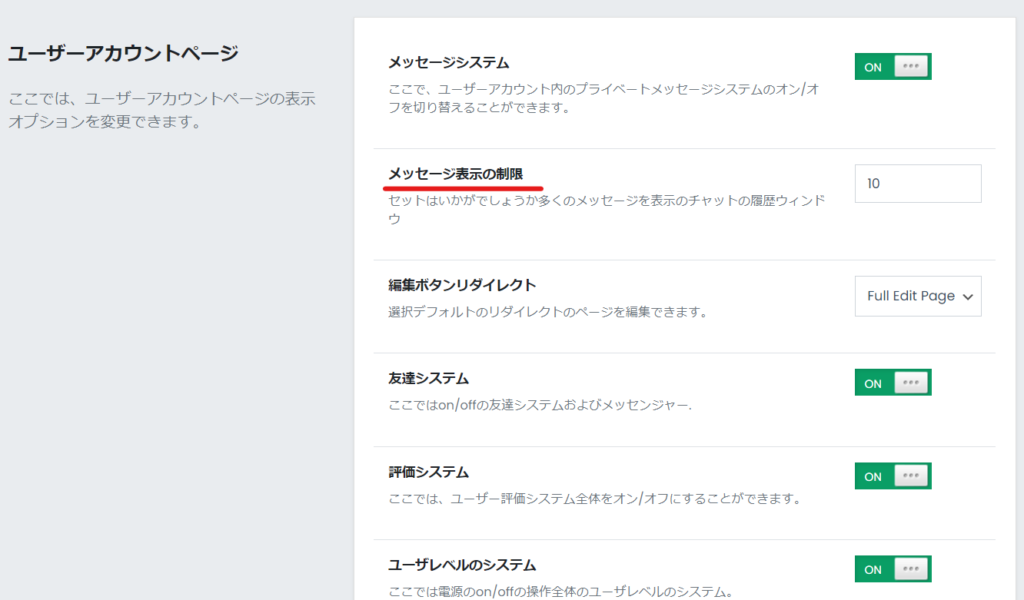
Message Display Restrictions
This determines how much of the chat history you want to display.
Edit Button Redirect
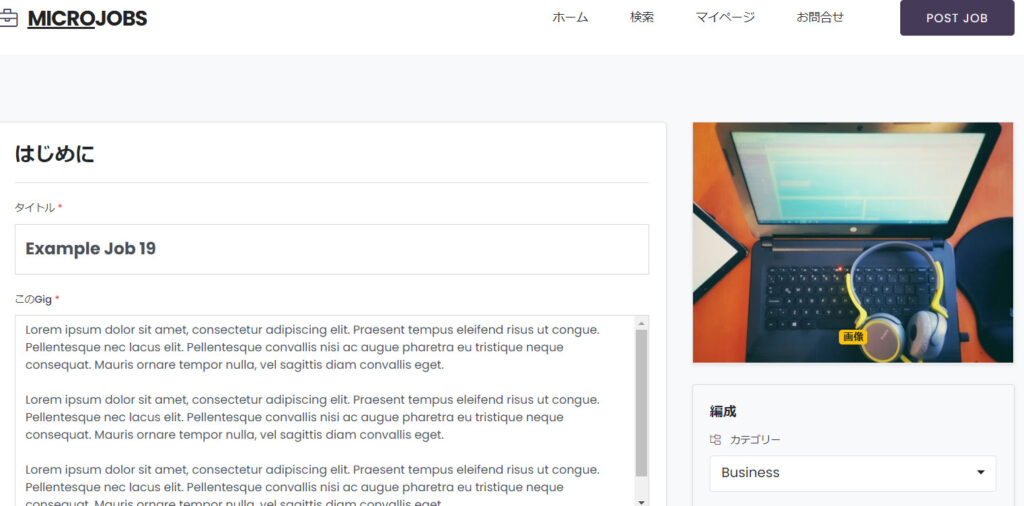
This is the page setting that appears when you click the Edit button when you want to edit the services you have listed on your My Page.
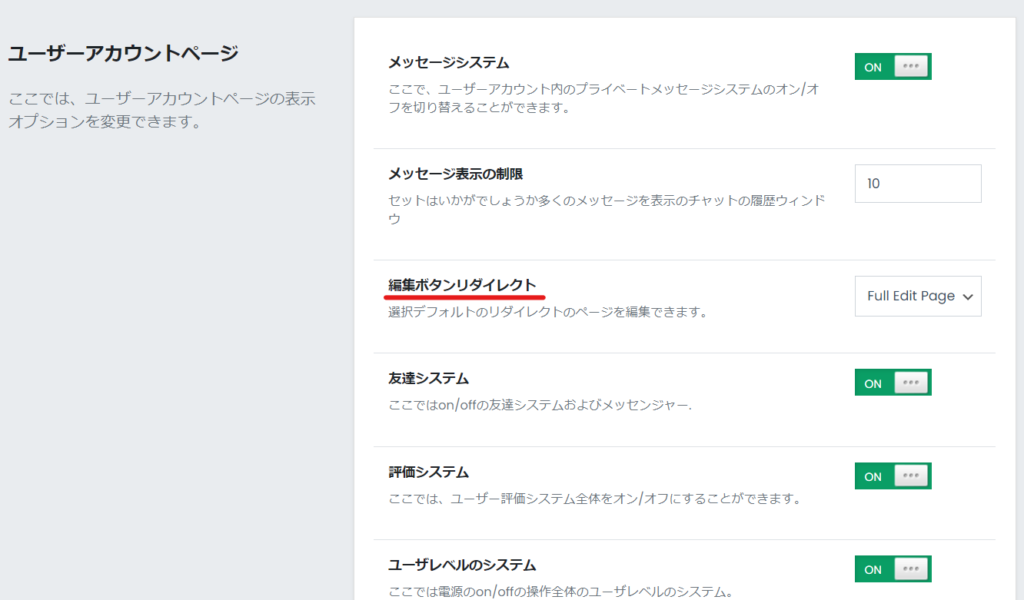
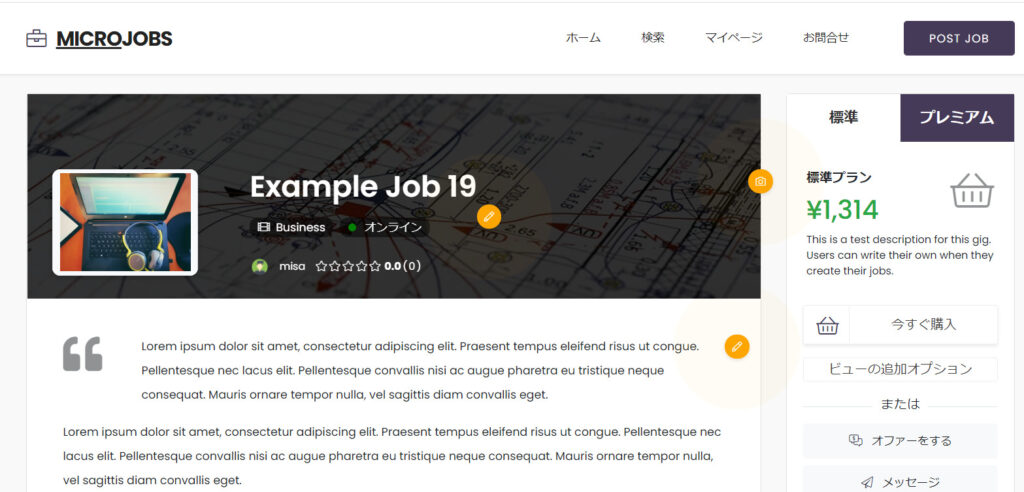
Select Full Edit Page
Once you have selected Live Edit Page
You can now edit directly like this. This Live mode is automatically displayed when viewing your listed services on the site while logged in.
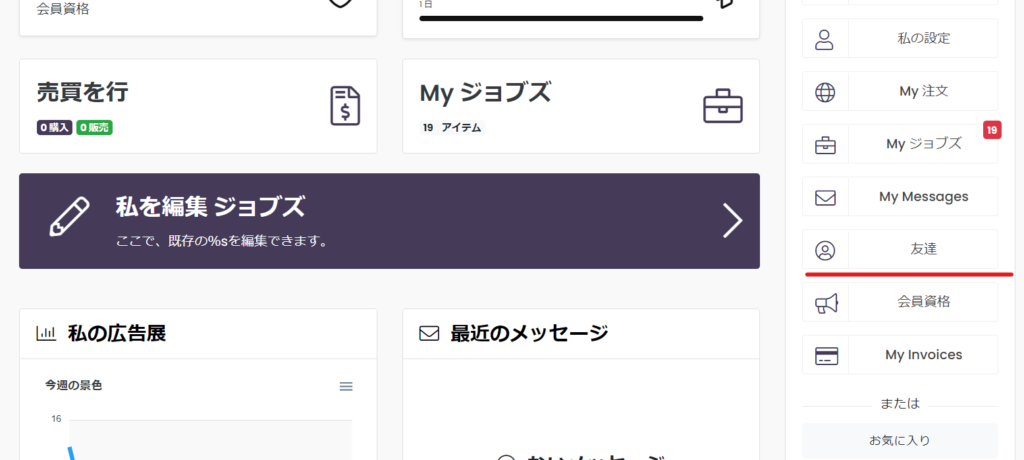
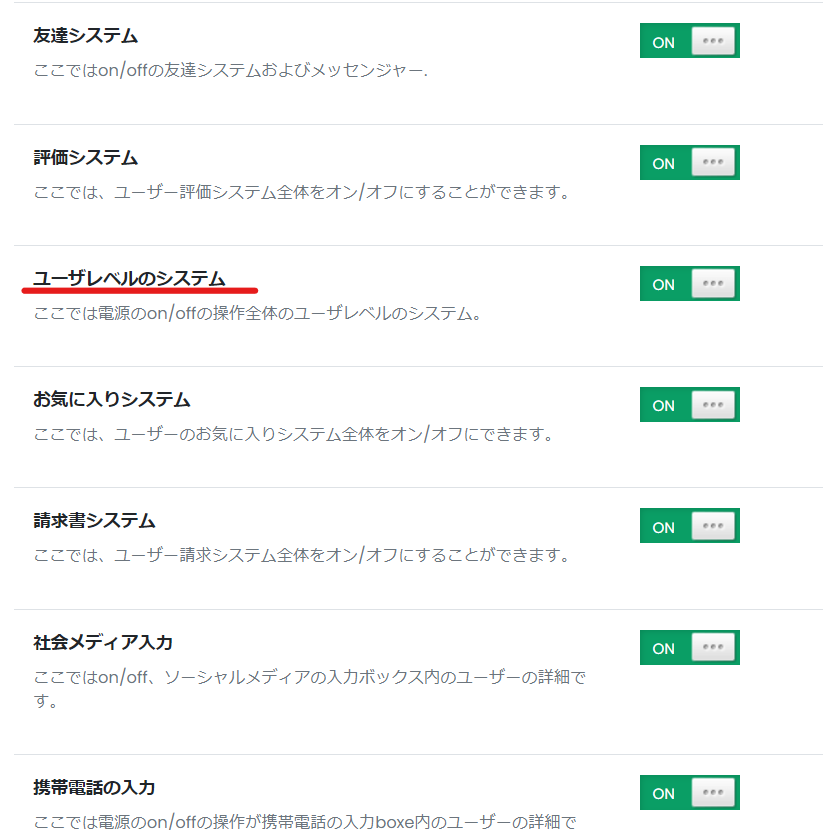
Friend System

A Friends section will appear on your My Page. This is a feature that allows you to add users to your favorites as friends.
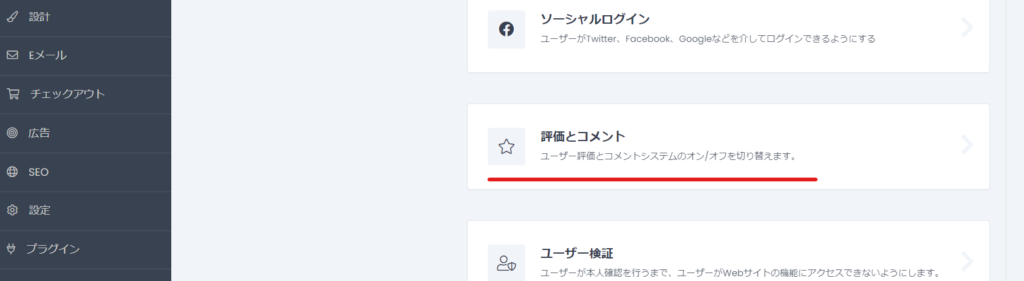
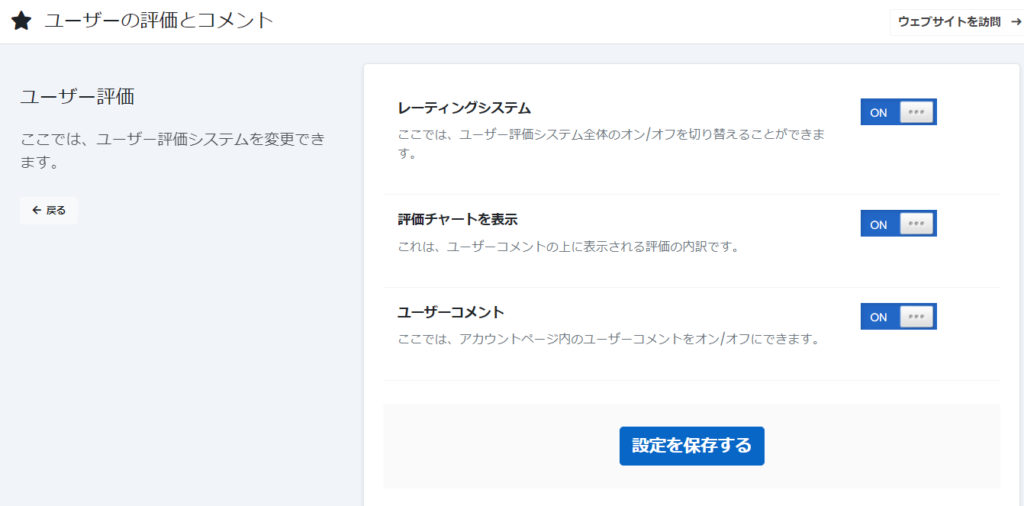
Rating System
There is a system in place where both users and sellers can rate an item after the transaction is completed.
In the evaluation settings
- Rating System - To use the rating function or not
- Show rating chart - Show rating details or not
- User comments - whether to display the user comments table
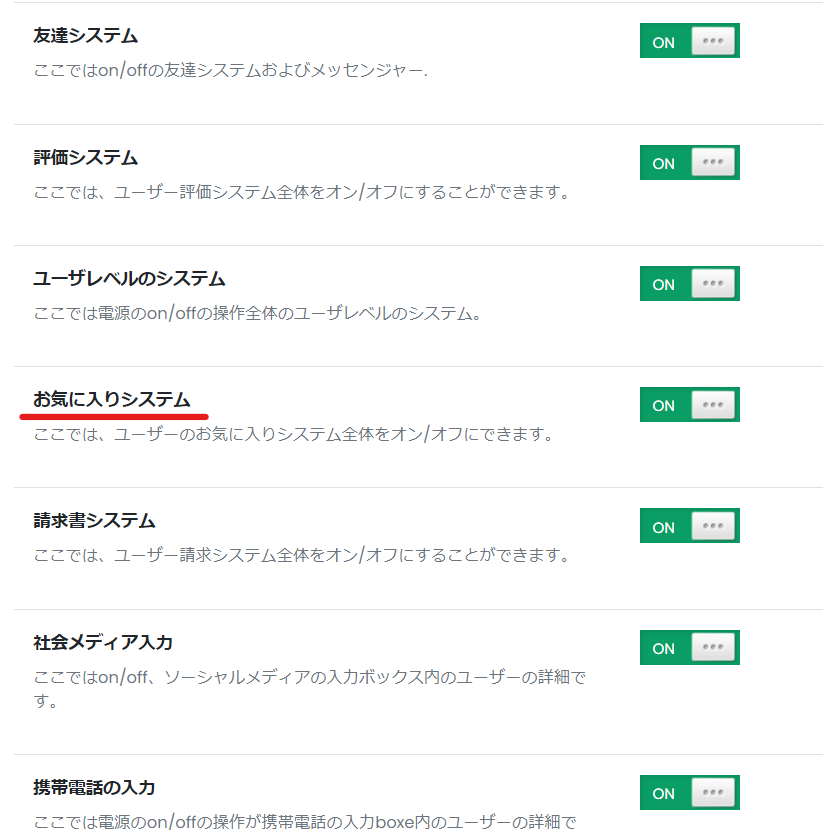
User-level systems
This is where you can set whether or not to enable user level all at once.
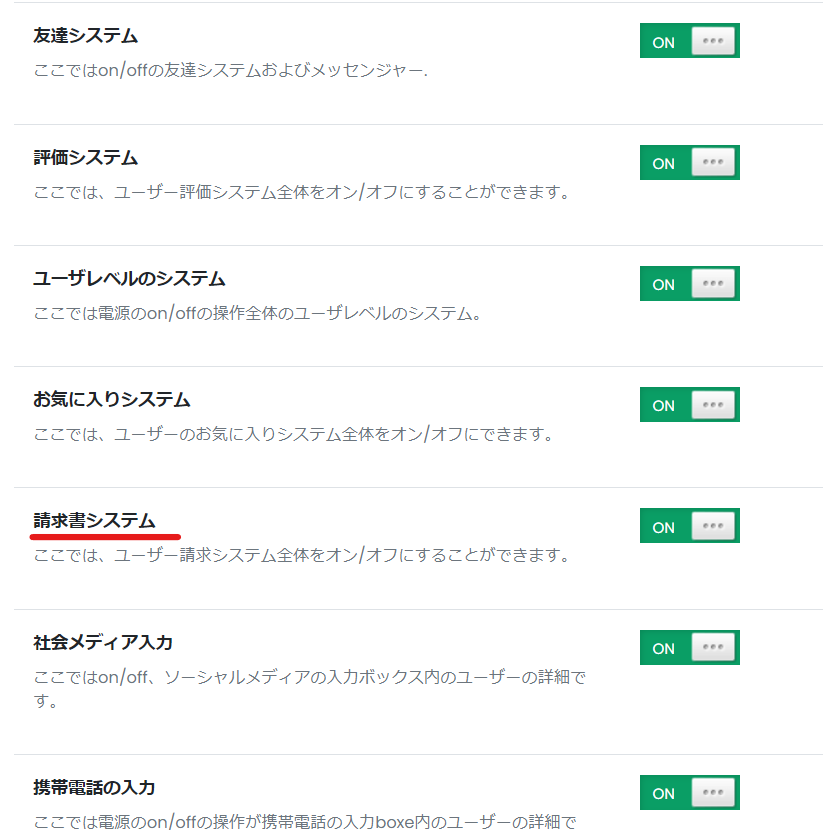
Favorites System
You can create a system that allows you to register services as favorites on your site.
Invoice System
After a user purchases a service, they can display the invoice on their personal page.
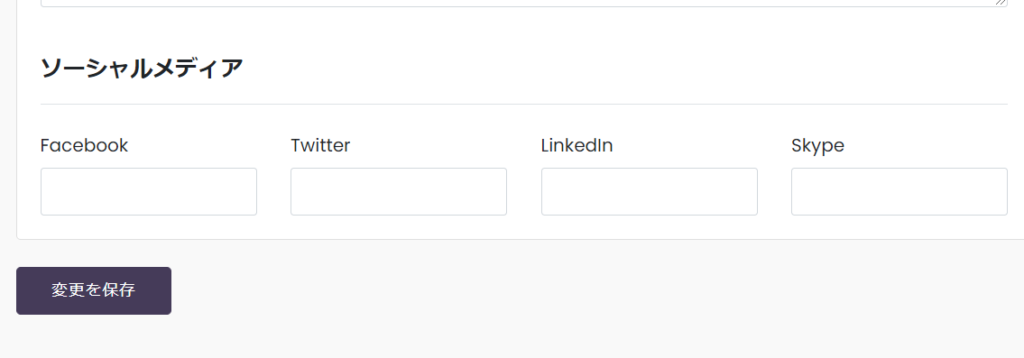
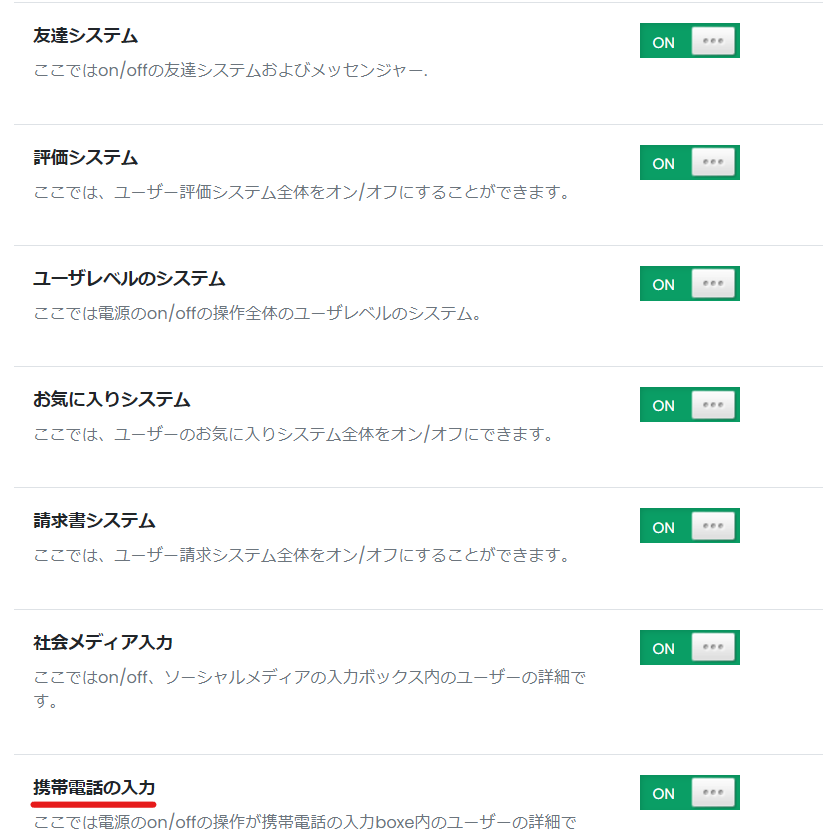
Social Media Input
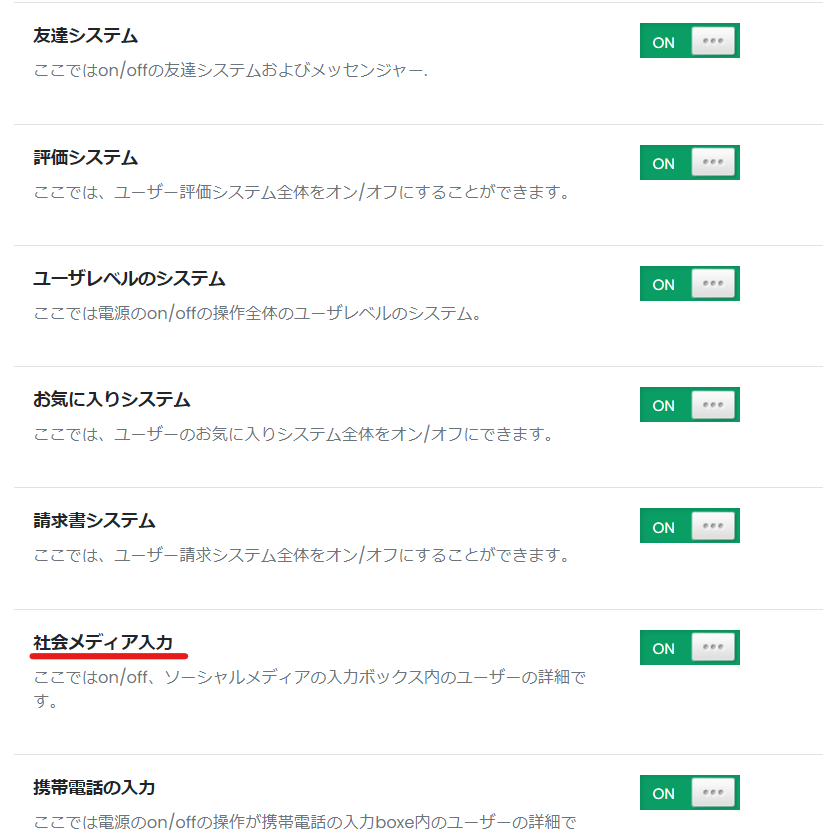
You can register the following information from your My Page.
Mobile phone registration
You can register your mobile phone number from your My Page.
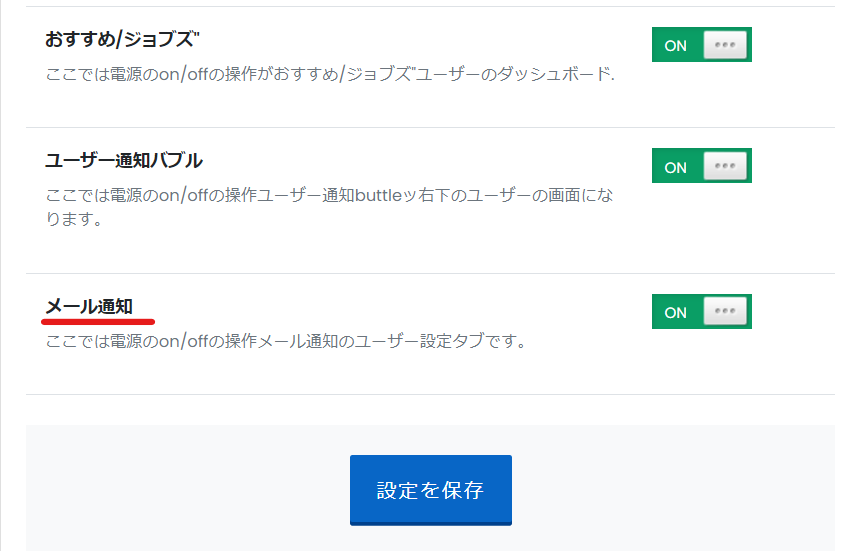
Recommended Jobs
Switching recommended service settings on the dashboard
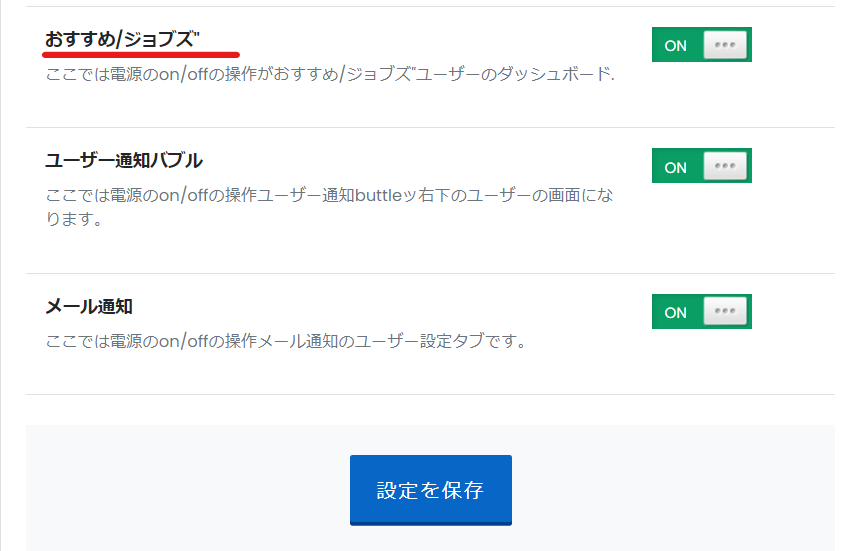
User Notification Bubbles
While you are logged in and browsing the site, you will receive pop-up notifications if your listed service has sold, if you have received a message, etc.
It will be displayed at the bottom right of the screen.
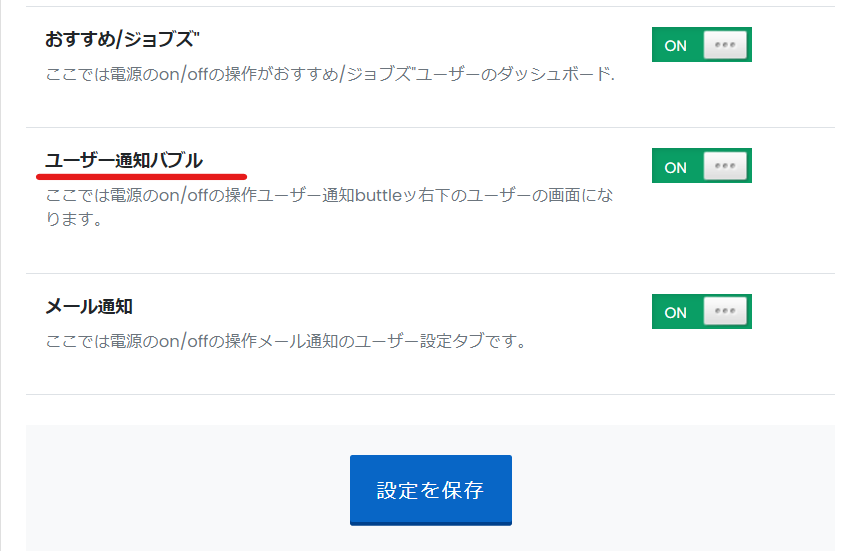
E-mail notification
This setting sends notifications by email regarding service purchases, message receipt, etc.
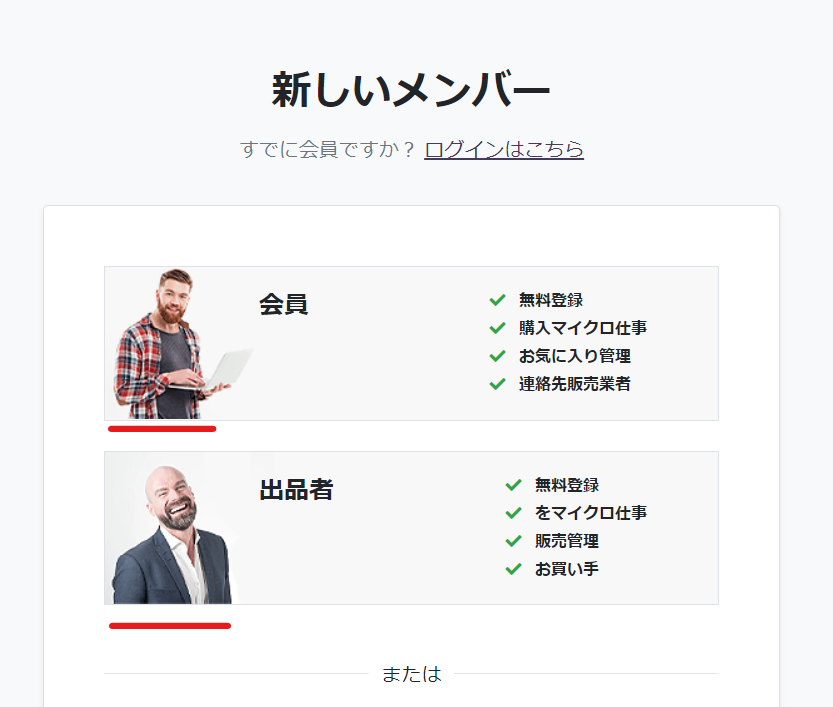
Buyer/Seller settings
There are two types of user accounts:
- Members - Refers to the buyer
- Seller - refers to the party that sells the service
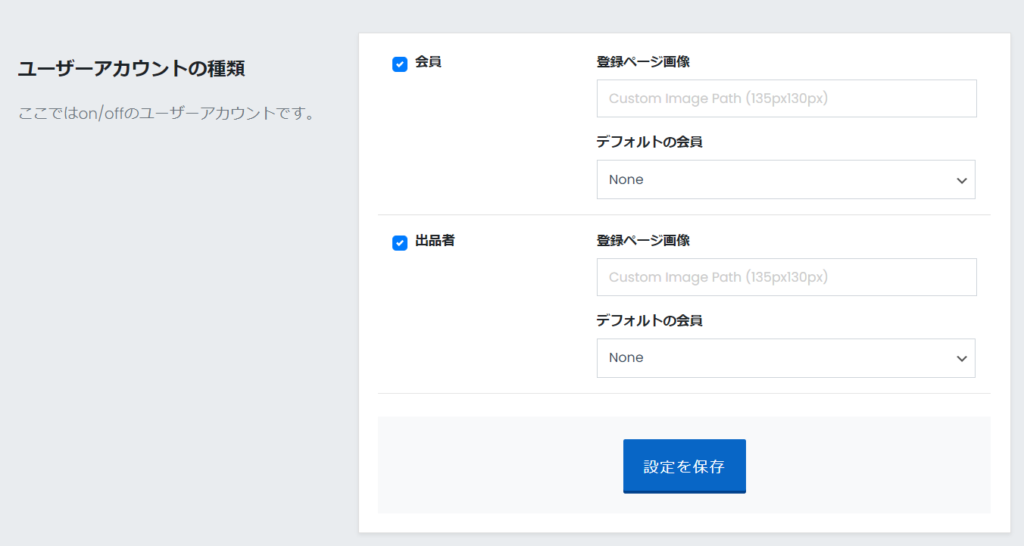
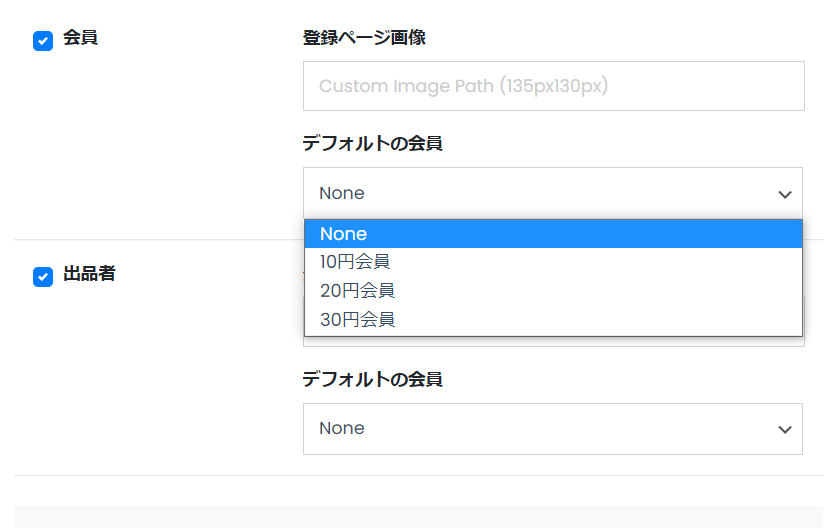
This page is linked to the page below when you register.
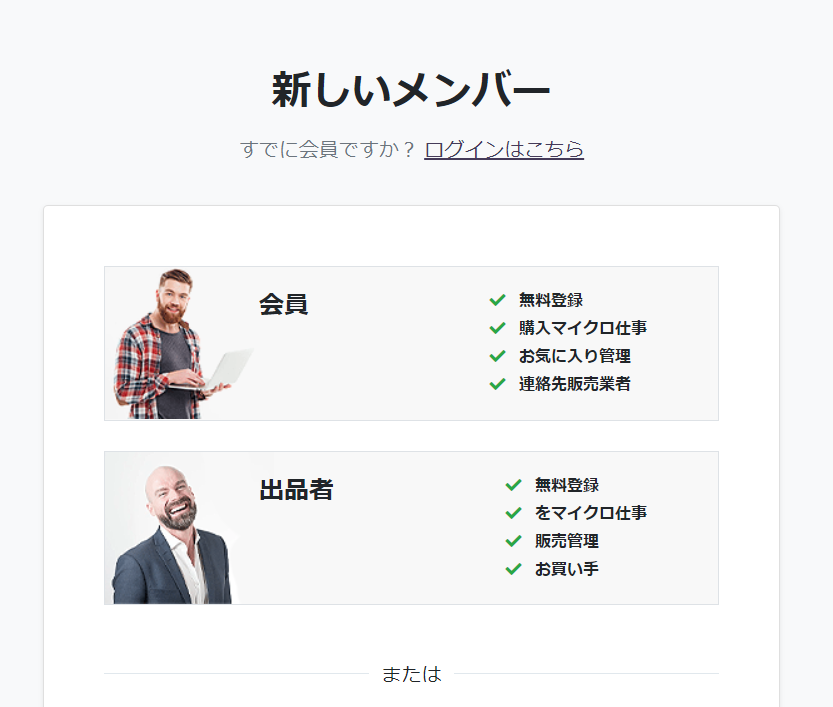
Registration page image
If you set an image URL here, currently a demo photo of a person will be included, but you can change it to your own original photo.
Default Member
When you click on "member" and register, or when you click on "seller" and register, you can link them to the membership you created in advance.
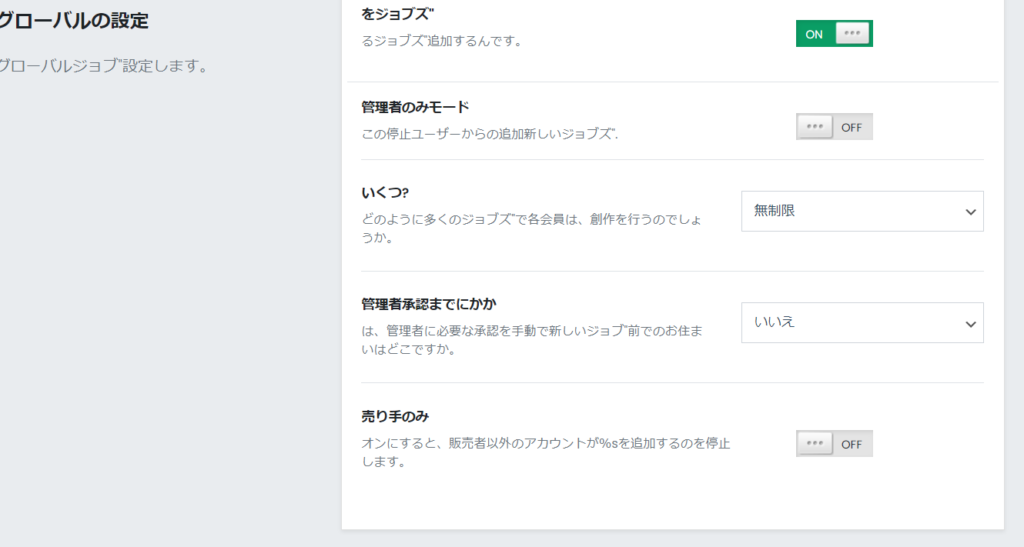
I want to sell only to sellers
In PREMIUMPRESS's [Job Settings], if you turn on the [Sellers only] option,
- Members can only purchase
- Sellers can both buy and sell
You can create a system.
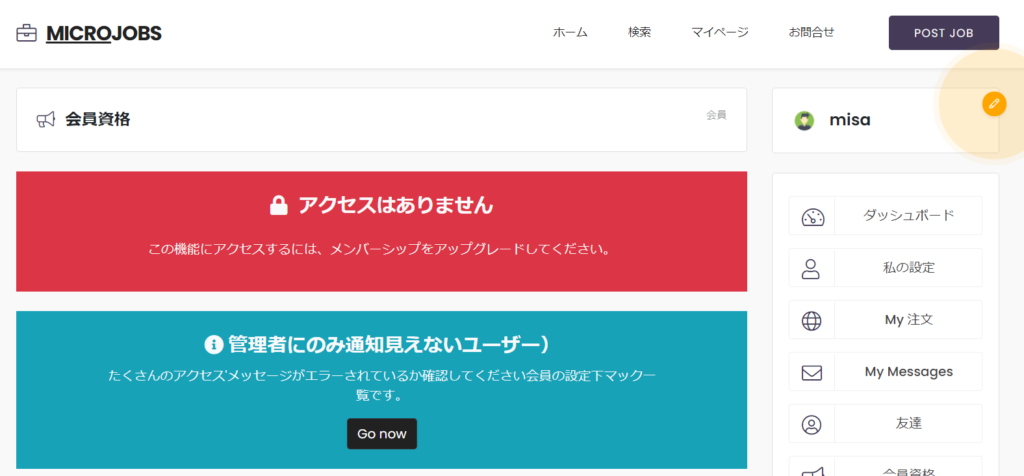
How to switch between member and seller
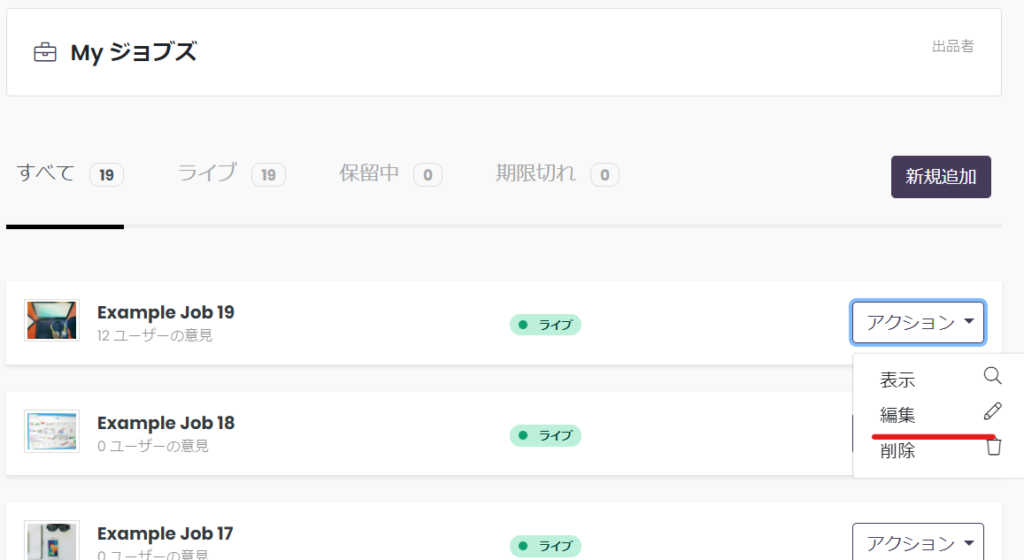
When I go to my settings on the dashboard, I can choose between [Member] and [Seller].
Here, select the seller
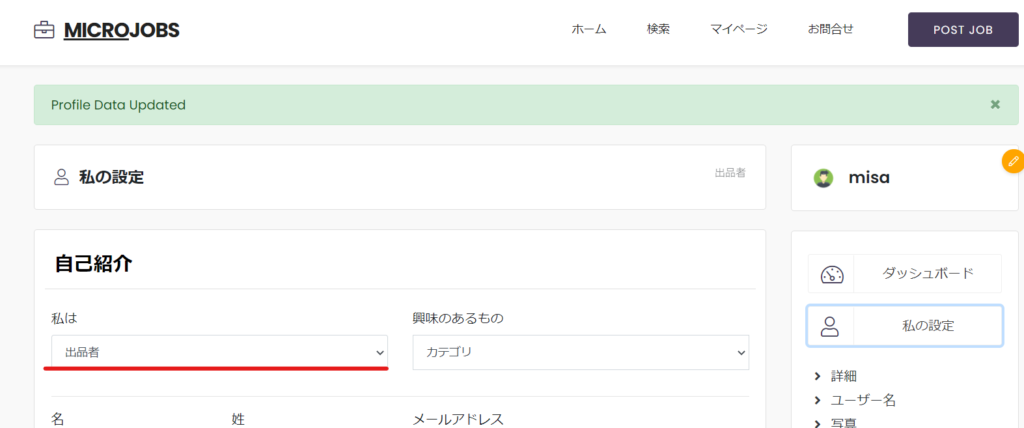
The functions necessary for listing will be added.
If you change to a regular membership, job-related items will not be displayed.
If you go to the listing screen while still using your member privileges, you will not be able to list an item.
Sales revenue management
Finally, we will explain how to set up the Cashout system (sales management).
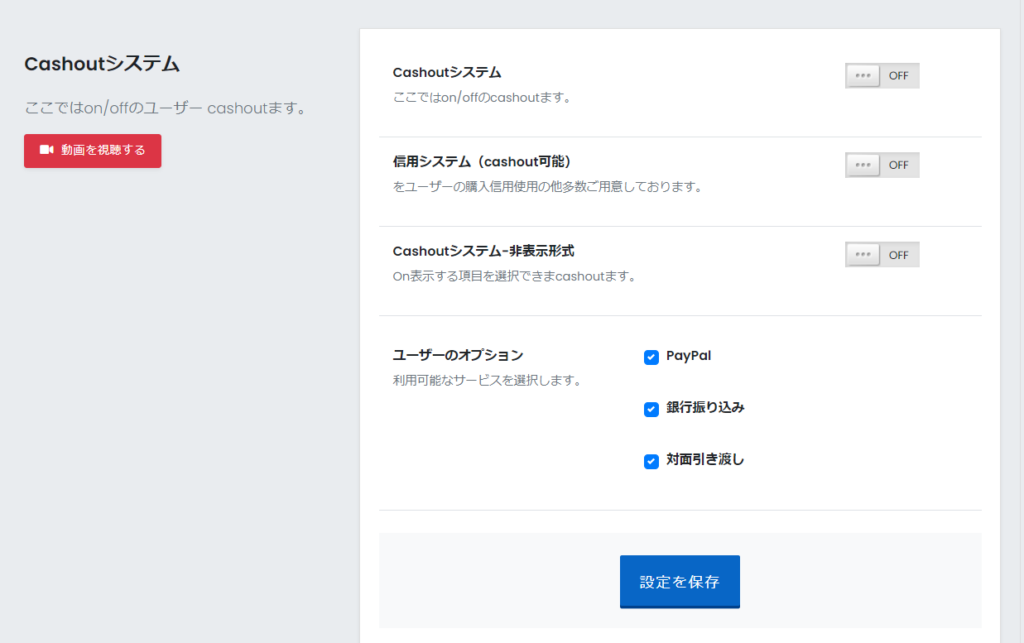
Cashout System
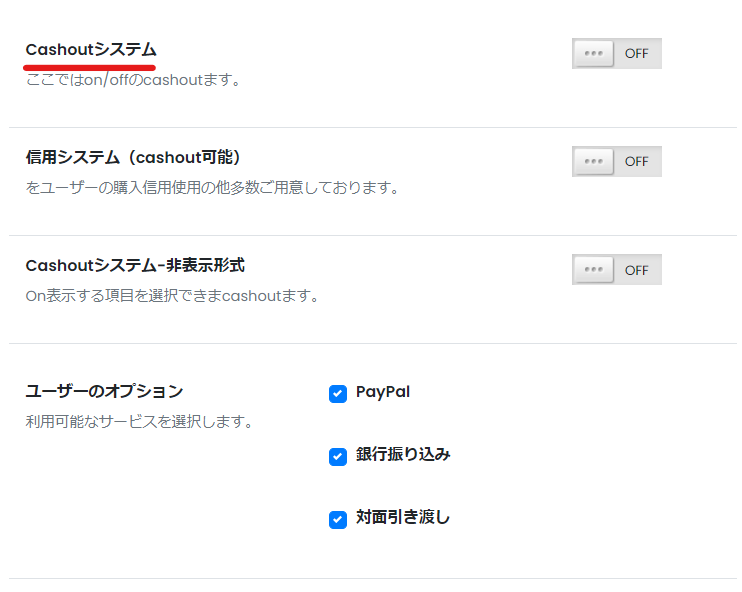
A new item called "Payments" will appear on your dashboard.
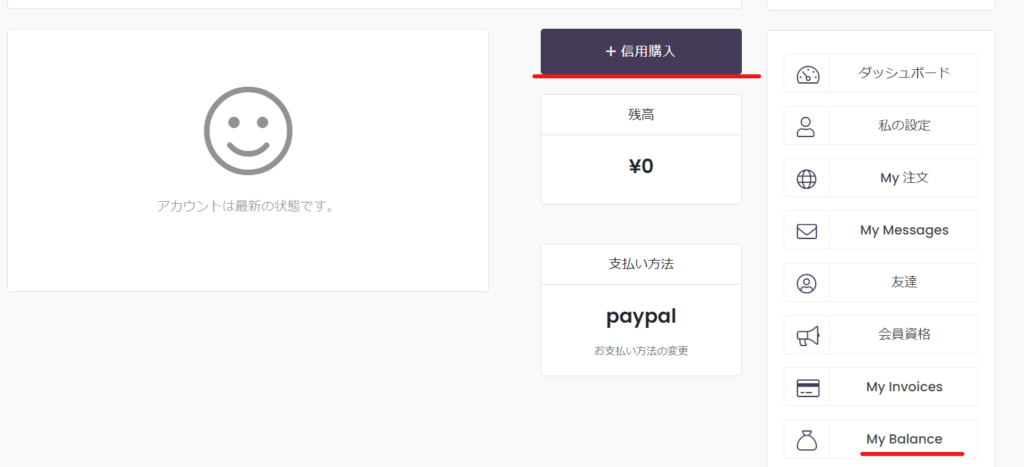
Credit System
When this is turned on, users will be able to charge money in advance.
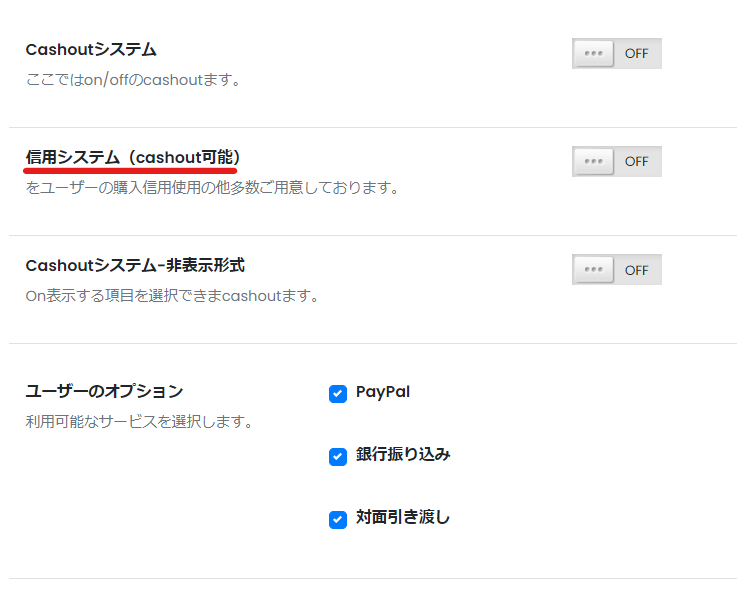
A new item called "Credit Purchase" will be added to the "My Balance" section of your user page.
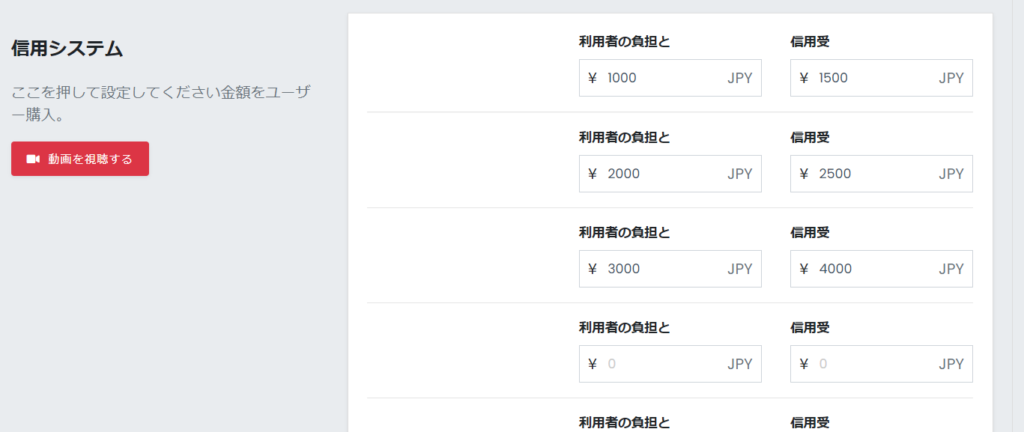
Setting the charge amount
For this credit system to work, you need to set the amount you want to charge in advance.
Scroll down further to the section called [Credit System] to set it up.
- User's burden - Purchase price
- Credit Love - Amount to be charged
For example, you can purchase a 1,500 yen charge for 1,000 yen. In this way, we create a system that allows users to use the site at a discount.
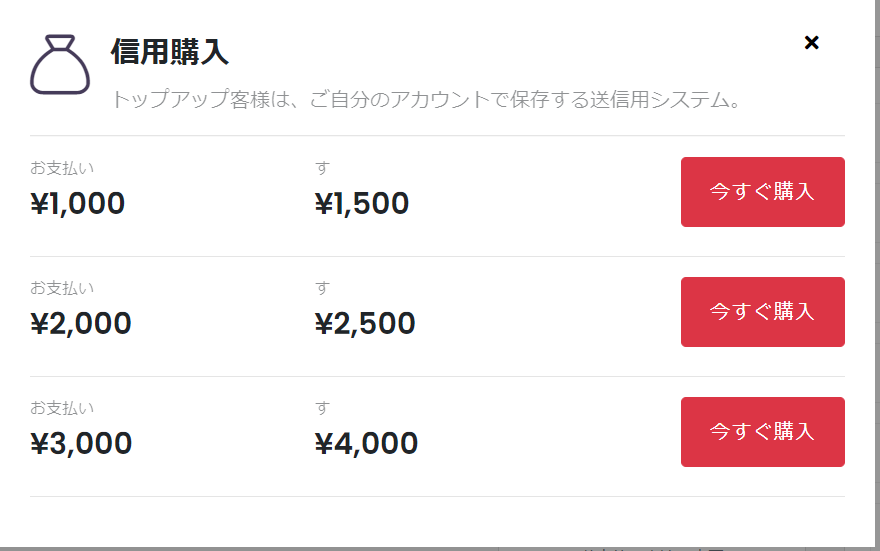
Once you have set it up, clicking on the credit system will display a list of charges and you can purchase them.
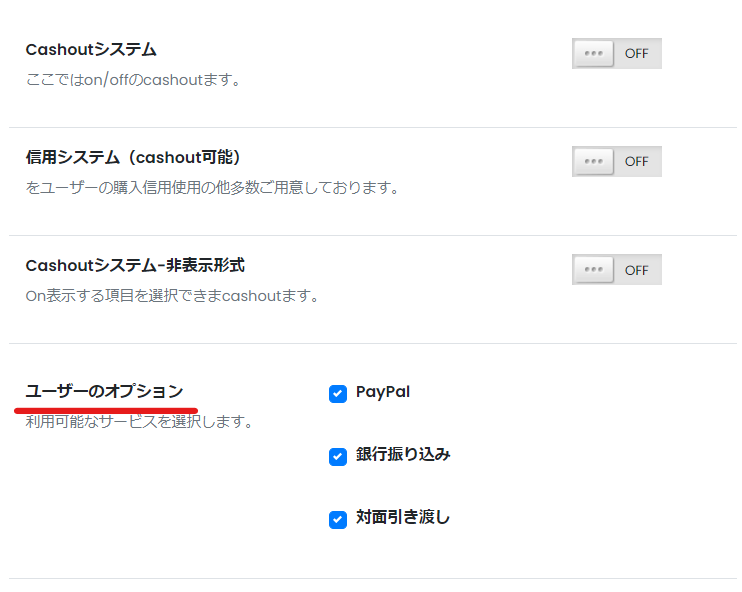
Cashout System
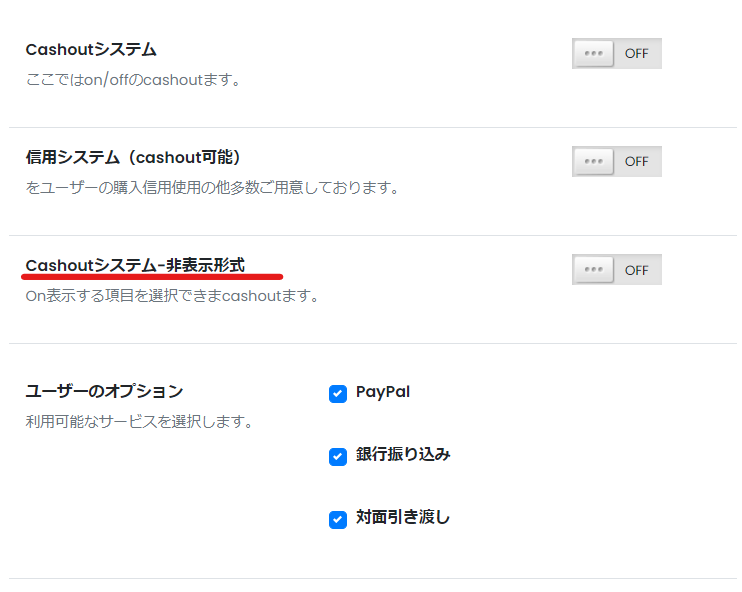
You can hide the sales revenue application form.
When turned ON
Select the method for claiming sales revenue
When a user applies for revenue
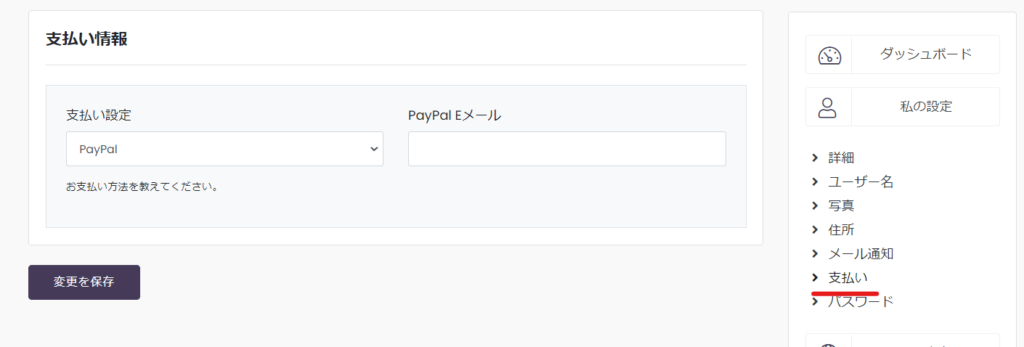
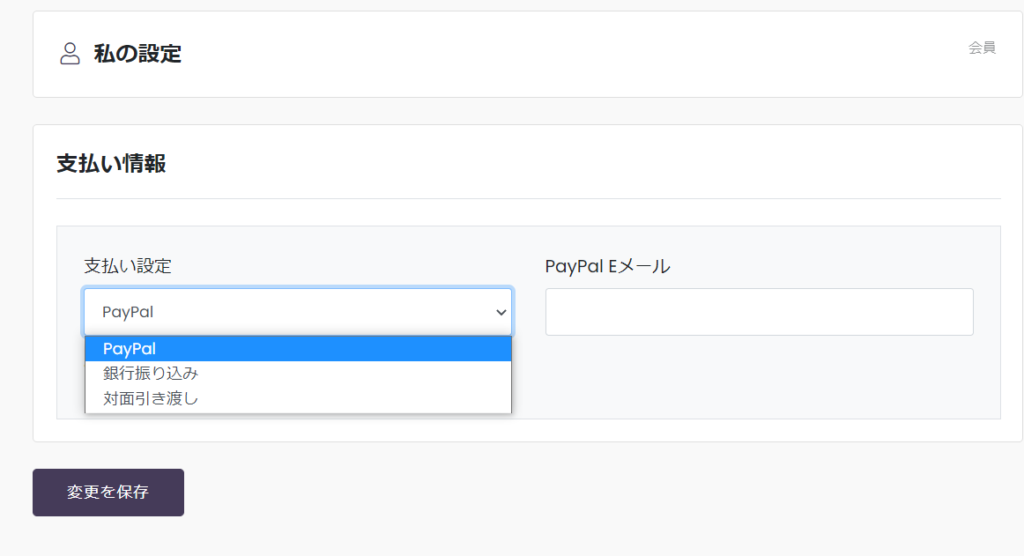
- Paypal - Register your email address
- Bank transfer
- Face-to-face delivery
This is where you can set it up so that you can select from. Check only the check boxes you need.
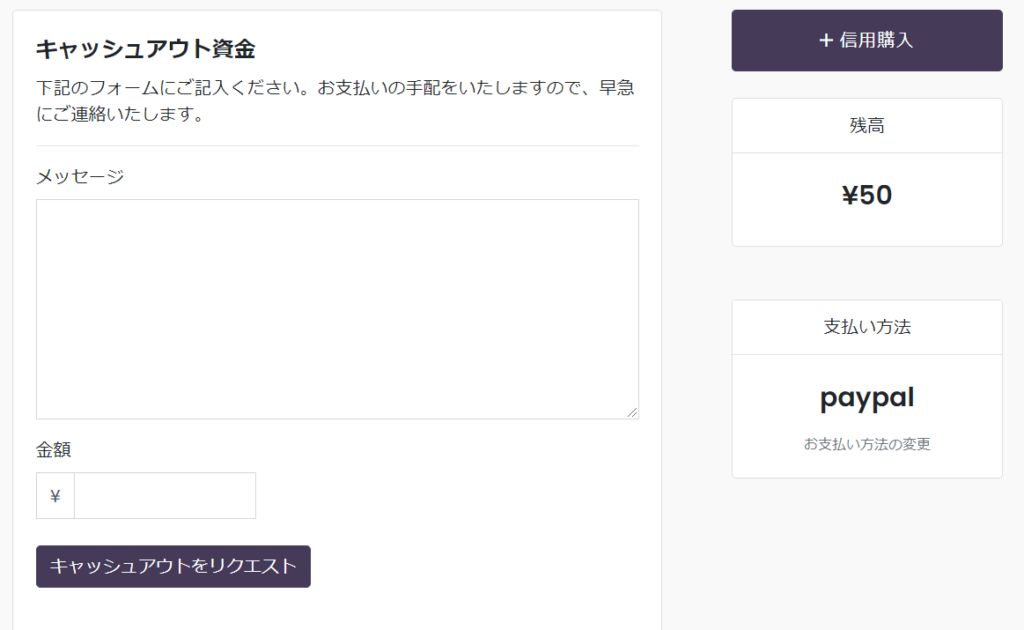
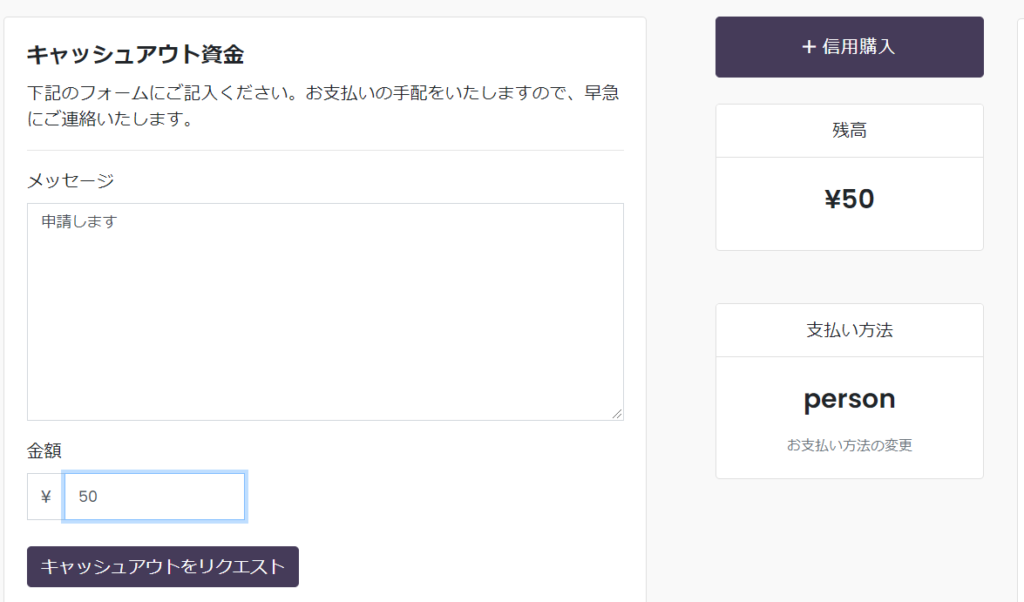
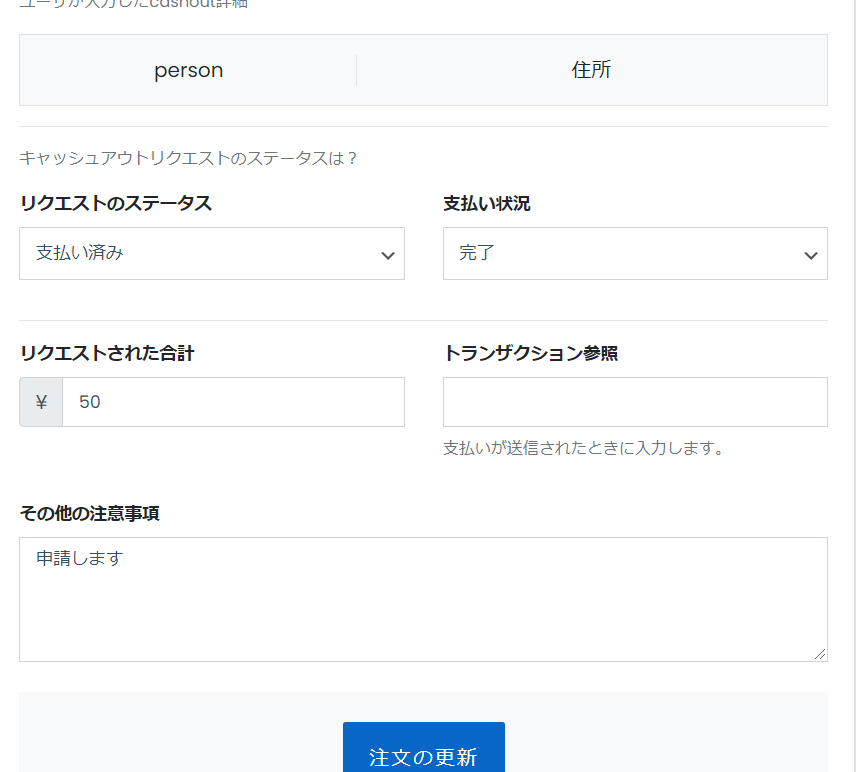
Apply for a sales tax return
I changed the payment method to cash and increased my sales by 50 yen. I will now submit a sales request.
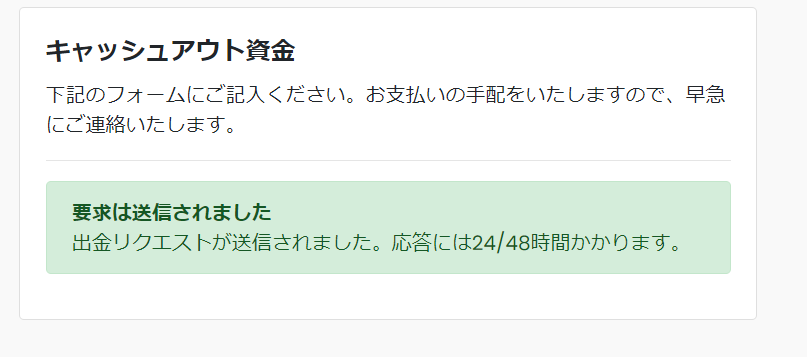
After sending
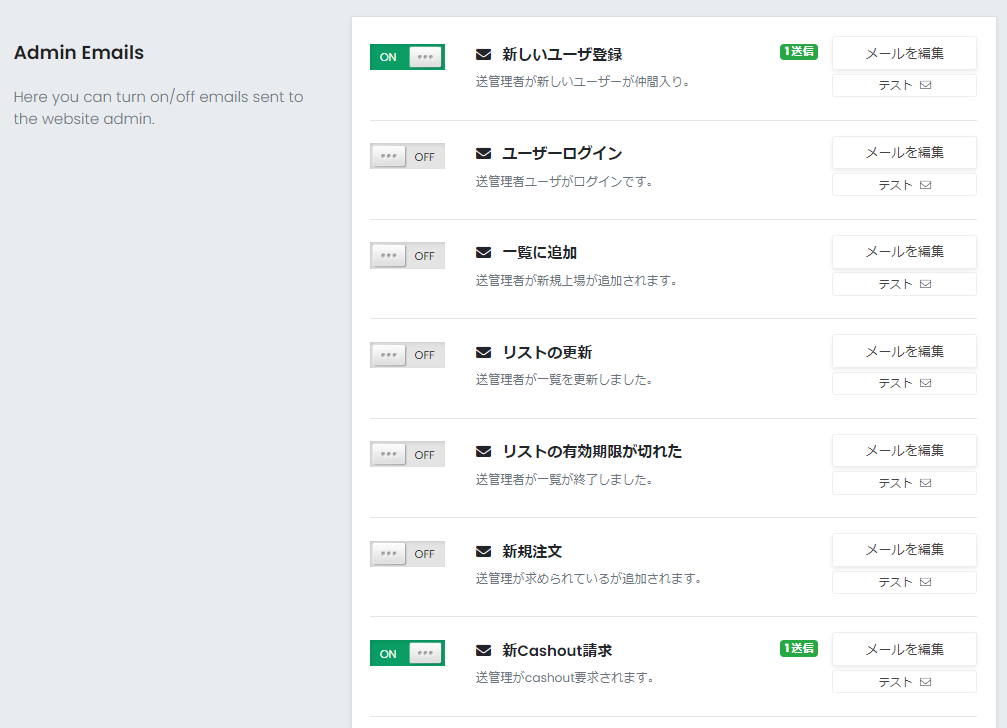
Administrator email settings
I received an email from [New Cachout Billing] in the Admin Emails under [Email Address] > [System Email] in PREMIUMPRESS.
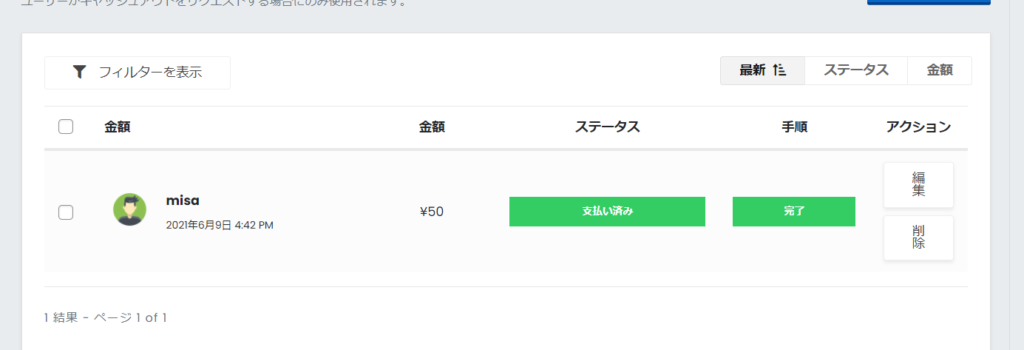
Operator Dashboard
It has been added to the [Cash Out] item of PREMIUMPRESS.
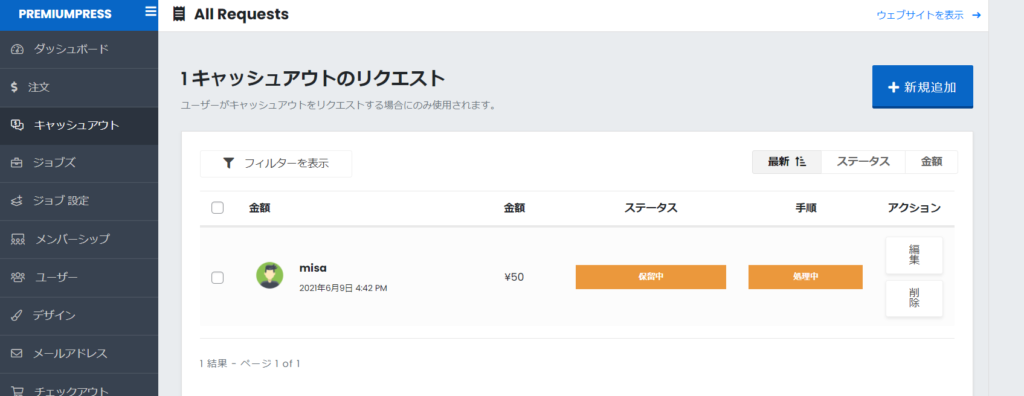
Open the details page, check the user's application method, change the status, etc., and click the [Update Order] button.
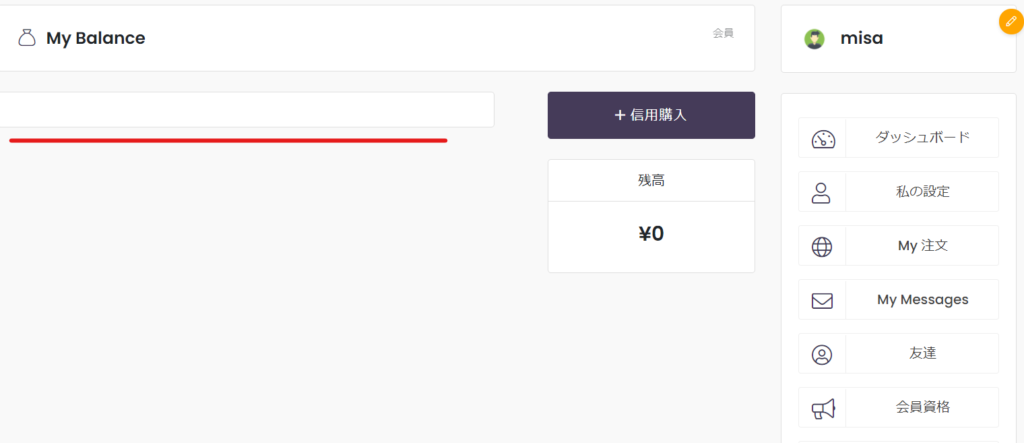
Changed to Paid
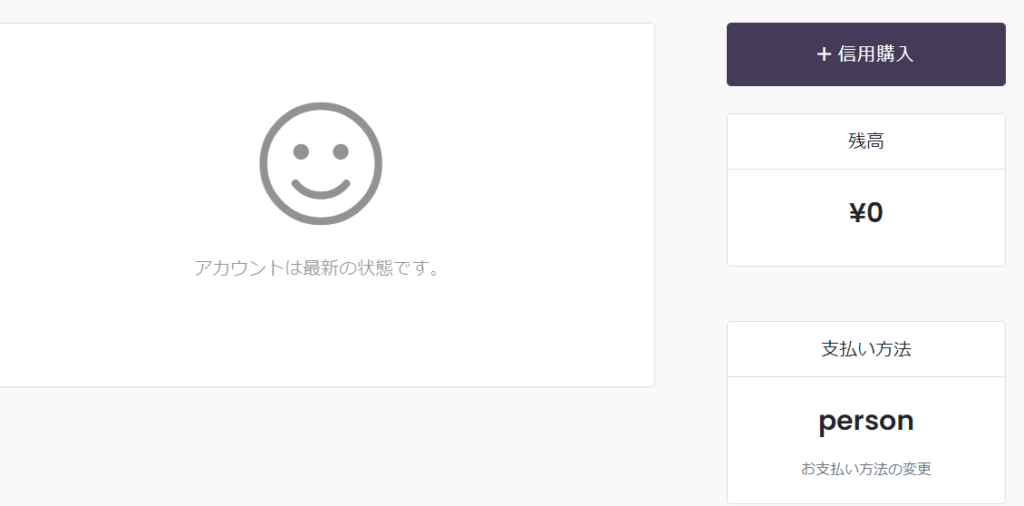
The user's My Page
The application amount was deducted and returned to 0 yen.
I accidentally interrupted the process of applying for sales revenue in the middle, but I will continue with the setup.
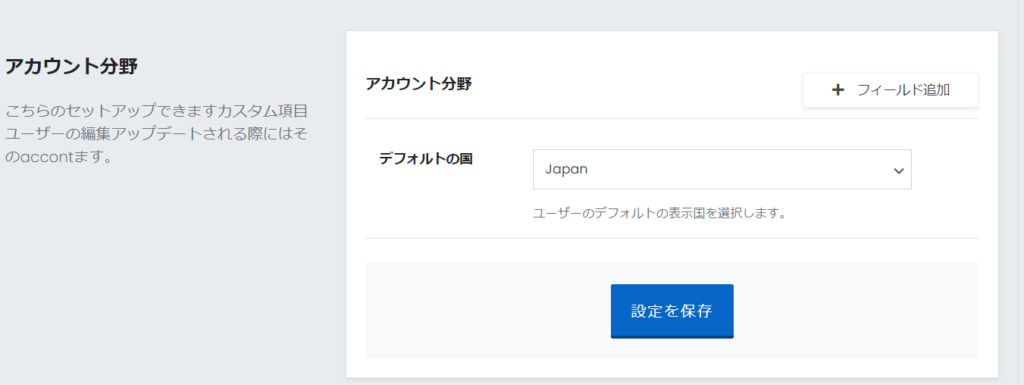
User default country setting
If you do not make any settings, the address field on your user page will be filled in with an overseas address.
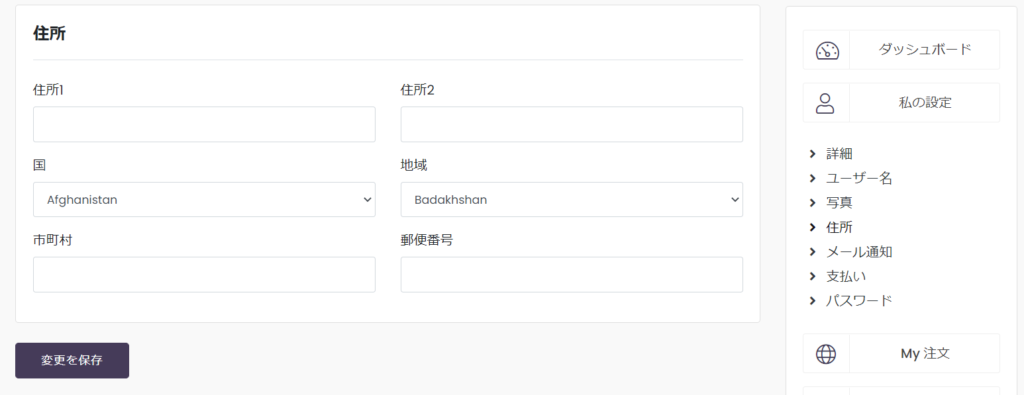
Change the Account field to Japan.
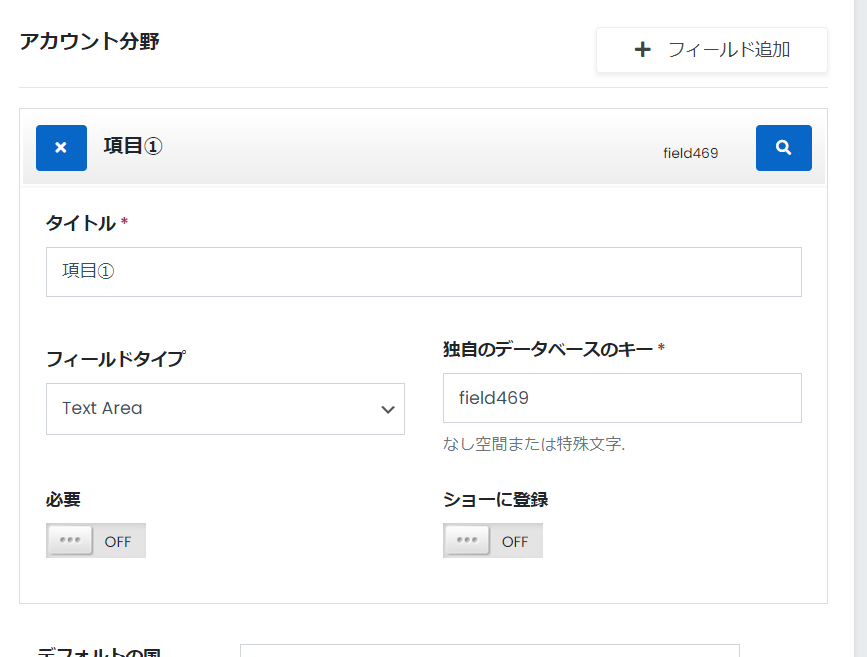
Increase user information on My Page
Click [Add Field] and enter the required information.
- Title - The label name displayed in the details of the user's My Page
- No need to change your own database keys
- Field type - Input Area (a text input field of about one line) / Text Area (a text input field of multiple lines) / Check box (a check box that allows multiple selections) / Radio button (a radio button that allows one selection) / Select box (a select box that expands the selection area)
- Required
- Register for a show - whether to add input fields when registering
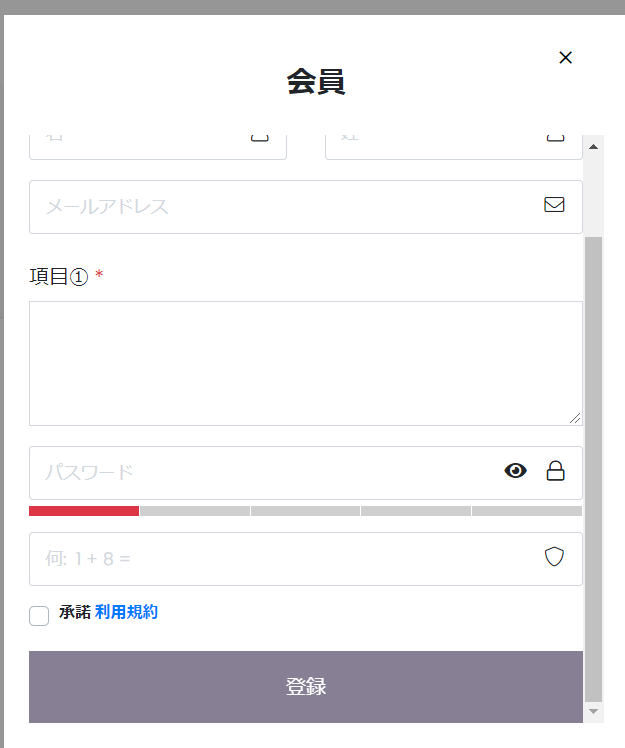
Item ① has been added to the [Details] section of the user's My Page.
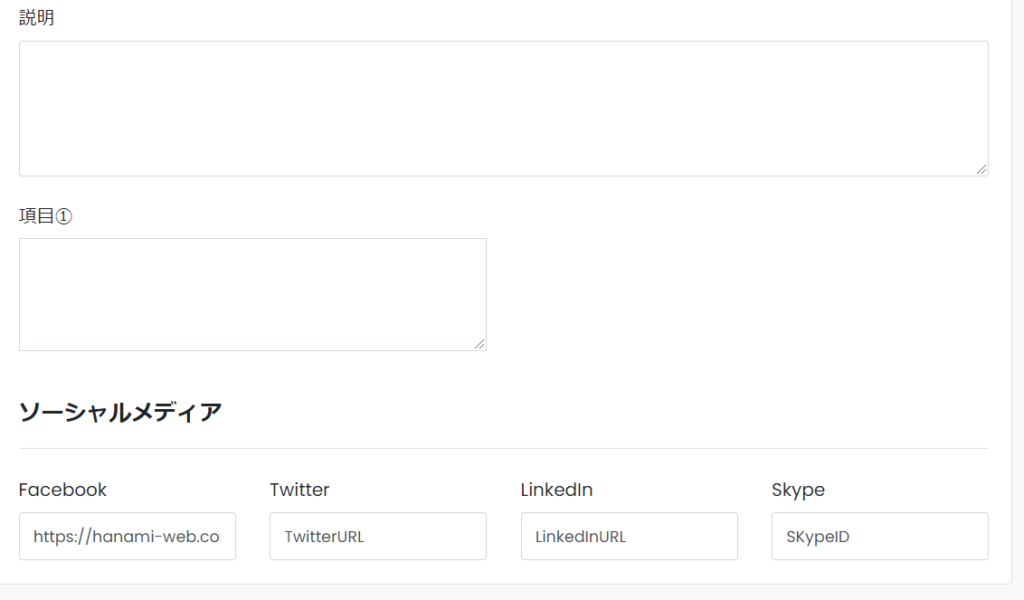
Add to Show will add an input field when signing up.
User page permissions
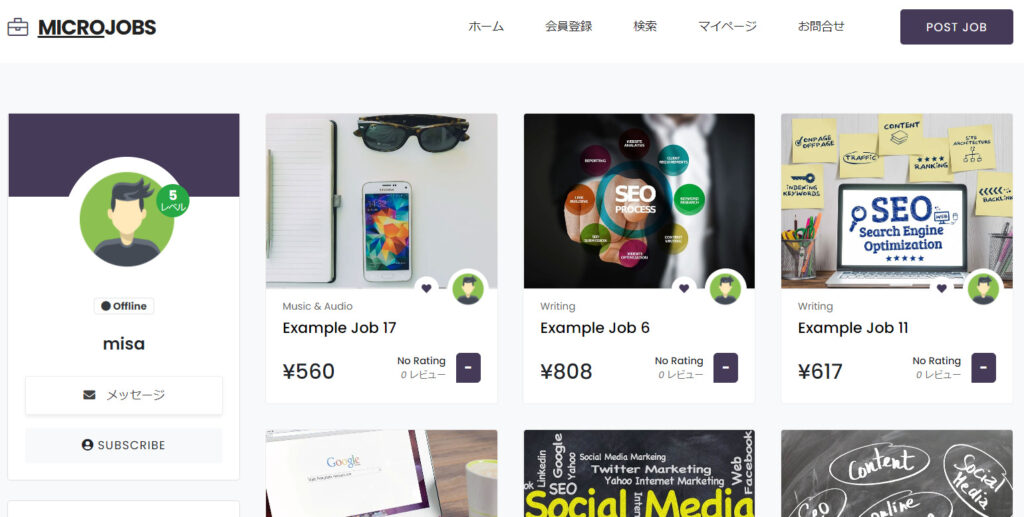
The bottom item is WordPress Creator Page. It is a setting for user pages. A user page is a page that is automatically created for each user.
Personally, I think it's a good idea to have it because you can see a list of services being offered.
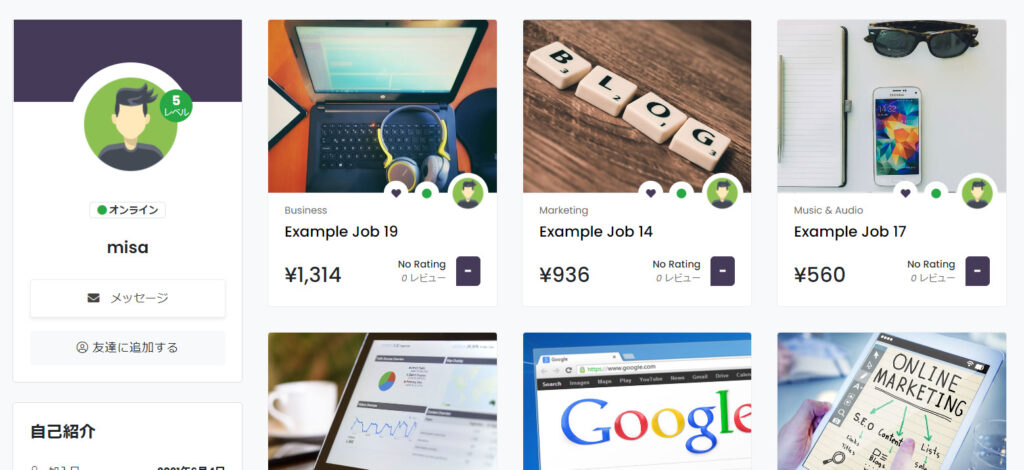
- Creator Page - Turning this off will prevent the user page from being displayed
- Author feedback - Hide feedback on user page
- Author Comments - Hide comments on user page
- Creator Advertisement - Display settings for listing services on user page
- Creator Ratings - Hide ratings on user page
This is the place where you can do this.
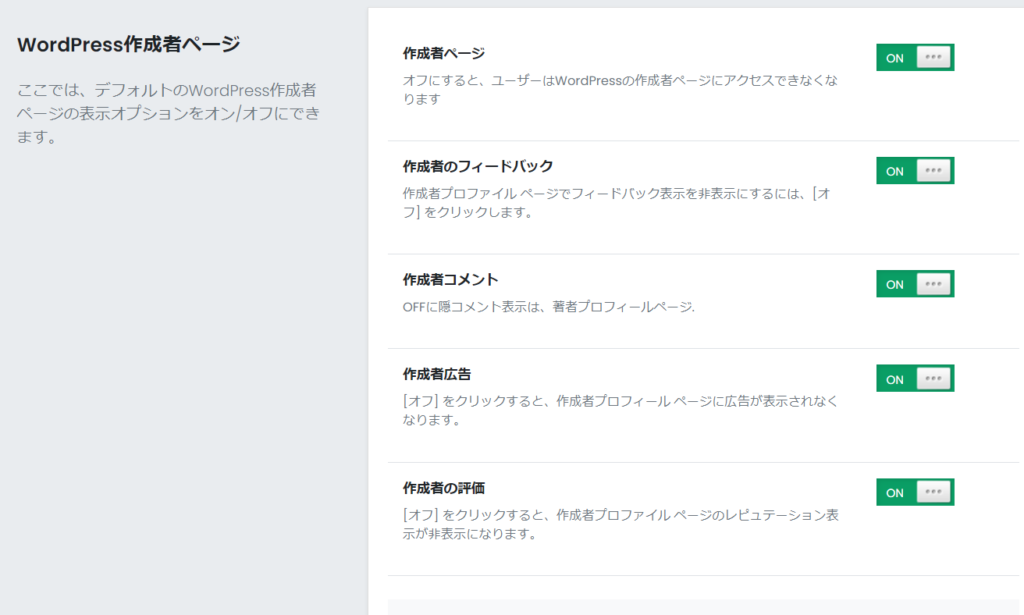
There are so many settings that it's confusing.
Please note that the creator advertisements are not advertisements.
This is the setting section for whether or not to display a list of the services you are offering.
Other user settings
- User Registration Settings
- Membership Settings
- Membership Pricing
So, keep trying your best to set it up!

We are available on weekends and holidays!
Please contact us if you have any problems with your website!

- Unable to log in to WordPress
Malware infection?
- The homepage suddenly stopped displaying!
- A PHP error is occurring.
We also offer support on weekends and holidays for those who need assistance.
If you are in a hurry, please call us now at 03-6694-7024.
Latest Articles
Timing and Process for Renewing Your Recruitment Website | Key Points to Review to Increase the Number of Applications
7 Key Points for Creating a Recruitment Website | How to Create a Recruitment Site That Job Seekers Will Choose
What is the average cost of a recruitment website? A thorough explanation of pricing by production method.
5 Benefits of Creating a Recruitment Website with WordPress | Explaining Why It's Easy for the Person in Charge to Update