How to create a website using WordPress/How to use plugins/No-code construction blog
Build a matching site with WordPress! Explaining PremiumPress' Microjob theme membership registration settings
At HanamiWEB Online School,
●Ask questions in real-time in the virtual study room!
●Ask as many questions as you want via chat!
●E-learning materials that you can learn as much as you want, 24 hours a day!
All included for just 2,500 yen/month!
I wanted to build a matching website using WordPress! I tried out a Micro job theme from an overseas theme company called PREMIUMPRESS, and this article explains how to build it.
We will explain the settings that are very important when members register.
Membership registration settings
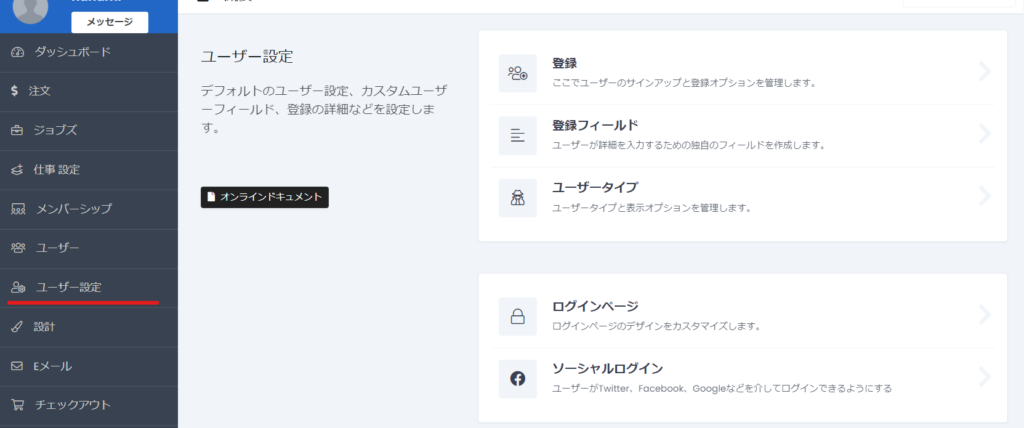
In PremiumPress, click [Settings] > [Registration].
Allow user registration
This setting determines whether users can freely register as members on the site.

Username Settings
This is a system where users are required to register a username when they register.
User sets password
This is where you decide whether the user will set a password when registering.
Hide first and last name
This setting hides the user's first and last name input fields when registering a user.
When the administrator updates a user's information, it cannot be saved unless the first and last name are entered, so unless there is a special reason, it is better to turn this setting off and have users enter their first and last name when registering.
Enter your mobile phone number
You can set whether or not you want users to enter their mobile phone number.

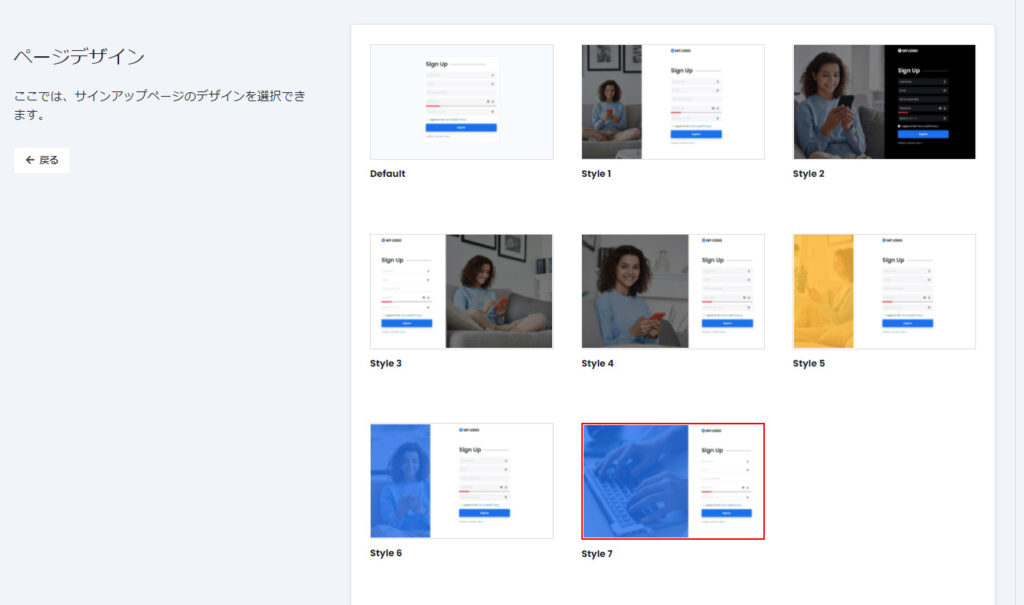
Registration page design
The registration page has been made very stylish and you can choose the design.
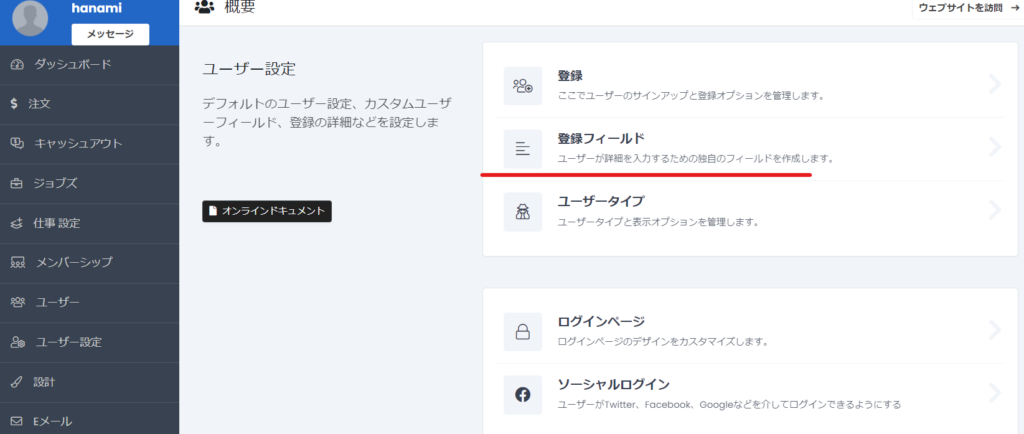
Add registration field
You can add additional input fields when users register.
For example, if you want to add an age input field
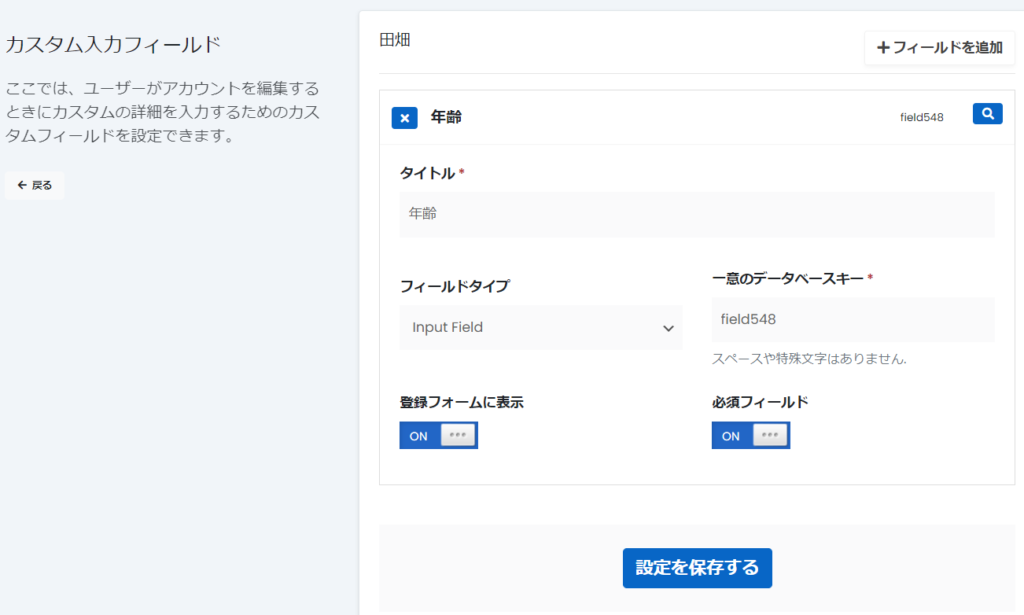
Added to the registration form.

Social Login
You can also register and log in using social media.
- Twitter login settings
- Facebook Login Settings
- Google Login Settings
- LinkedIn Login Settings
The ones with links are articles that have completed instructions on how to issue an API key and other settings.

Registered User Type
- buyer
- Seller
There are two types of users:
- Premium Press
- User Setting
- User Type
and set it up.
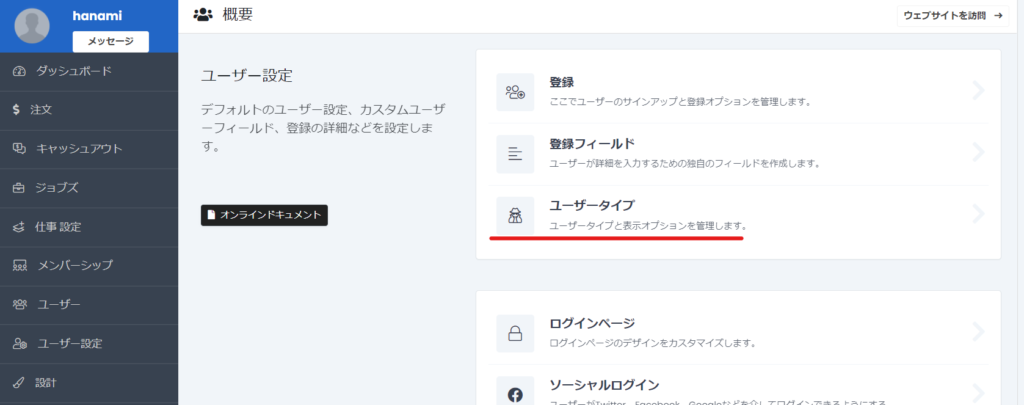
- Image change
- Set type - Member (Buyer) / Seller
- Default Membership - Specify the membership that will be set upon registration
- Prevent users from switching between buyer and seller modes on their personal page

Email Settings
During the registration process
- (To user) Email verification email
- (To users) Membership registration email
- (To the operator) Membership registration email
will be sent automatically. Detailed settings will be explained in the email settings.
In PREMIUMPRESS, the settings items are located under [Email Address] > [System Email].
First, the [Confirmation Email Address] in User Emails is the automatic reply email for email verification, and [New User Registration] is the automatic reply email for user registration.
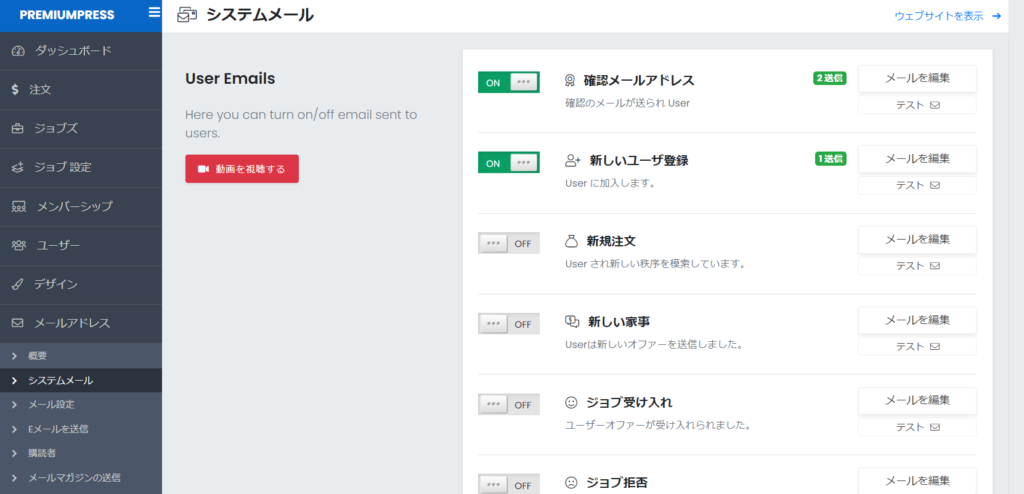
If you scroll further down, you will see that under Admin Emails, you will see the [New User Registration] option, which is the user registration notification email that will be sent to the administrator.
For each email, edit the text by clicking Edit Email.

Create a page for email verification
With the default settings on PremiumPress, when you click on the URL sent in the verification email sent to you when you register as a user, English text will be displayed.
This is a page that you will need to prepare yourself, so prepare one by adding a new static page.
Although it is simple, I created a static page like the one below.

Link to a page
Simply creating a static page does not link it to the URL listed in the verification email, so next go to [Settings] > [Link to Page] in PREMIUMPESS.
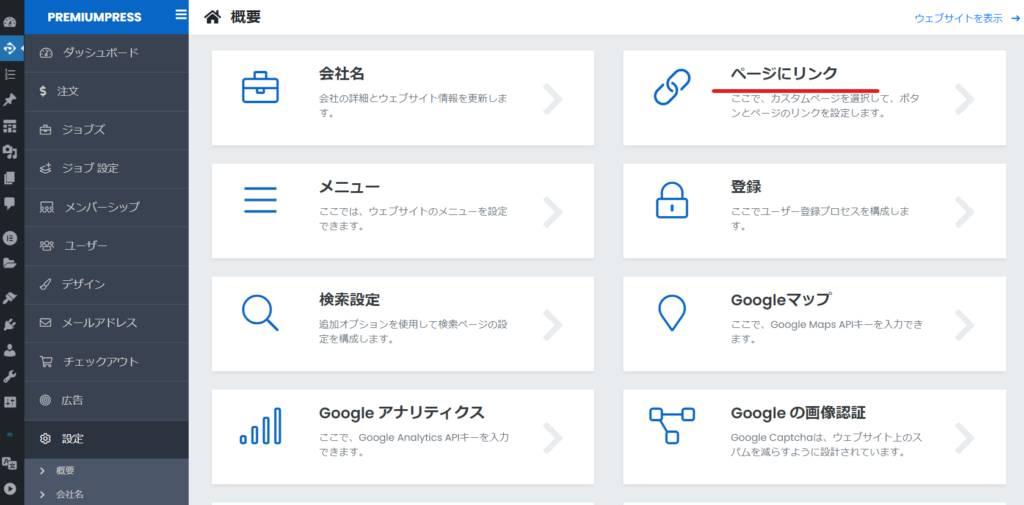
I think the strange translation of "email verification" is blank, so expand the part underlined in red and set up the static page for email verification that you created earlier.

This completes the basic settings for user registration.
continuation
- User Setting
- Membership Settings
- Membership fee schedule setting
Please complete your user registration setup!
Released as soon as the next morning! Weekends and holidays are also available!
Super rush website creation plan
We offer a rush website creation plan for those who need a website in a hurry!
We can publish your content as soon as the next morning, even on weekends and holidays! If you have any questions, please check the details below!
Latest Articles


