How to create a website using WordPress/How to use plugins/No-code construction blog


[2026 Latest Version] Complete Initial Setup Guide for Rank Math Free Version | SEO Settings Strong for AI Overdrive Search (LLMO)
At HanamiWEB Online School,
●Ask questions in real-time in the virtual study room!
●Ask as many questions as you want via chat!
●E-learning materials that you can learn as much as you want, 24 hours a day!
All included for just 2,500 yen/month!
This section compiles articles detailing HanamiWEB's actual experiences with SEO design in the AI era, RankMath settings, and structured data implementation.
If you're looking to implement SEO strategies on WordPress, the first tool you should consider is "Rank Math." Even the free version offers ample functionality and allows for designing solutions that are compatible with the AI search era (including LLMO optimization).
This article provides a clear, step-by-step guide, complete with screenshots, on how to install and configure the free version of Rank Math.
What is Rank Math? Why is it the preferred choice in the age of AI search?
Rank Math is an SEO plugin for WordPress.
In addition to traditional search engine optimization (SEO), it is also effective for AI search optimization, such as the following:
- Easy implementation of structured data (Schema)
- Page-level SEO optimization
- Content readability check
- Metadata optimization
What is particularly important is,Standard support for structured datais.
AI (such as ChatGPT and Google's AI search) uses this structure to understand information, making this setting essential.
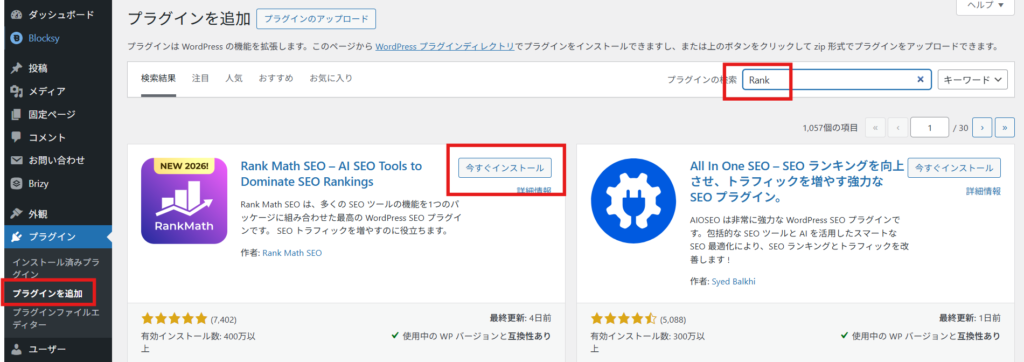
How to install the free version of Rank Math
First, install it from the WordPress administration screen.
- Admin Panel → Plugins → Add New
- Search for "Rank Math"
- "Install Now" → "Activate"
How to proceed with the initial setup
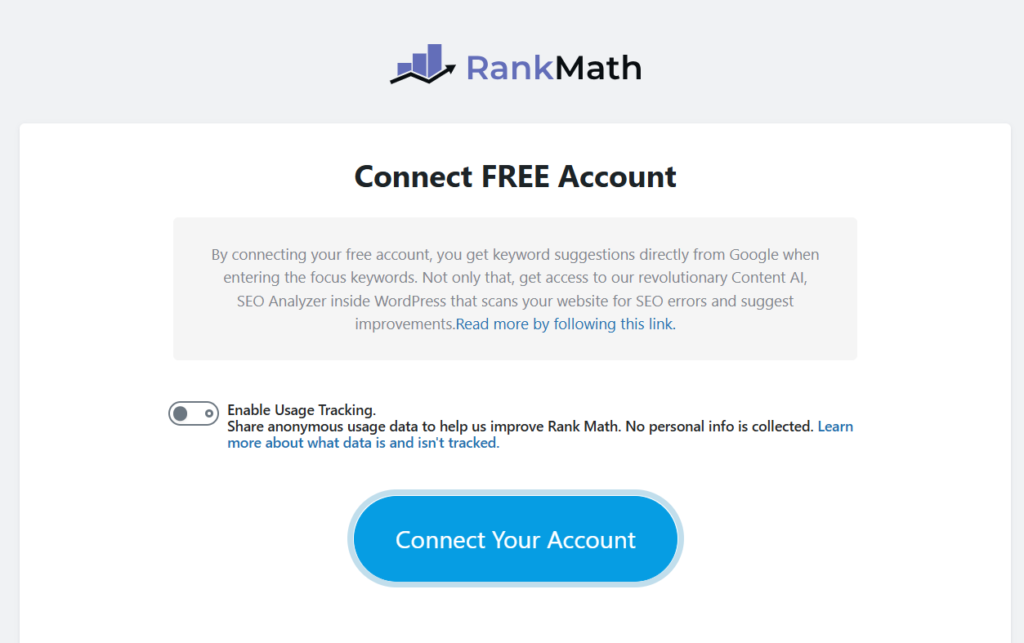
After activation, you will be redirected to the account connection screen.
Turning tracking on or off is optional.
Click Connect Your Account to create and connect your account.
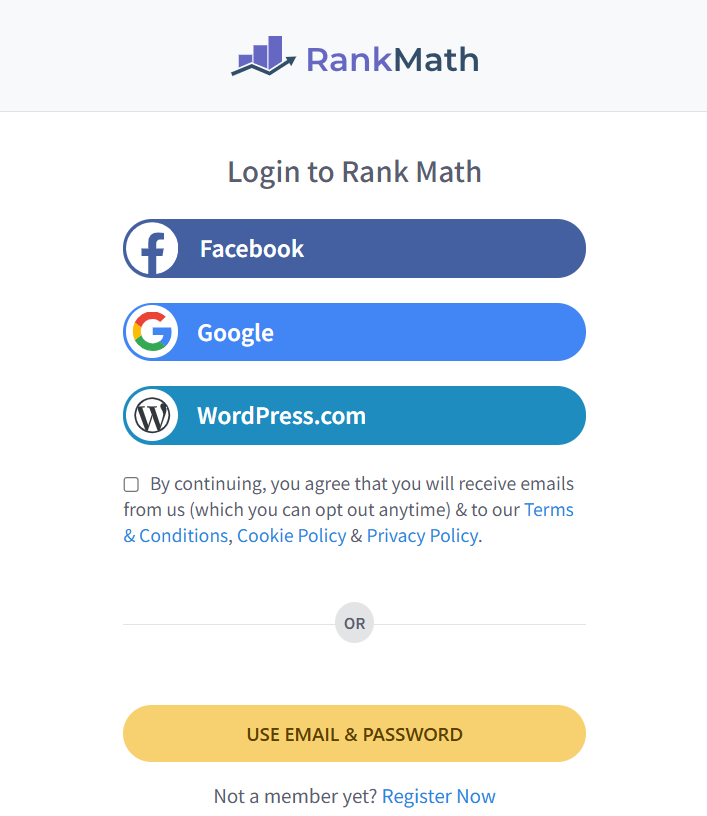
Please create a count using your preferred connection method.
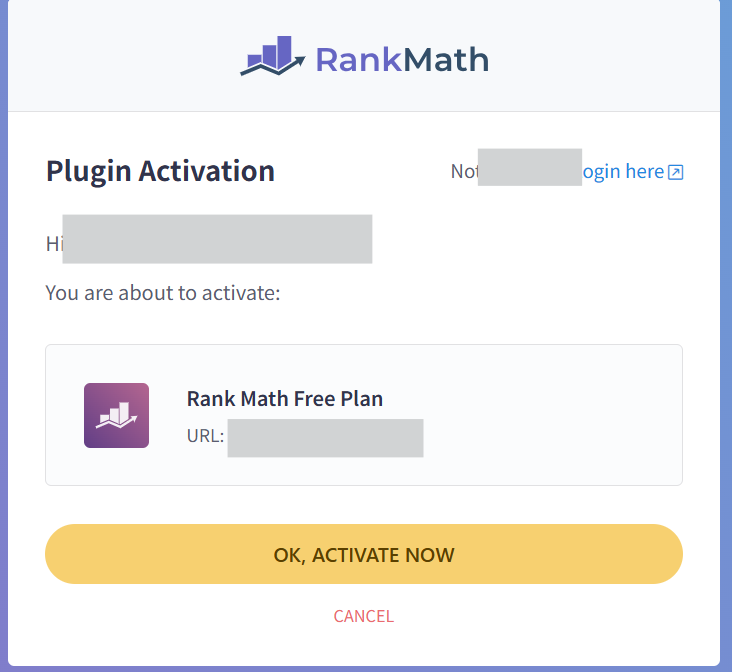
OK, complete the connection with Activate now.
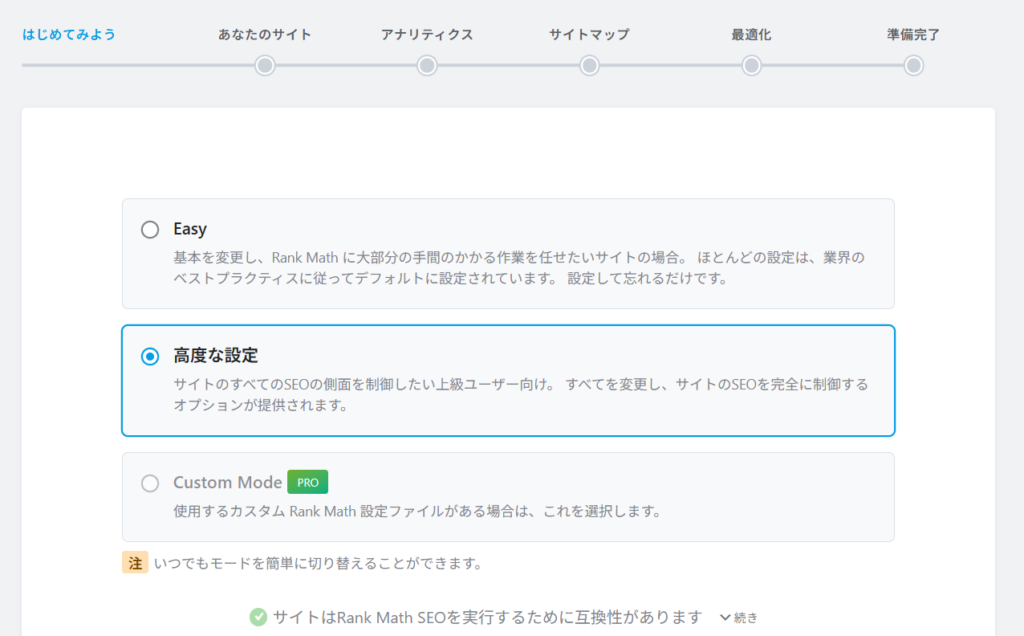
Initial Setup Wizard Settings
The setup wizard will appear automatically.
Not "easy",Please select "Advanced (Advanced Settings)".
Press the Start Wizard button.
Detailed settings are crucial for AI search optimization!
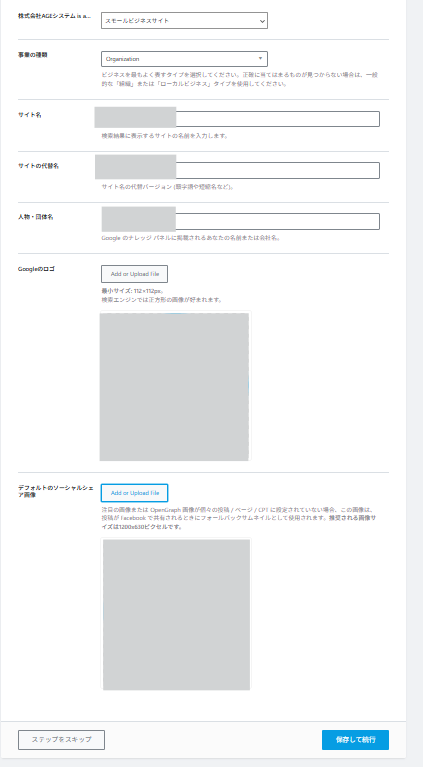
Site Information Settings
Enter the basic information for your site here.
- Type of website (company, personal, etc.)
- Site name (It's best to make it clear, such as company name + service name. Example: HanamiWEB Co., Ltd., a website design company in Nerima Ward.)
- Alternative name for the site (Enter a simple name without "Co., Ltd." Example: HanamiWEB)
- Name of person/organization (Please use the official name, such as HanamiWEB Co., Ltd.)
- Logo image (Search engine logos are typically 112px x 112px squares, so it's best to crop the symbol.)
【point】
Since the logo is used in structured data, be sure to set it.
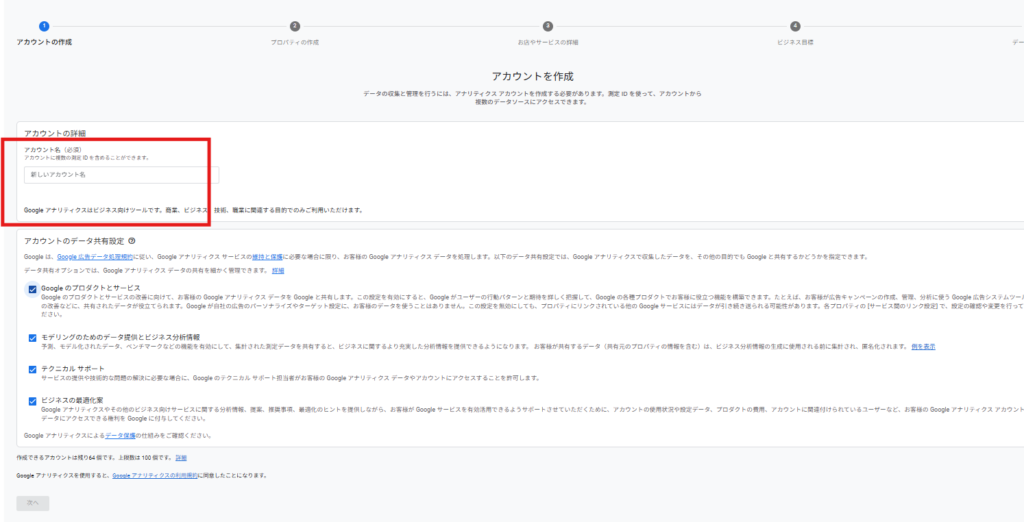
Creating an Analytics Account
Next, in order to connect to Google Search Console and Google Analytics, you will need to create an Analytics account beforehand.
Click the button below to go to the Google Analytics page, log in to Google, and then create an account.
Create an account via Create > Account.

Enter a new account name
It's a good idea to include the site name.
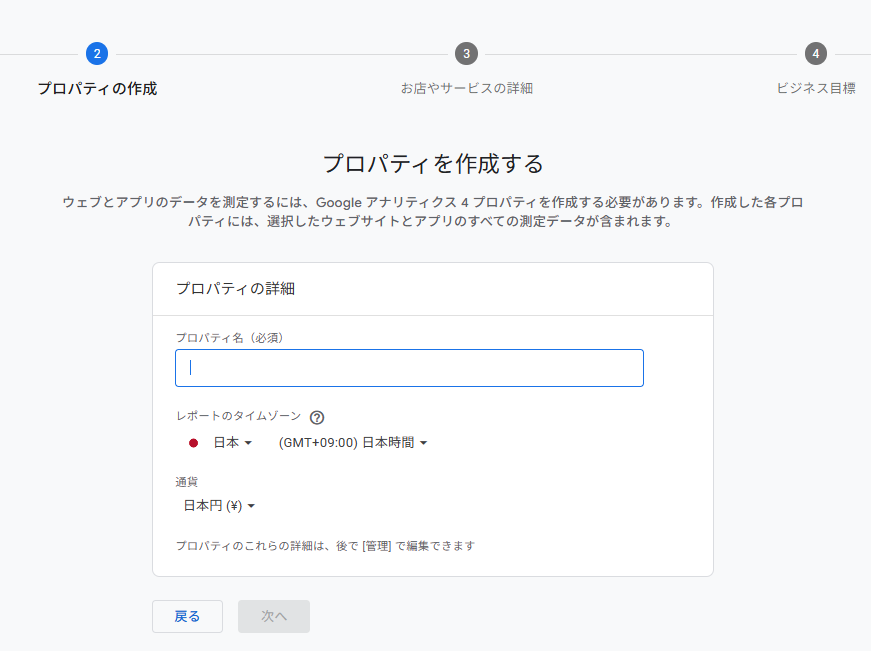
Create property
The property name can be the same as the account name you used earlier. Enter it and proceed to the next step.
Set the time zone and currency to Japan.
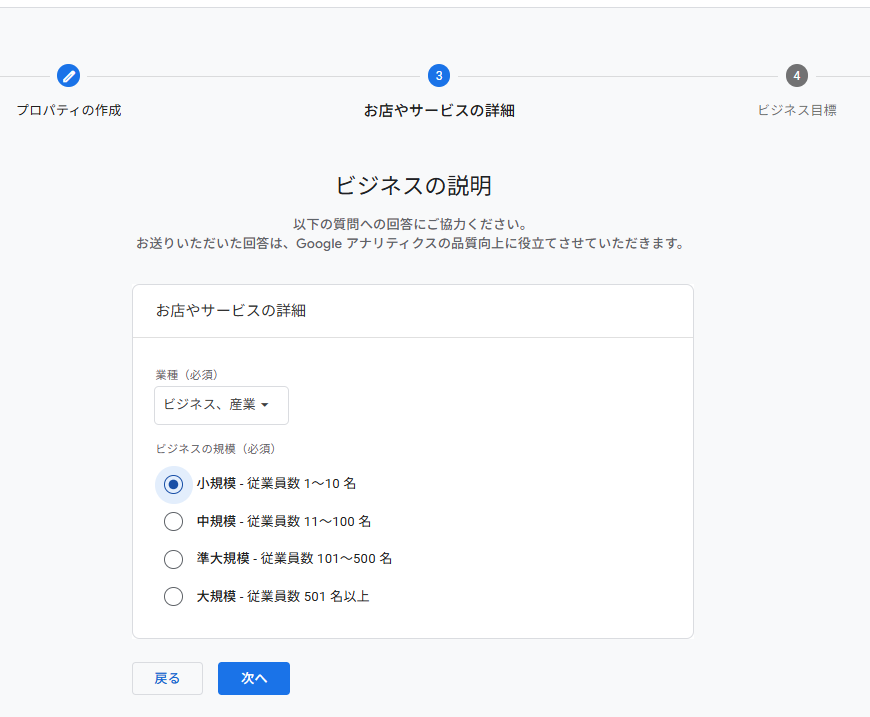
Details of the store and services
Select a business description. Set your industry and size, then proceed to the next step.
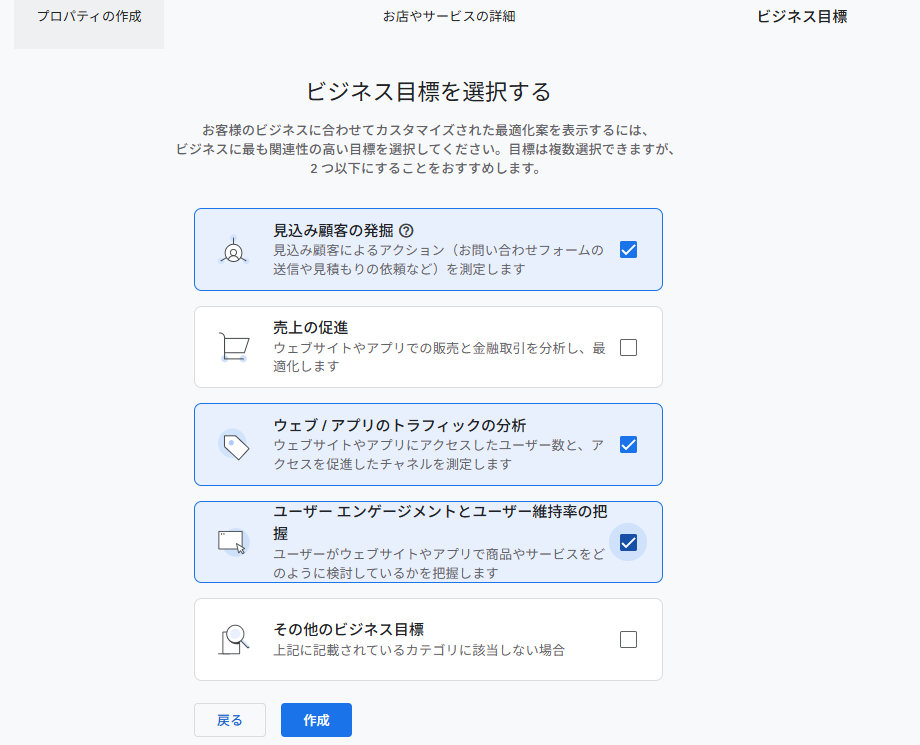
Choose your business goals
Finally, select your business goal, click the create button, and create a Google Analytics account.
Data collection
You will be taken to the data collection screen, so select [Web].
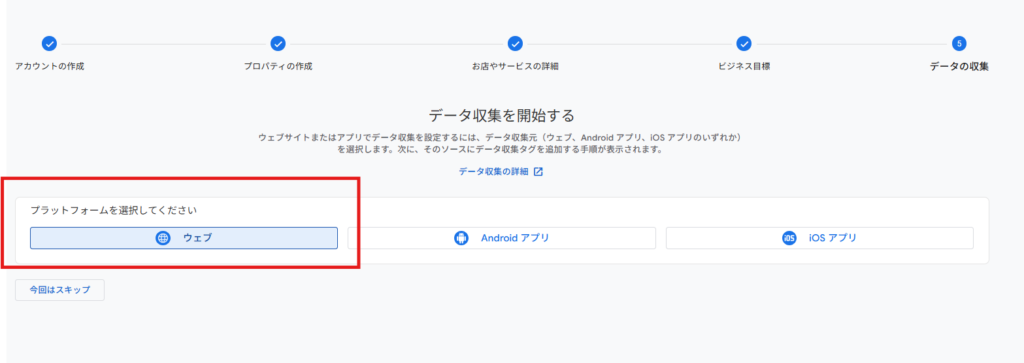
Add the domain and create it.
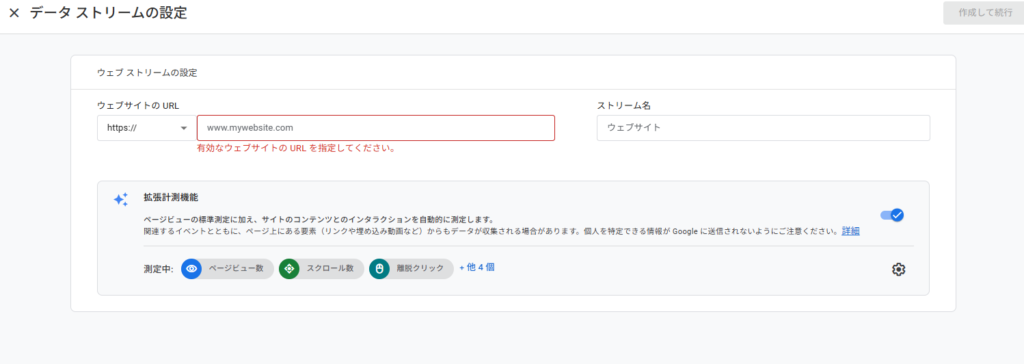
Once you've finished creating your analytics, return to the RankMath settings in WordPress.
Connecting Search Console and Analytics
By integrating with Google Search Console/Analytics, you can view search data within WordPress.
This setting is optional, but we recommend connecting.
Click the "Connect with Google Services" button to connect.
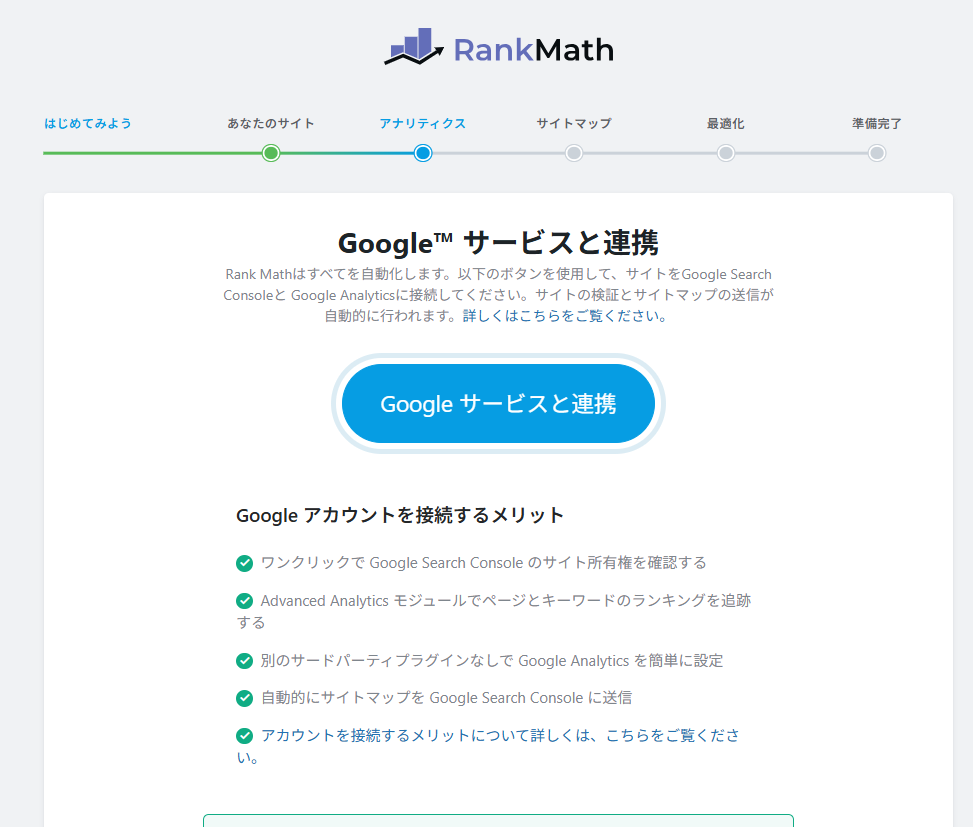
Please agree to all terms and proceed.

Select your Search Console and Analytics accounts.
Since Search Console is automatically generated, select the automatically generated account.
For analytics, select the account you just created.
What is Search Console?
Google Search Console is a free analytics tool provided by Google.
You can check things like "what keywords people are using to search for your site" and "how often your site appears in search results."
Why is setting up Search Console necessary?
When implementing SEO measures and AI search optimization,
Understanding "which pages are being viewed" and "what search keywords are driving traffic" is extremely important.
By using Search Console, you can check the following data:
- Number of impressions (number of times it appeared in search results)
- Number of clicks
- Search keywords
- Ranking
By making improvements based on this data,
This will lead to improved search rankings and increased visibility in AI search results.
Reasons why you should connect to Search Console in the early stages
Search Console begins collecting data from the moment you connect to it.
Therefore, if you don't connect immediately after the site is launched,
Initial access data could not be retrieved.
In particular, it is important to analyze the effects of AI search and SEO over time,
We recommend connecting as early as possible.
*If you connect later, you will not be able to retrieve past data.
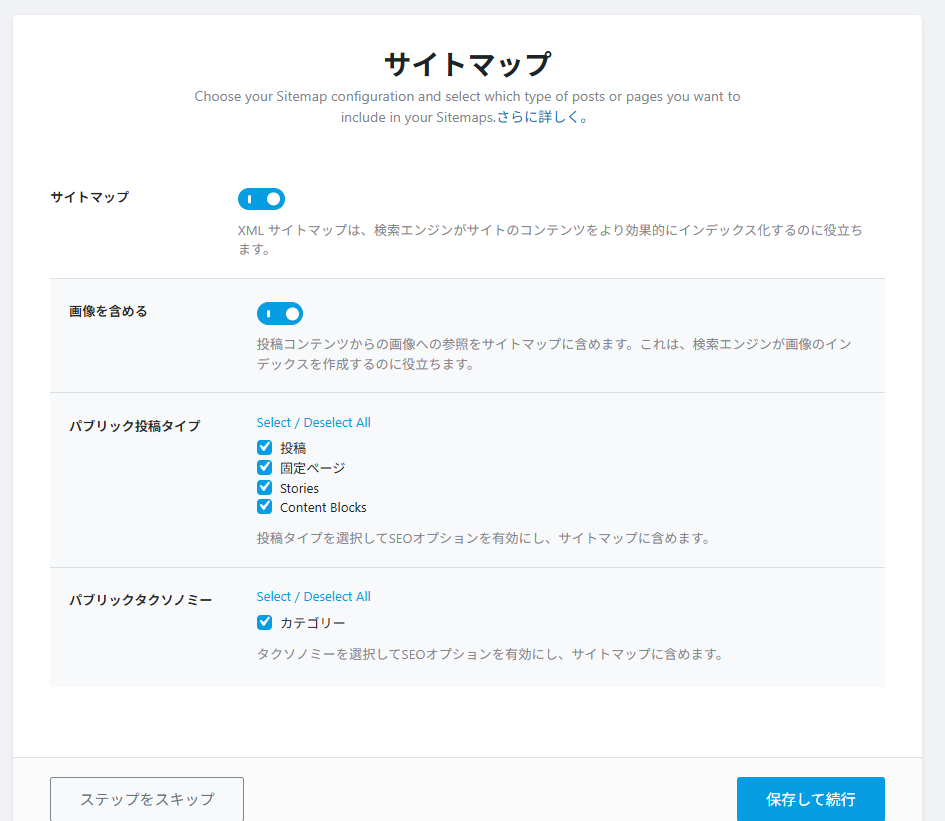
Sitemap settings
The sitemap is an important page that tells search engines about your site. It is turned ON by default, so we will proceed with the current settings.
SEO settings (most important)
This is the most important point.
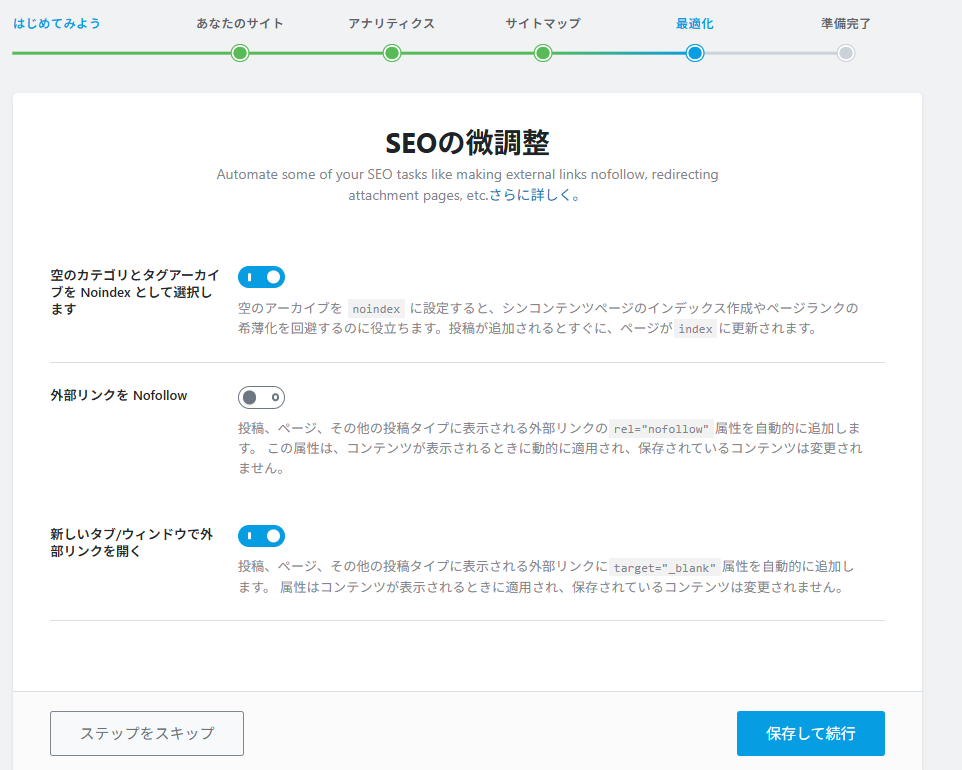
■ Noindex setting
The default settings are generally fine.
■ Nofollow setting for external links
To ensure that only links to advertising sites and unreliable sites are set to nofollow, not all external links are set to nofollow by default.
■ Open external links in a new tab
External links should ideally open in a new tab, so leaving this setting ON by default is fine.
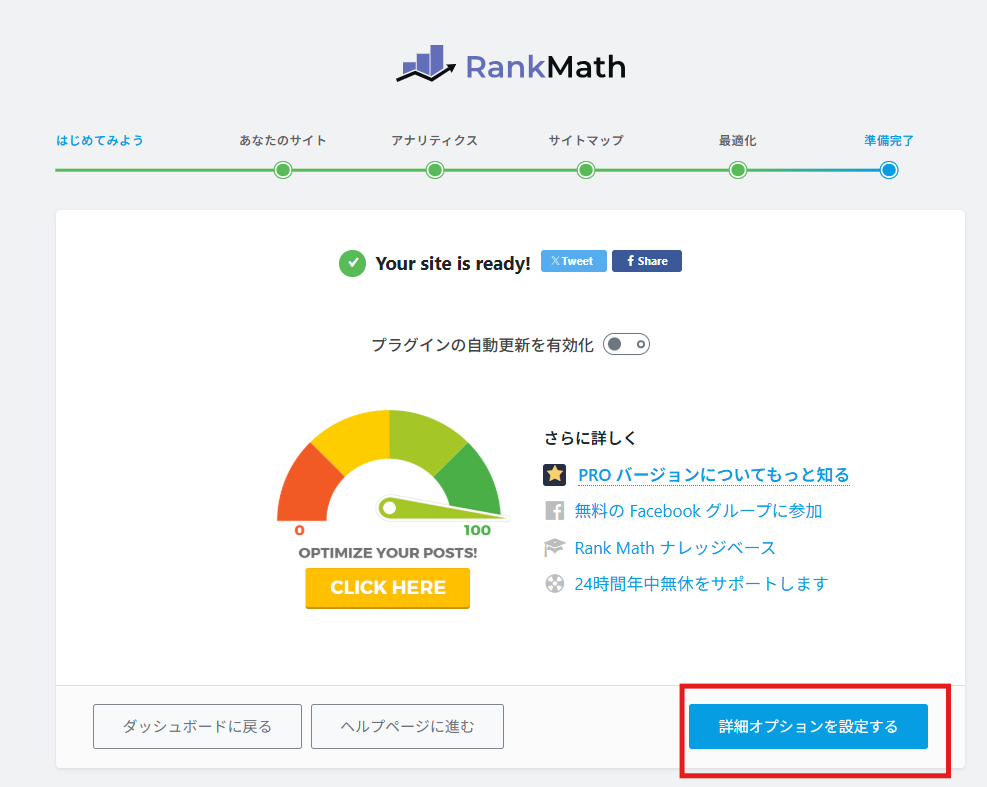
Proceed to RankMath detailed settings
Next, we will proceed to the detailed settings for RankMath.
Role Manager
This is used when you have users other than administrators who only post blog entries, and you want to set RankMath access permissions according to their administrative privileges.

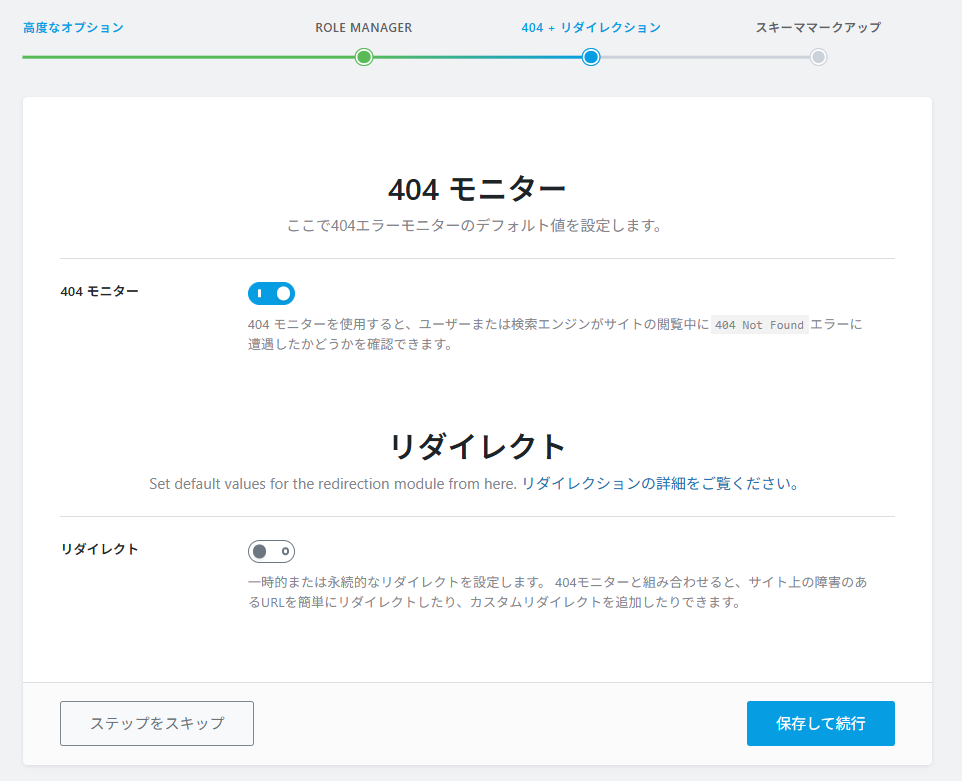
404 Monitor
We will now configure the 404 monitoring system. A 404 error is displayed when accessing a URL that does not exist. It is a good idea to monitor this using a monitor.
Furthermore, if the URL changes due to a site redesign or other reasons, you can configure redirects within the RankMath plugin without adding a separate redirect plugin. In that case, simply turn on redirects.
You can turn it on later.
schema markup
This involves setting up schema markup, which is crucial for AI traffic and SEO.
Select the content that best suits the website.
The free version has separate settings for posts and static pages, but the paid version allows for more detailed settings for each page.
"Posts" refers to blog entries. Therefore, I used "posts."
Pages refers to static pages. Since this is a service page, I selected "Service".
Editor-story and Ct_content_blocks are not necessary.

Summary | Rank Math is perfectly playable even in its free version.
Even the free version of Rank Math can handle the AI search era if configured correctly.
The following three points are important:
- Setting up structured data
- Clarification of author information
- Page-by-page meta optimization
With these points in mind, let's aim to attract not only SEO traffic but also AI search traffic.

We are available on weekends and holidays!
Please contact us if you have any problems with your website!

- Unable to log in to WordPress
Malware infection?
- The homepage suddenly stopped displaying!
- A PHP error is occurring.
We also offer support on weekends and holidays for those who need assistance.
If you are in a hurry, please call us now at 03-6694-7024.
Latest Articles
Timing and Process for Renewing Your Recruitment Website | Key Points to Review to Increase the Number of Applications
7 Key Points for Creating a Recruitment Website | How to Create a Recruitment Site That Job Seekers Will Choose
What is the average cost of a recruitment website? A thorough explanation of pricing by production method.
5 Benefits of Creating a Recruitment Website with WordPress | Explaining Why It's Easy for the Person in Charge to Update